
In this tutorial, you will learn how to export all files from the WordPress Media Library to CSV or Excel using Import Export by RockStarLab.
This workflow is useful when you need a spreadsheet-ready list of images, videos, PDFs, and other media files from your WordPress website. You can export file URLs, titles, file types, file sizes, dimensions, upload dates, and other attachment data.
In this example, the test website contains 61 media files, and we export them into a CSV file.
Why Export the WordPress Media Library?
Exporting the WordPress Media Library can be useful for many practical workflows. Instead of reviewing media files one by one inside WordPress, you can work with media data in a spreadsheet.
You may want to export media files for:
- Media Library audits
- SEO image audits
- Image optimization reports
- Migration planning
- Client reporting
- Finding large images
- Reviewing file URLs
- Preparing media data for import into another WordPress website

Before You Start
To follow this tutorial, install and activate Import Export by RockStarLab on your WordPress website.
You can download the plugin from WordPress.org:
Download Import Export by RockStarLab
Once the plugin is active, open your WordPress admin dashboard.
Step 1: Open the Export Tool
In the WordPress admin menu, go to:
Import Export by RockStarLab → Export
The Export wizard lets you choose which type of WordPress data you want to export.
Step 2: Select Media as the Content Type
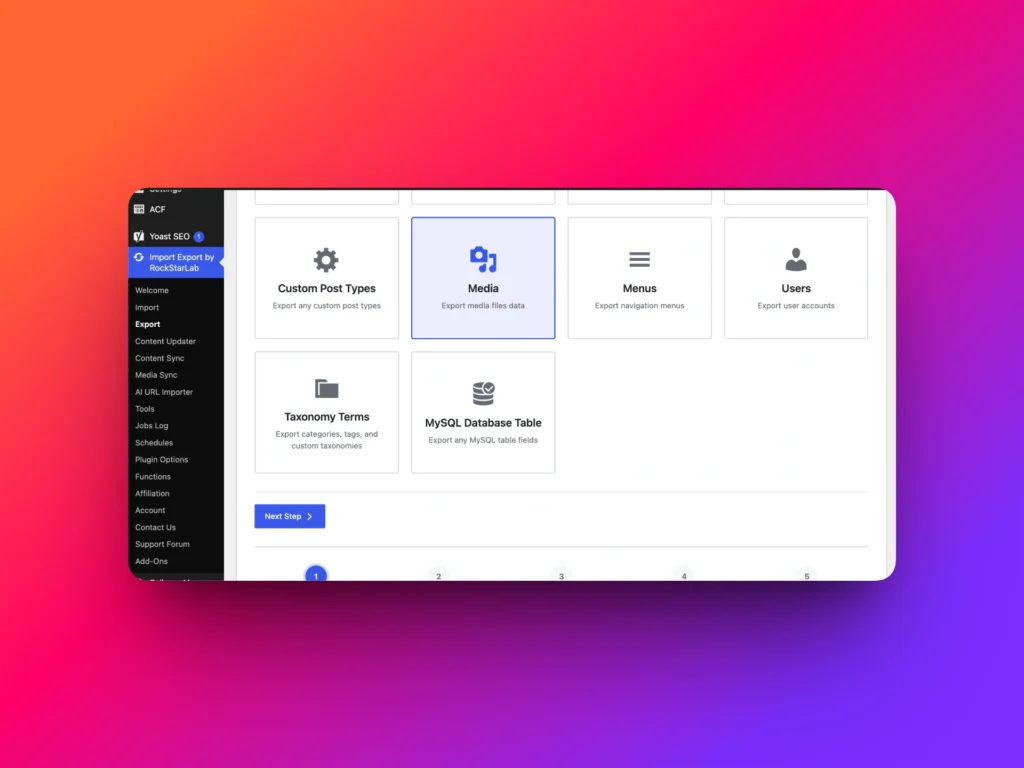
On Step 1 of the Export wizard, choose Media as the content type.
Then click Next Step.
The plugin will show how many media files are available for export. In this example, there are 61 media files.
Step 3: Filter Media Files Before Export
On Step 2, you can add filters if you do not want to export the entire Media Library.
For example, you can export only:
- Images wider than a specific number of pixels
- Files uploaded during a specific date range
- Videos only
- PDF documents only
- Files matching a specific title or metadata condition
To add a filter, click Add Filter. Choose a field, choose a condition, and enter a value.
In the video, we filter images by width greater than 500 pixels. The plugin finds 56 matching files.
Since the goal of this lesson is to export the full Media Library, we remove the filter and return to all 61 media files.

Step 4: Choose Media Fields to Export
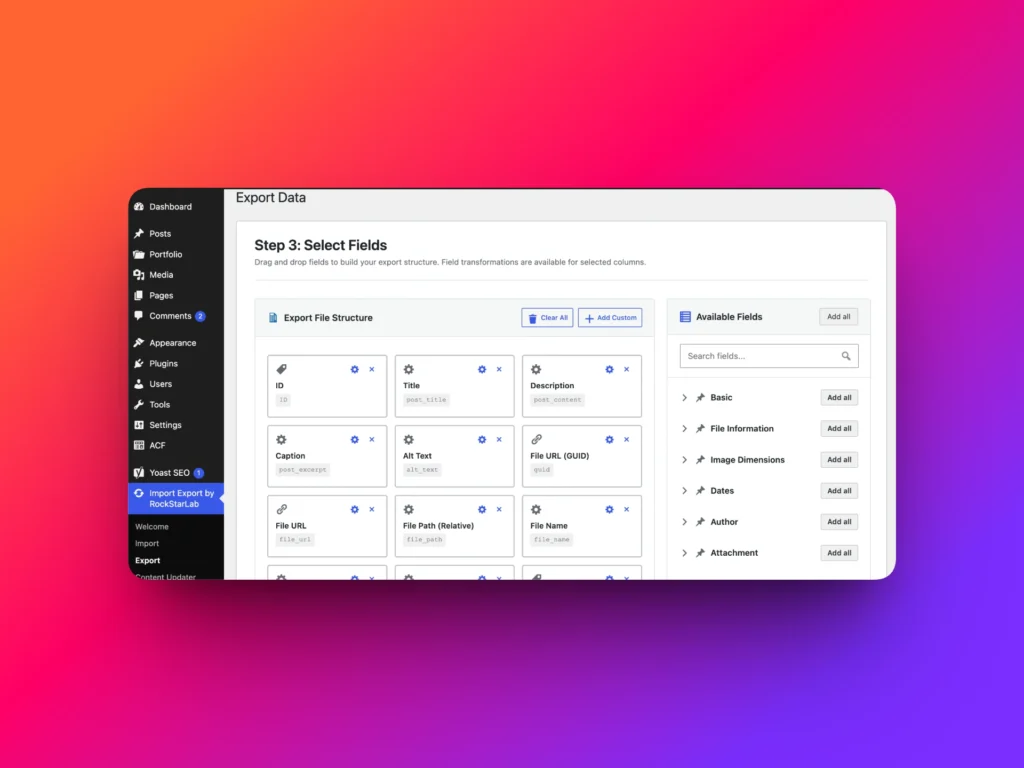
On Step 3, choose which media fields should be included in the export file.
All available media fields are listed in the Available Fields box.
For a simple media audit, you may only need fields such as:
- ID
- Title
- File URL
For a more detailed SEO or media optimization audit, you may also want fields such as:
- File type
- MIME type
- File size
- Image width
- Image height
- Alt text
- Caption
- Description
- Upload date
In this example, we export all available media fields by clicking Add All.
The selected fields appear in the Export File Structure area. In the video, the final export structure contains 21 columns.
Step 5: Reorder Export Columns
The Export File Structure controls the column order in the final CSV or Excel file.
If you need a specific order, you can drag fields up or down before starting the export.
This is useful when you are preparing a file for a report, spreadsheet template, SEO audit, migration workflow, or another tool.
Step 6: Choose CSV or Excel Format
On the final export step, choose the format for your file.
The most common options are:
| Format | Best For |
|---|---|
| CSV | Google Sheets, Excel, LibreOffice, simple data exchange, SEO audits, and migration workflows |
| XLSX | Native Microsoft Excel workflows and spreadsheet-ready exports |
In this lesson, we choose CSV.
Click Start Export and wait until the process finishes.
Step 7: Download the Export File
After the export completes, the plugin shows how many records were exported.
In this example, all 61 media files were exported successfully.
Click Download Export File.
Step 8: Review the Exported File
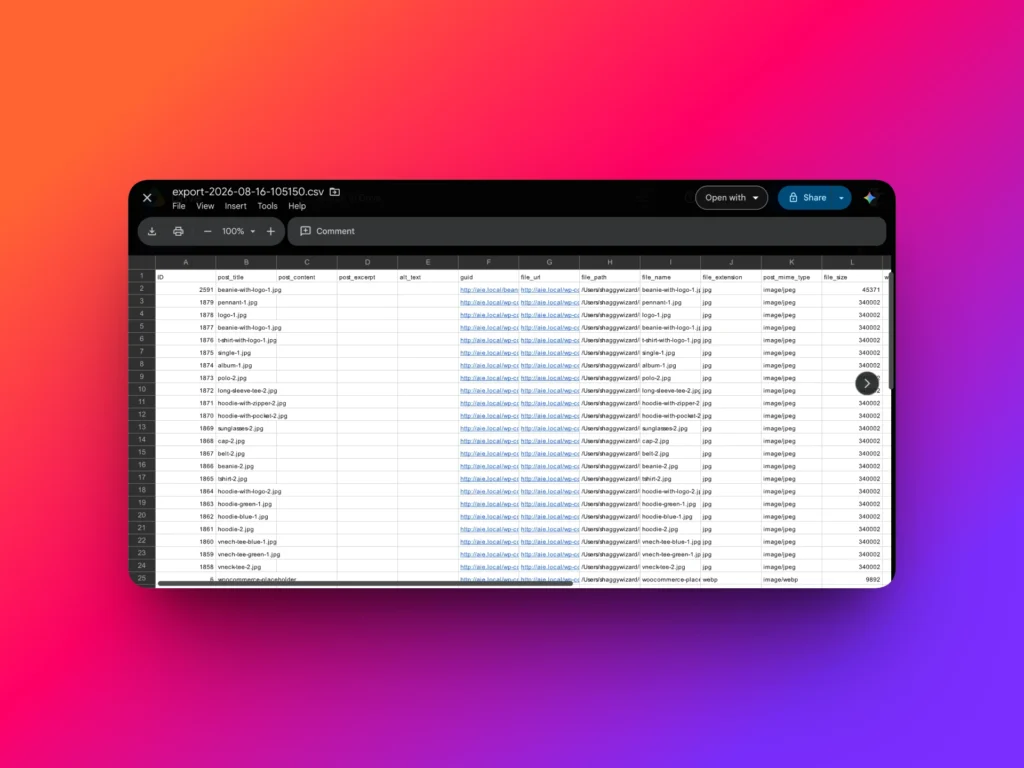
After downloading the file, you can open it in Google Sheets, Microsoft Excel, LibreOffice, or another spreadsheet tool.
In the video, we open the exported file in Google Drive.
Each row represents one media file from the WordPress Media Library.
The exported columns include the attachment ID, title, file URL, file type, file size, image width, image height, upload date, and other media data.
Media Export Use Cases
| Use Case | Useful Export Fields | Why It Helps |
|---|---|---|
| SEO image audit | Title, alt text, file URL, width, height, file size | Helps identify missing alt text, oversized images, and image optimization opportunities |
| Media cleanup | ID, title, file type, upload date, file size | Helps review old, large, or unnecessary media files |
| Migration planning | File URL, MIME type, file size, upload date | Helps prepare media data before moving files to another website |
| Client reporting | Title, file URL, type, dimensions, upload date | Creates a clear spreadsheet report of website media assets |
| Image optimization | Width, height, file size, file URL | Helps find images that may need compression or resizing |
Can This File Be Used for Import?
Yes. The exported media file can also be used later to import media into another WordPress website.
This is useful when you want to move a Media Library between websites. In the next lesson, we show how to import media files from the exported CSV or Excel file into a different WordPress site.
Best Practices for Exporting the Media Library
- Export only the fields you need when preparing a focused audit.
- Use filters when you want to review only large images, specific media types, or files uploaded during a date range.
- Use CSV for flexible spreadsheet workflows.
- Use XLSX if you prefer native Microsoft Excel files.
- Keep a copy of the original export before editing the file.
- Review file URLs and metadata before using the export for migration.
Conclusion
Import Export by RockStarLab makes it easy to export all WordPress Media Library files to CSV or Excel.
You can export the full Media Library or filter specific files, choose exactly which media fields to include, reorder columns, download the export file, and review the result in a spreadsheet.
This workflow is useful for SEO audits, media cleanup, reporting, image optimization, migration planning, and preparing Media Library data for import into another WordPress website.
Learn more about the WordPress import export plugin
FAQ
Can I export the WordPress Media Library to CSV?
Yes. Import Export by RockStarLab lets you export WordPress Media Library files to CSV, including file URLs and attachment metadata.
Can I export WordPress media files to Excel?
Yes. You can export media file data to XLSX format for Microsoft Excel workflows.
Can I filter media files before export?
Yes. You can add filters to export only specific media files, such as images wider than a certain number of pixels or files uploaded during a specific date range.
Which media fields can I export?
You can export fields such as attachment ID, title, file URL, file type, MIME type, file size, width, height, alt text, caption, description, and upload date.
Can I use the exported media file for migration?
Yes. The exported media file can be used later to import media files into another WordPress website.