
In this tutorial, you will learn how to import WordPress blog posts from a CSV or Excel file using Import Export by RockStarLab.
This workflow is useful when you need to move blog posts from one WordPress website to another, migrate content, rebuild a website, copy structured ACF data, or import posts from a prepared spreadsheet.
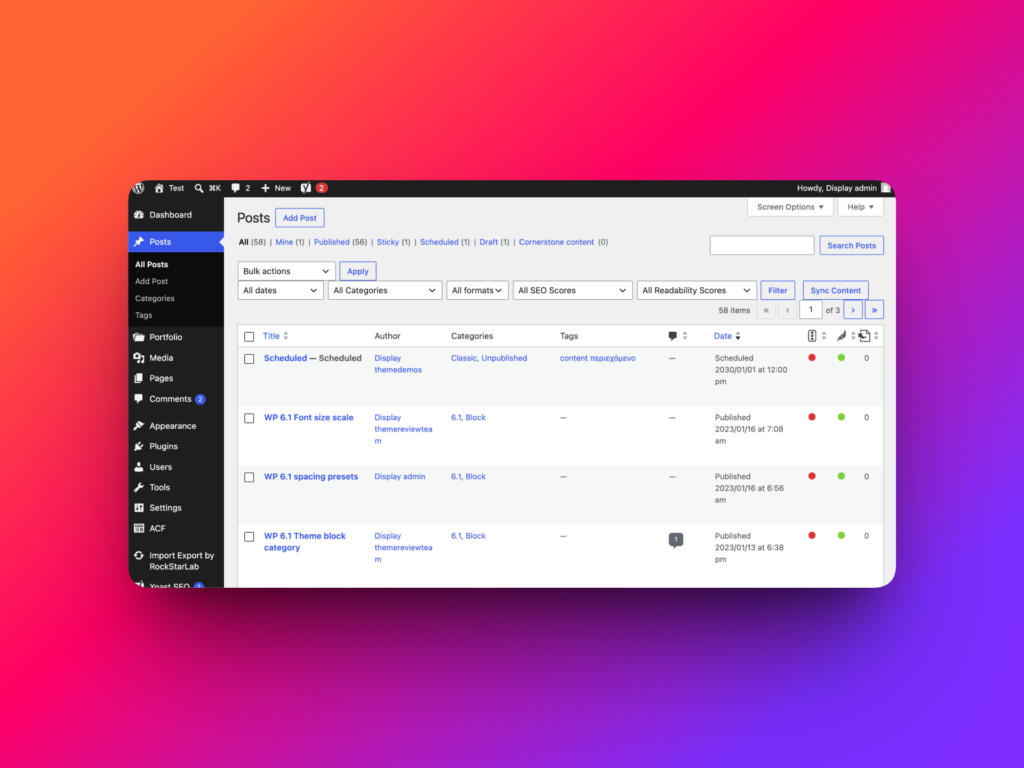
In this example, we export 58 blog posts from one WordPress website and import them into a second empty website. The import includes post content, categories, tags, featured images, inline images, ACF fields, and ACF Repeater fields.
What This WordPress Import Workflow Covers
Importing blog posts is not always just about moving titles and content. In many real projects, posts include categories, tags, featured images, media inside the content, and custom fields.
With Import Export by RockStarLab, you can import structured WordPress post data from CSV or Excel and map file columns to WordPress fields.
In this lesson, we import:
- Blog post titles
- Post content
- Post excerpts
- Categories
- Tags
- Featured images
- Images inside the post content
- Advanced Custom Fields data
- ACF Repeater fields
Before You Start
To follow this tutorial, install and activate Import Export by RockStarLab on both WordPress websites: the source website and the destination website.
You can download the plugin from WordPress.org:
Download Import Export by RockStarLab
If your posts use Advanced Custom Fields, make sure ACF is installed and the required field groups exist on the destination website before importing ACF data.
If the export file contains media URLs, the importer can download those images into the Media Library during import.
Step 1: Export Blog Posts from the Source Website
First, open the WordPress admin dashboard on the website where the posts already exist.
Go to:
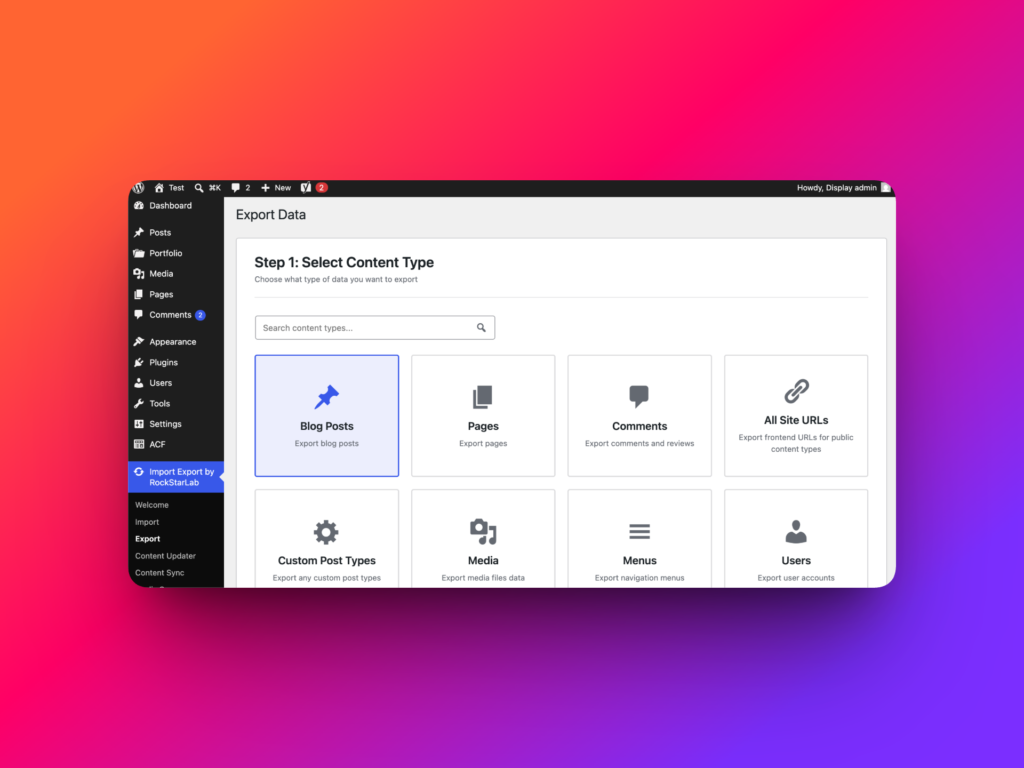
Import Export by RockStarLab → Export
On Step 1, choose the content type. Select Blog Posts, then click Next Step.
Step 2: Choose Whether to Export All Posts or Filter Them
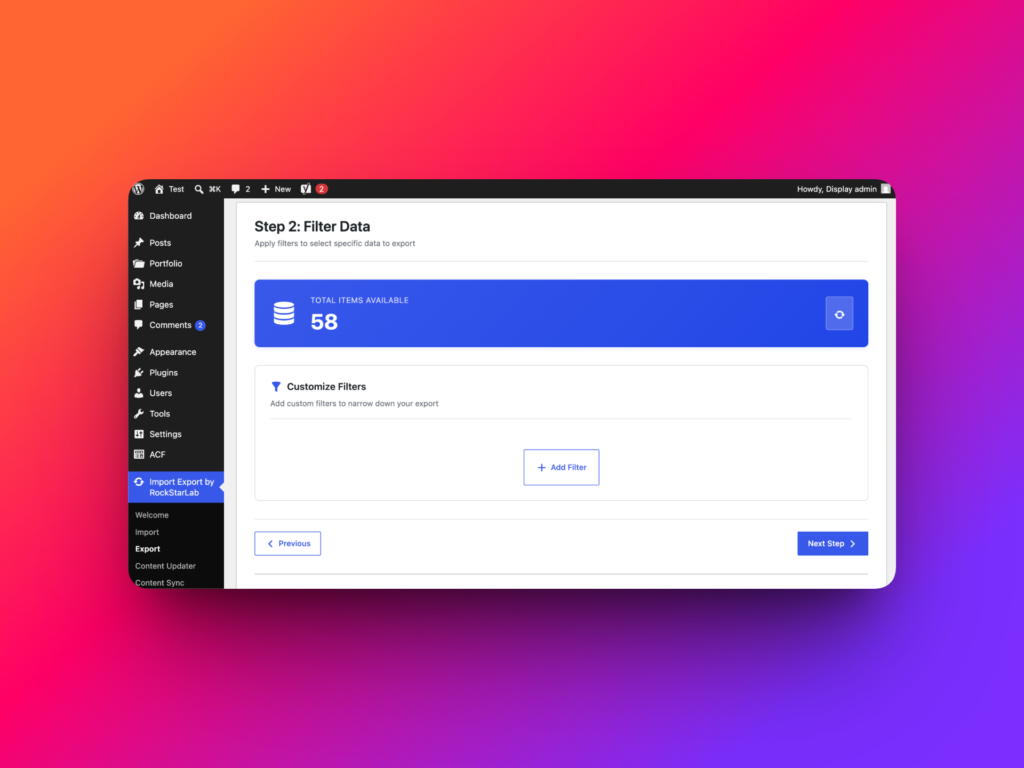
On Step 2, you can add filters if you only want to export selected posts.
For example, you can export only posts by a specific author, only posts with a specific status, or only posts created during a certain date range.
In this lesson, we want to move all blog posts from the source website to the destination website, so we do not add any filters.
Click Next Step.
Step 3: Select All Export Fields
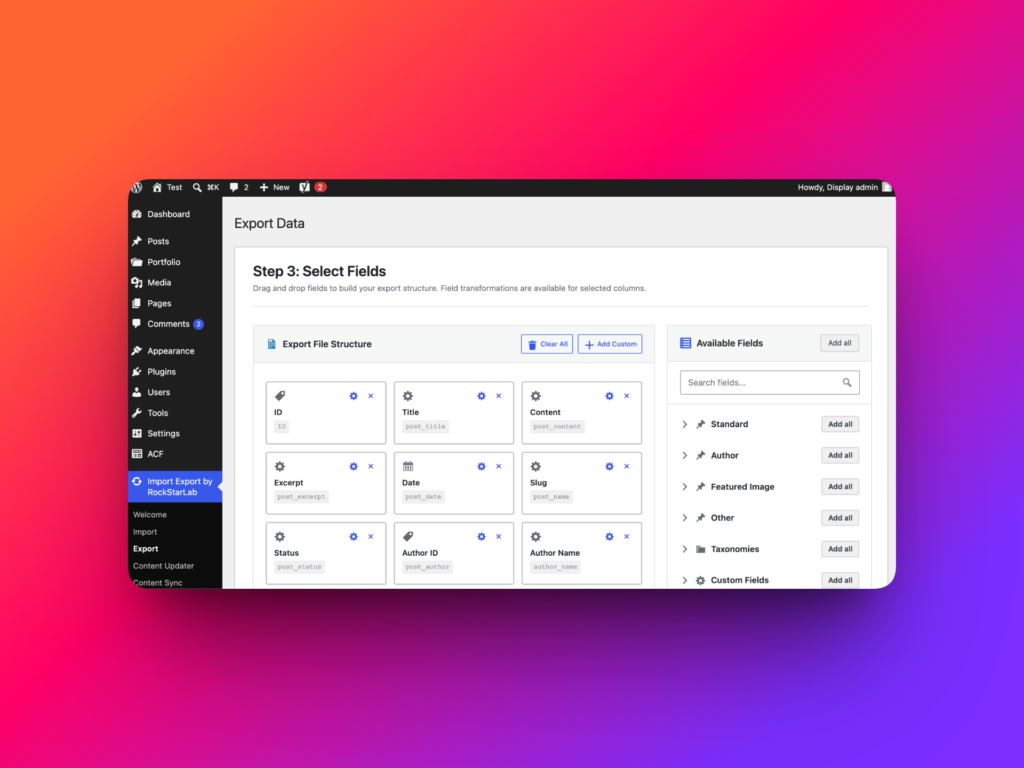
On Step 3, choose which data should be included in the export file.
This step is useful when you only need specific data, such as titles and slugs for an SEO audit. But for a full migration, you usually want to include all available fields.
In the Available Fields block, click Add All.
The Export File Structure block will now contain the fields that will be exported from WordPress.
You can reorder fields by dragging them. The order of fields becomes the column order in the export file.
In the PRO version, you can also apply transformation functions during export. For example, you can clean titles, format dates, replace values, or transform field values before they are written to the file.
Step 4: Export to CSV or Excel
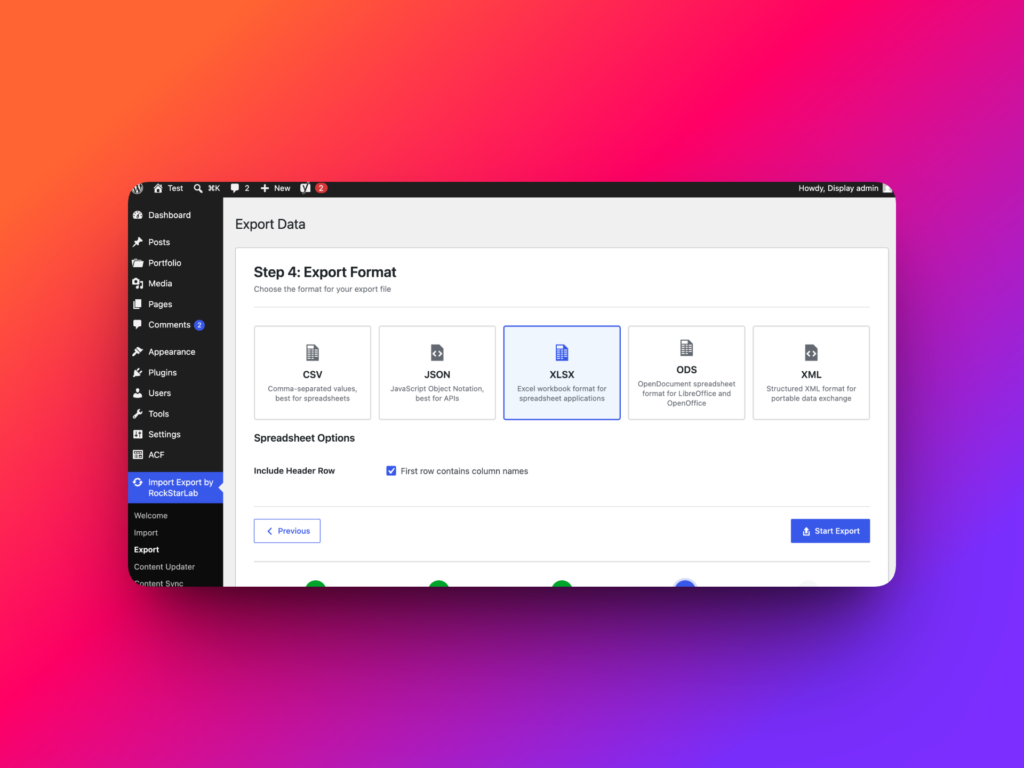
On Step 4, choose the export format.
Import Export by RockStarLab supports several formats:
| Format | When to Use It |
|---|---|
| CSV | Best for spreadsheet editing, content migration, SEO audits, and simple data exchange |
| XLSX | Best when you want a native Microsoft Excel file |
| JSON | Best for developers, APIs, structured data workflows, and integrations |
| ODS | Best for OpenDocument and LibreOffice spreadsheet workflows |
| XML | Best for structured data exchange and compatibility with XML-based systems |
In this video, we choose XLSX, which is the Excel format.
Click Start Export. After the export completes, download the file.
In this example, the export file contains 58 blog posts.
Step 5: Open the Destination Website
Now switch to the second WordPress website, where you want to import the blog posts.
This website is empty in our example and does not contain any blog posts yet.
Go to:
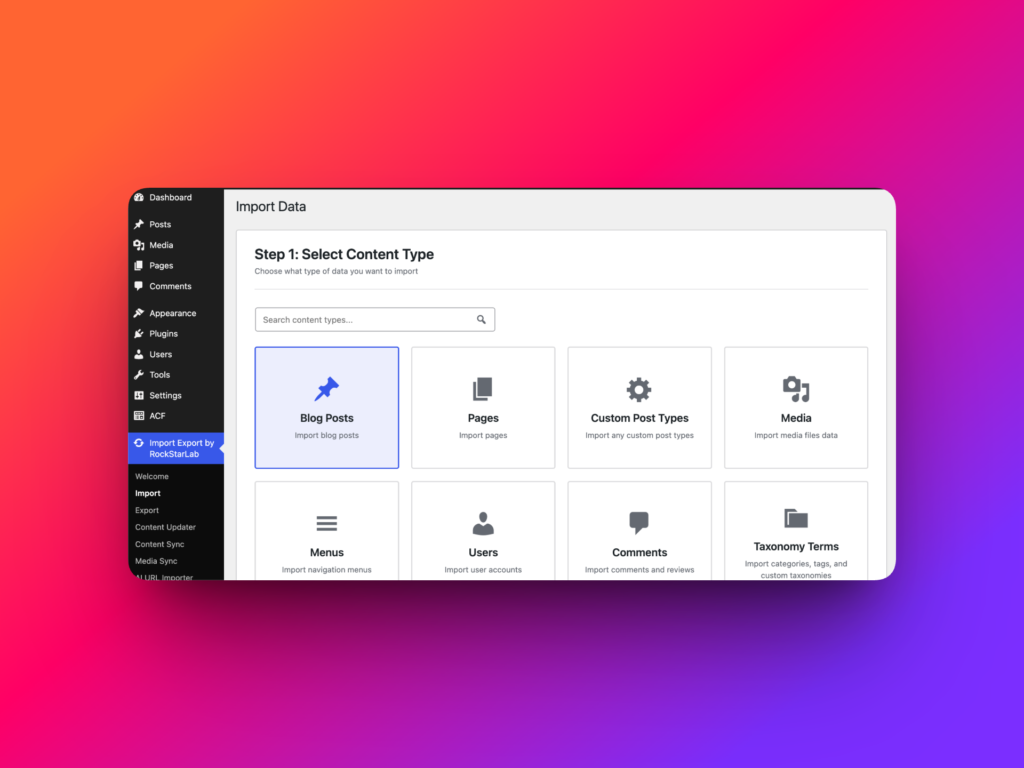
Import Export by RockStarLab → Import
On Step 1, select Blog Posts, then click Next Step.
Step 6: Upload the CSV or Excel File
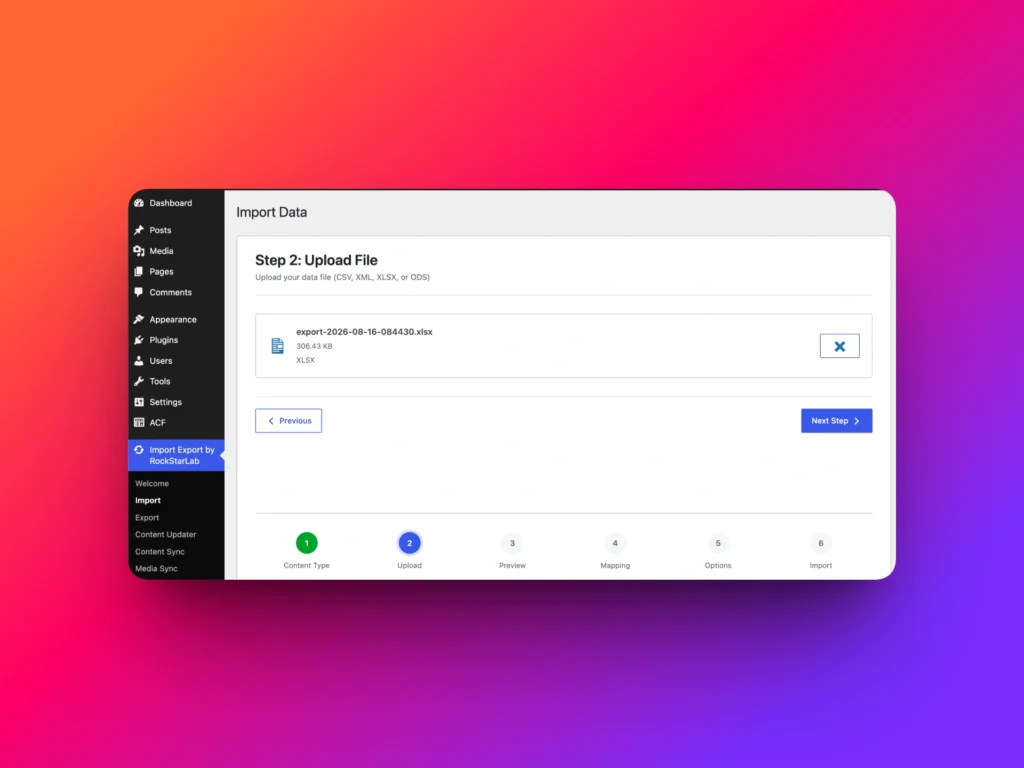
On Step 2, upload the file exported from the source website.
The plugin supports importing data from CSV and Excel workflows, so you can upload your prepared import file and continue.
After the file is uploaded successfully, click Next Step.
Step 7: Preview the Import Data
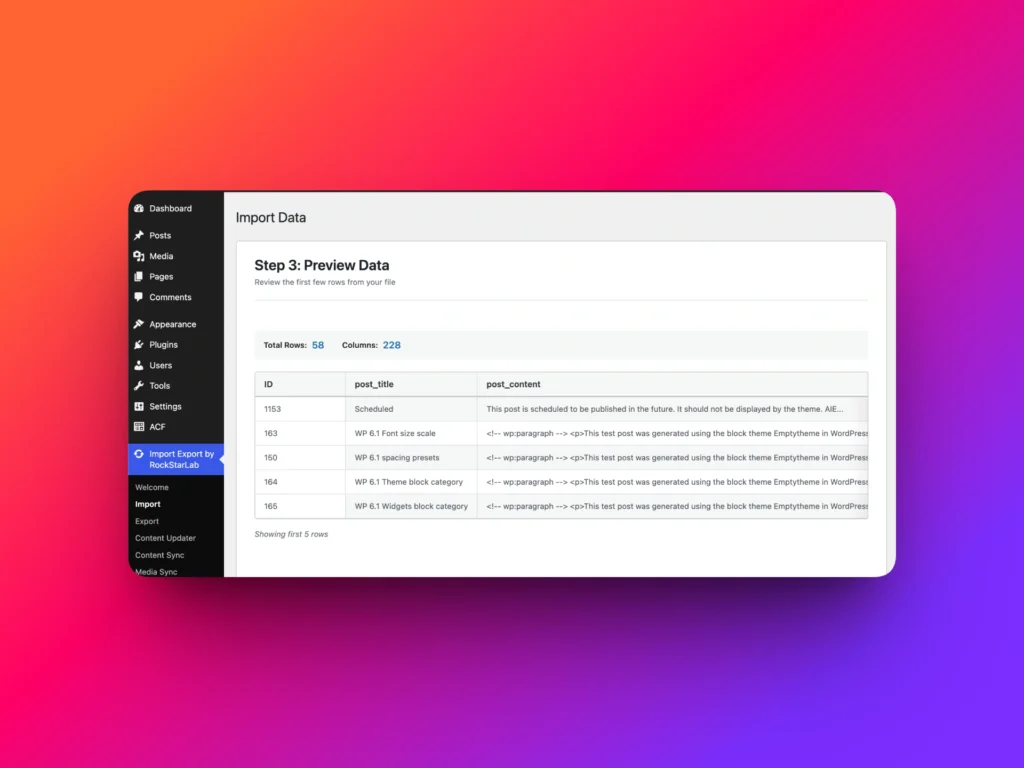
Step 3 shows a preview of the import file.
You can review the first few records and make sure the plugin detected the columns and values correctly.
If everything looks correct, click Next Step.
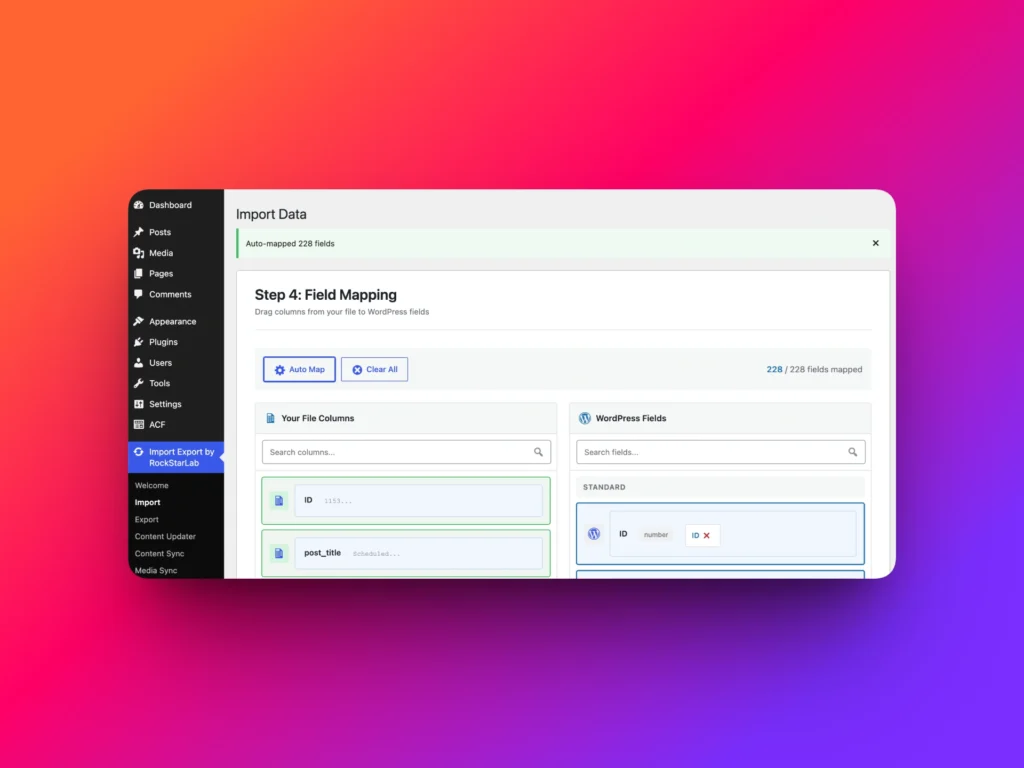
Step 8: Map File Columns to WordPress Fields
Step 4 is field mapping.
This is where you connect columns from your import file to WordPress fields on the destination website.
You can map fields manually by dragging values from the left side to the correct WordPress fields on the right side.
Manual mapping is useful when your file has custom column names or when you only want to import selected fields.
In this lesson, the file was exported from Import Export by RockStarLab, and we want to import all data. So we can click Auto Map.
The plugin automatically connects the file columns to the correct WordPress fields.
You can still review and adjust the mapping manually if needed.
Optional: Apply Transformation Functions During Import
In the Mapped Fields section, you can apply transformation functions to any mapped field. This option is available in the PRO version.
Transformation functions can clean or prepare values before they are saved into WordPress.
For example, during import you can:
- Clean post titles
- Format dates
- Replace text
- Normalize custom field values
- Prepare SEO fields
- Clean imported content
In this example, we do not need transformations, so we continue to the next step.
Step 9: Configure Import Options
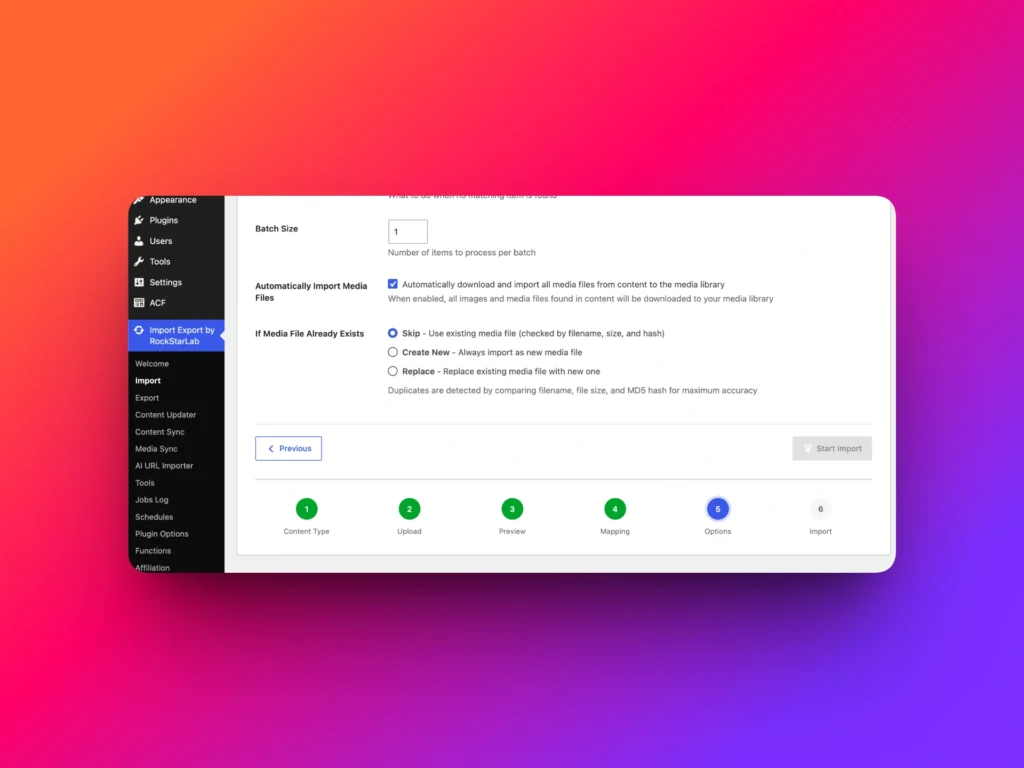
Step 5 contains import options.
Here you need to choose how the importer should detect existing records.
This is important because WordPress may already contain posts with the same title, ID, slug, or another matching value.
You can decide what should happen when a matching post already exists:
- Create a new post if no existing match is found.
- Update the existing post if a match is found.
- Ignore the row if a match is found.
- Import the row as a new post anyway.
In this tutorial, we choose Title as the matching field.
This means the importer compares existing posts by post title. If a post with the same title already exists, we choose to update it.
Batch Size and Image Download
The Batch Size setting controls how many records are processed at once.
If your import includes many images, keep the batch size low. A batch size of 1 is often safer when images need to be downloaded into the Media Library, because it helps avoid server timeouts.
If your import is mostly text data, you can increase the batch size to process records faster.
Next, enable the option to automatically download found images.
This allows the plugin to download images from the source website and save them into the Media Library of the destination website.
This is useful for featured images, images inside post content, and images stored in ACF fields.
Step 10: Start the Import
After reviewing all settings, click Start Import.
The plugin begins importing the blog posts from the CSV or Excel file.
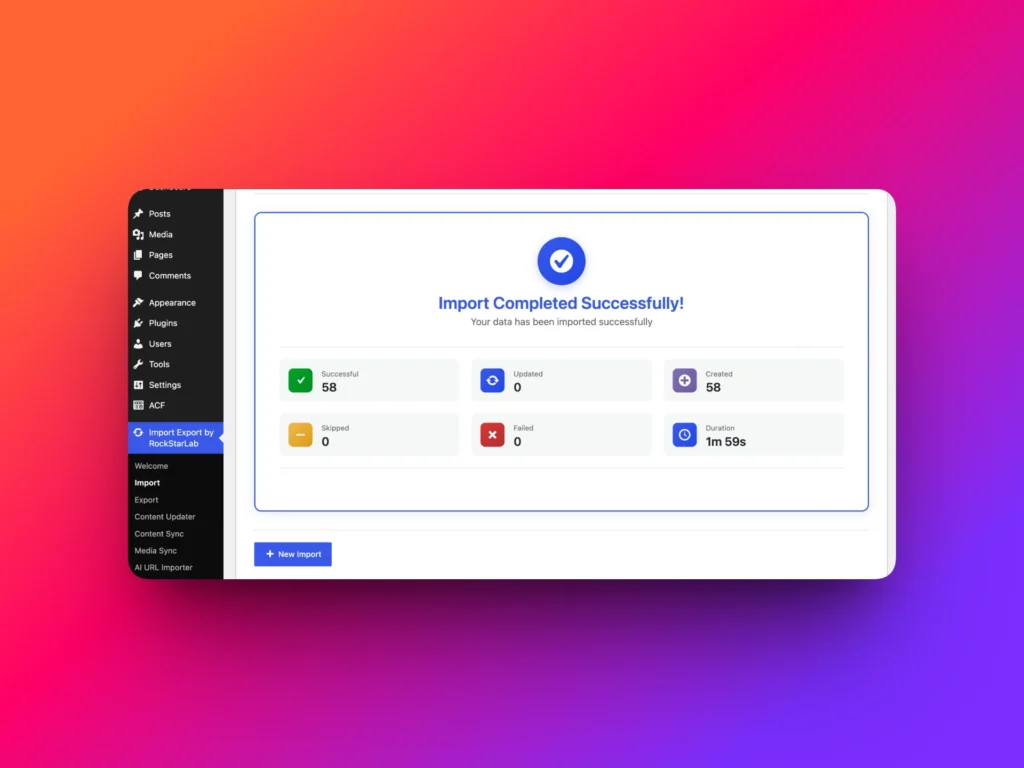
When the import finishes, the plugin shows the result. In this example, all 58 posts were imported successfully.
Step 11: Verify Imported Posts
After the import completes, open the WordPress Posts screen on the destination website.
You should see the imported blog posts created there.
In this example, all 58 posts were created successfully. Categories and tags were preserved as well.
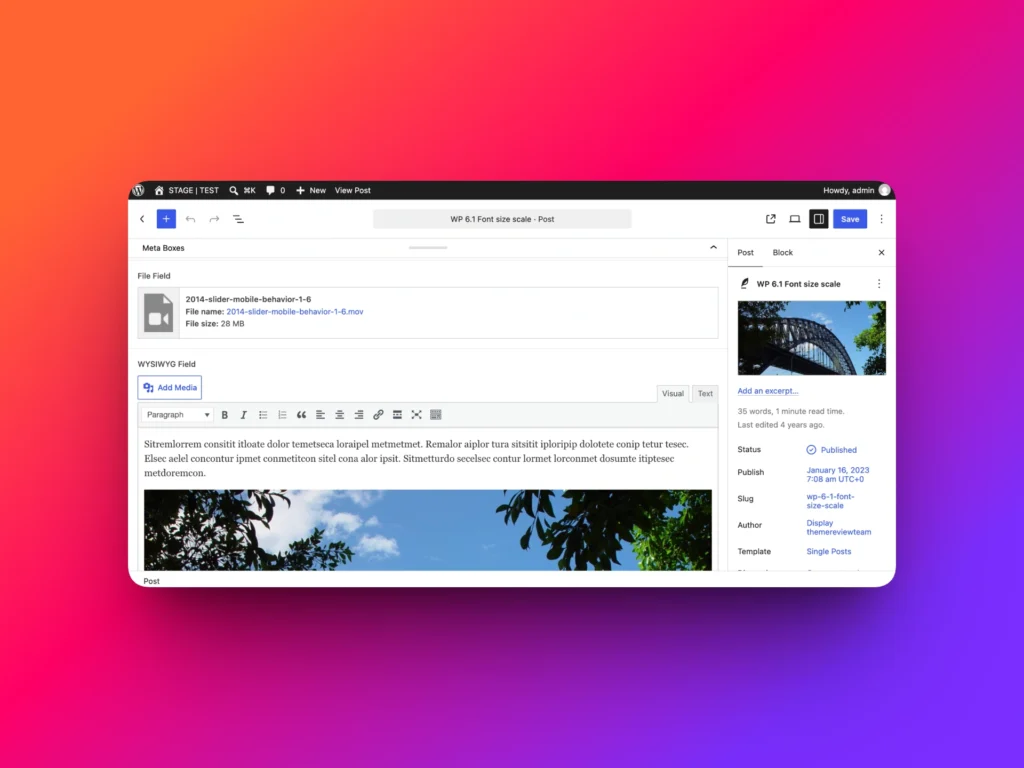
Now open one of the posts that contains ACF fields.
Check the post content, featured image, inline images, ACF field values, and ACF Repeater fields.
In the video, the imported post contains the same data as the original post on the first website.
Import Workflow Summary
| Step | Action | Why It Matters |
|---|---|---|
| 1 | Export posts from the source website | Creates the file that will be imported into the second website |
| 2 | Select all required fields | Ensures content, taxonomies, media fields, and custom fields are included |
| 3 | Choose CSV or Excel format | Creates a portable import file |
| 4 | Upload the file on the destination website | Starts the import process |
| 5 | Preview the data | Confirms that the file was detected correctly |
| 6 | Map file columns to WordPress fields | Controls where each value will be saved |
| 7 | Configure matching and update behavior | Prevents accidental duplicates or controls updates |
| 8 | Enable automatic image download | Copies images into the Media Library on the destination site |
| 9 | Start import and verify posts | Confirms that content, categories, tags, images, and ACF data were imported |
Best Practices for Importing WordPress Blog Posts
- Create a backup before importing data into a production website.
- Start with a small test import before importing hundreds of posts.
- Make sure required plugins, such as ACF, are active on the destination website.
- Review field mapping carefully before starting the import.
- Use a low batch size when importing many images.
- Check categories, tags, featured images, and ACF fields after the import finishes.
Conclusion
Import Export by RockStarLab makes it possible to import WordPress blog posts from CSV or Excel files and move structured content between websites.
You can import post content, categories, tags, featured images, inline images, custom fields, ACF fields, and ACF Repeater fields. You can also map fields manually, use Auto Map, configure how existing posts are handled, and automatically download images into the Media Library.
This workflow is useful for WordPress migrations, rebuilding websites, moving blog content, and transferring ACF-powered posts between WordPress installs.
Learn more about the WordPress import export plugin
FAQ
Can I import WordPress blog posts from CSV?
Yes. Import Export by RockStarLab lets you import WordPress blog posts from CSV files and map file columns to WordPress fields.
Can I import WordPress blog posts from Excel?
Yes. You can import blog posts from Excel XLSX files as part of the import workflow.
Can imported images be downloaded into the Media Library?
Yes. The plugin can automatically download found images into the WordPress Media Library during import.
Can I import ACF fields with blog posts?
Yes. If Advanced Custom Fields is installed and the required fields exist on the destination website, ACF field data can be imported with blog posts.
Can I import ACF Repeater fields?
Yes. ACF Repeater field data can be imported when it exists in the import file and the destination website has the correct ACF field setup.