
In this tutorial, you will learn how to export WordPress blog posts to CSV using Import Export by RockStarLab.
This workflow is useful when you need a spreadsheet-ready export of your blog posts for migration, content review, SEO audits, agency handoff, backup workflows, or editing content outside WordPress.
Although this lesson focuses on WordPress CSV Posts Export, the same export tool can also export posts to Excel XLSX, JSON, XML, and ODS formats.
Why Export WordPress Posts to CSV?
CSV is one of the most practical formats for working with WordPress content outside the admin dashboard. You can open a CSV file in Google Sheets, Microsoft Excel, LibreOffice, or use it in custom migration and integration workflows.
Exporting WordPress posts to CSV can help with:
- Moving blog posts between WordPress websites.
- Reviewing content in a spreadsheet.
- Auditing titles, slugs, excerpts, statuses, and dates.
- Preparing SEO updates.
- Exporting ACF fields and structured content.
- Creating migration files for another website.
- Sharing content data with clients, editors, developers, or SEO teams.
Before You Start
To follow this tutorial, install and activate Import Export by RockStarLab on your WordPress website.
You can download the plugin from WordPress.org:
Download Import Export by RockStarLab
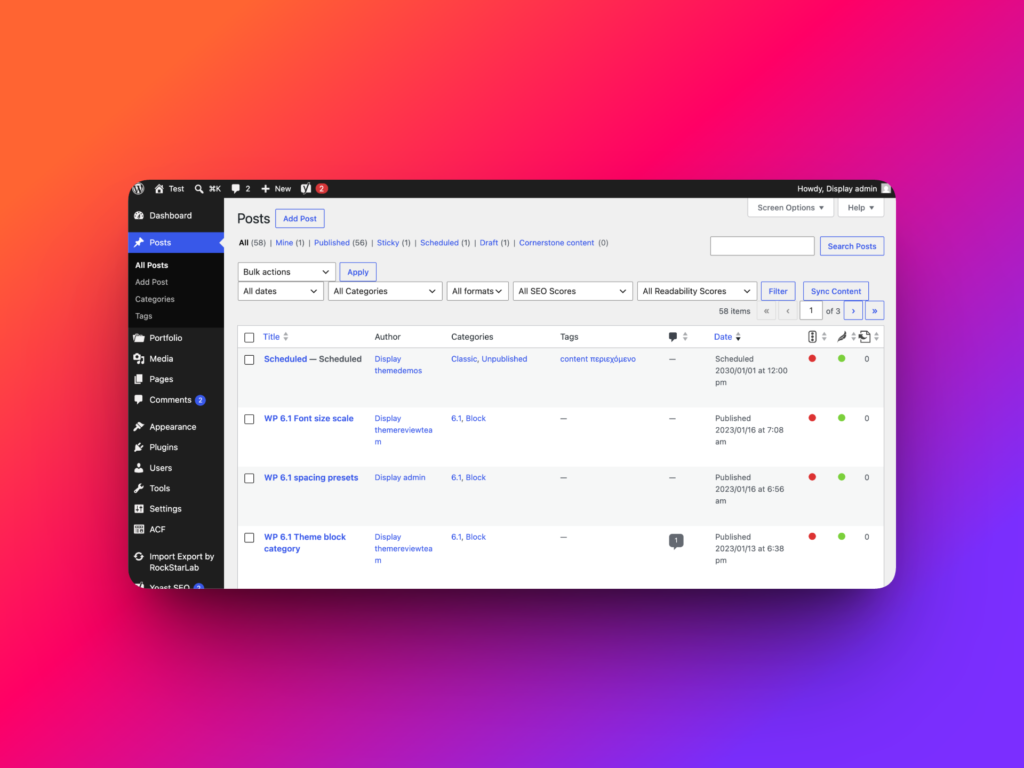
In this example, the demo website contains 58 test blog posts. We will filter them by author and export 18 matching posts to CSV.
Step 1: Open the Export Tool
In the WordPress admin dashboard, go to:
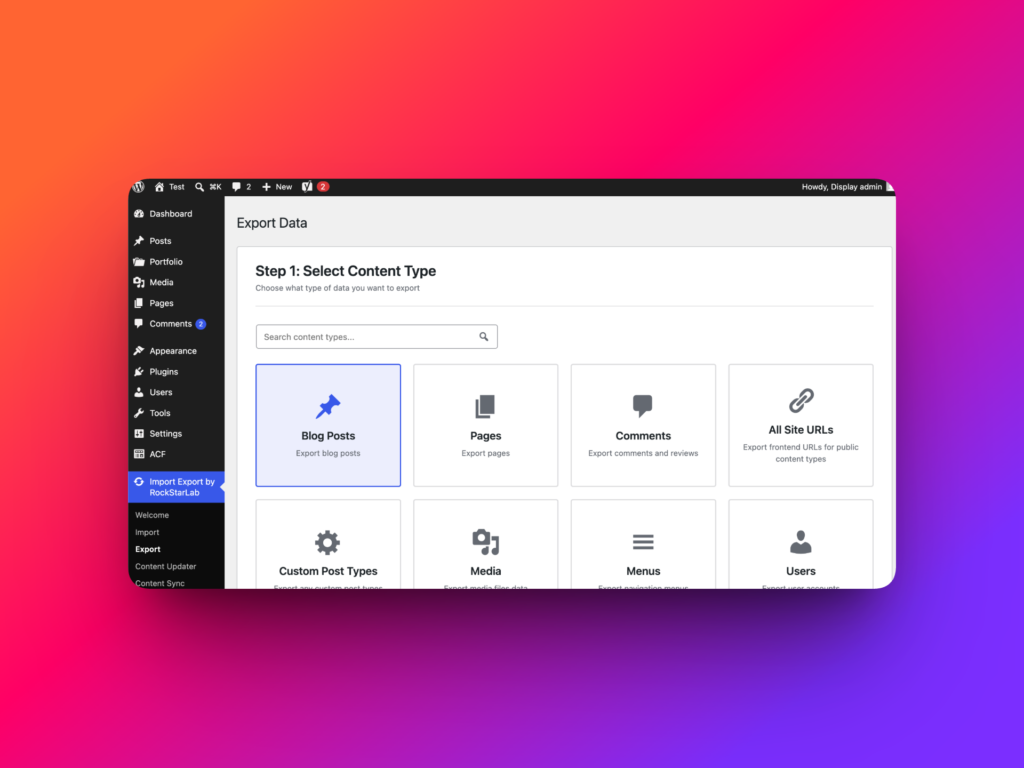
Import Export by RockStarLab → Export
The Export screen shows the available content types that can be exported.
For this lesson, select Blog Post as the content type and click Next Step.
Step 2: Export All Posts or Add Filters
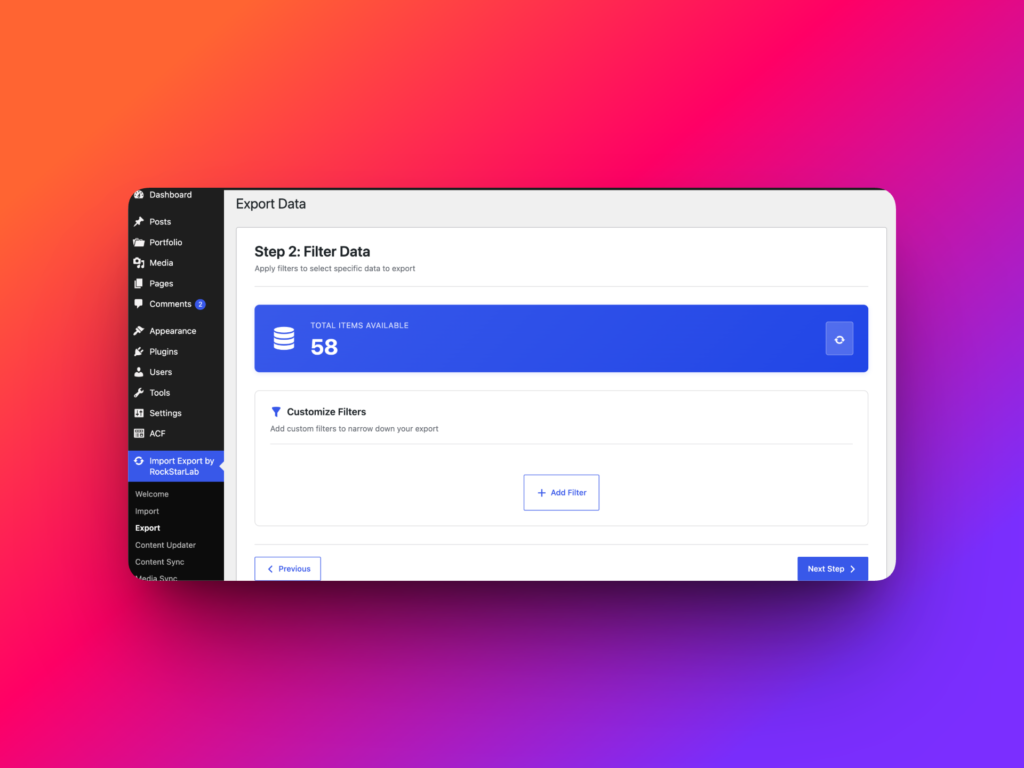
On the filter step, you can decide whether to export all available posts or only a specific subset.
If you do not add filters, the plugin exports all matching blog posts. In this demo, that would be all 58 test posts.
Filters are useful when you want to export only selected content, for example:
- Posts written by a specific author.
- Posts with a specific status.
- Posts created during a specific date range.
- Posts where the title contains a specific word.
- Posts matching custom field or metadata conditions.
Example: Filter Posts by Author Email
In this video, we export only posts written by a specific author.
On the demo website, the test author is Theme Review Team. This author has 18 published posts.
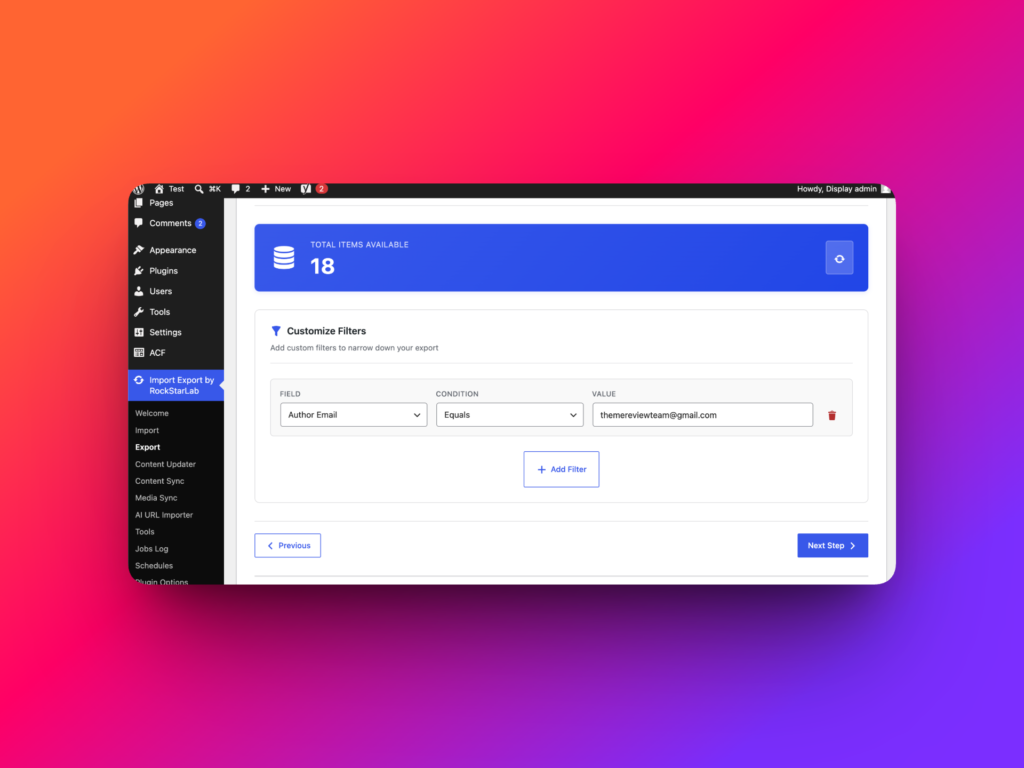
To export only those posts, click Add Filter.
Choose Author Email as the filter field.
For the condition, choose Equals because we know the exact author email address.
If you only know part of the email, such as the domain, you can use a condition like Contains.
Paste the author email into the value field. After the filter is applied, the matching post count changes from 58 to 18.
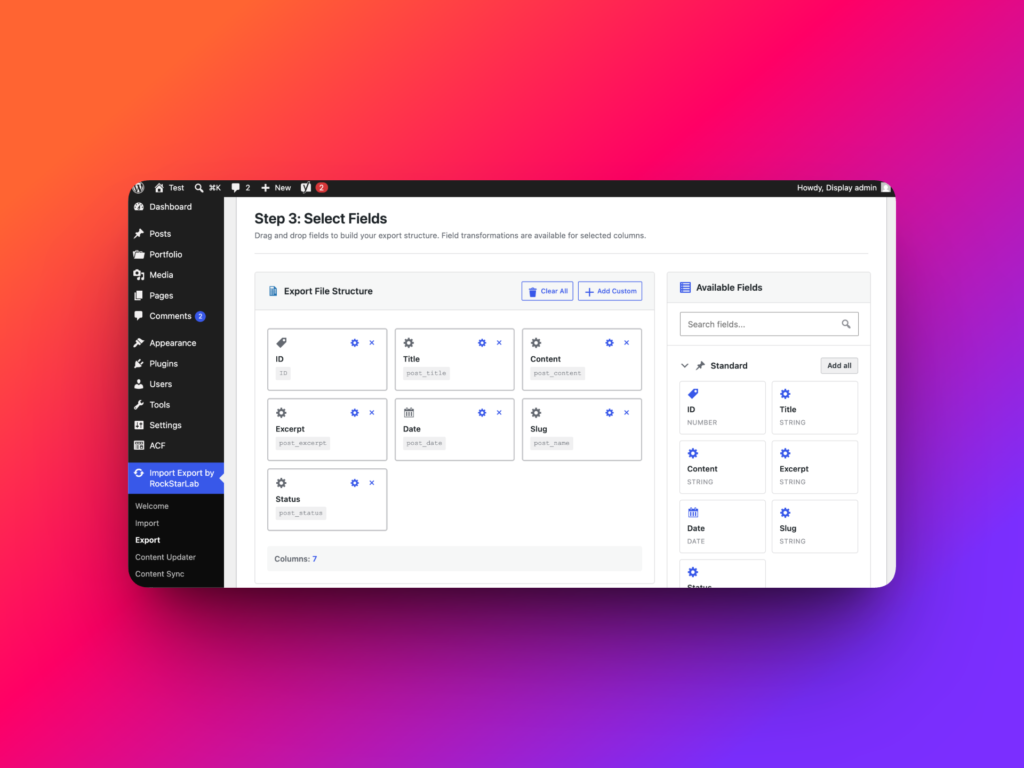
Step 3: Select Fields for the Export File
After filters are configured, click Next Step to choose the fields that should appear in the export file.
The plugin shows standard WordPress post fields such as:
- ID
- Title
- Content
- Excerpt
- Date
- Slug
- Status
If you are exporting Gutenberg content, the post body is usually stored in the Content field.
You can manually move fields from Available Fields to Selected Fields. You can also reorder selected fields, and that order will become the column order in the final CSV file.
Export ACF Fields and ACF Repeater Fields
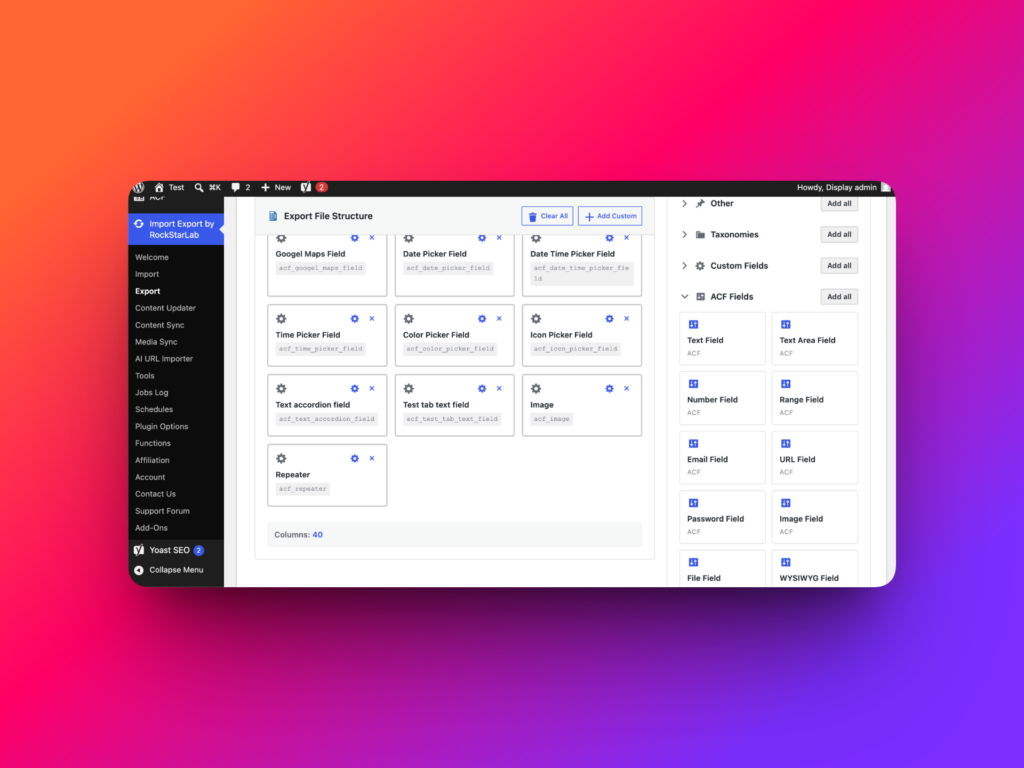
If Advanced Custom Fields is installed and fields are registered for the selected post type, Import Export by RockStarLab can show those fields in the export field selection step.
In this demo, the blog posts include many ACF field types, including:
- Text
- Textarea
- Number
- Range
- Image
- WYSIWYG Editor
- Gallery
- Checkbox
- Radio
- True/False
- Repeater fields from ACF Pro
These fields can be included in the export file together with standard WordPress fields.
You can select ACF fields individually, or use Add All to include all fields from a group.
Step 4: Reorder Export Columns
The selected field list controls the structure of your export file.
If you want the CSV columns in a specific order, simply rearrange the selected fields before continuing.
This is helpful when you are preparing a file for another website, a migration tool, a spreadsheet template, a CRM, or a custom integration.
Optional: Transform Field Values During Export
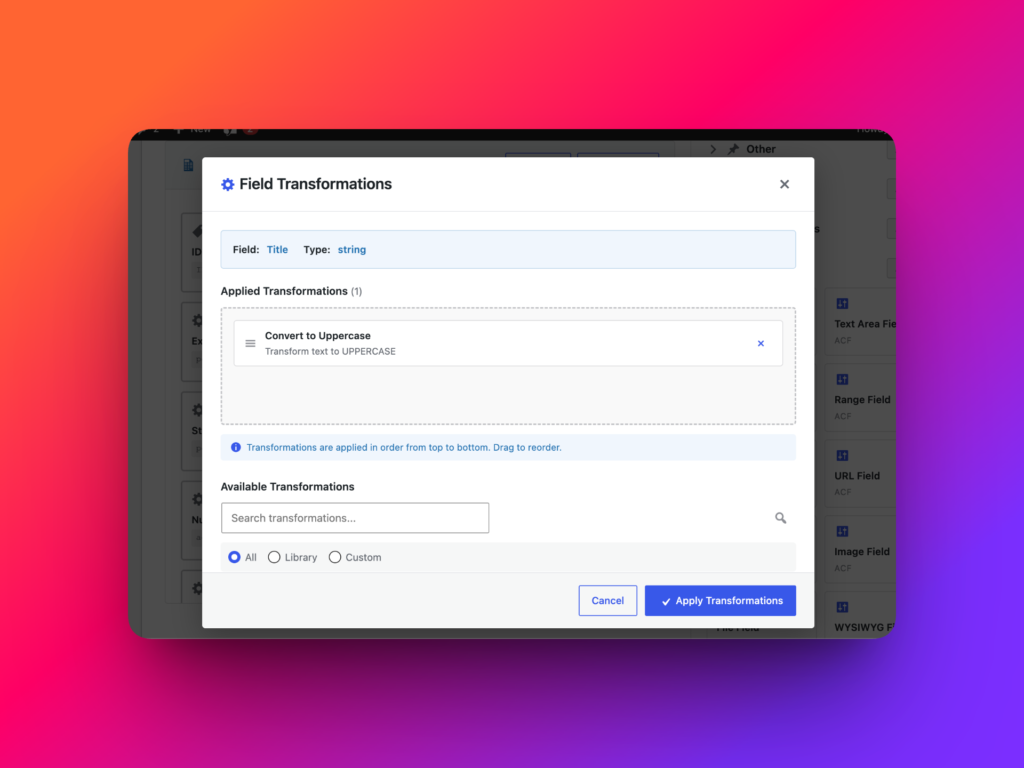
In the PRO version, you can transform field values during export.
For example, if your post titles are stored in lowercase but you want them to look cleaner in the exported spreadsheet, you can assign a transformation function to the Title field.
You can apply built-in functions such as:
- Capitalize First Letter
- Title Case
- Convert to Uppercase
- Convert to Lowercase
You can also assign custom functions created in the Functions screen.
Multiple functions can be assigned to the same export field, and they will run one by one in the order you choose.
Step 5: Choose CSV, Excel, JSON, XML, or ODS
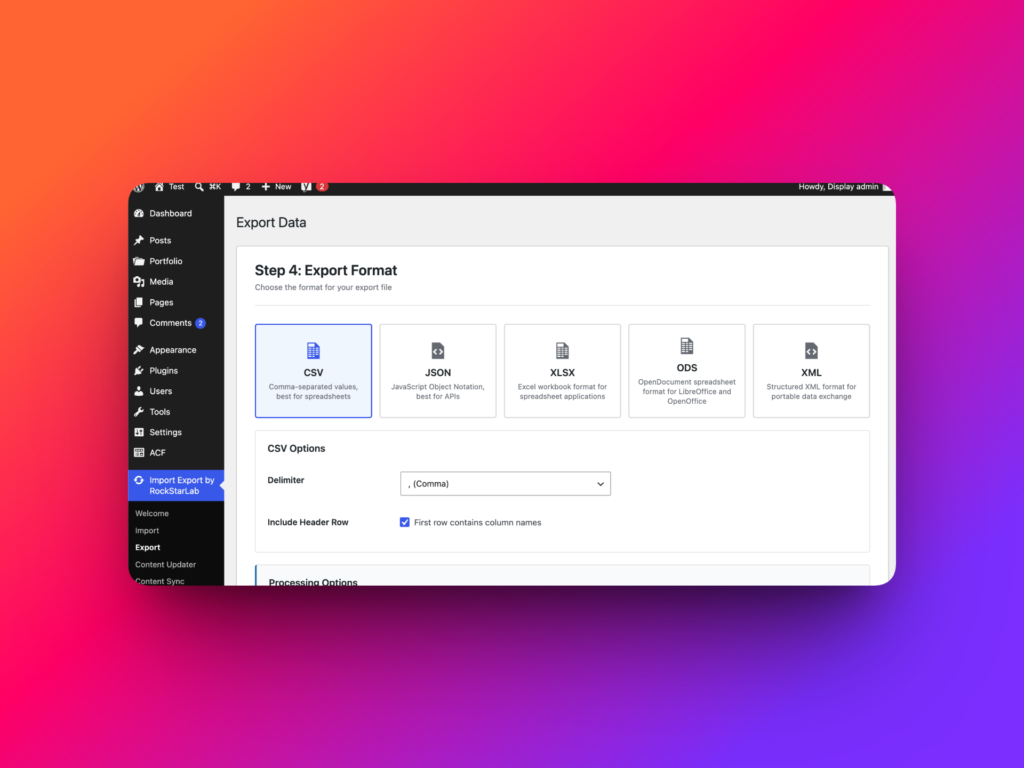
On the final step, choose the export format.
| Format | Best For |
|---|---|
| CSV | Spreadsheets, content audits, migrations, SEO reviews, and simple data exchange |
| XLSX | Microsoft Excel workflows and spreadsheet-ready exports |
| JSON | Developers, APIs, structured data, and integrations |
| XML | Structured data exchange and compatibility with XML-based systems |
| ODS | OpenDocument spreadsheets and LibreOffice workflows |
For this tutorial, choose CSV and click Start Export.
Step 6: Download the Export File
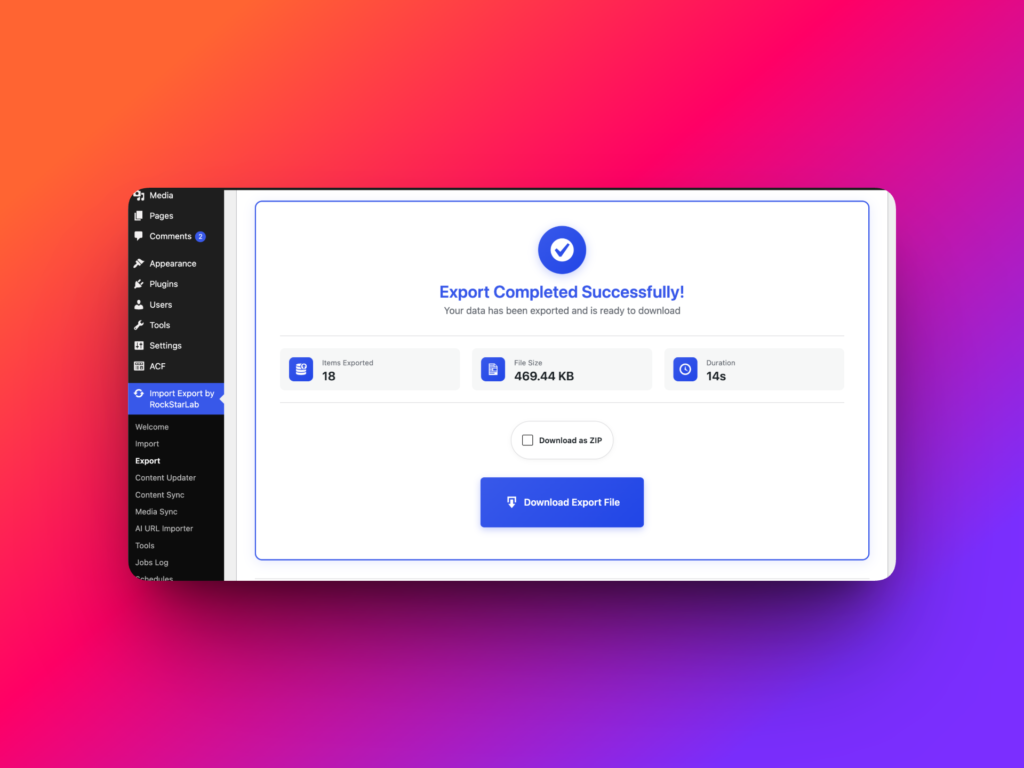
After the export process finishes, the plugin shows how many posts were exported.
In this example, 18 filtered posts were exported.
Click Download Export File to download the CSV file.
If you want to compress the export, enable the Download as ZIP checkbox before downloading.
Step 7: Review the CSV in Google Sheets
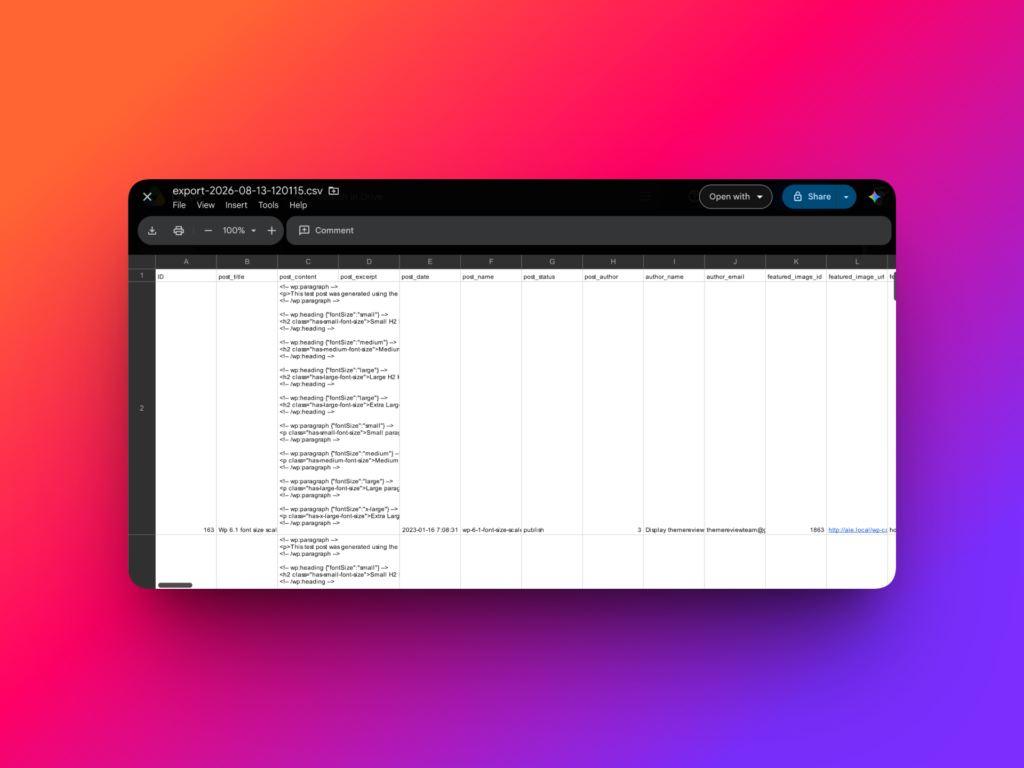
After downloading the file, you can open it in Google Sheets, Microsoft Excel, LibreOffice, or another spreadsheet tool.
In the video, we upload the CSV file to Google Drive and open it as a spreadsheet.
The exported file contains the selected standard WordPress fields, ACF fields, and ACF Repeater field data.
Importing the Exported File Into Another WordPress Website
The exported file can be used later as an import source on another WordPress website.
This is useful when moving blog posts between sites, migrating structured content, or transferring ACF-powered posts.
If the exported data includes media fields, images can be handled during import. Import Export by RockStarLab can download media files into the WordPress Media Library and check for duplicates, helping reduce manual media work.
In the next lessons, we will show how to import the data from this exported file into another WordPress website, including ACF fields and media files.
Feature Summary
| Feature | Available | Why It Helps |
|---|---|---|
| Export blog posts | Yes | Create a portable file with WordPress post data |
| Filter posts before export | Yes | Export only the posts you need |
| Choose export fields | Yes | Control which columns appear in the final file |
| Reorder columns | Yes | Prepare the export structure for spreadsheets or migrations |
| Export ACF fields | Yes | Move structured custom field data with posts |
| Export ACF Repeater fields | Yes | Support complex ACF Pro content structures |
| Transformation functions | PRO | Clean or format values during export |
| CSV, XLSX, JSON, XML, ODS formats | Yes | Choose the right export format for your workflow |
| ZIP download | Yes | Compress export files before downloading |
Conclusion
Import Export by RockStarLab makes it easy to export WordPress blog posts to CSV and other formats.
You can export all posts or filter them, choose exactly which fields to include, reorder the export structure, include ACF fields and ACF Repeater fields, optionally transform values during export, and download the result as CSV, Excel XLSX, JSON, XML, ODS, or ZIP.
This makes the plugin useful for WordPress migrations, content audits, SEO reviews, spreadsheet editing, and moving structured blog content between websites.
Learn more about the WordPress import export plugin
FAQ
Can I export WordPress posts to CSV?
Yes. Import Export by RockStarLab lets you export WordPress blog posts to CSV, including selected post fields and available custom fields.
Can I filter posts before exporting?
Yes. You can use filters such as author email, title, date, status, and other available fields to export only specific posts.
Can I export ACF fields with WordPress posts?
Yes. If Advanced Custom Fields is installed and fields are registered for the selected post type, ACF fields can be selected for export.
Can I export ACF Repeater fields?
Yes. ACF Repeater field data can be included in the export file when available for the selected post type.
Which export formats are supported?
The plugin supports CSV, JSON, XML, XLSX, and ODS export formats. You can also download the export file as a ZIP archive.