
In this tutorial, you will learn how to export selected files from the WordPress Media Library using Import Export by RockStarLab.
This workflow is useful when you do not need to export the full Media Library. Instead, you can choose only the images, documents, videos, or other media files you want, export them to CSV, and import them into another WordPress website.
The Export Selected Media workflow is available in the PRO version of Import Export by RockStarLab. New users can activate PRO free for one month.
Why Export Selected Media Files?
Exporting the full WordPress Media Library is useful for complete migrations and full media audits. But in many real projects, you only need a few selected files.
For example, you may want to:
- Move selected images from one website to another.
- Transfer media files from staging to production.
- Export only files used in a specific client project.
- Create a focused CSV file for media review.
- Prepare selected images, PDFs, or documents for migration.
- Avoid exporting hundreds of files when you only need a few.
Before You Start
To follow this tutorial, install and activate Import Export by RockStarLab on both WordPress websites: the source site and the destination site.
You can download the free plugin from WordPress.org:
Download Import Export by RockStarLab
The selected media export workflow requires the PRO version. You can activate PRO free for one month if you are a new user.
Step 1: Open the Media Library
On the source website, open the WordPress dashboard and go to:
Media → Library
In this example, the Media Library contains 61 files.
We do not want to export all of them. We only want to export a few selected images.
Step 2: Select Media Files
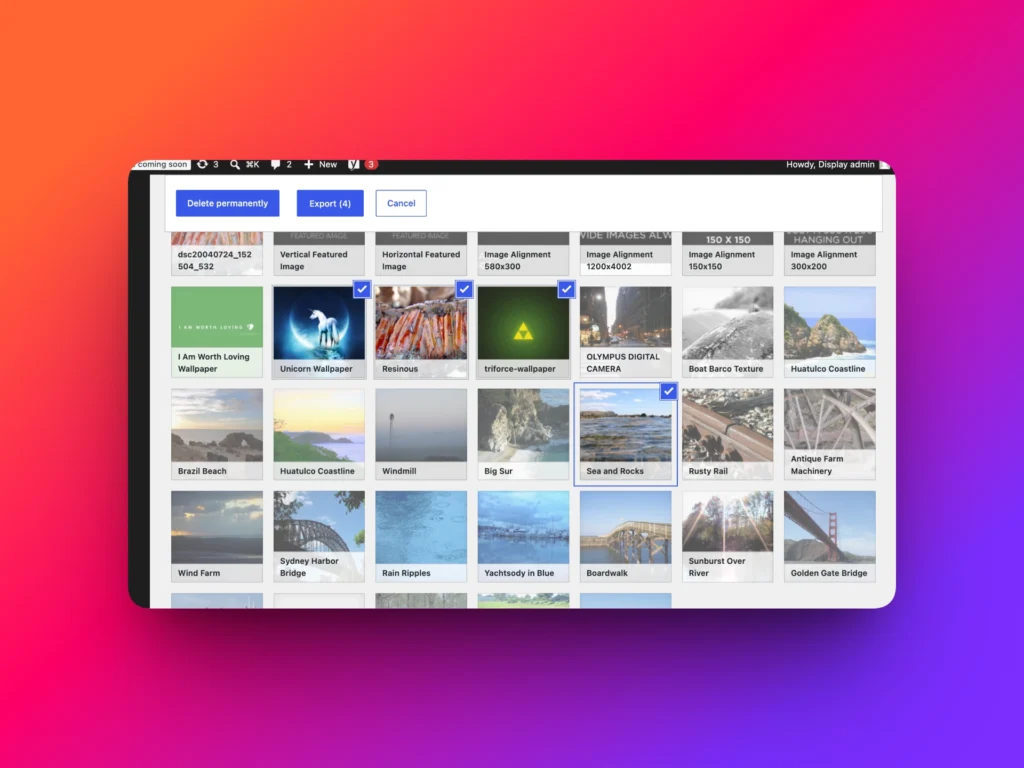
Click Bulk Select.
Now choose the media files you want to export.
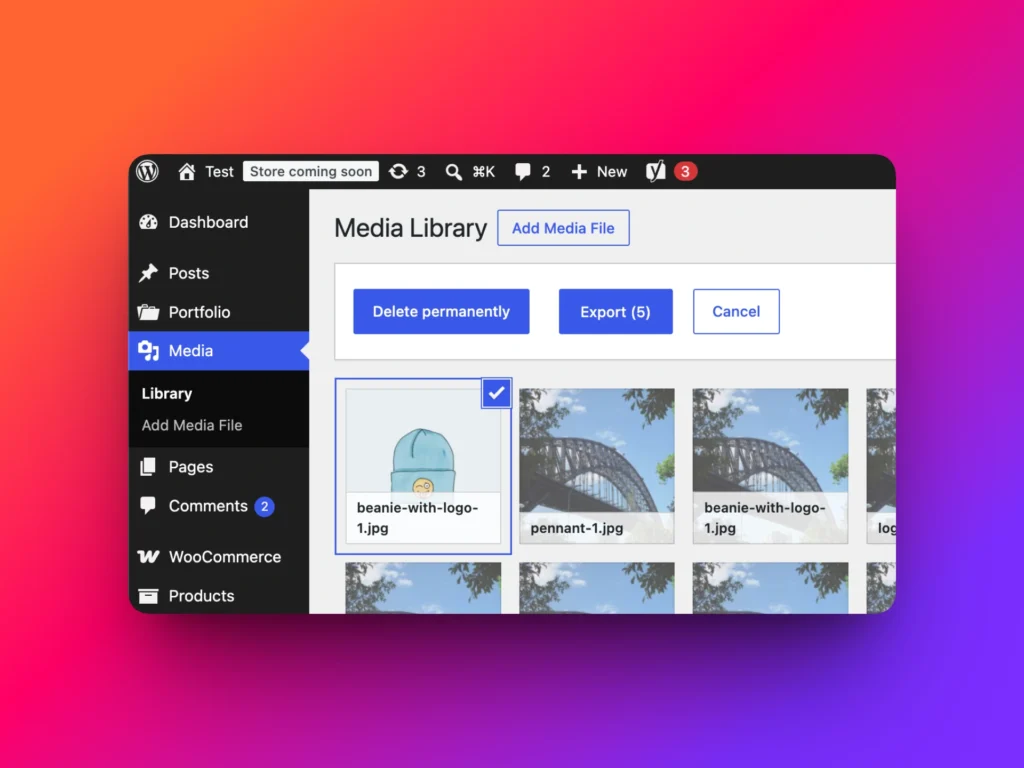
After selecting files, an Export button appears. This button starts the selected media export workflow.
Step 3: Start the Selected Media Export
Click Export.
The plugin opens the Export Media workflow in a new tab.
The selected media files are automatically passed into the export filters. This means you do not need to manually create filters or search for the same files again.
Step 4: Choose Media Fields
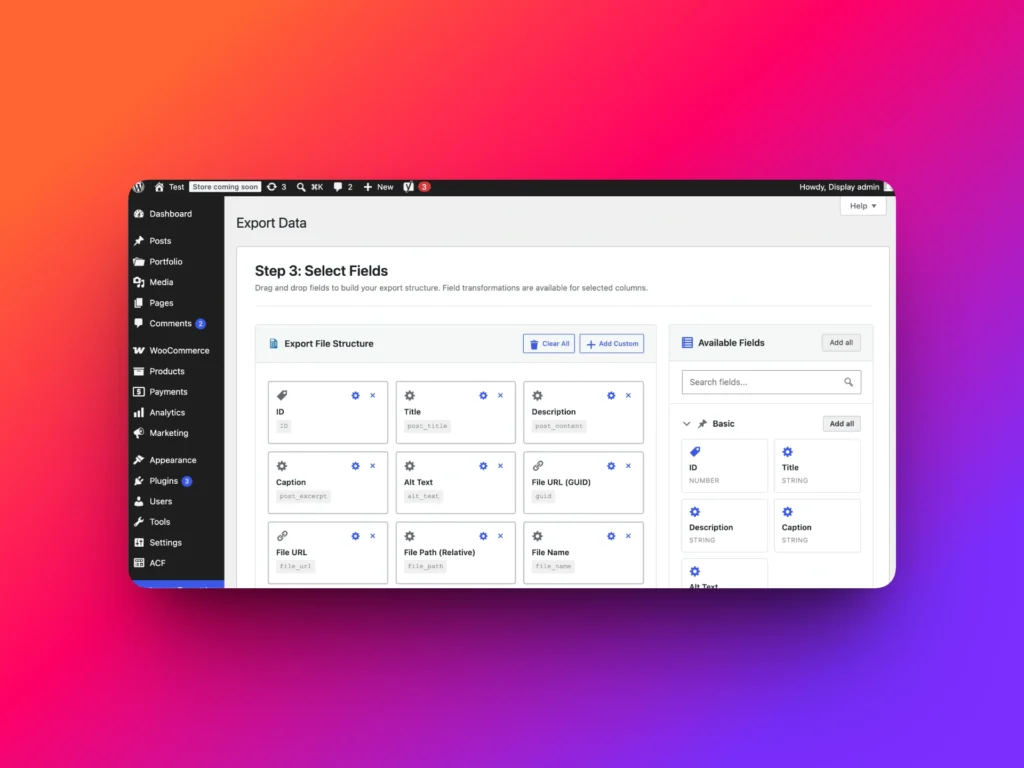
On the field selection step, choose which media fields should be included in the export file.
For this example, we export all available media data by clicking Add All next to Available Fields.
This adds all available media fields to the export file structure.
You can also export only specific fields, such as:
- Attachment ID
- Title
- File URL
- File type
- File size
- Width and height
- Upload date
Step 5: Choose CSV Format and Export
On the final export step, choose the export format.
For this tutorial, we choose CSV, but you can use the format that fits your workflow.
Click Start Export.
After the export completes, the plugin shows that 7 media files were exported.
Click Download Export File to download the CSV file.
Step 6: Import Selected Media into Another Website
Now open the WordPress dashboard on the destination website.
Go to:
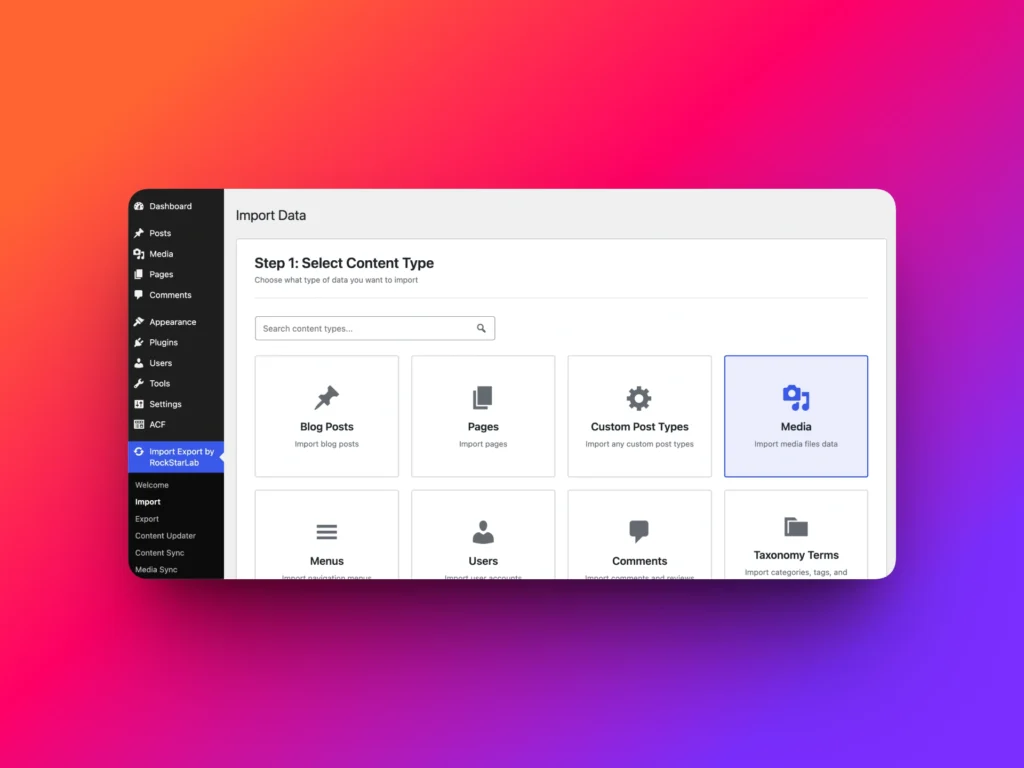
Import Export by RockStarLab → Import
On Step 1, choose Media as the content type and click Next Step.
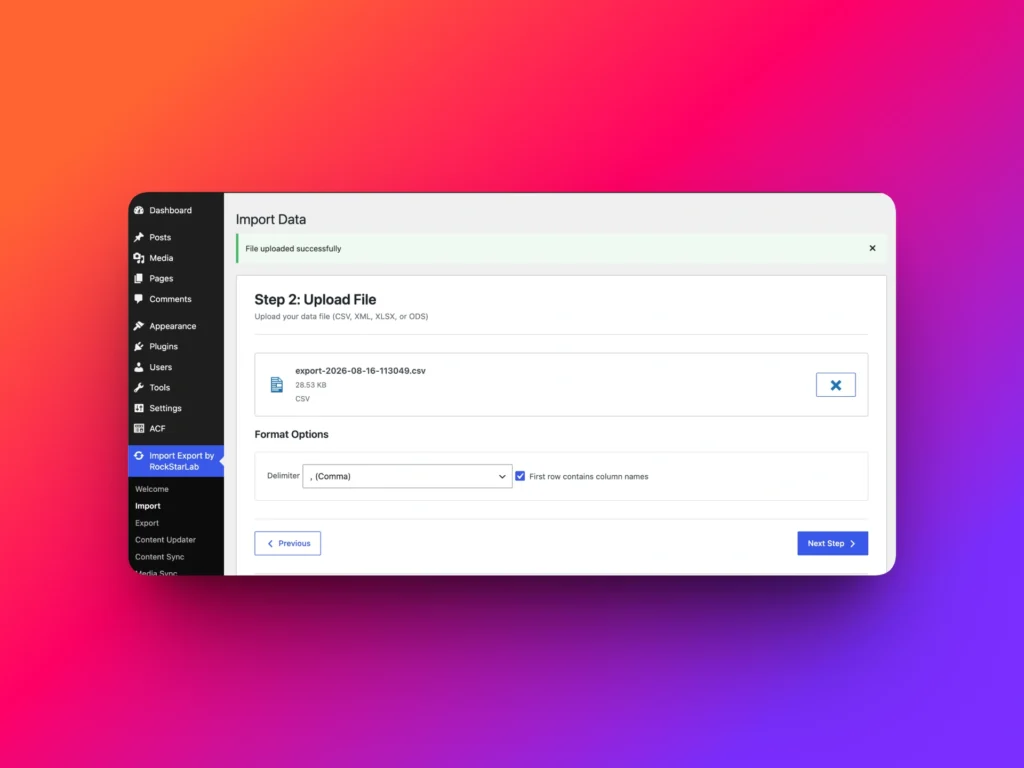
Step 7: Upload the Export File
Upload the CSV file that was generated during the selected media export.
After the file is uploaded, click Next Step.
The preview step shows the first 5 rows from the import file. In this example, the file contains 7 rows in total, so 7 media files will be imported.
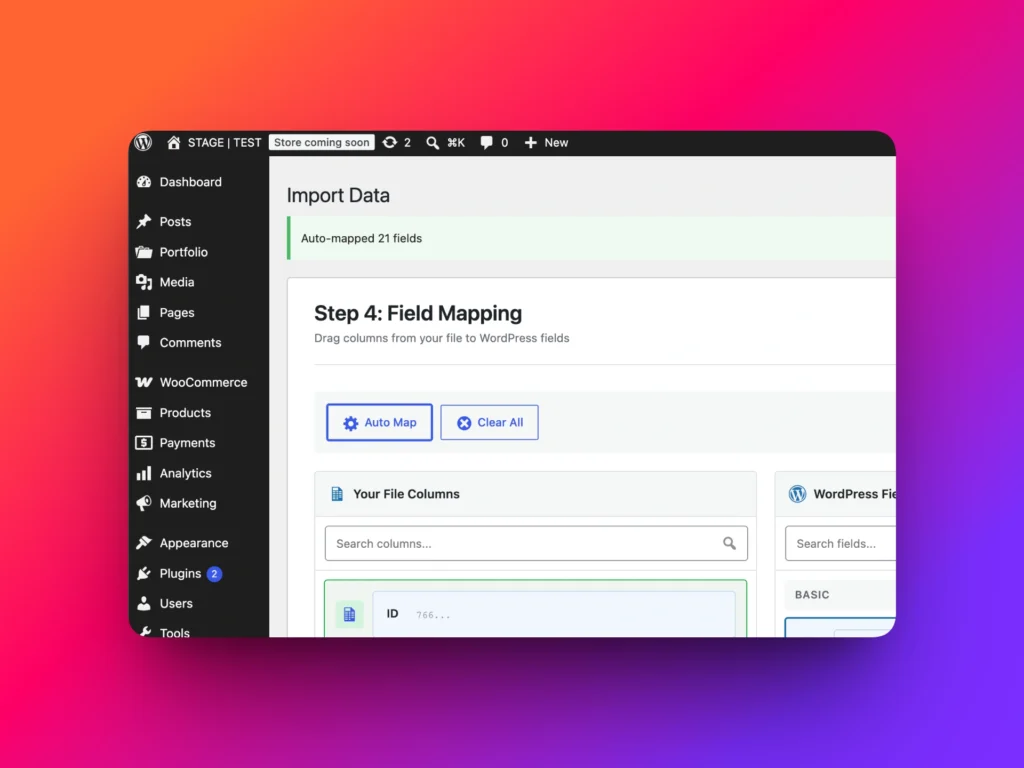
Step 8: Auto Map Fields
On the field mapping step, click Auto Map.
Because the CSV file was generated by Import Export by RockStarLab, the plugin can automatically connect the file columns with the correct WordPress media fields.
If you use a custom CSV file, you can also map fields manually.
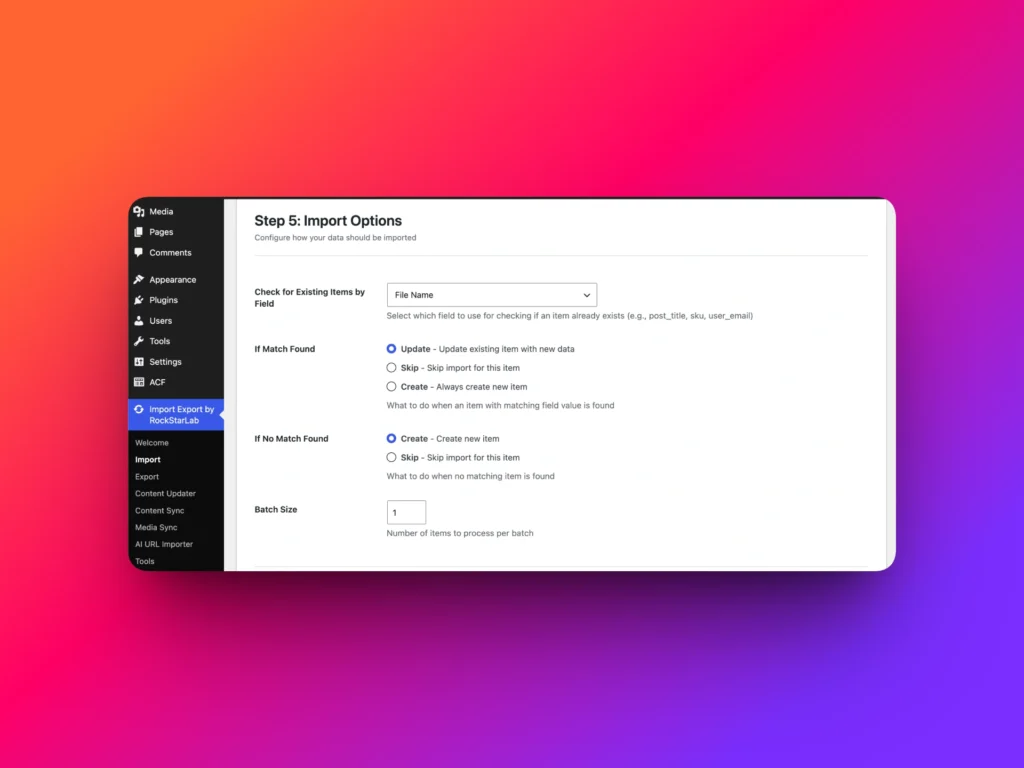
Step 9: Configure Import Options
On the import options step, choose how the importer should detect existing files.
In this lesson, we choose Filename in the Check for existing items by field option.
This means the importer will compare files by filename and help avoid duplicates in the destination Media Library.
Then click Start Import.
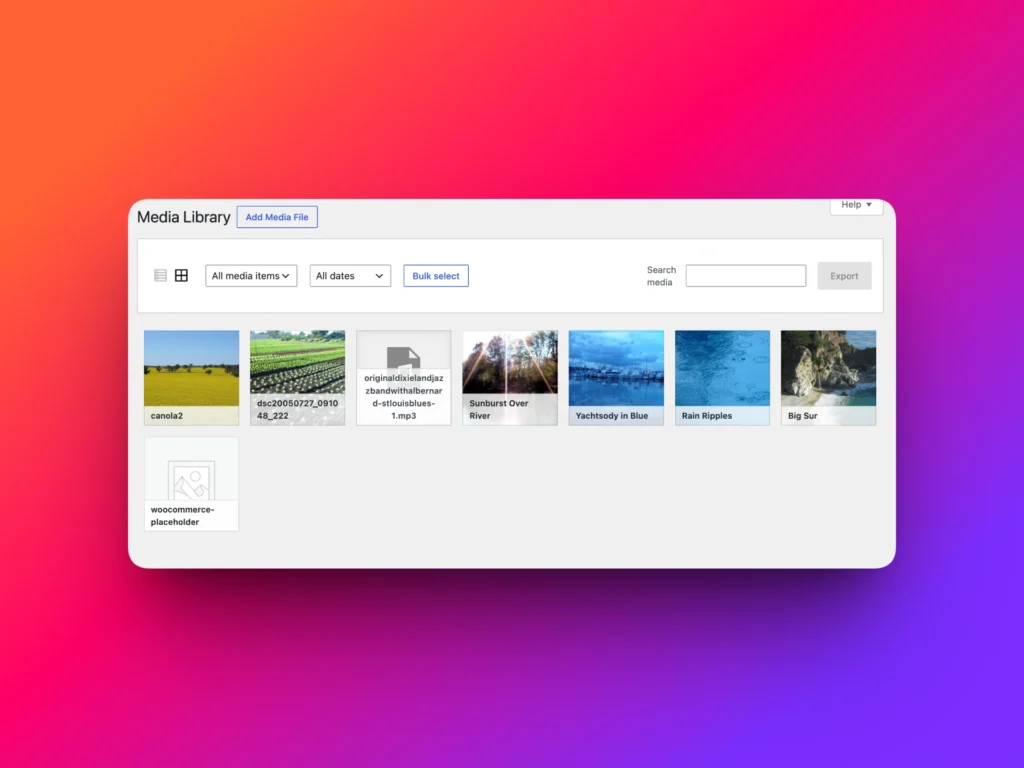
Step 10: Verify Imported Media Files
After the import completes, the plugin shows that 7 files were imported successfully.
Open:
Media → Library
You should see the selected media files imported into the destination website.
Selected Media Export vs Full Media Export
| Workflow | Best For | Why Use It |
|---|---|---|
| Full Media Export | Complete Media Library migration or full audit | Exports all media files and attachment data |
| Selected Media Export | Moving only chosen files | Creates a smaller, focused export file from selected Media Library items |
| Filtered Media Export | Exporting files by size, date, type, or metadata | Useful when you need a rule-based export instead of manual selection |
Best Practices
- Use selected media export when you only need specific files.
- Use full media export when you need the complete Media Library.
- Use filters when you need files matching a condition, such as width, upload date, or file type.
- Use filename matching during import to help prevent duplicates.
- Review the destination Media Library after import.
- Create a backup before importing media into a production website.
Conclusion
Export Selected Media in Import Export by RockStarLab PRO gives you a faster way to move only the media files you choose from one WordPress website to another.
You can select files directly in the Media Library, start the export workflow, download a CSV file, and then import those selected files into another WordPress site.
This is especially useful for staging-to-production workflows, client projects, focused migrations, and media-heavy websites where exporting the entire library is unnecessary.
Learn more about the WordPress import export plugin
FAQ
Can I export only selected files from the WordPress Media Library?
Yes. Import Export by RockStarLab PRO lets you select specific files in the Media Library and export only those files.
Is selected media export available in the free version?
No. Export Selected Media is available in the PRO version of Import Export by RockStarLab.
Can I import selected media files into another WordPress website?
Yes. After exporting selected media files, you can upload the export file on another WordPress website and import those media files into its Media Library.
Can the plugin prevent duplicate media files?
You can choose a field such as filename to detect existing media files during import and help control duplicates.
When should I use selected media export instead of full media export?
Use selected media export when you only need specific files. Use full media export when you need to move or audit the entire Media Library.