
Sometimes orders end up in the wrong WooCommerce store: a staging copy kept taking orders during a migration, a second shop is being merged into the main one, or you need last quarter’s orders on a new site. WooCommerce has no built-in order import, and orders are harder to move than products: each one has line items, taxes, shipping, coupons, refunds, notes and a customer, and the store must not send emails or change stock while history is being copied. Orders can be imported from a CSV file so they arrive exactly as they were, and the same import can run again without creating duplicates.
We tested it by moving 18 orders from a staging store into a live store with Import Export by RockStarLab 2.1.26 and the PRO add-on 2.1.6, WooCommerce 11.2 and WordPress 7.1. Exporting and importing WooCommerce orders is a PRO feature.
Short Answer
- On the store that has the orders, go to Import Export → Export, choose WooCommerce Orders, filter the orders you need and export them to CSV with the Order Key, Order Items and Tax Lines (Array) columns.
- Back up the store that will receive them.
- There, go to Import Export → Import, choose WooCommerce Orders, upload the CSV and click Auto Map.
- Set Check for Existing Items by Field to Order Key, keep If Match Found: Update and If No Match Found: Create, and start the import.
- Open a few orders and compare totals, taxes and refunds with the source store.
What Gets Imported
One CSV row is one order. Simple values (status, currency, dates, billing and shipping address, payment method, totals) are normal columns. Everything that can repeat inside an order is stored as a JSON list in one cell:
- Order Items: products with SKU, quantity, subtotal, total and tax per line.
- Shipping Lines and Fee Lines: method, amount and tax.
- Coupon Lines: coupon codes and discounts.
- Tax Lines (Array): each tax rate of the order with its name (“CA Sales Tax”), rate, and the tax on products and on shipping.
- Refunds: amount, reason and date of each refund.
- Order Notes: the notes with their dates.
You don’t have to write these lists by hand. Export the orders with the same plugin and the file already has the right layout.
Step 1: Export the Orders from the Source Store
On the store that has the orders, open Import Export → Export and choose WooCommerce Orders. On Filter Data, add a filter if you need only some orders. We took everything placed since 1 September: Order Date, Greater or Equal, 01/09/2026. That gave 18 orders:

Other useful filters are Status (for example only completed and refunded orders) and Order Total. See WordPress Export Data Filters: Examples for more.
On Select Fields, the quickest way is Add all next to each group. Make sure these columns are in the file:
- Order Key: the unique key WooCommerce gives every order (wc_order_…). It identifies the order on any site.
- Order Items, Shipping Lines, Fee Lines, Coupon Lines: without them the orders arrive empty.
- Tax Lines (Array) together with Cart Tax, Shipping Tax and Total Tax: these keep the tax names and amounts.
- Refunds and Order Notes, if you want the order history.
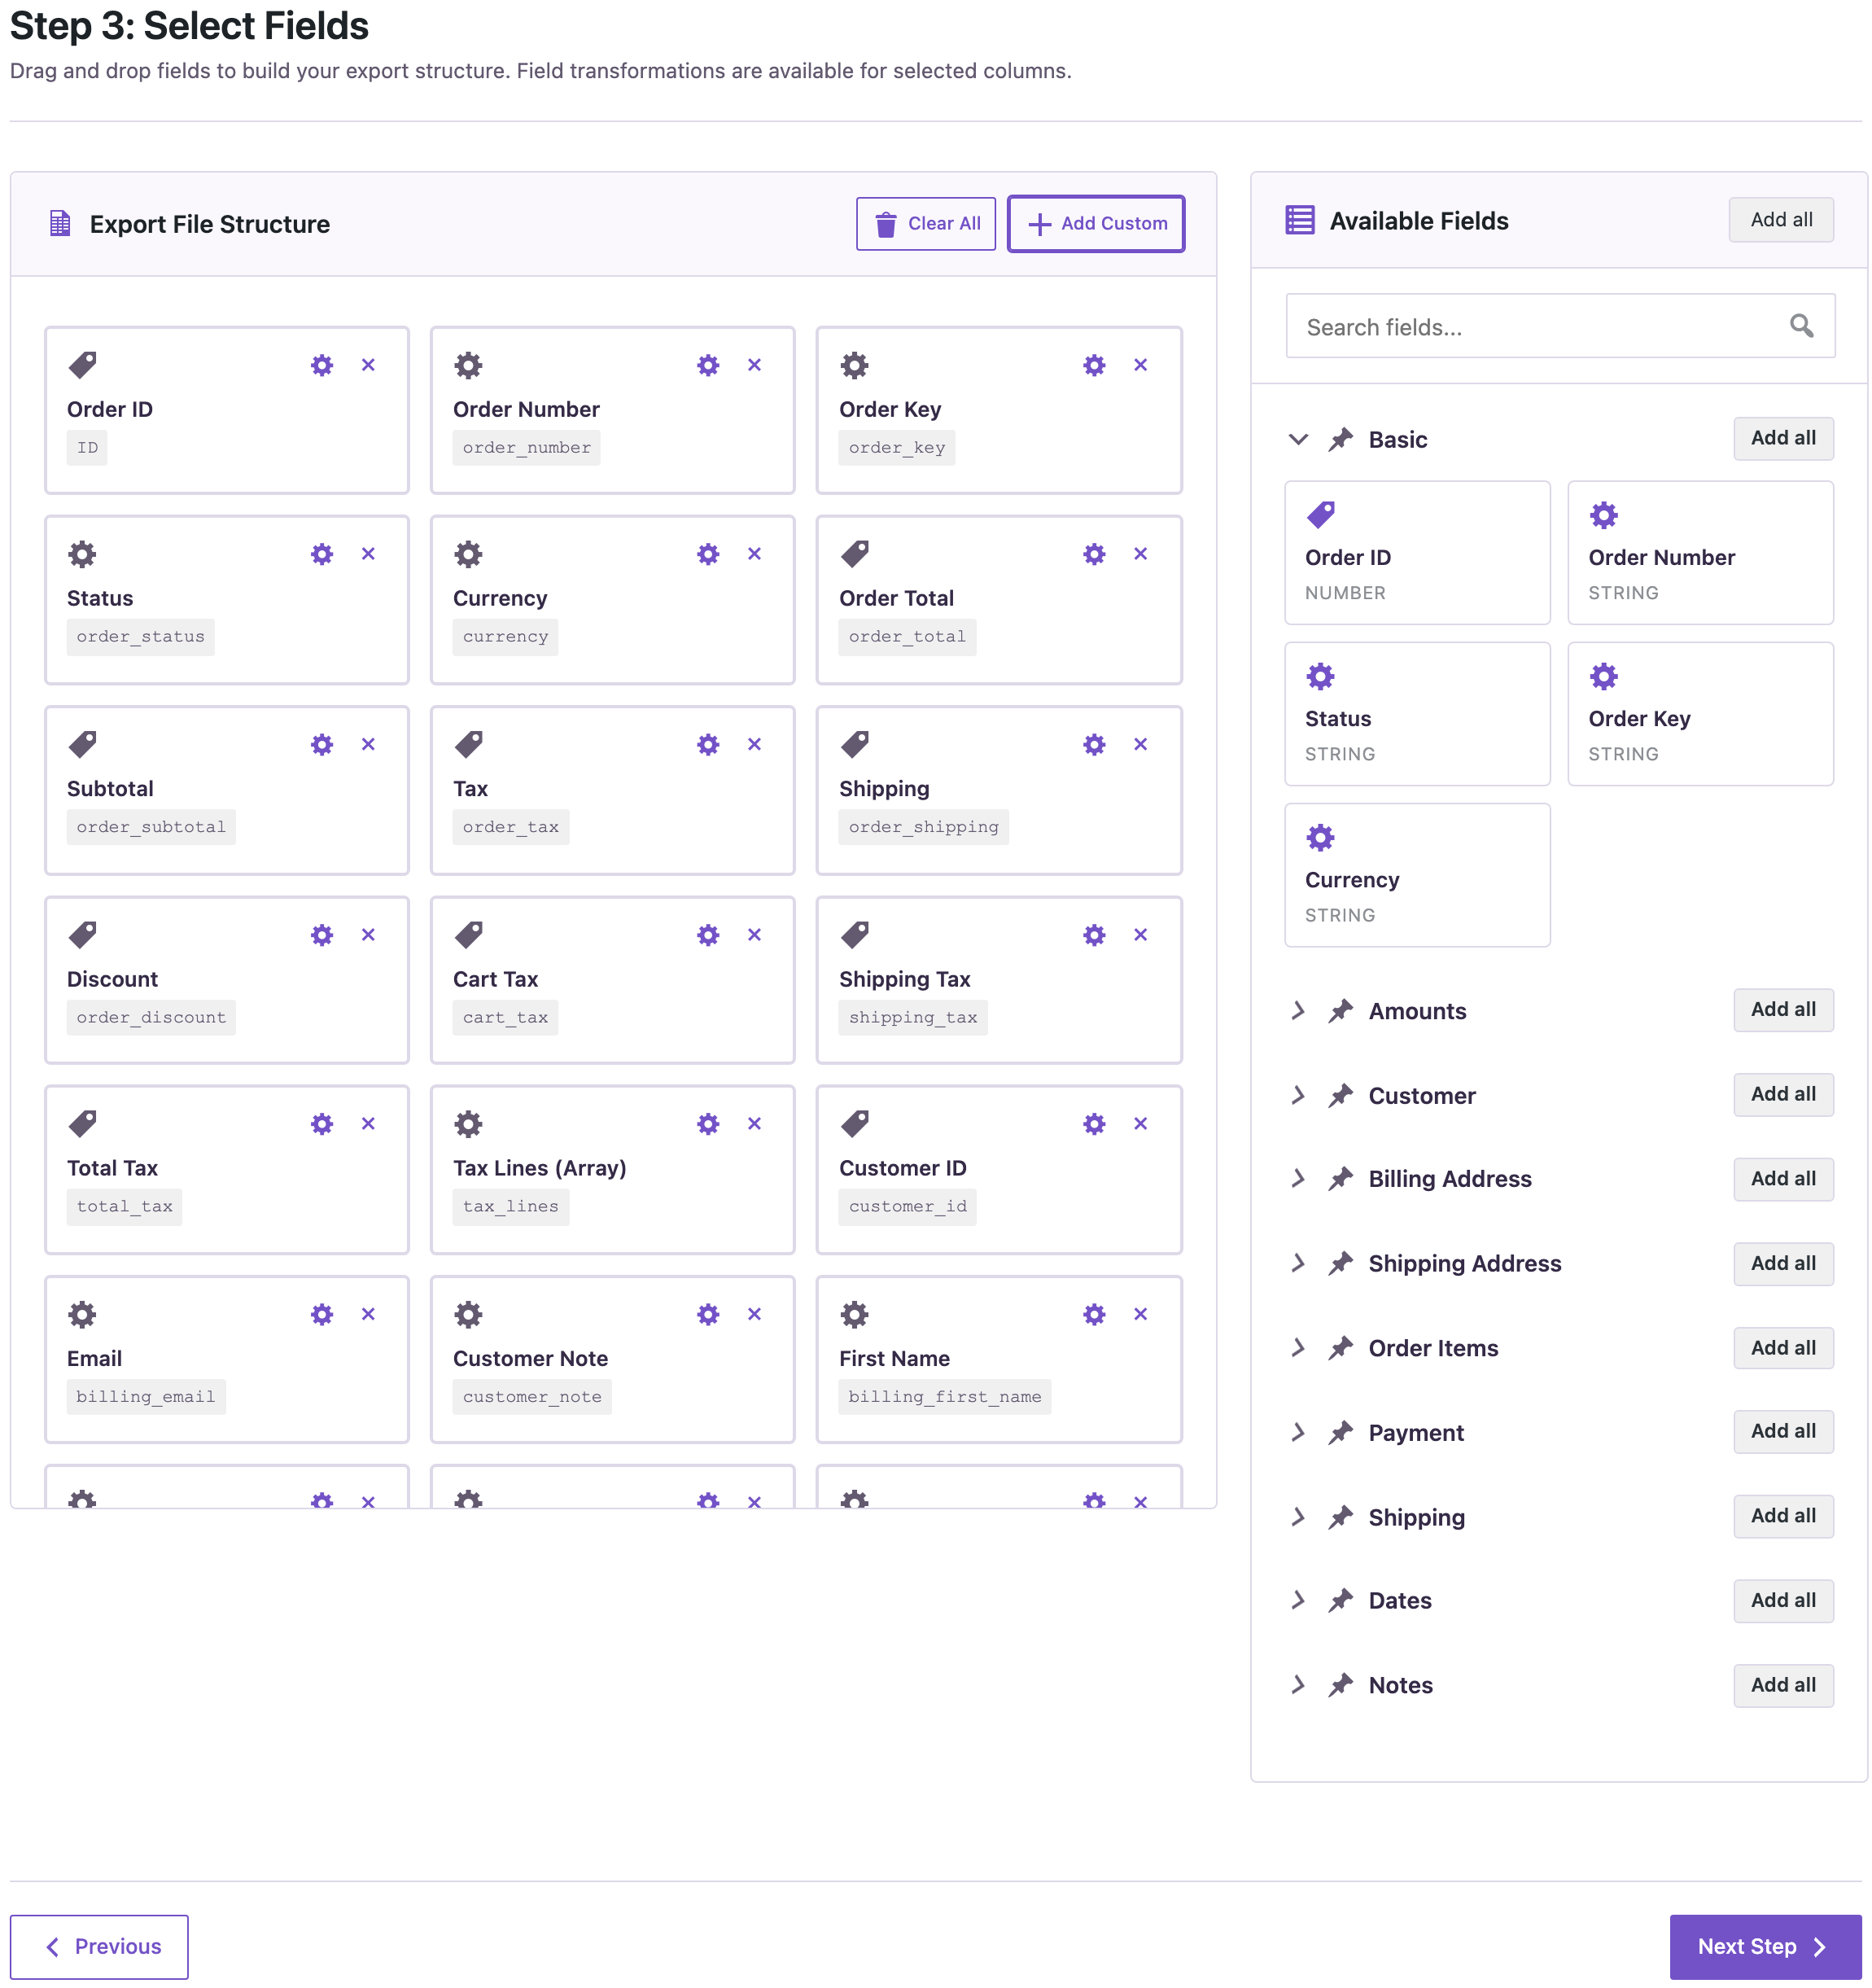
Export to CSV and download the file. If you only need orders for a spreadsheet or your accountant, a shorter set of columns is enough; see Export WooCommerce Orders for Accounting. For an import into another store, export the full set.
Step 2: Back Up the Target Store
The import creates and updates orders and their refunds. Make a backup of the store that receives them: UpdraftPlus Backup Now, your host’s backup, or ask an AI agent to run rsl-ie/updraftplus-backup-start. See How to Create a WordPress Website Backup and Restore It. The plugin also reminds you about it before the upload step.
Step 3: Upload the CSV and Map the Columns
On the target store, open Import Export → Import, choose WooCommerce Orders and upload the file. The delimiter and encoding are detected automatically:
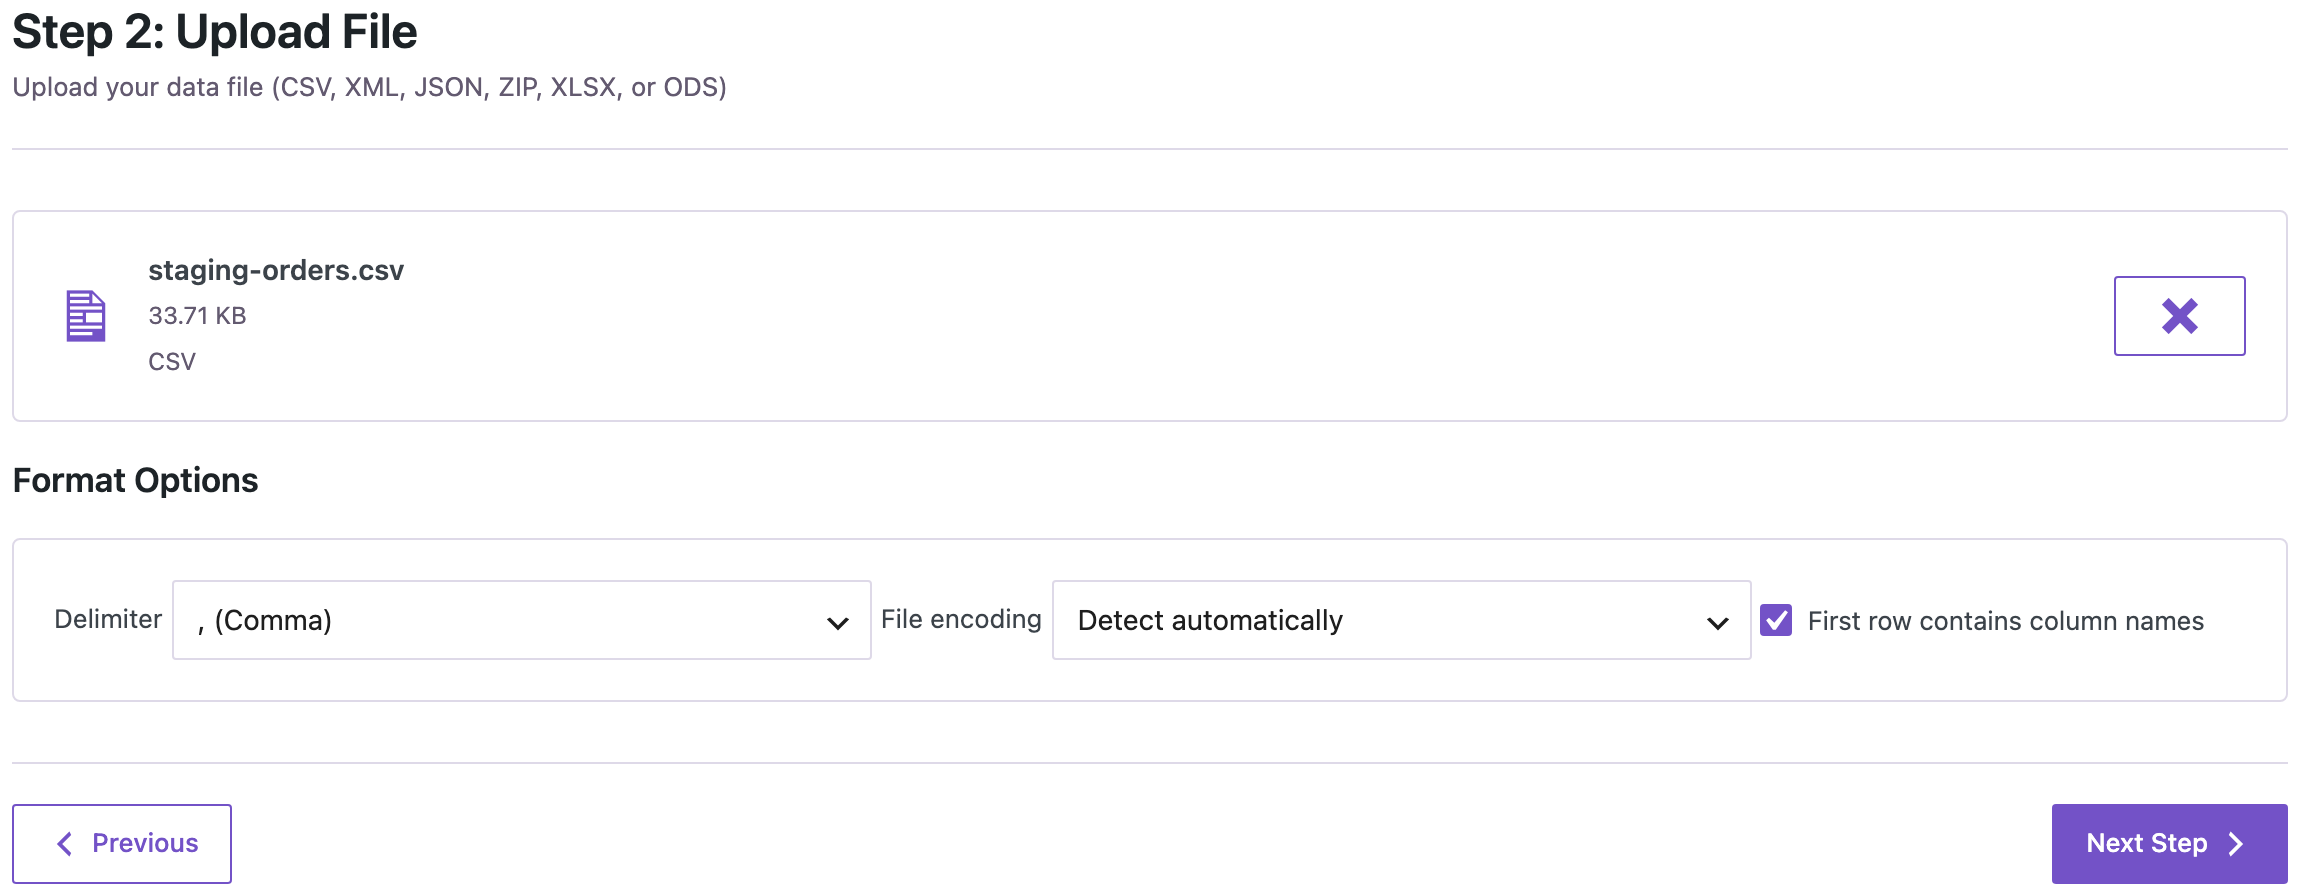
Go to Field Mapping and click Auto Map. A file exported by the plugin uses the same column names as the order fields, so all 51 columns were mapped:

If your file was made by another tool, drag each column to its field by hand. The minimum for a useful order is a status, an email, the order items and the total.
Step 4: Match Orders by Order Key and Import
On Import Options, set Check for Existing Items by Field to Order Key:
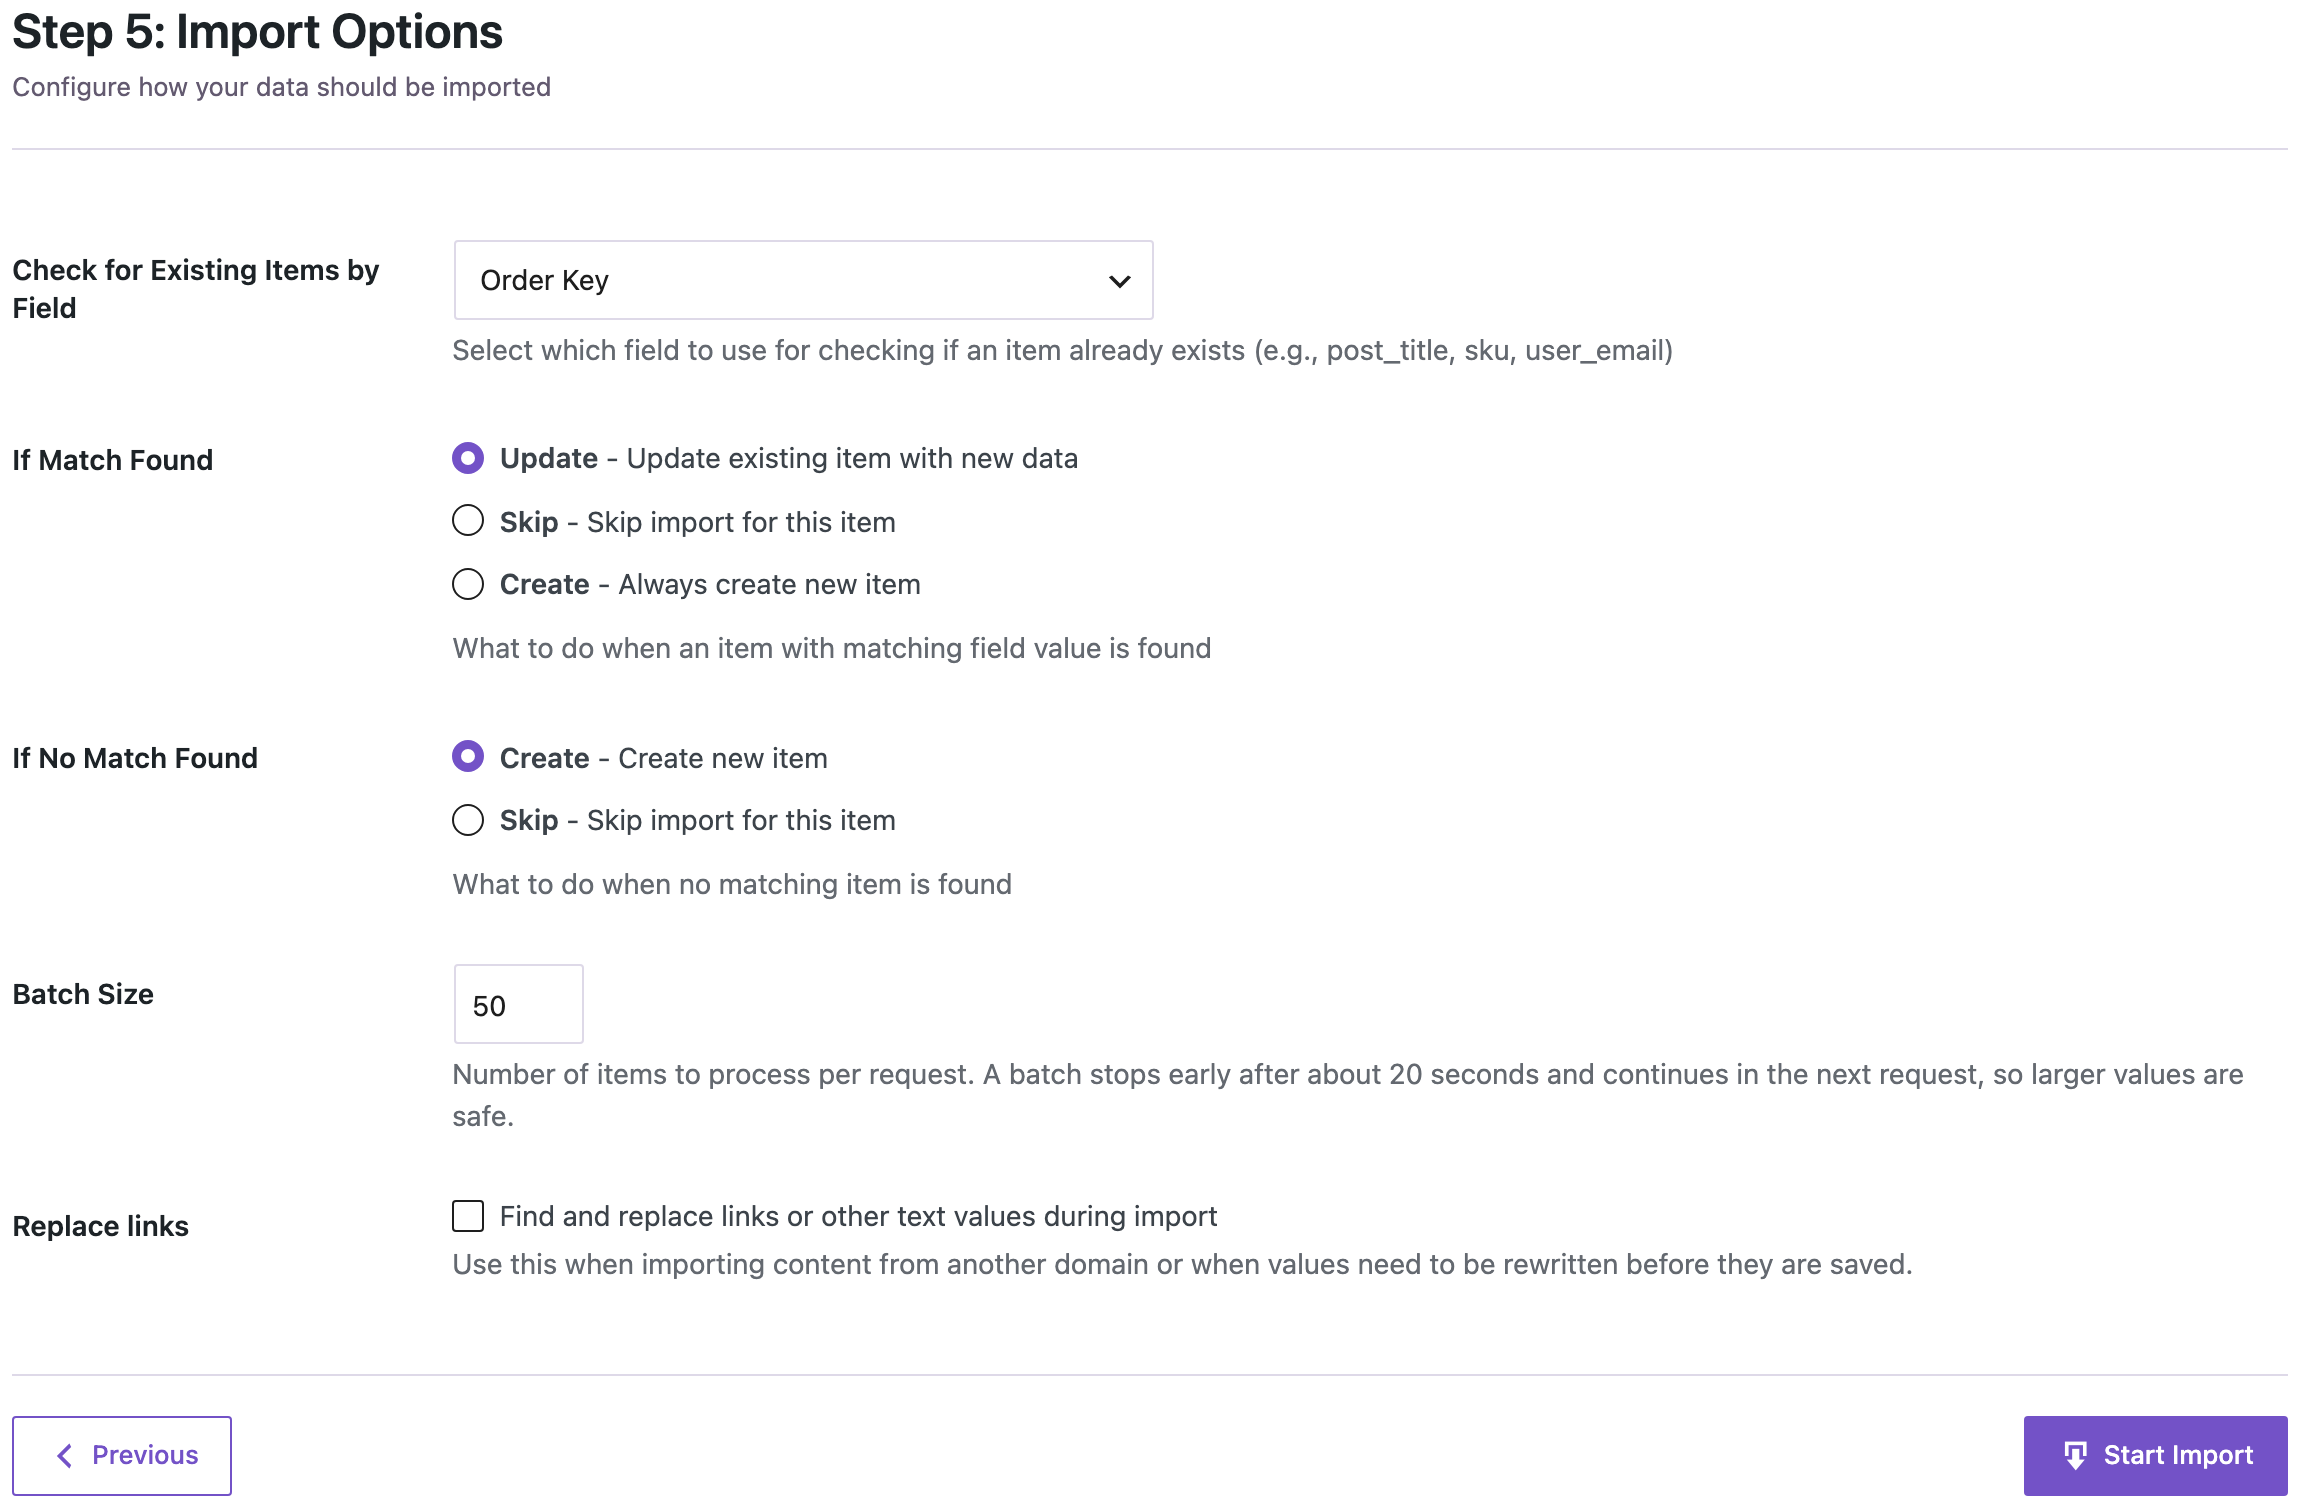
This is the most important setting of the import. Order IDs (the order numbers you see in the admin) are counted separately on every site, so the same number usually means a different order. In our test, order #2015 on staging was a test checkout, while #2015 on the live store was a real customer’s order. The order key is different for every order and stays the same when the order moves, so it is the safe way to recognize an order that is already there.
- If Match Found: Update brings an existing order up to date with the file: status, items, totals, refunds. Skip leaves orders that are already in the store untouched.
- If No Match Found: Create adds the orders that are new. Choose Skip if the file should only update orders you already have.
Use Order ID only when you import a file back into the same store it came from, for example after editing it in a spreadsheet.
Start the import. 12 orders were created and 6 were updated:

Our staging site had been copied from the live store, so the 6 older orders existed on both sites. They were recognized by their keys and updated instead of being added a second time. That also means you can run the same import again later, for example with orders placed after your first export, and get no duplicates.
Step 5: Check the Imported Orders
Open WooCommerce → Orders. The imported orders keep their original dates and statuses, including pending, cancelled and refunded ones, and the refunded amounts are shown next to the totals:

New orders get the next free number of the target store. Order #2119 from staging became #2028 here. If customers or your accounting refer to the old numbers, search by the customer’s email or keep the export file as a reference.
Open an order with taxes and a coupon. Ours has a $45 hoodie with the 10% coupon oct10, flat-rate shipping and California sales tax:

The line totals, the discount, the tax on the product ($2.94) and on shipping ($0.44), the tax row “CA Sales Tax”, the paid date and the payment method are the same as on the source store. We compared all 18 orders field by field: items, taxes, shipping, discounts, refunds, dates and notes matched.
The tax columns appear in the order only when taxes are turned on in the target store: WooCommerce → Settings → General → Enable tax rates and calculations. The amounts are saved either way and are included in the order total.
What the Import Does Not Do
An imported order is history, not a new purchase, so the import leaves the rest of the store alone:
- No emails. Customers don’t get “Your order is complete” again, and the store doesn’t get “New order” emails.
- No stock changes. Product stock, total sales and coupon usage counts stay as they are. The goods were already sold and shipped from the other store.
- No recalculation. Totals and taxes come from the file. Tax rates and prices on the target store don’t change old orders.
Customers and Products
- Customers are found by the billing email. If a customer account with that email exists in the target store, the order is assigned to it and shows in the customer’s My Account page. If not, the order is a guest order. An order that is already in the target store keeps its customer. To keep accounts, import customers first; see Import WooCommerce Customers from CSV and Export WooCommerce Customers to CSV.
- Products are found by SKU, or by the product slug when a product has no SKU. Product IDs differ between stores, so give your products SKUs before you move orders; see How to Sync WooCommerce Products Between Two WordPress Sites. A line whose product is not in the target store is still imported with its name, quantity and price, just without a link to a product.
Common Mistakes
- Matching by Order ID between two stores. The same number belongs to different orders on different sites, so the import would overwrite them. Use Order Key.
- Exporting without Order Items. The orders are created with totals but no products. Check the column list before you export.
- Leaving out Tax Lines (Array). The tax amounts are still imported, but the names and rates of the tax rows then depend on the tax settings of the target store. With the column, they are taken from the source: “CA Sales Tax”, 7.25%.
- Editing the file in Excel. Cells with JSON lists are long and full of quotes; Excel can cut or change them, and it changes dates and long numbers. If you must change something, do it in the source store and export again, or edit the CSV in a text editor.
- Moving orders before products and customers. Lines without a matching SKU and orders without a matching email are imported unlinked. Move products and customers first.
- Importing test orders. A staging store often has test checkouts. Filter them out on export, for example by status or by the test email address.
FAQ
Can I import orders from a CSV that was not made by this plugin?
Yes, if you map the columns. Simple fields (status, email, names, addresses, totals, dates) map directly. Order items must be a JSON list in one cell, with product SKU, name, quantity and totals per line. The easiest way to get the format right is to export one order from your store and copy its layout.
Will the import send emails to customers?
No. Imported orders send no emails to customers or to the store.
Does it reduce stock?
No. Stock, total sales and coupon usage stay as they are.
Can I keep the original order numbers?
New orders get the next number of the target store. The order key, dates, customer, items and payment details are kept.
What about refunds?
Refunds in the Refunds column are imported with the order, with their amounts, reasons and dates. Partly refunded orders show the remaining total, fully refunded orders have the Refunded status. To work with refunds on their own, see How to Export All WooCommerce Refunds.
Do I need PRO?
Yes, exporting and importing WooCommerce orders is part of the PRO add-on.
Related Guides
- How to Export All WooCommerce Orders into CSV or Excel
- Export WooCommerce Orders for Accounting
- Import WooCommerce Customers from CSV
- How to Migrate WooCommerce Store Data to Another Site
- How to Import WooCommerce Coupons
Get the free plugin on WordPress.org.

Comments 0
Have a question or a tip to share? Leave it below.