
At some point every WooCommerce store owner ends up needing a full export of orders — not just the last ten for a quick look, but literally everything the store has ever processed. Maybe your accountant asked for it, maybe you’re migrating to a new platform, maybe you just want a spreadsheet you can poke at without logging into wp-admin every five minutes. Whatever the reason, doing this by hand is not something anyone should attempt past order number twenty.
This guide walks through exporting WooCommerce orders with Import Export by RockStarLab — the full, unfiltered dump, plus the more surgical stuff: filtering down to exactly the orders you need, automating the whole thing on a schedule, and reshaping fields on the way out so the file actually matches what the person receiving it expects.
Why export all orders in the first place?
It’s rarely “just because.” A few situations that come up constantly:
- Accounting and tax filing. Your bookkeeper (or you, at 11pm before a deadline) needs every order with totals, taxes, and dates in a flat file that drops straight into whatever accounting software is in use. Trying to reconstruct this from the admin UI is painful once you’re past a few hundred orders.
- Sales audits. Someone — a partner, an investor, sometimes just you — wants to verify revenue numbers against what the store actually recorded. A full order export is the source of truth for that conversation.
- Analytics in Excel or a BI tool. WooCommerce’s built-in reports are fine for a quick glance, but they fall apart the moment you want to pivot by product, region, or customer cohort over a multi-year period. Dump the orders into a CSV, load it into Power BI or a well-built spreadsheet, and you can slice it however you want.
- Platform migration. Moving from WooCommerce to Shopify, or to a different WooCommerce install entirely, or even just consolidating two stores into one — you need the historical order data to come with you, not get left behind.
- Backups that aren’t just database dumps. A raw SQL backup is great until you need to actually read something in it. A periodic CSV or XLSX export of orders is a human-readable safety net that doesn’t require spinning up a staging environment to inspect.
- Handing data to warehouse, CRM, or logistics systems. Your fulfillment partner probably doesn’t have API access to your WordPress install, but they can absolutely work with a CSV dropped into a shared folder or emailed over. Same story for syncing order history into a CRM that doesn’t have a native WooCommerce connector.
Notice none of these actually require filters — sometimes you genuinely want every single order, start to finish. We’ll cover that first, then get into filtering and the rest.
Choose the right file format for your orders
Before starting, think about what will open or process the file. The export wizard offers several formats:
- CSV is a simple table of values and almost always the safe default for accounting handoffs and anything going to a warehouse system. It opens everywhere and nobody has to install anything special.
- XLSX is an Excel workbook. Choose it when the file is going straight to someone who’s going to eyeball it in Excel without reformatting — you get actual columns and number formatting out of the box instead of a raw comma-separated blob.
- JSON makes sense if you’re feeding this into another system’s API or a script rather than a human.
The plugin also offers XML and ODS if those suit your workflow better. You’ll need the Import Export by RockStarLab plugin installed and active, and WooCommerce itself running with at least a handful of orders in the system — testing a full export on zero orders tells you nothing useful.
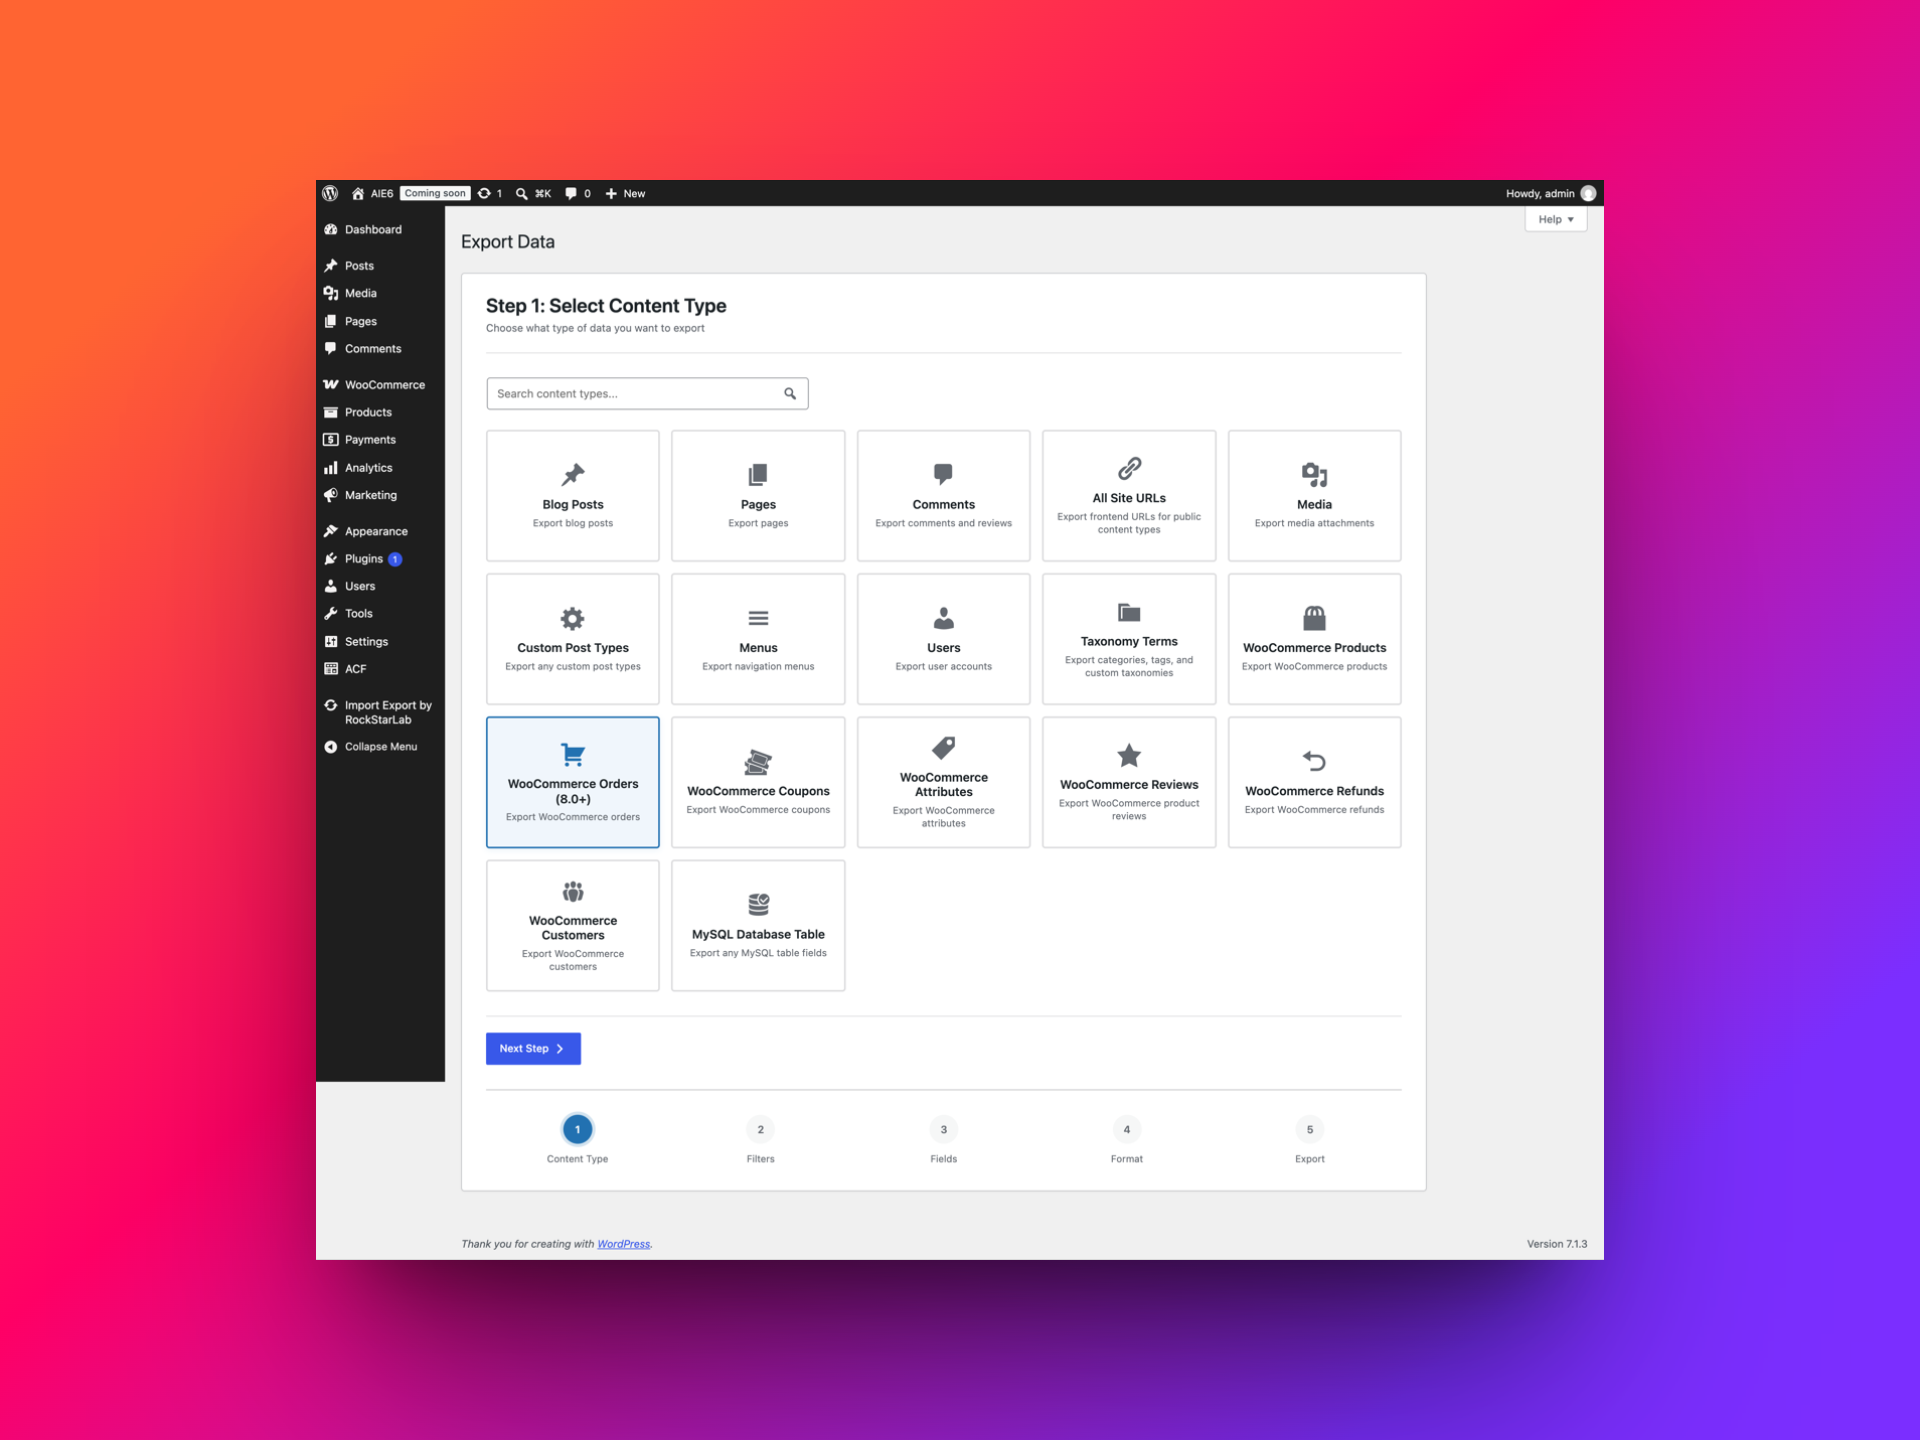
Step 1: Select WooCommerce Orders
- In the WordPress dashboard, open Import Export by RockStarLab → Export.
- On Step 1: Select Content Type, choose WooCommerce Orders.
- Continue to the next step to set up filters, or skip straight past it if you want literally every order.
Step 2: Filter orders instead of exporting everything
Full exports are great for backups and migrations, but most of the time you don’t actually want every order ever placed — you want this month’s completed orders, or everything from one country, or orders paid through a specific gateway. The filters step lets you build conditions on FIELD / CONDITION / VALUE, and you can stack multiple ones together.
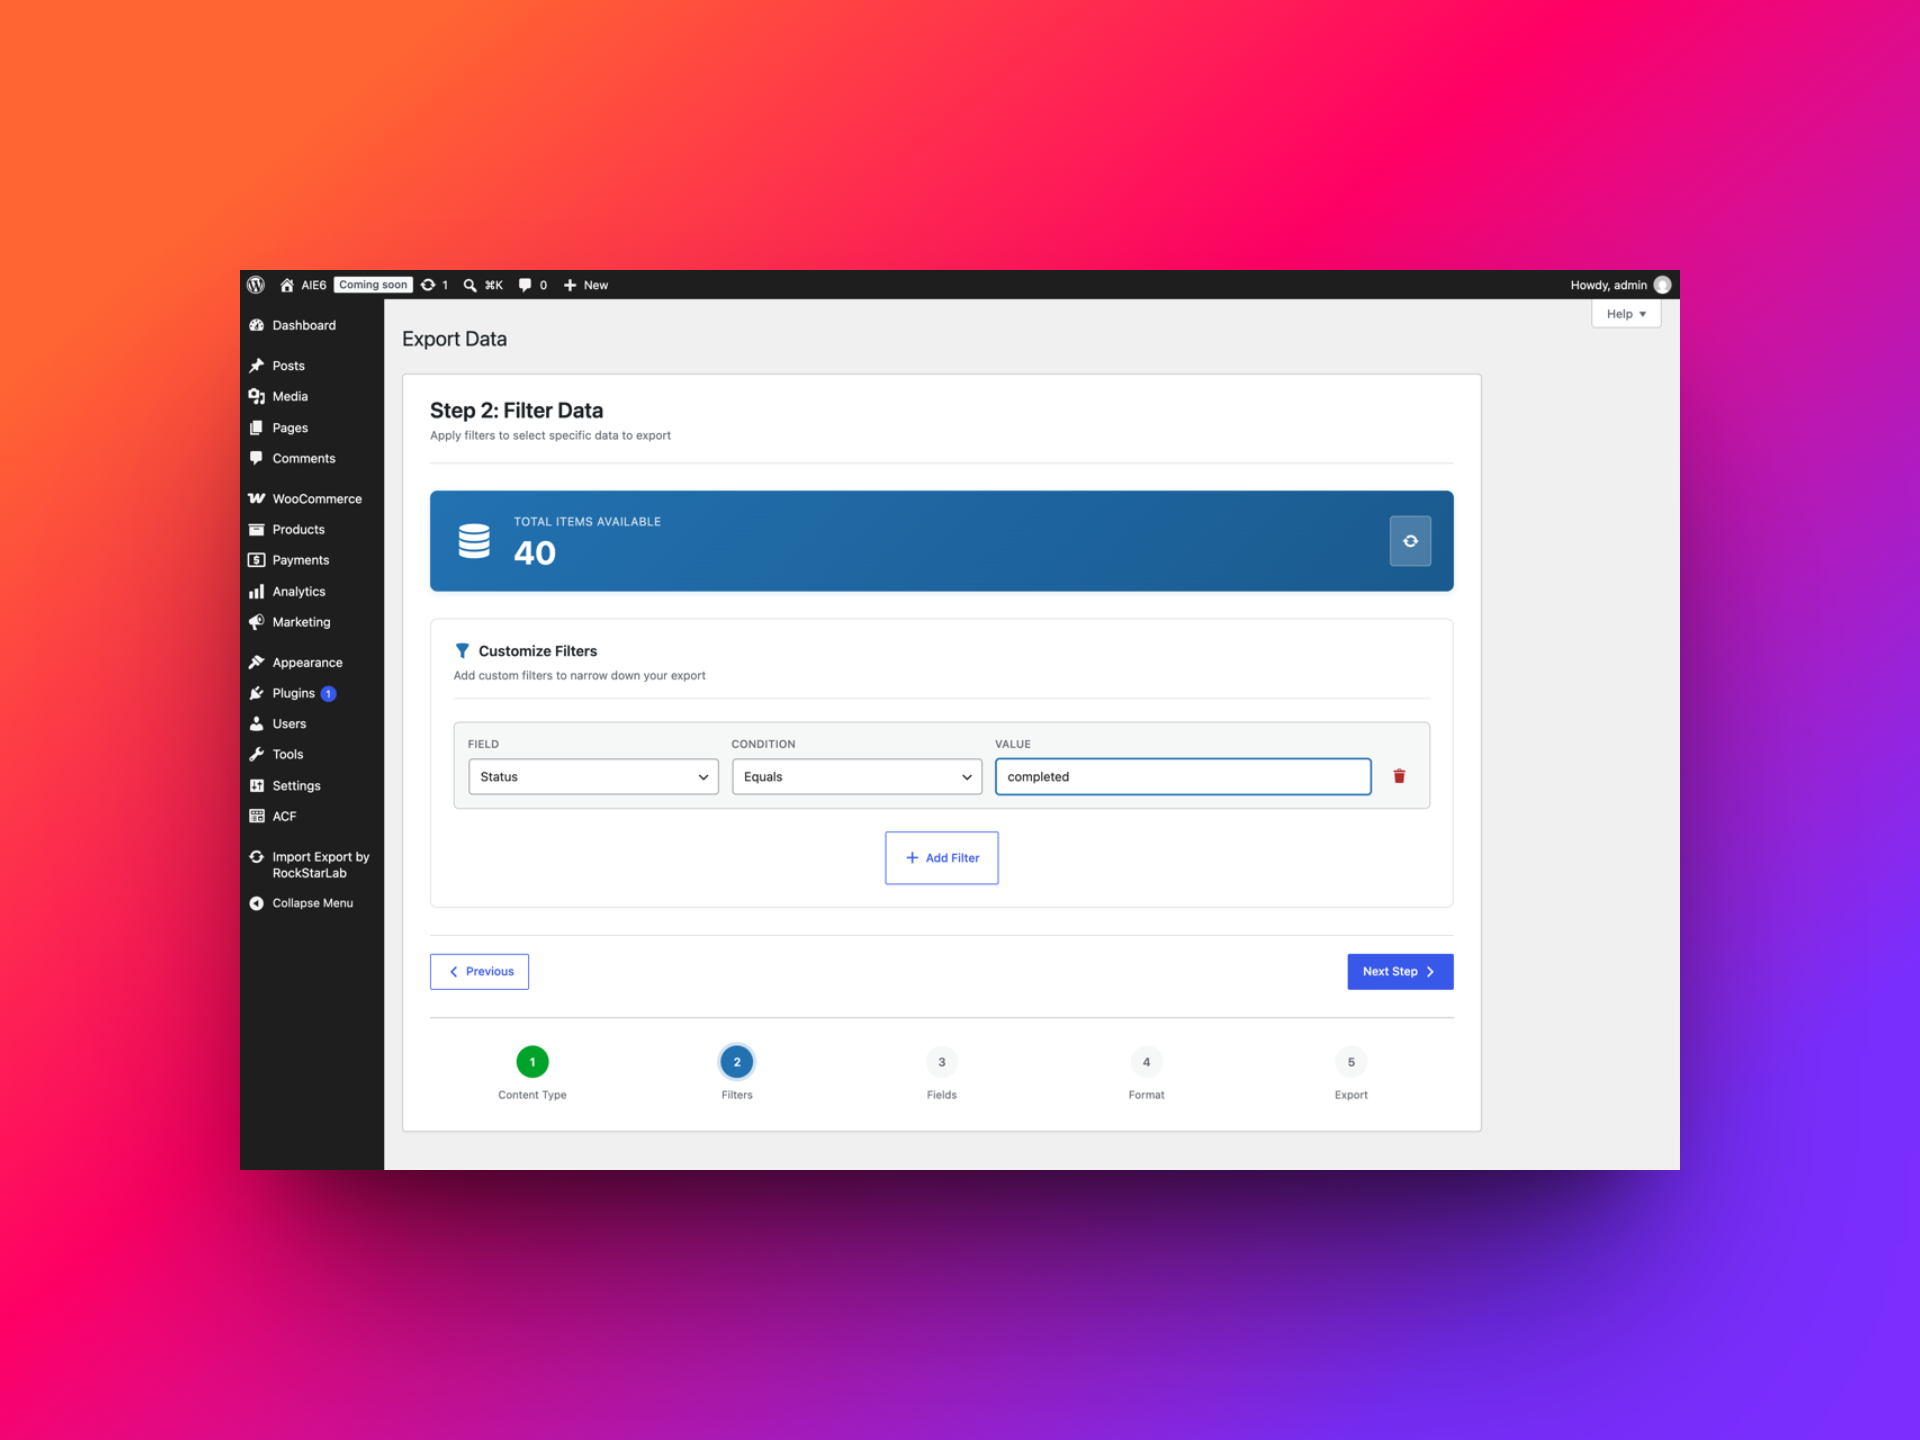
Example 1: Only completed orders
If you’re handing data to accounting, pending or cancelled orders are noise — filter Status equals completed and you’re left with only the revenue that actually materialized. Give the counter a few seconds after you type the value; it recalculates over AJAX rather than instantly.
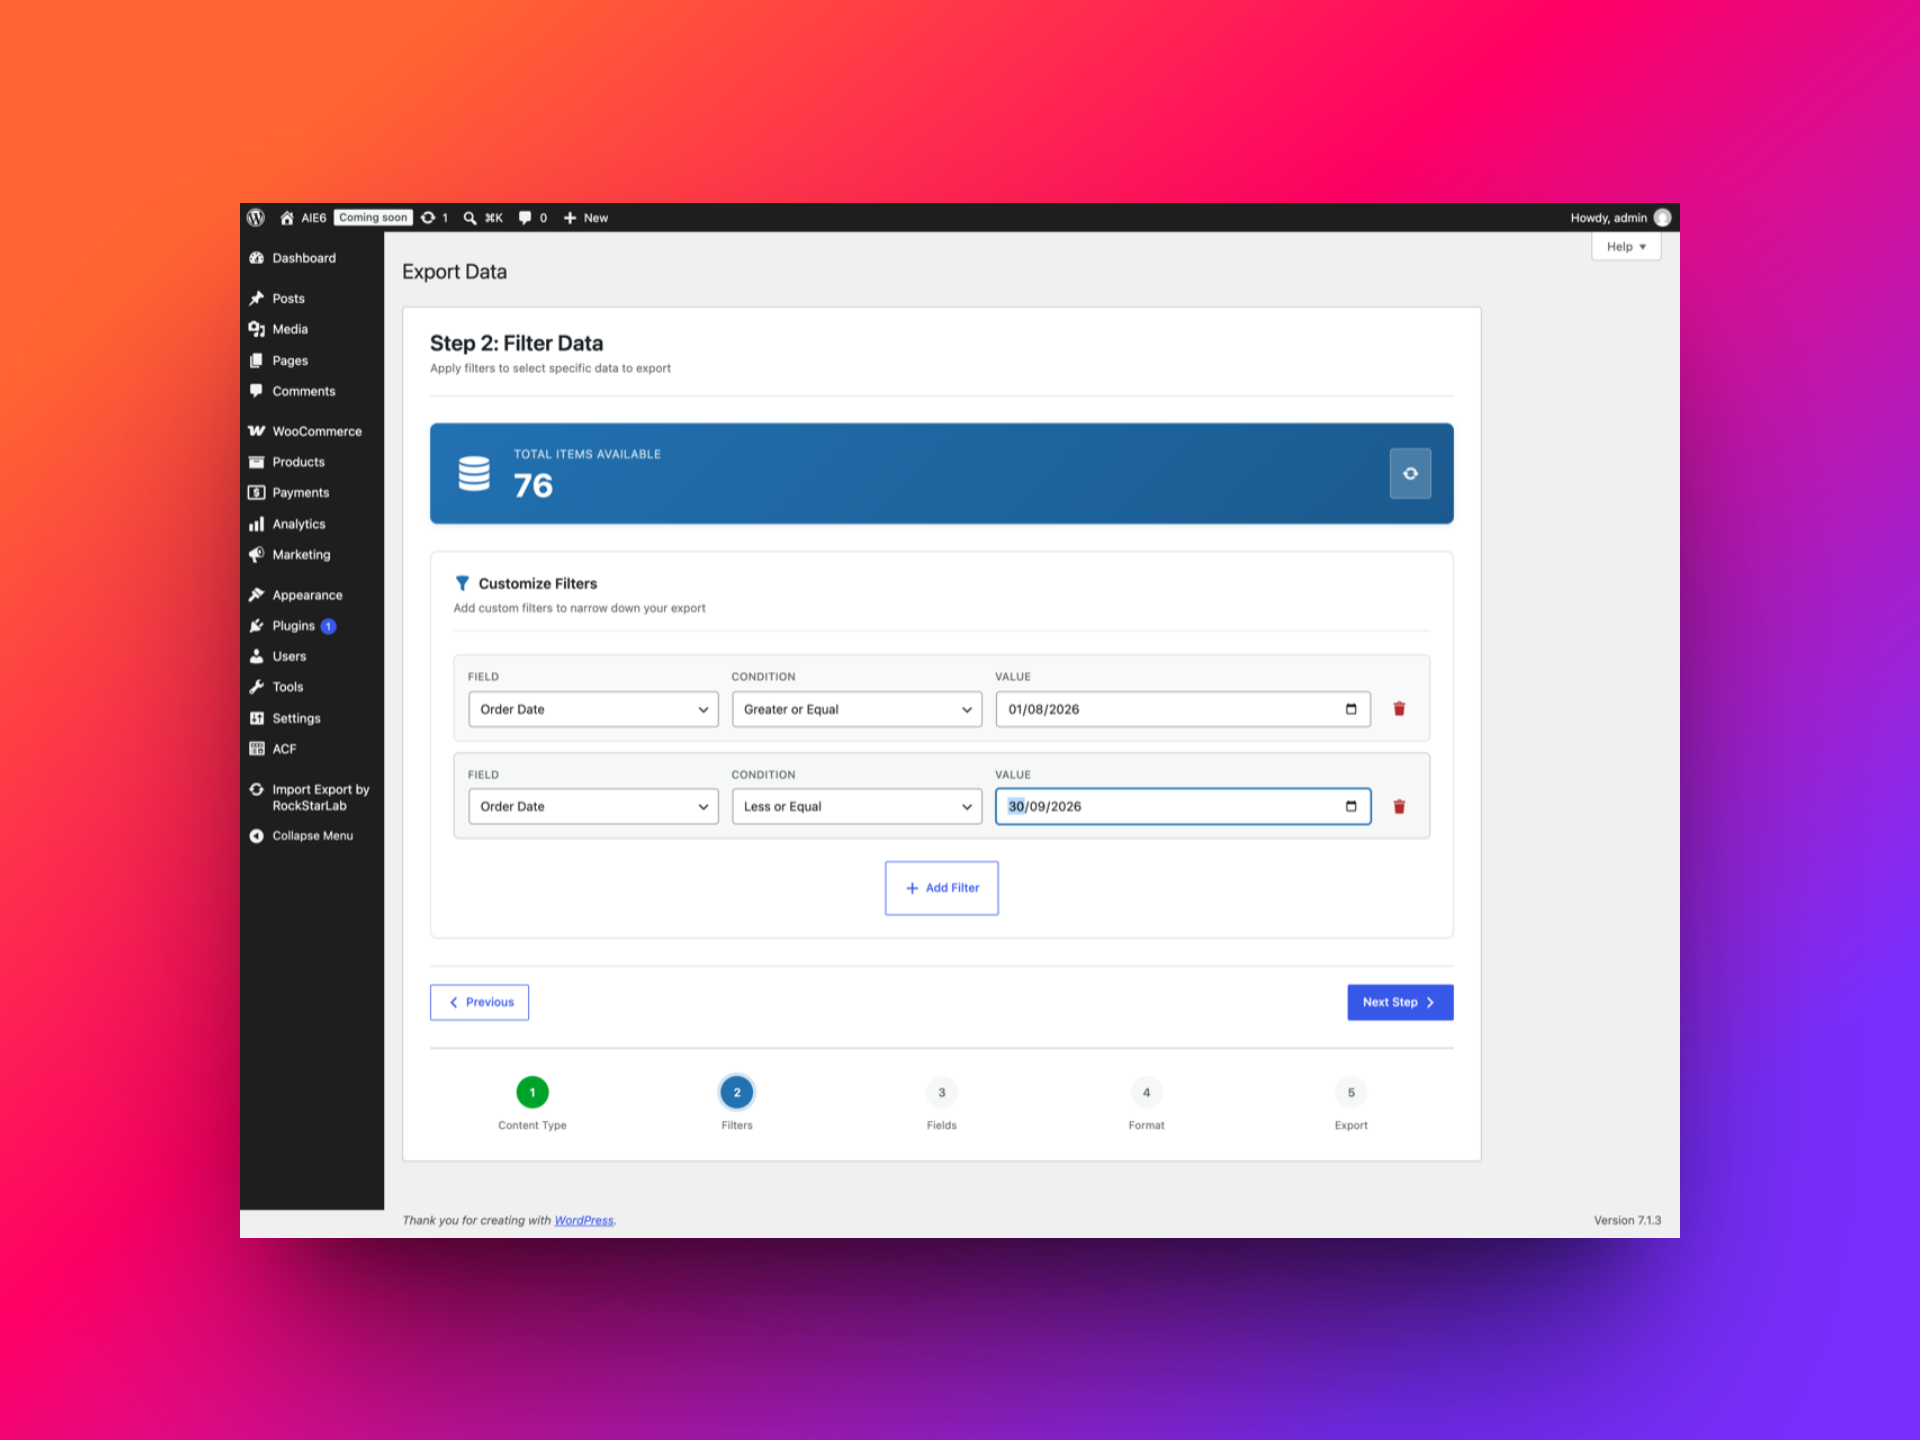
Example 2: A specific date range
For monthly or quarterly reporting, filter on Order Date using a range — this is where the greater-than/less-than operators come in, since you’re bracketing a window rather than matching an exact value.
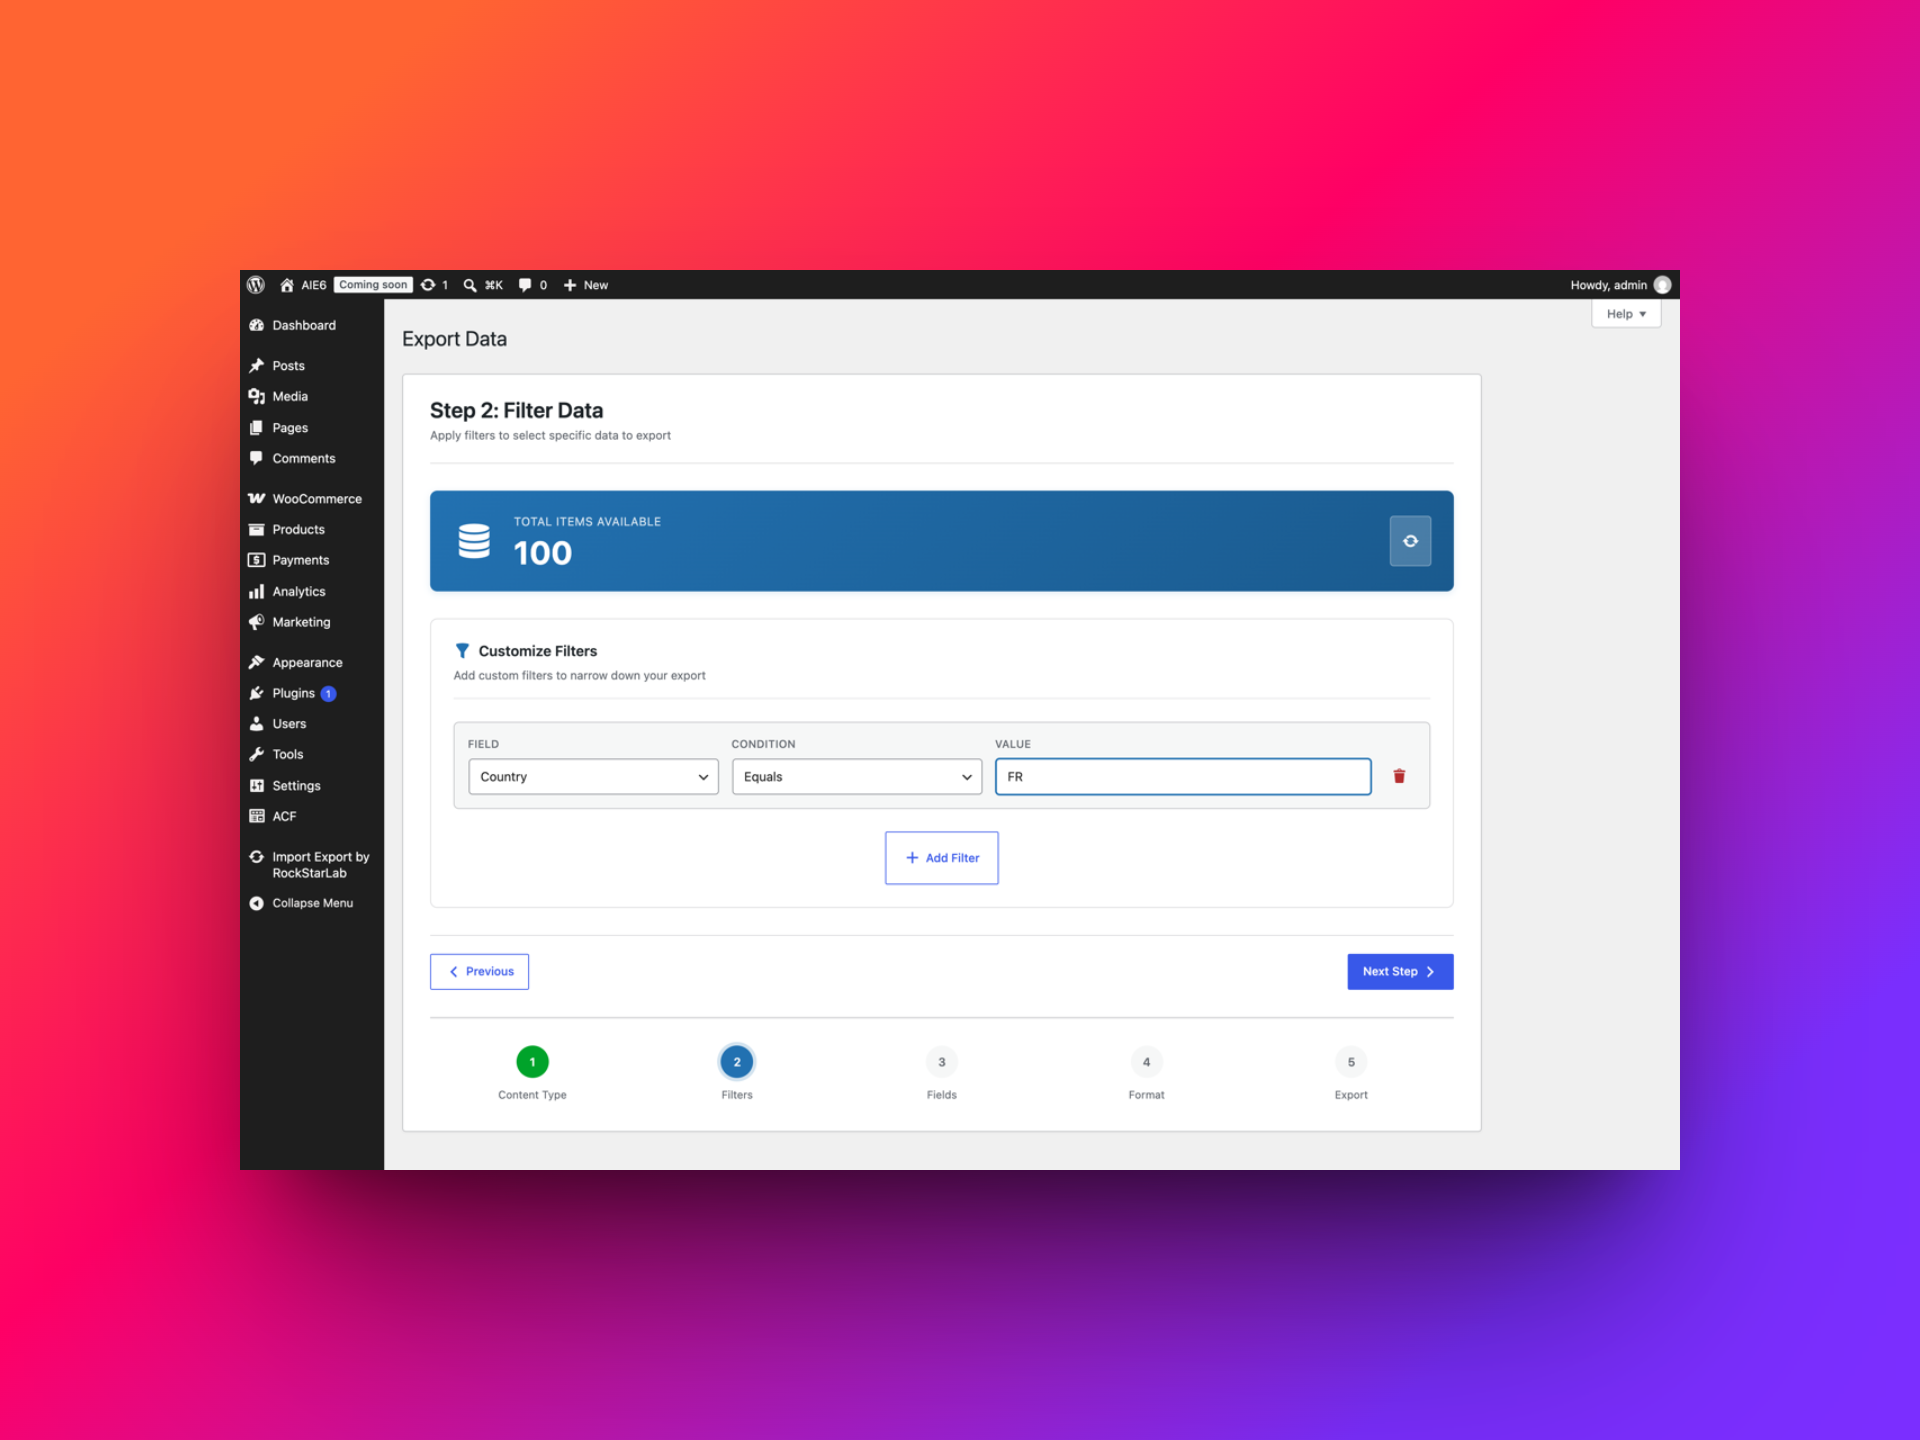
Example 3: By customer country
Selling internationally and need a region-specific extract for VAT purposes, or just want to see how a particular market is performing? Filter billing Country equals, say, FR. In a store that trades mostly with one country, this filter can legitimately return most or all of your orders — a flat number here isn’t a sign of a stuck filter, it just means that’s where your customers are.
Example 4: By payment method
Reconciling against your payment processor’s own statements? Filter Payment Method equals stripe (or whatever gateway you’re checking) so you’re not cross-referencing orders paid through PayPal or bank transfer by mistake.
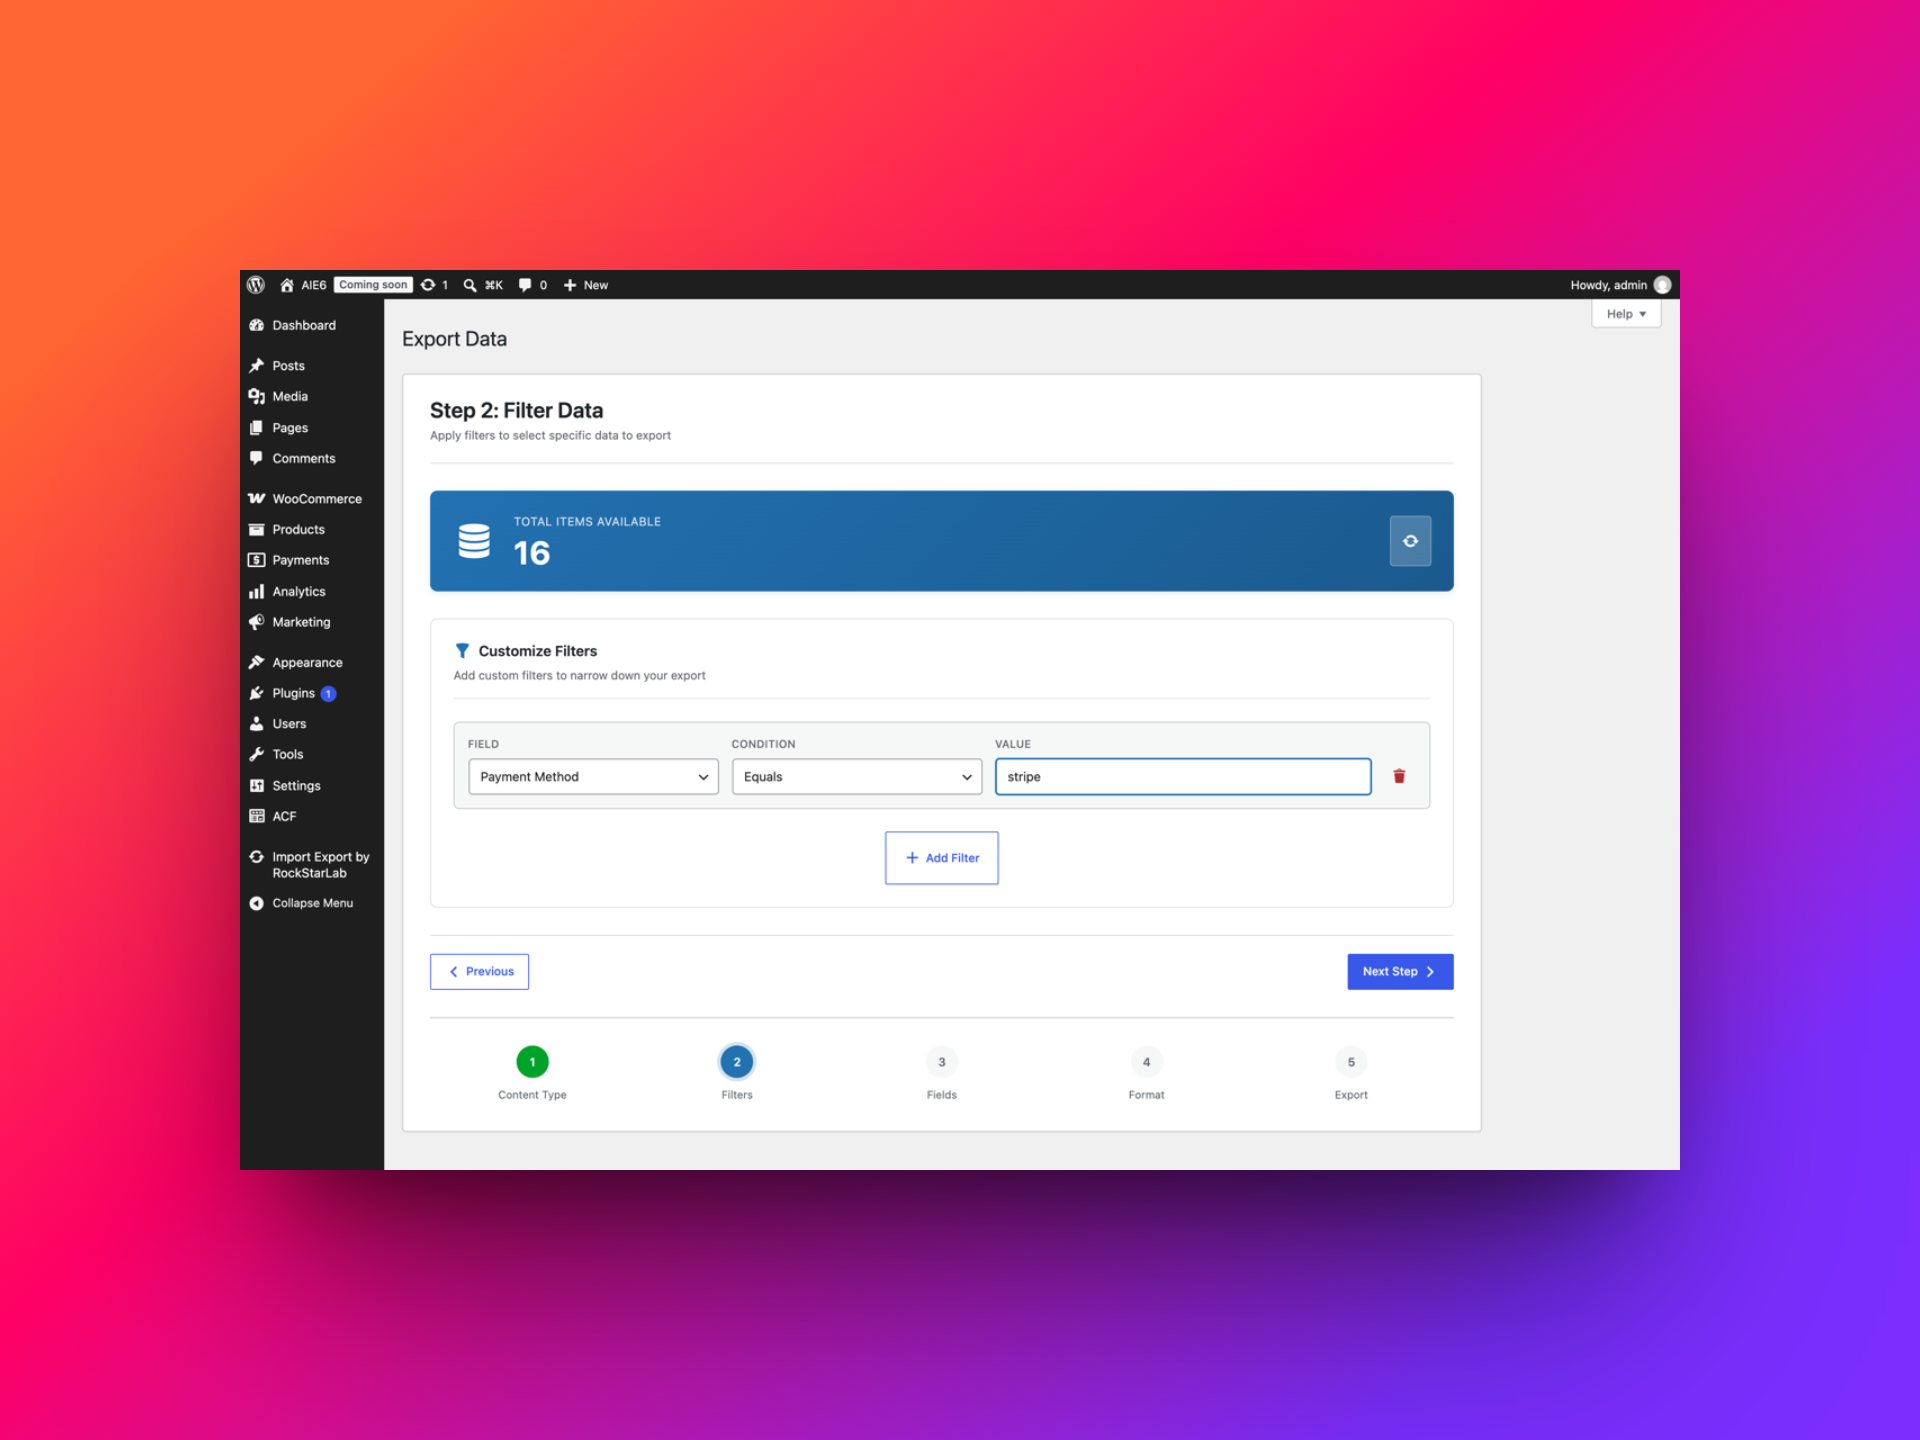
Example 5: Combining filters
Filters stack, so you can get fairly specific — status plus country plus a date range all at once, for example “processing orders from France.” Just add each condition as its own row; the count updates for the combination as a whole once the AJAX call settles.
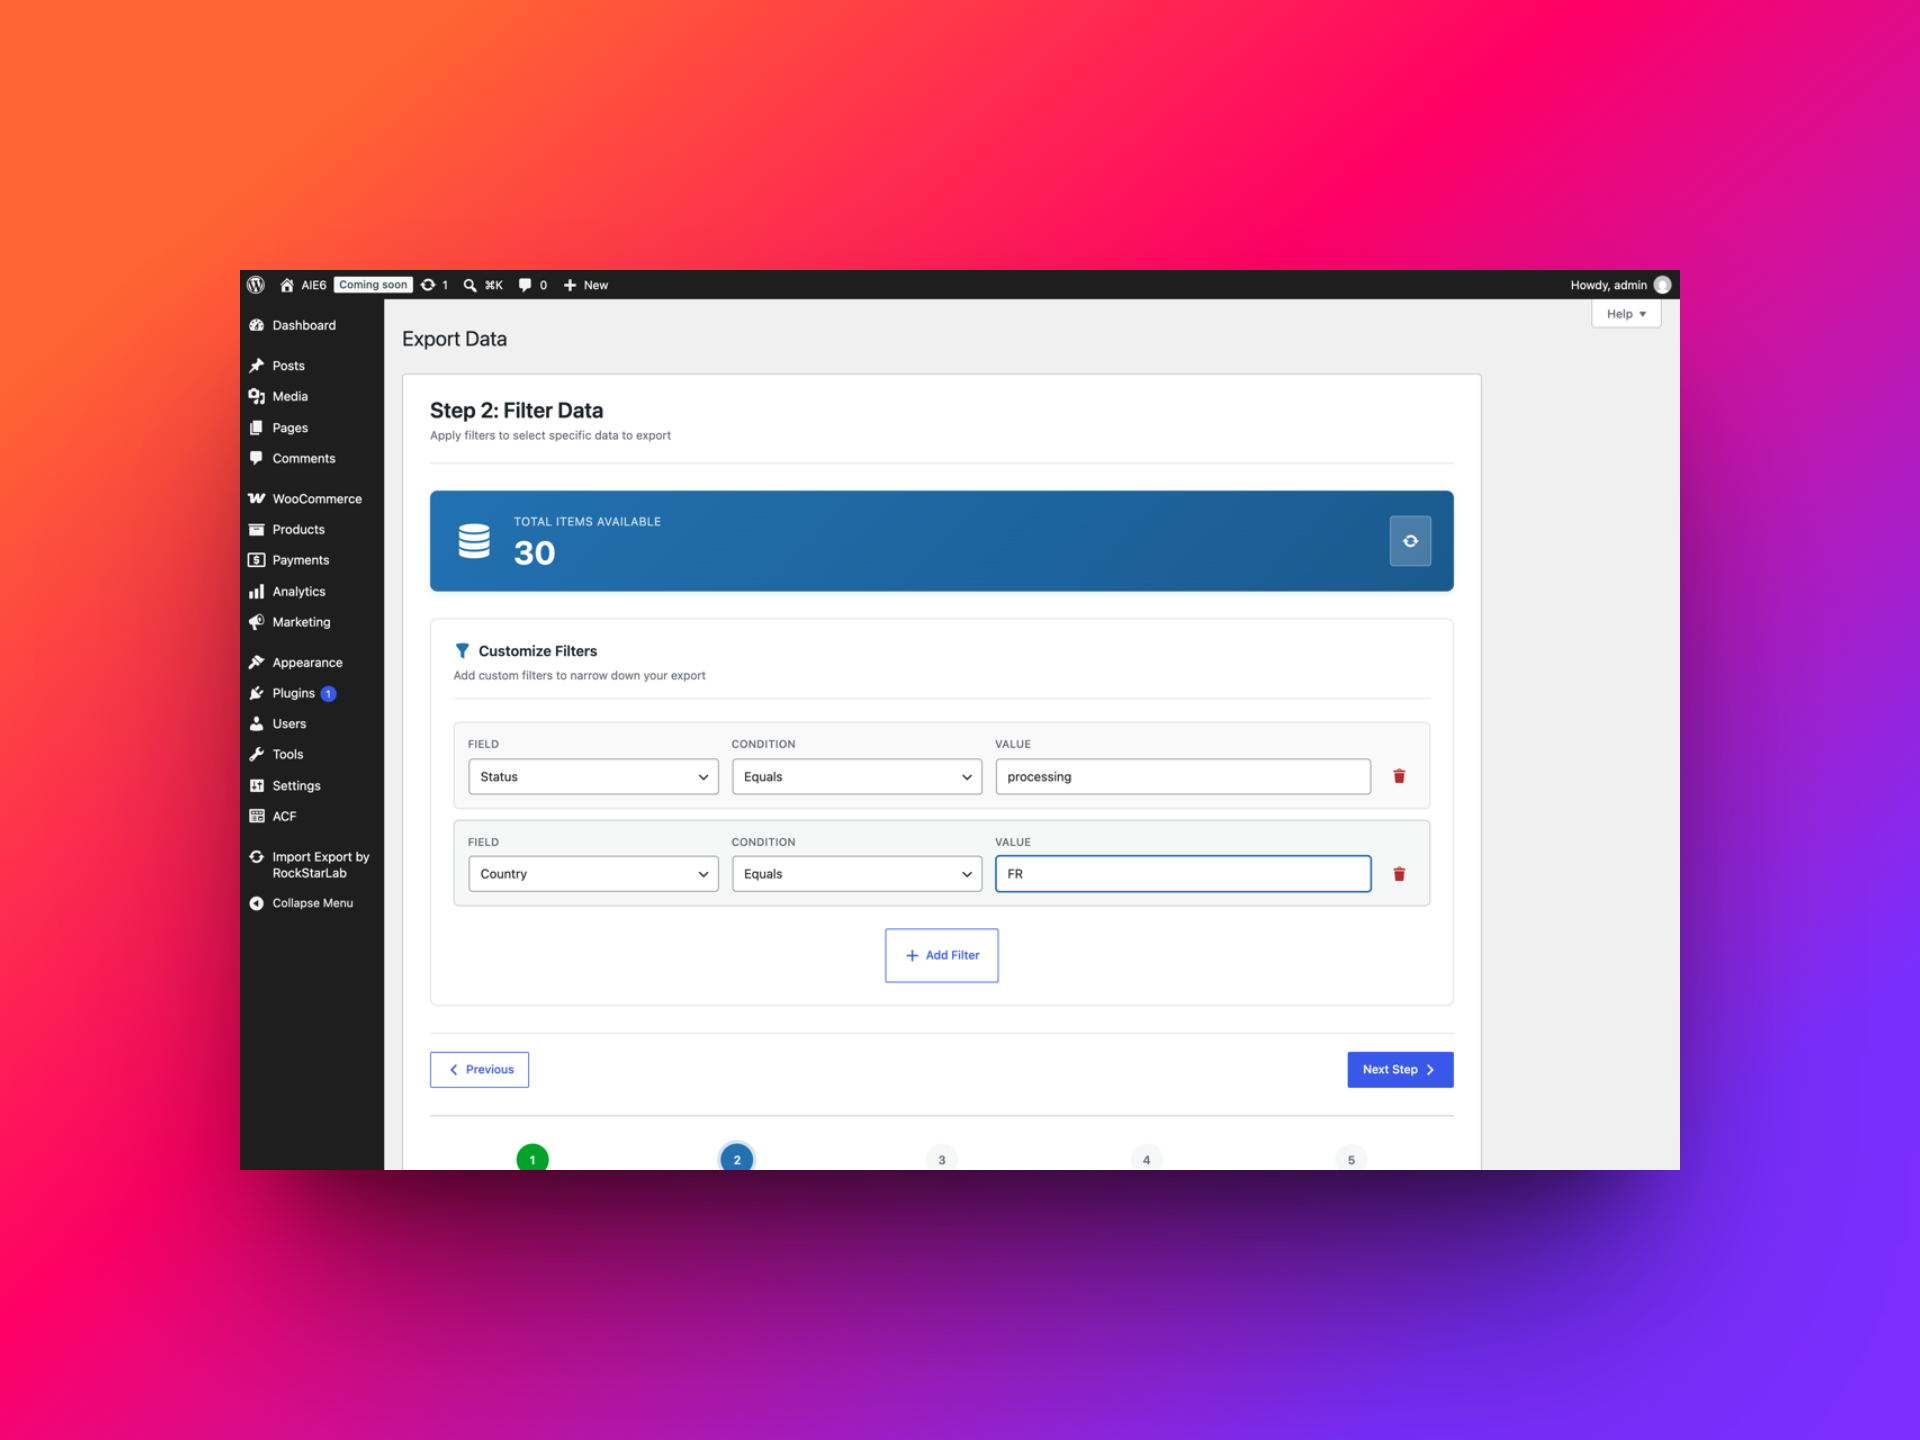
A couple of things worth knowing before you lean on filters heavily: the available operators change depending on what field you’ve picked (text fields get Equals/Not Equals/Contains/In-Not In/Is Empty-Is Not Empty, numeric and date fields also get Greater/Less Than), and there isn’t a visible AND/OR toggle between conditions — stacked filters behave as AND, narrowing the result set rather than widening it. Also, text filters like Status, Country, and Payment Method don’t autocomplete as you type, so it helps to know the exact value you’re matching against rather than guessing. One more thing: the “Total Items Available” counter recalculates over AJAX, so there’s a short delay — a few seconds — between typing a value and seeing the real count. If you check it immediately it can look stuck on the old number; give it a moment and it catches up.
Step 3: Choose the order fields for your file
The next screen is where you pick which fields actually land in your file: order ID, status, billing details, line items, totals, dates, customer info, whatever’s relevant. You don’t have to grab every available field; most people end up trimming this down to maybe fifteen or twenty columns rather than the full set that WooCommerce orders can theoretically expose.
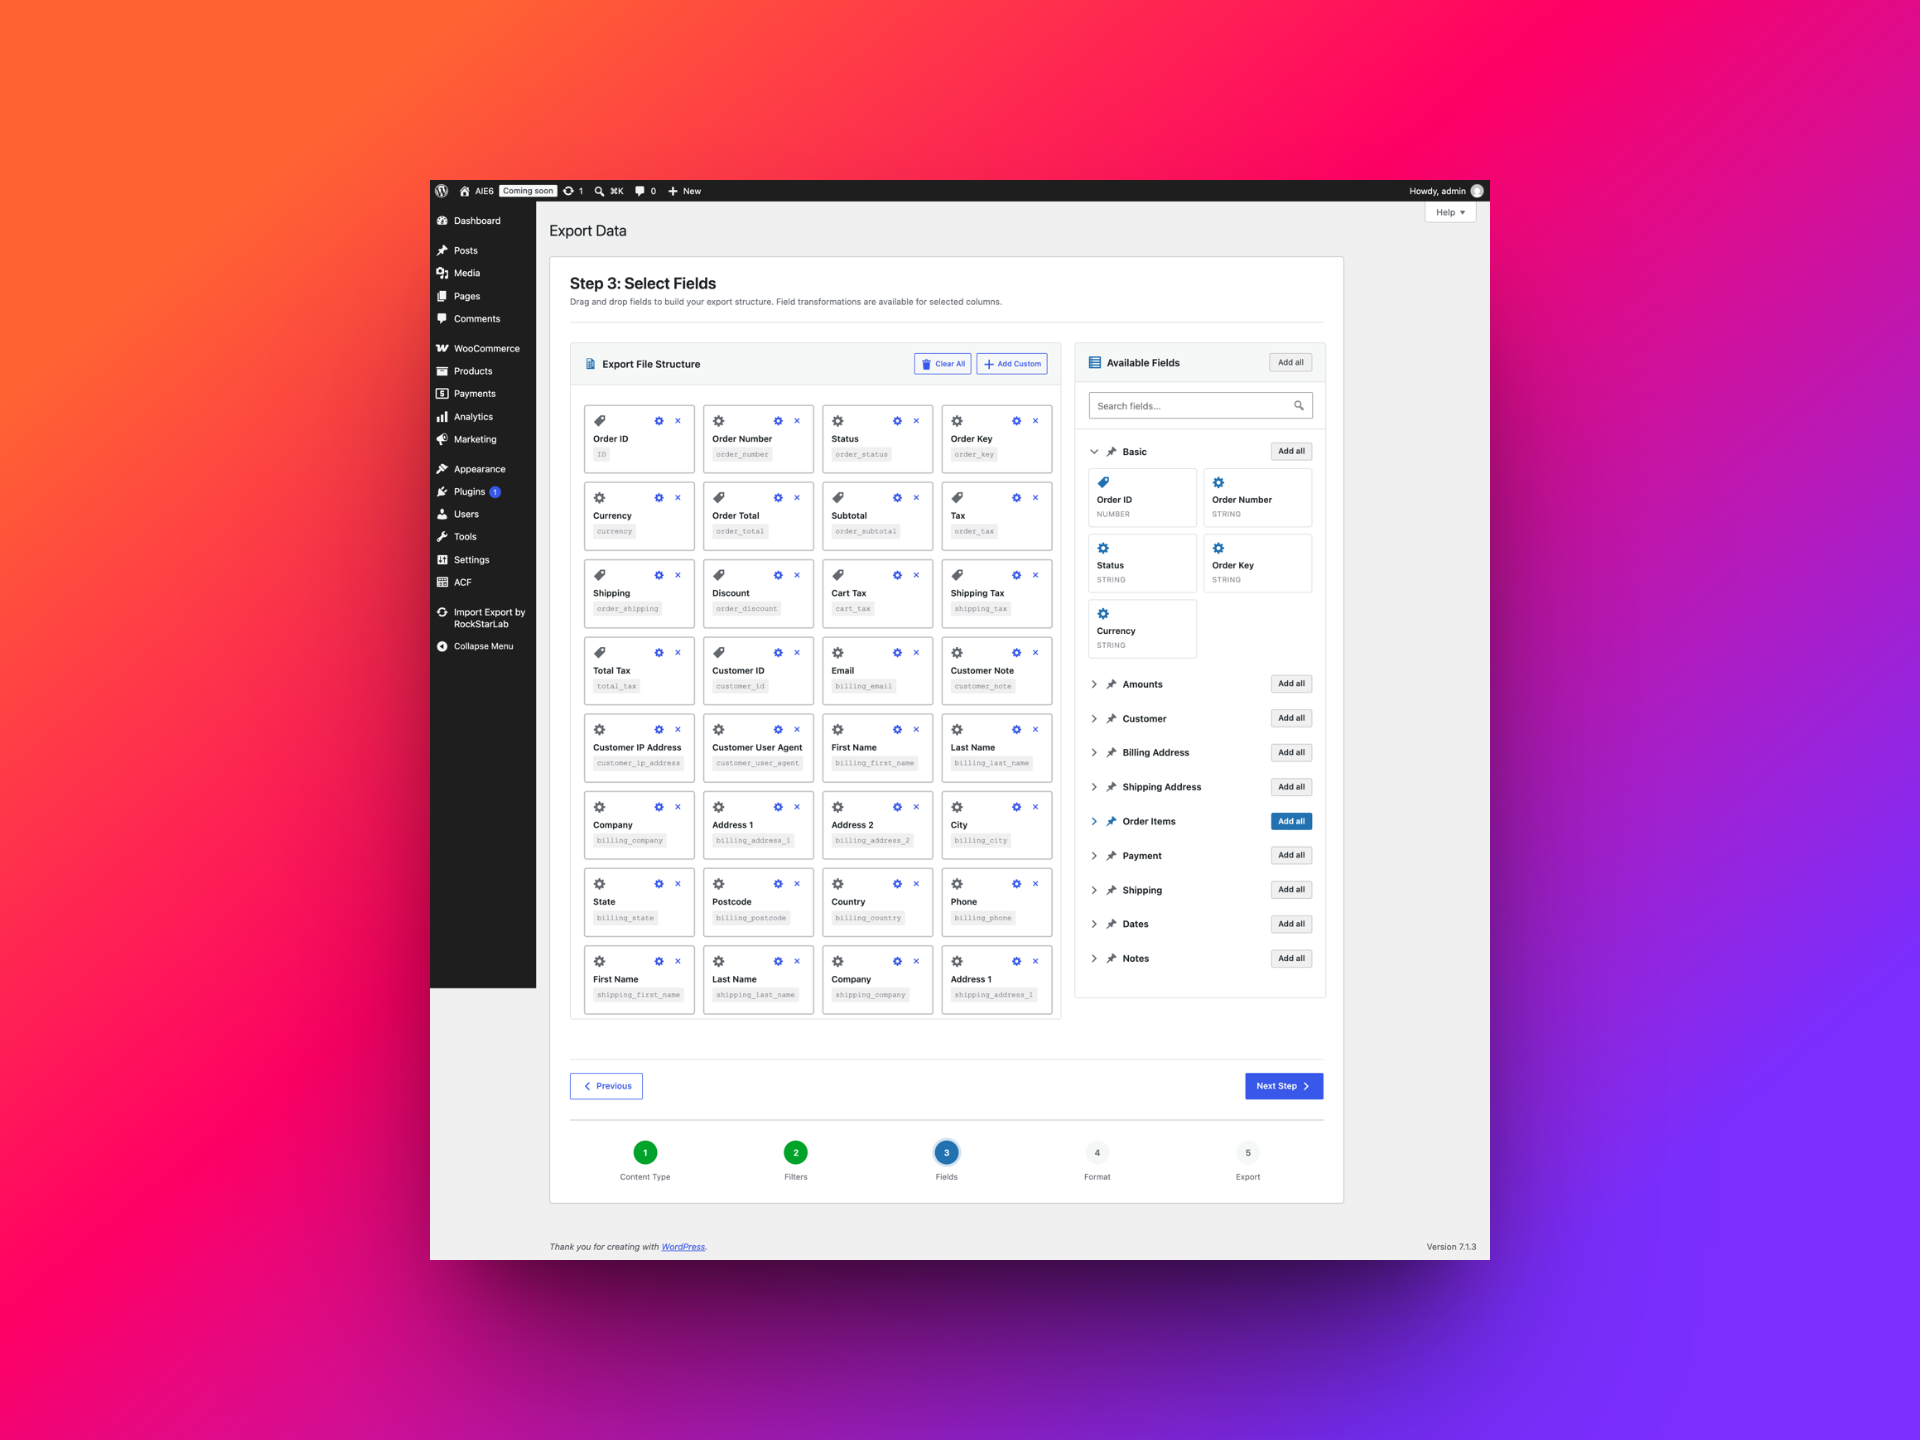
Step 4: Transform values before they go into the export
Raw order data rarely comes out in exactly the shape the receiving system wants. Dates might be in the wrong format, totals might need rounding, or you might want to merge first and last name into a single column rather than exporting them separately. This is where Field Transformations come in — they let you apply a function to a field’s value as it’s written to the export file, without touching the underlying order data itself.
On the Fields step, each column has a small gear icon that opens the Field Transformations modal. From there you can assign one of the built-in transformations — things like converting text case, trimming whitespace, reformatting dates, rounding numbers — or write your own custom function if nothing built-in quite fits.
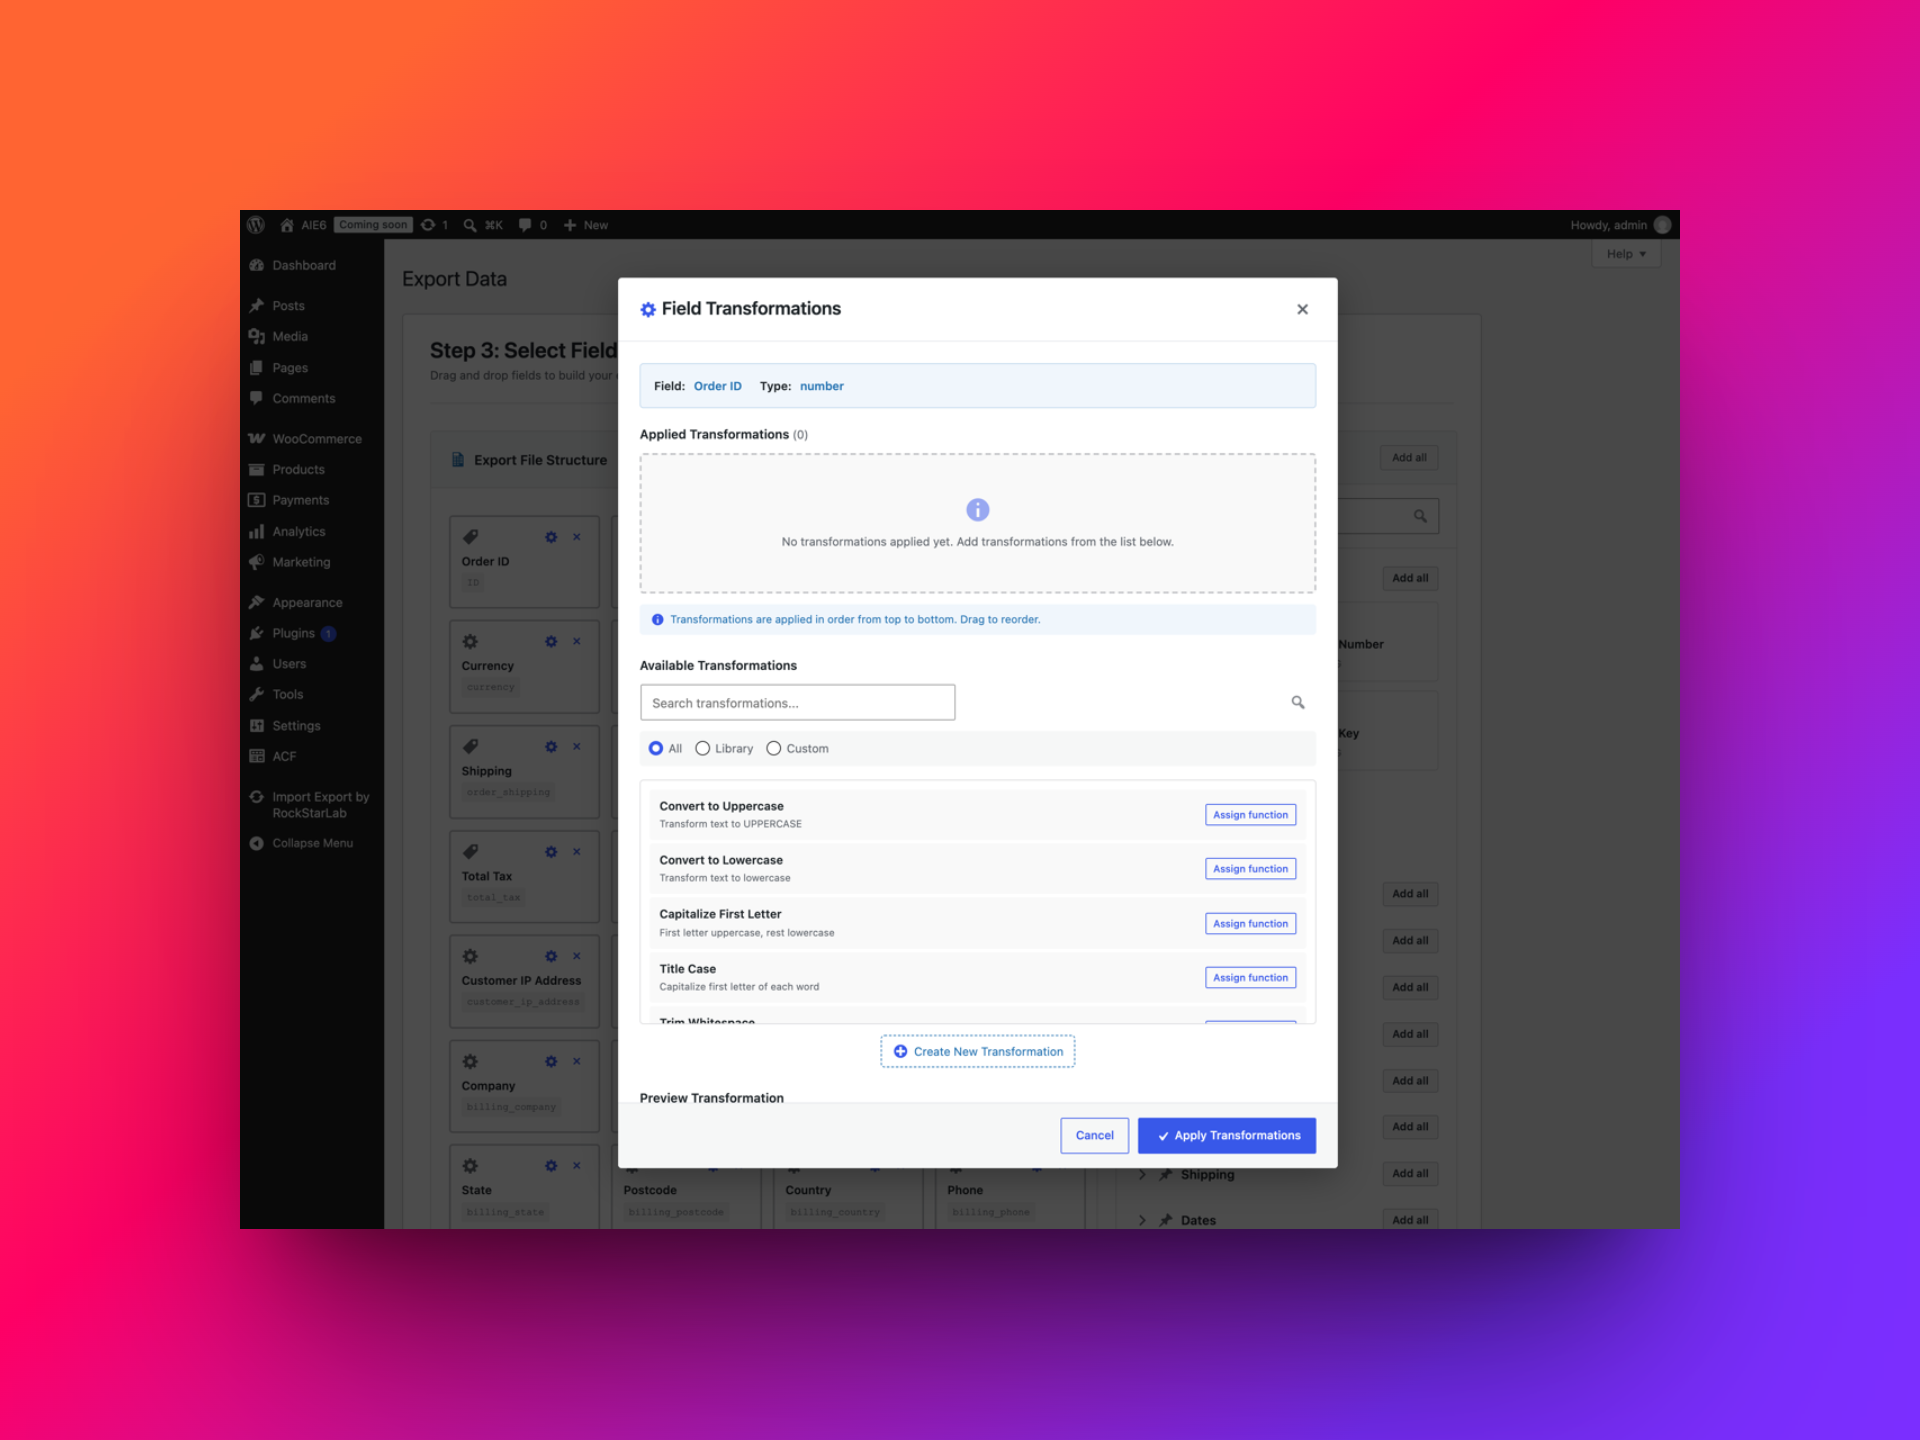
A few concrete uses: formatting the order date as DD/MM/YYYY because that’s what your accountant’s software expects instead of WordPress’s default; rounding order totals to two decimal places so you don’t end up with floating-point artifacts like 49.990000001 in your spreadsheet; or concatenating billing first and last name into a single “Customer Name” column because the warehouse system you’re feeding data into only has one name field, not two.
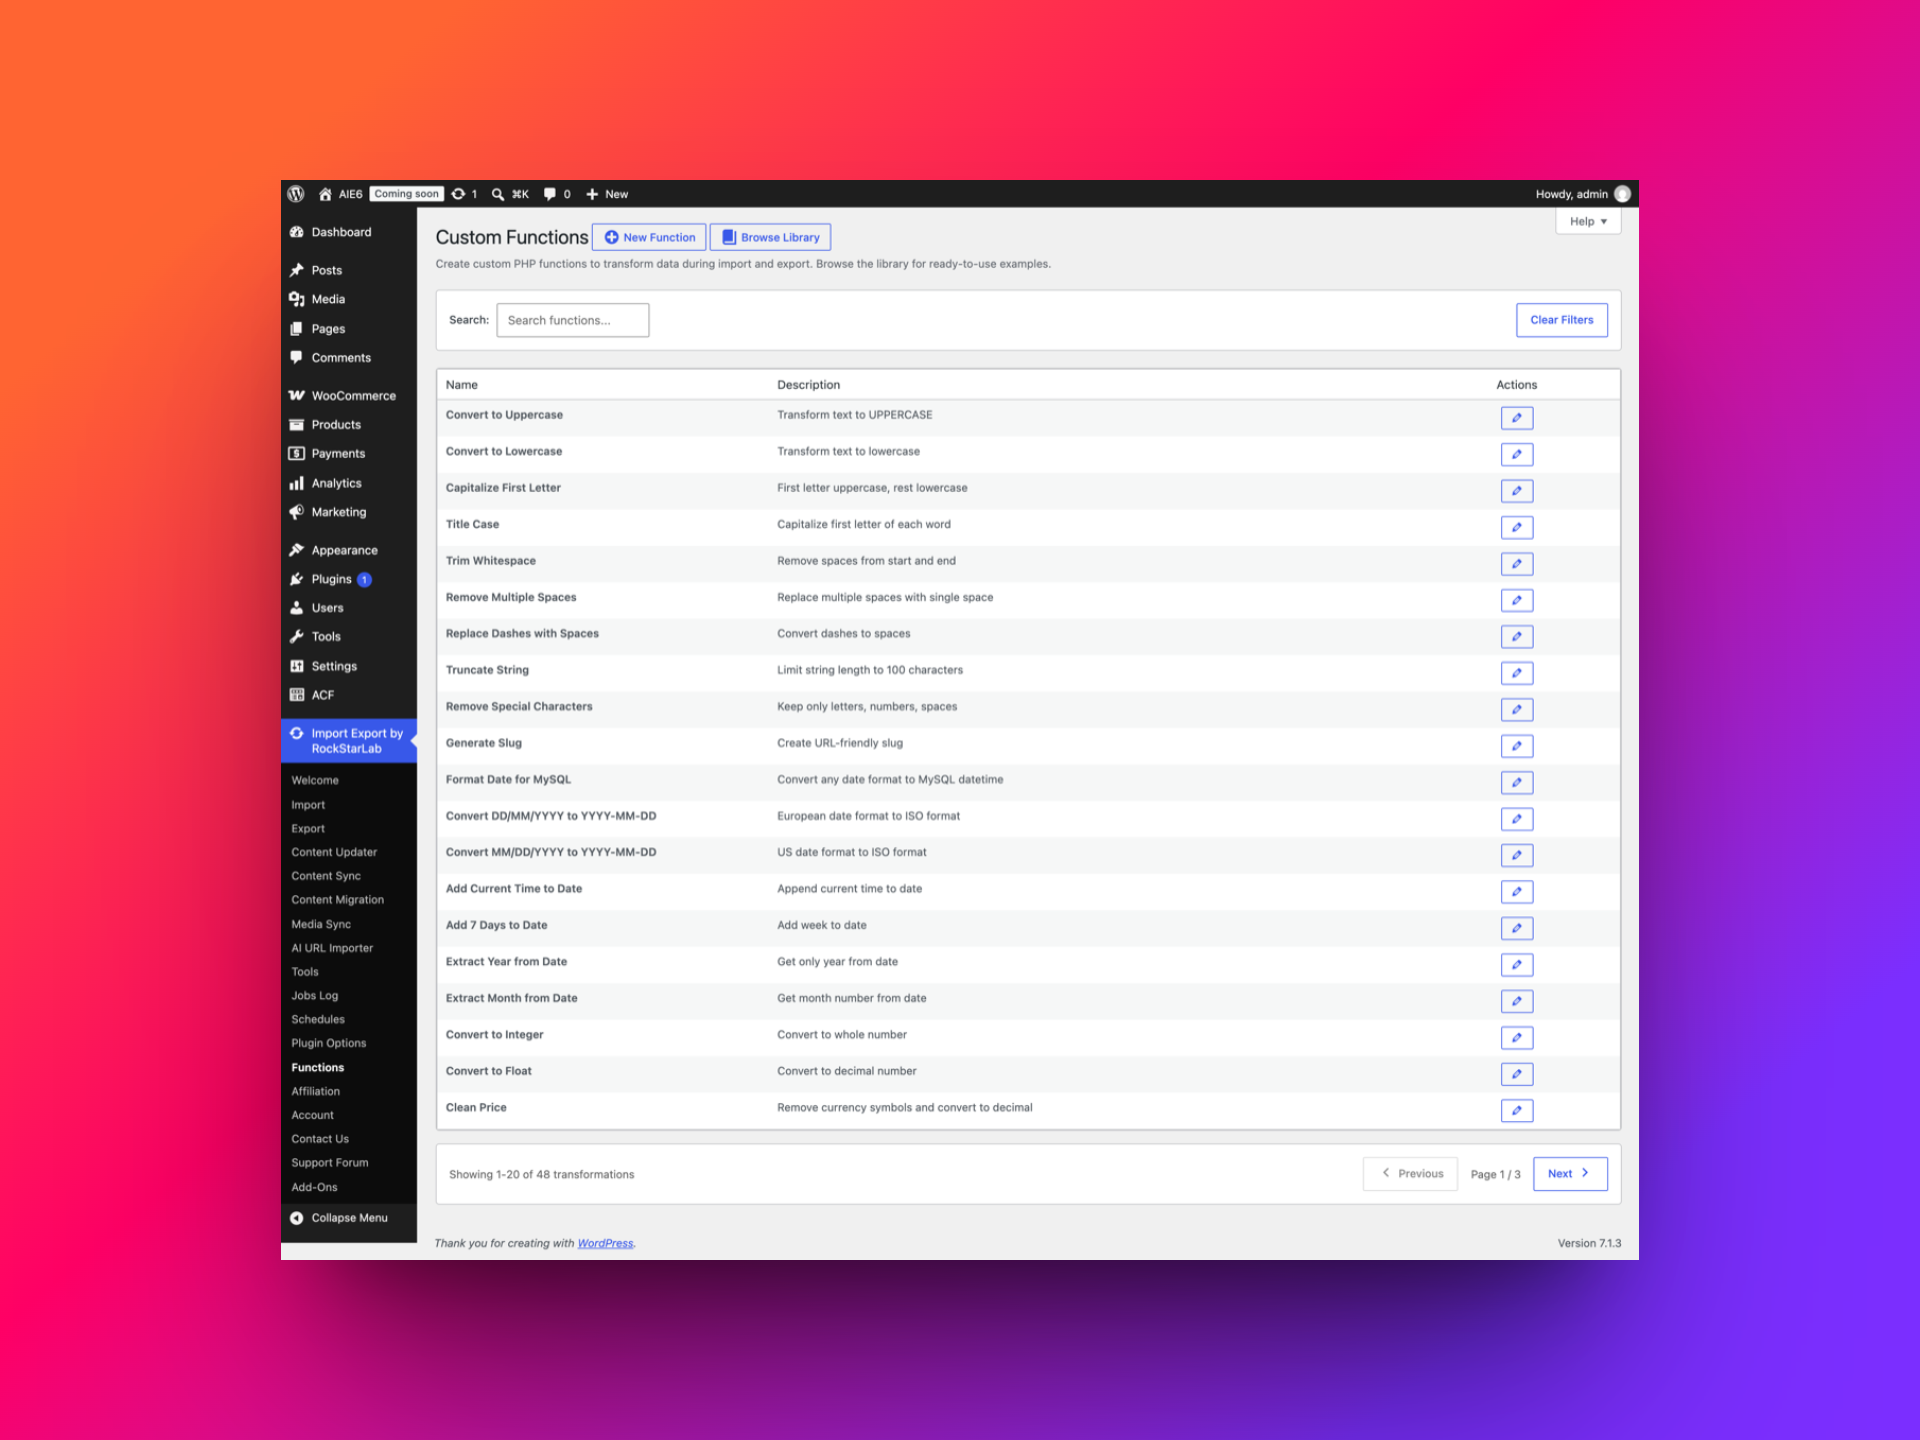
If you end up using the same transformation across multiple export jobs, it’s worth browsing the Functions library (Import Export by RockStarLab → Functions) rather than rebuilding it each time — there’s a sizeable set of ready-made snippets covering string manipulation, date/time formatting, numeric rounding, HTML cleanup, and a handful of WordPress-specific helpers, organized across a few pages.
Step 5: Set CSV, JSON, or XLSX options
Step four of the wizard is the format picker — CSV, JSON, XLSX, ODS, or XML. Each format has its own small set of options (for CSV: delimiter character, whether to include a header row), plus a couple that apply no matter what you picked — a custom export file name (you can use a {job_id} placeholder if you want every run to get a unique name automatically) and batch size, which controls how many orders get processed per chunk.
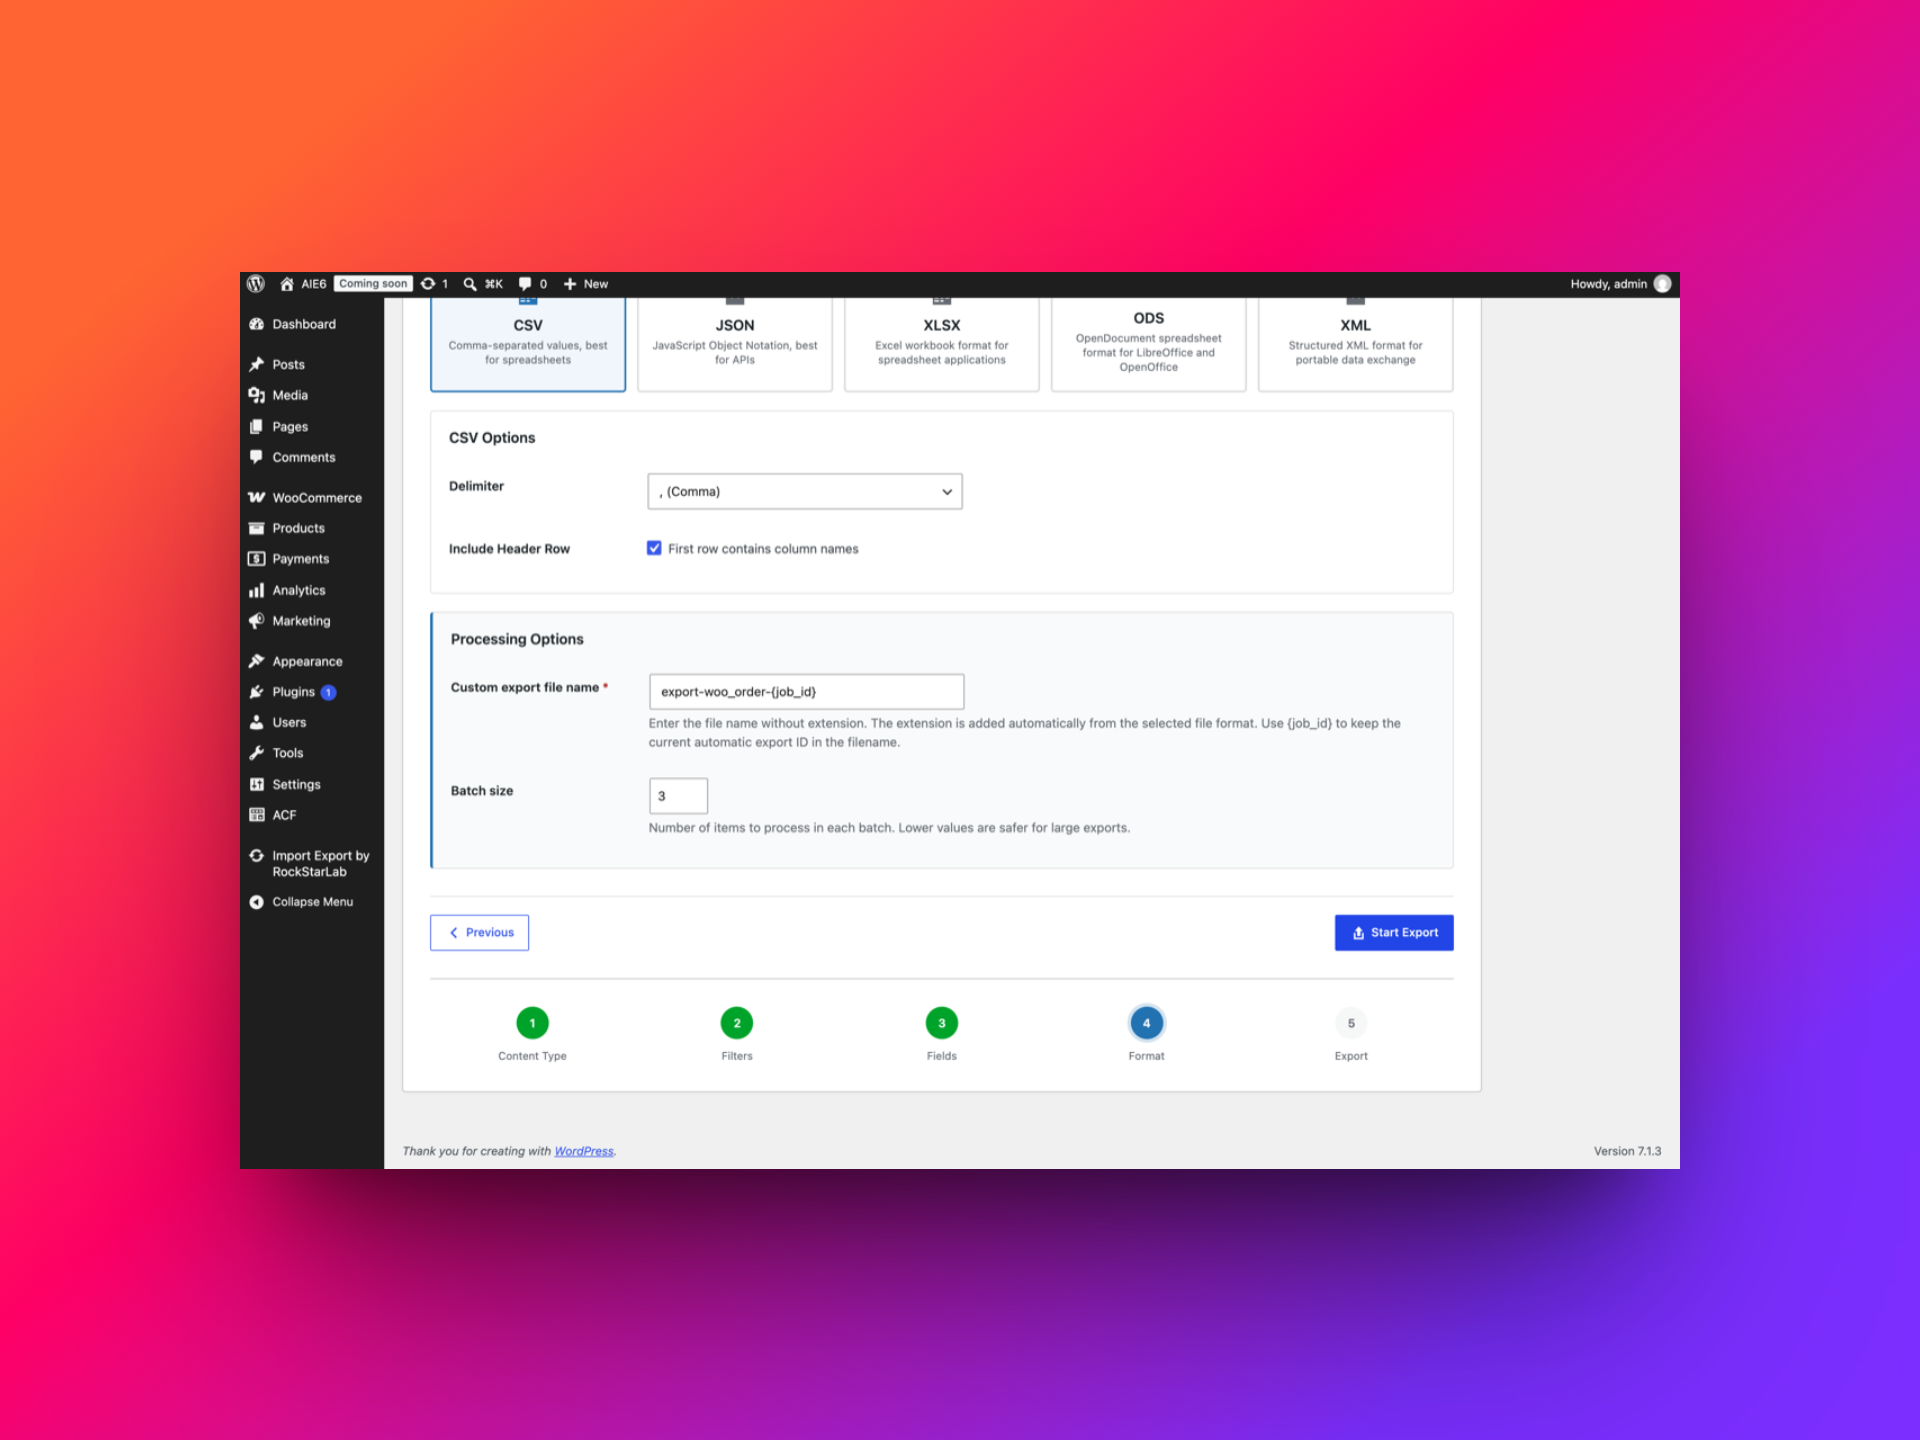
If your store has tens of thousands of orders, dropping the batch size a bit tends to keep things stable rather than trying to push everything through in one pass.
Step 6: Run, download, and verify the file
- Review the content type, filters, selected fields, format, filename, and batch size.
- Hit export and let the job run.
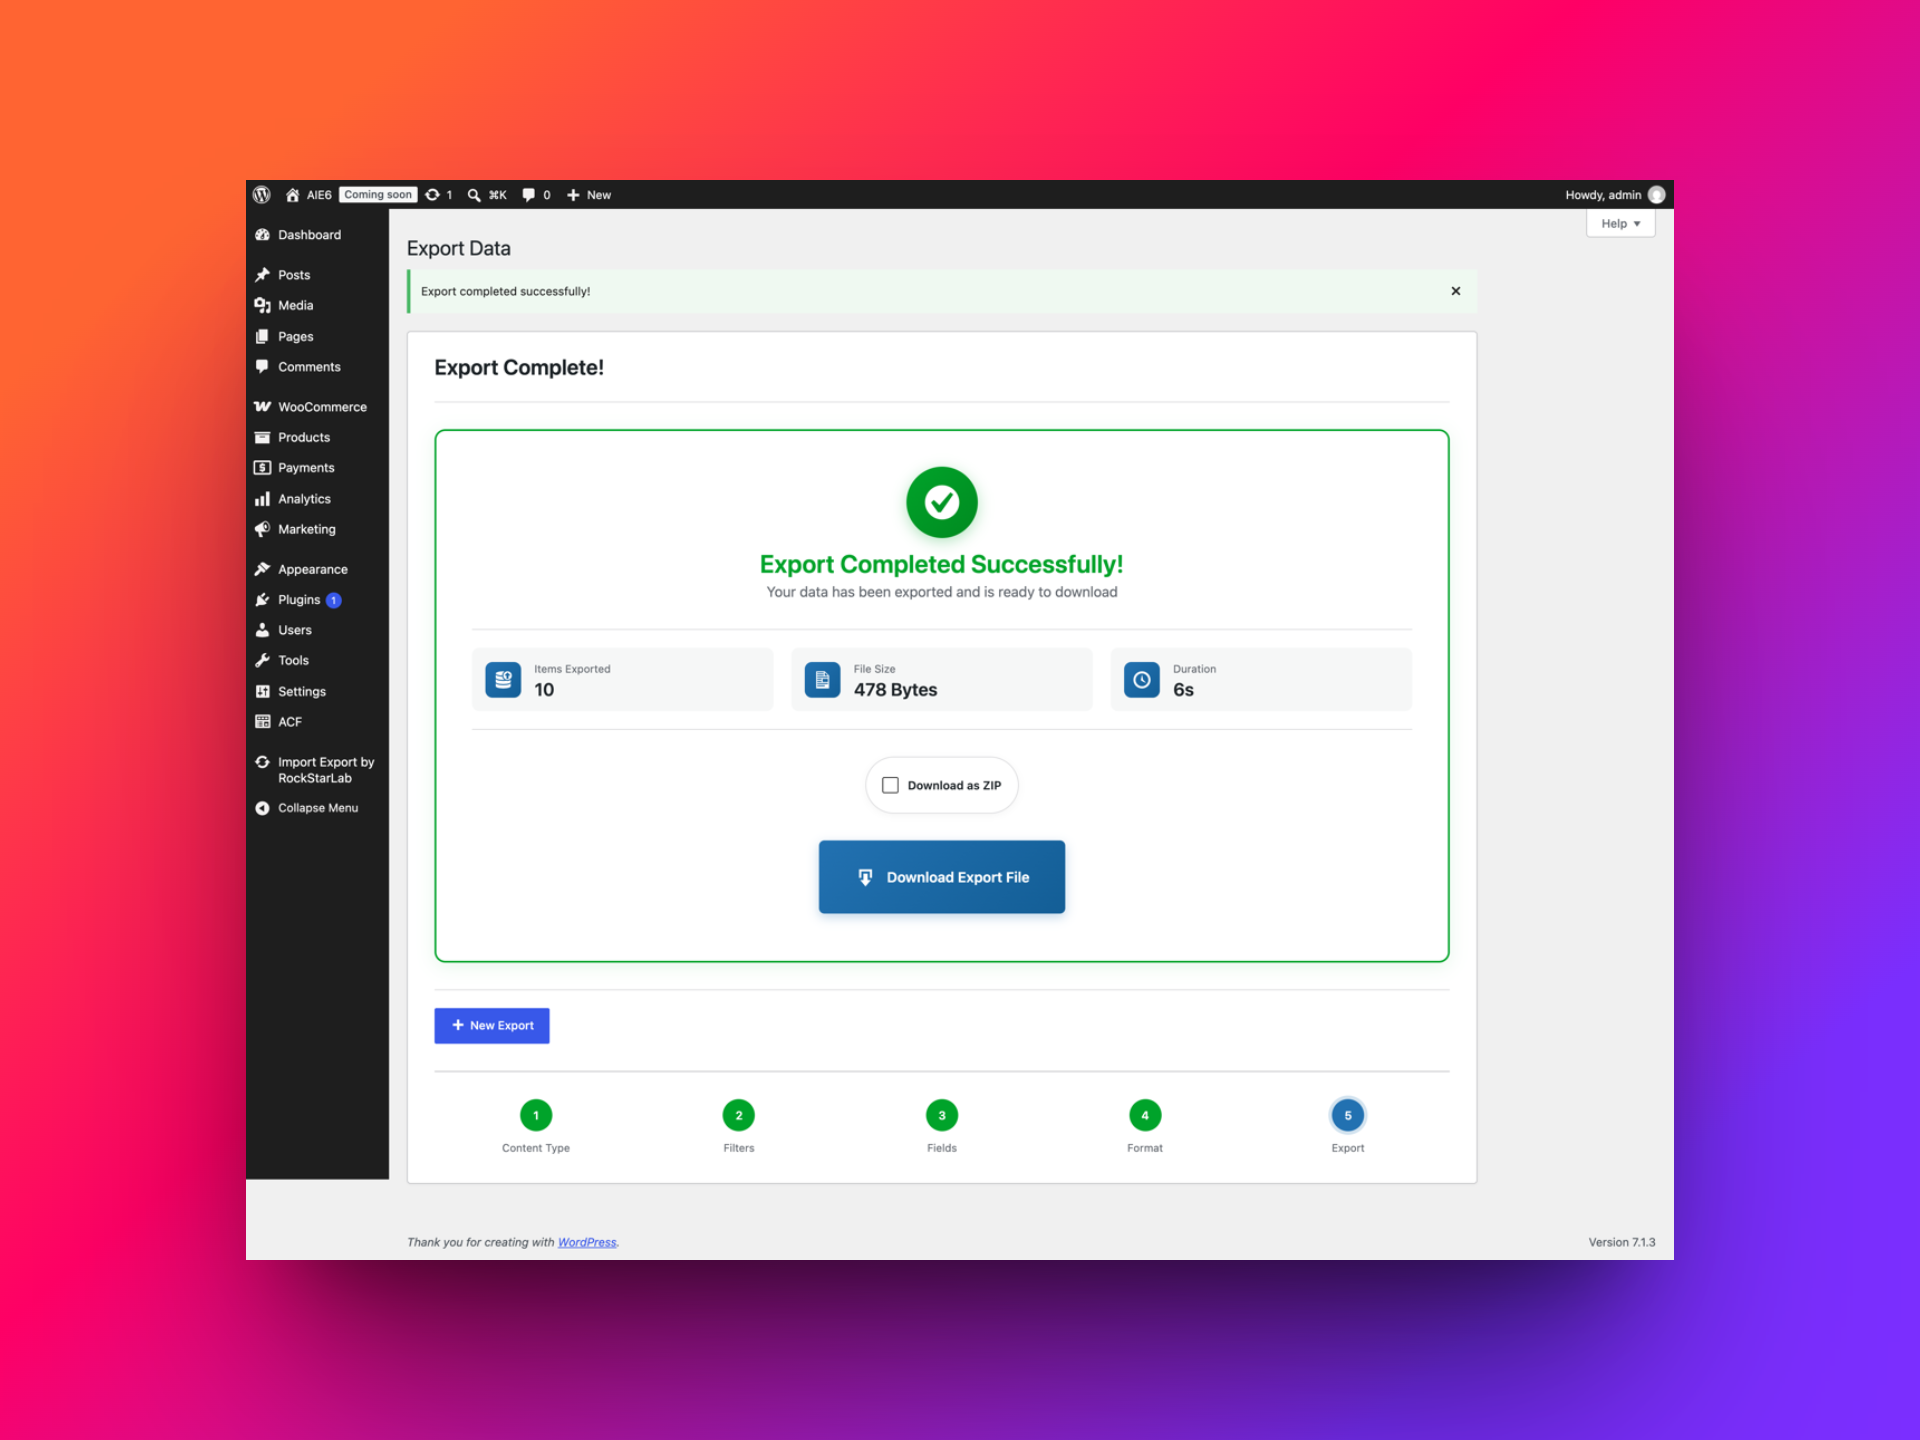
- When it completes, you’ll land on a completion screen with the item count, file size, how long it took, and a download button.
- Open the downloaded file and spot-check several orders. Confirm that totals, dates, statuses, and special characters look as expected.
That’s the whole flow for a complete export. Now let’s get into automating it so nobody has to run it by hand every week.
Automate exports with schedules
Running an export manually every week works fine until it doesn’t — someone’s on vacation, someone forgets, and suddenly accounting is a week behind on data they needed on a fixed cadence. This is exactly what the Schedules feature is for: set up a job once, point a schedule at it, and let it run on its own going forward.
Under Import Export by RockStarLab → Schedules, you can turn any existing export job into a recurring one. Give it a name, pick the source job (the export configuration you already built, filters and all), choose a run type — one-time or recurring — and if it’s recurring, set the repeat interval (daily, weekly, etc.) along with a first execution time and timezone.
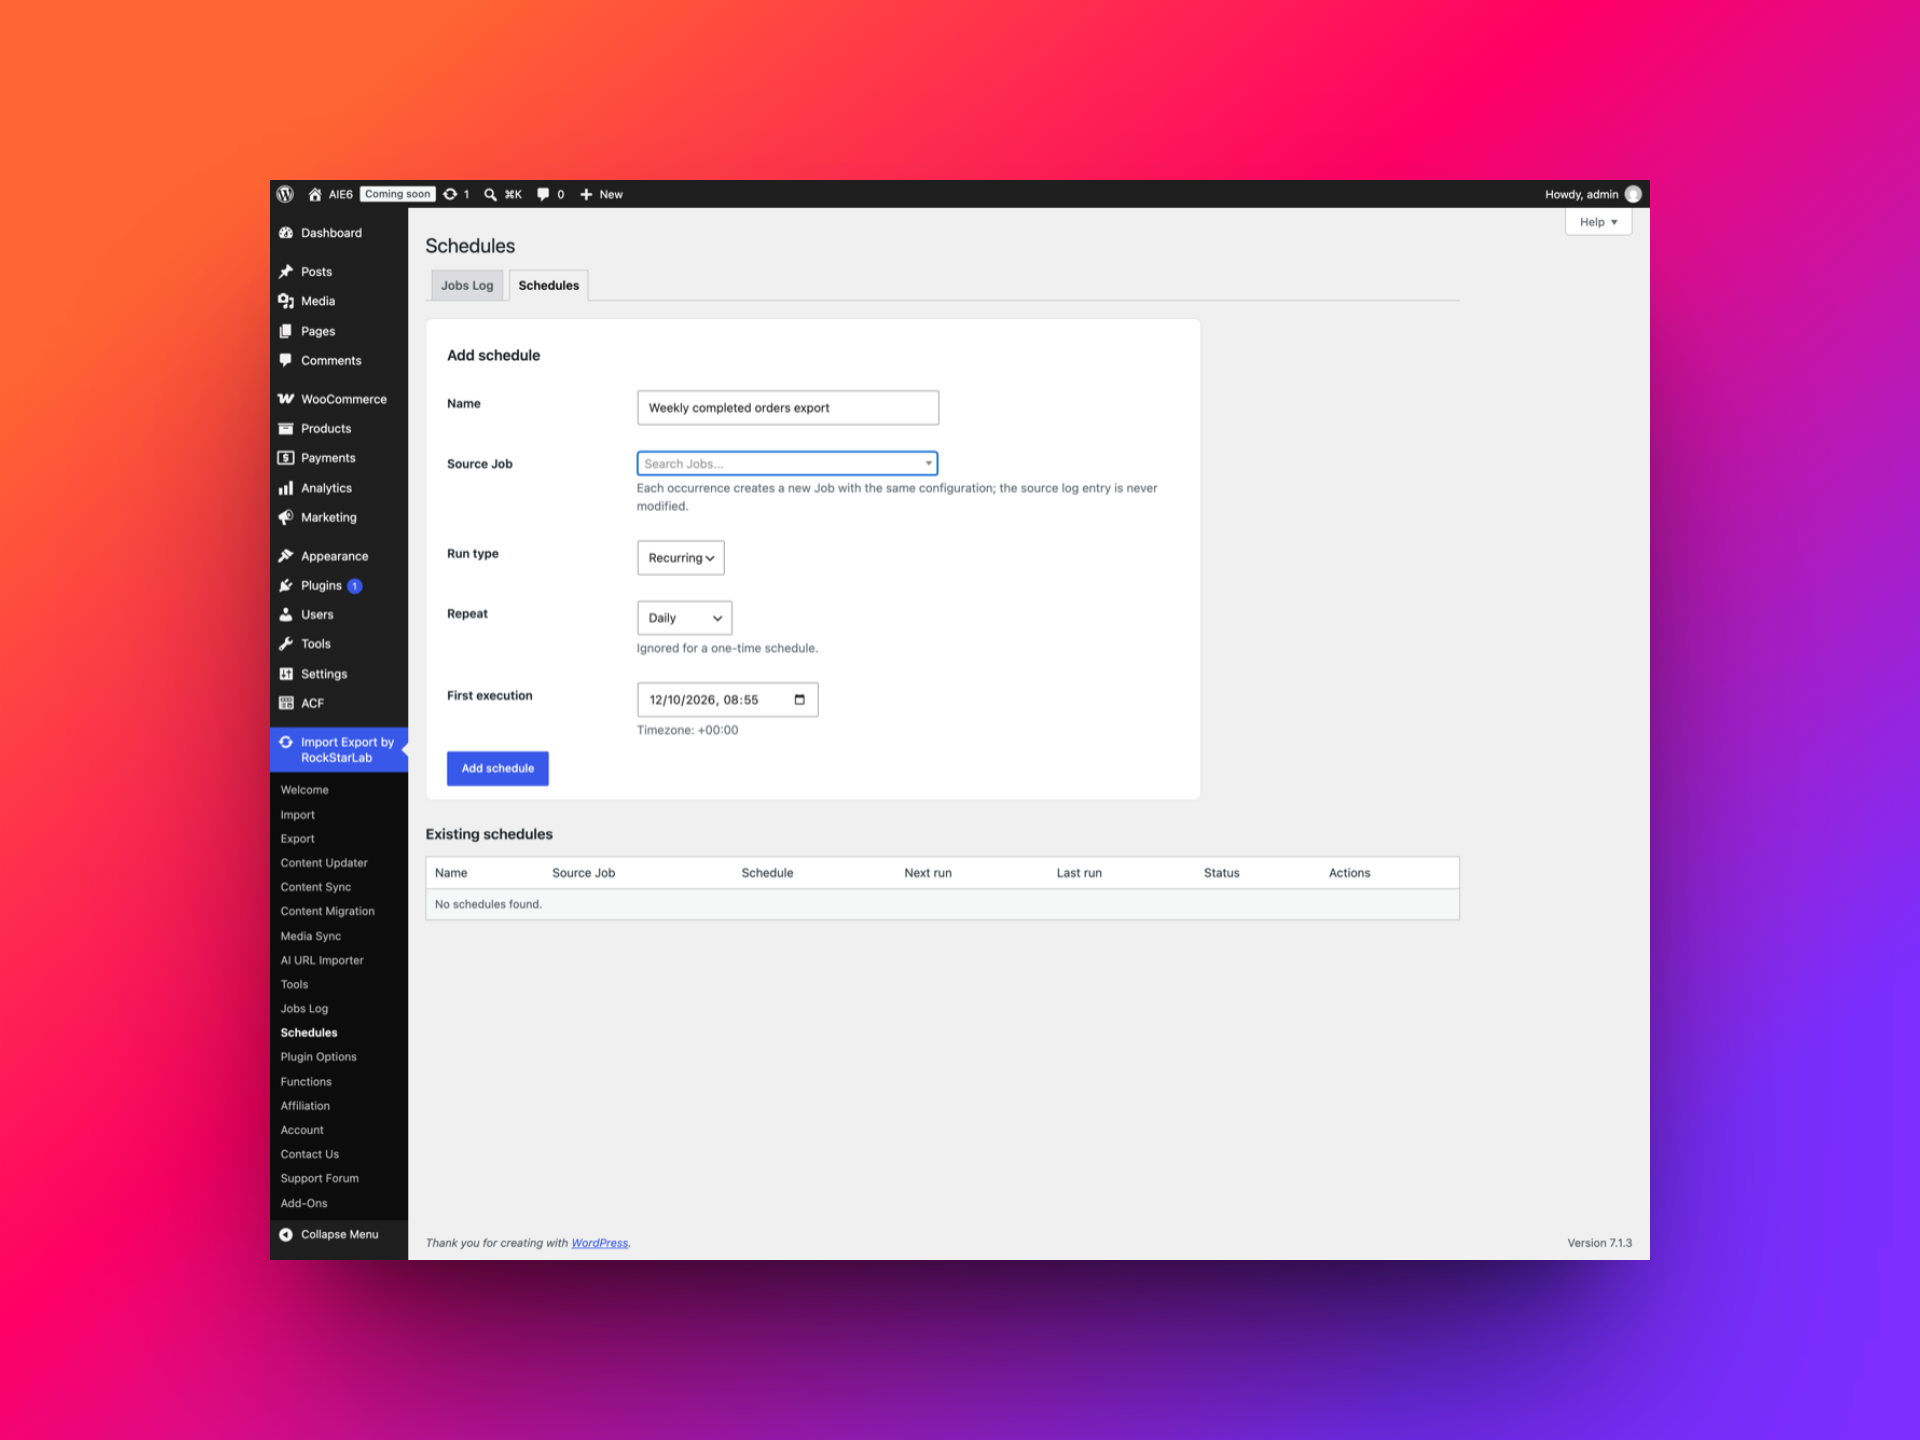
Practically, this means your accounting team can get a fresh CSV of completed orders every Monday morning without anyone touching WordPress, or your warehouse can pull a daily snapshot of new orders automatically. There’s also a Jobs Log tab alongside Schedules showing every run — status, progress, item counts, how long each one took — so if a scheduled export quietly fails overnight, you’ll actually notice instead of finding out three weeks later that nobody got the file.
Troubleshooting and good habits
- The item count looks stuck after typing a filter: the “Total Items Available” counter recalculates over AJAX, so it takes a few seconds to catch up after you type a value — if you glance at it immediately it can still show the old total. Wait a moment before trusting the number.
- A text filter isn’t matching anything: Status, Country, and Payment Method fields don’t autocomplete, so double-check you’re using the exact stored value (the two-letter country code, the gateway’s internal slug) rather than a guess.
- Filters seem to be excluding too much: remember stacked filters behave as AND, not OR — adding more conditions narrows the result set rather than widening it.
- A large job is interrupted: lower the batch size and try again, especially on a large order history.
- A scheduled export didn’t run on time: check the schedule’s status and next-run time in the Schedules table, and confirm the WordPress timezone matches what you expect.
- Name your jobs clearly. “Export 1” and “Export 2” mean nothing six months from now when you’re trying to figure out which schedule feeds which system.
- Test a filtered export on a small date range first before scheduling it to run against your entire order history — it’s much easier to catch a filter mistake on fifty rows than on fifty thousand.
- Keep at least one full, unfiltered export around as a periodic backup, separate from your filtered reporting exports. Filters are great for day-to-day use, but backups should capture everything.
Export exactly the WooCommerce order data you need
Whether you need a single complete dump for a migration or a tightly filtered, scheduled export feeding your accounting software every week, the same handful of steps cover it — pick the content type, decide whether filters apply, choose your fields and any transformations, pick a format, and either run it once or let a schedule handle it from here on out.