
To export all WooCommerce refunds with Import Export by RockStarLab, open Export, select WooCommerce Refunds, leave the filters empty, choose your columns and download the result as CSV, XLSX, ODS, JSON or XML. A refund export can include the refund amount, reason, date, currency and the order it belongs to.
The distinction between a refund and a refunded order matters. If you need to review individual refund transactions, selecting orders with a Refunded status does not answer the same question. A refund has its own ID and refers back to a parent order. An order can have more than one refund, and a partial refund does not necessarily leave the entire order with a Refunded status.
This guide follows the refund export wizard, explains useful filter combinations and shows how to keep the same configuration for recurring reports. The screenshots use a test store with four refund records; your store will show its own counts and values.
The interface screenshots in this guide use version 2.0 of Import Export by RockStarLab.
Before you export WooCommerce refunds
Start on the WordPress site that contains the orders and refunds. WooCommerce must be active, and your installation of Import Export by RockStarLab must include the WooCommerce Refunds content type. The test installation used the PRO add-on. If that card is unavailable in your installation, check the installed add-on and license before following the remaining steps.
Decide what the file is for. An accounts report usually needs a manageable set of columns: refund ID, parent order number, date, amount, currency and reason. A migration or a more detailed audit benefits from the additional matching fields and JSON data. You can export every refund without exporting every available field; these are separate choices.
Exporting reads the refund records. It does not issue a new refund or send money through a payment gateway. Keep the original export if you plan to edit a copy in a spreadsheet.
Step 1: Select WooCommerce Refunds
- In WordPress, open Import Export by RockStarLab → Export.
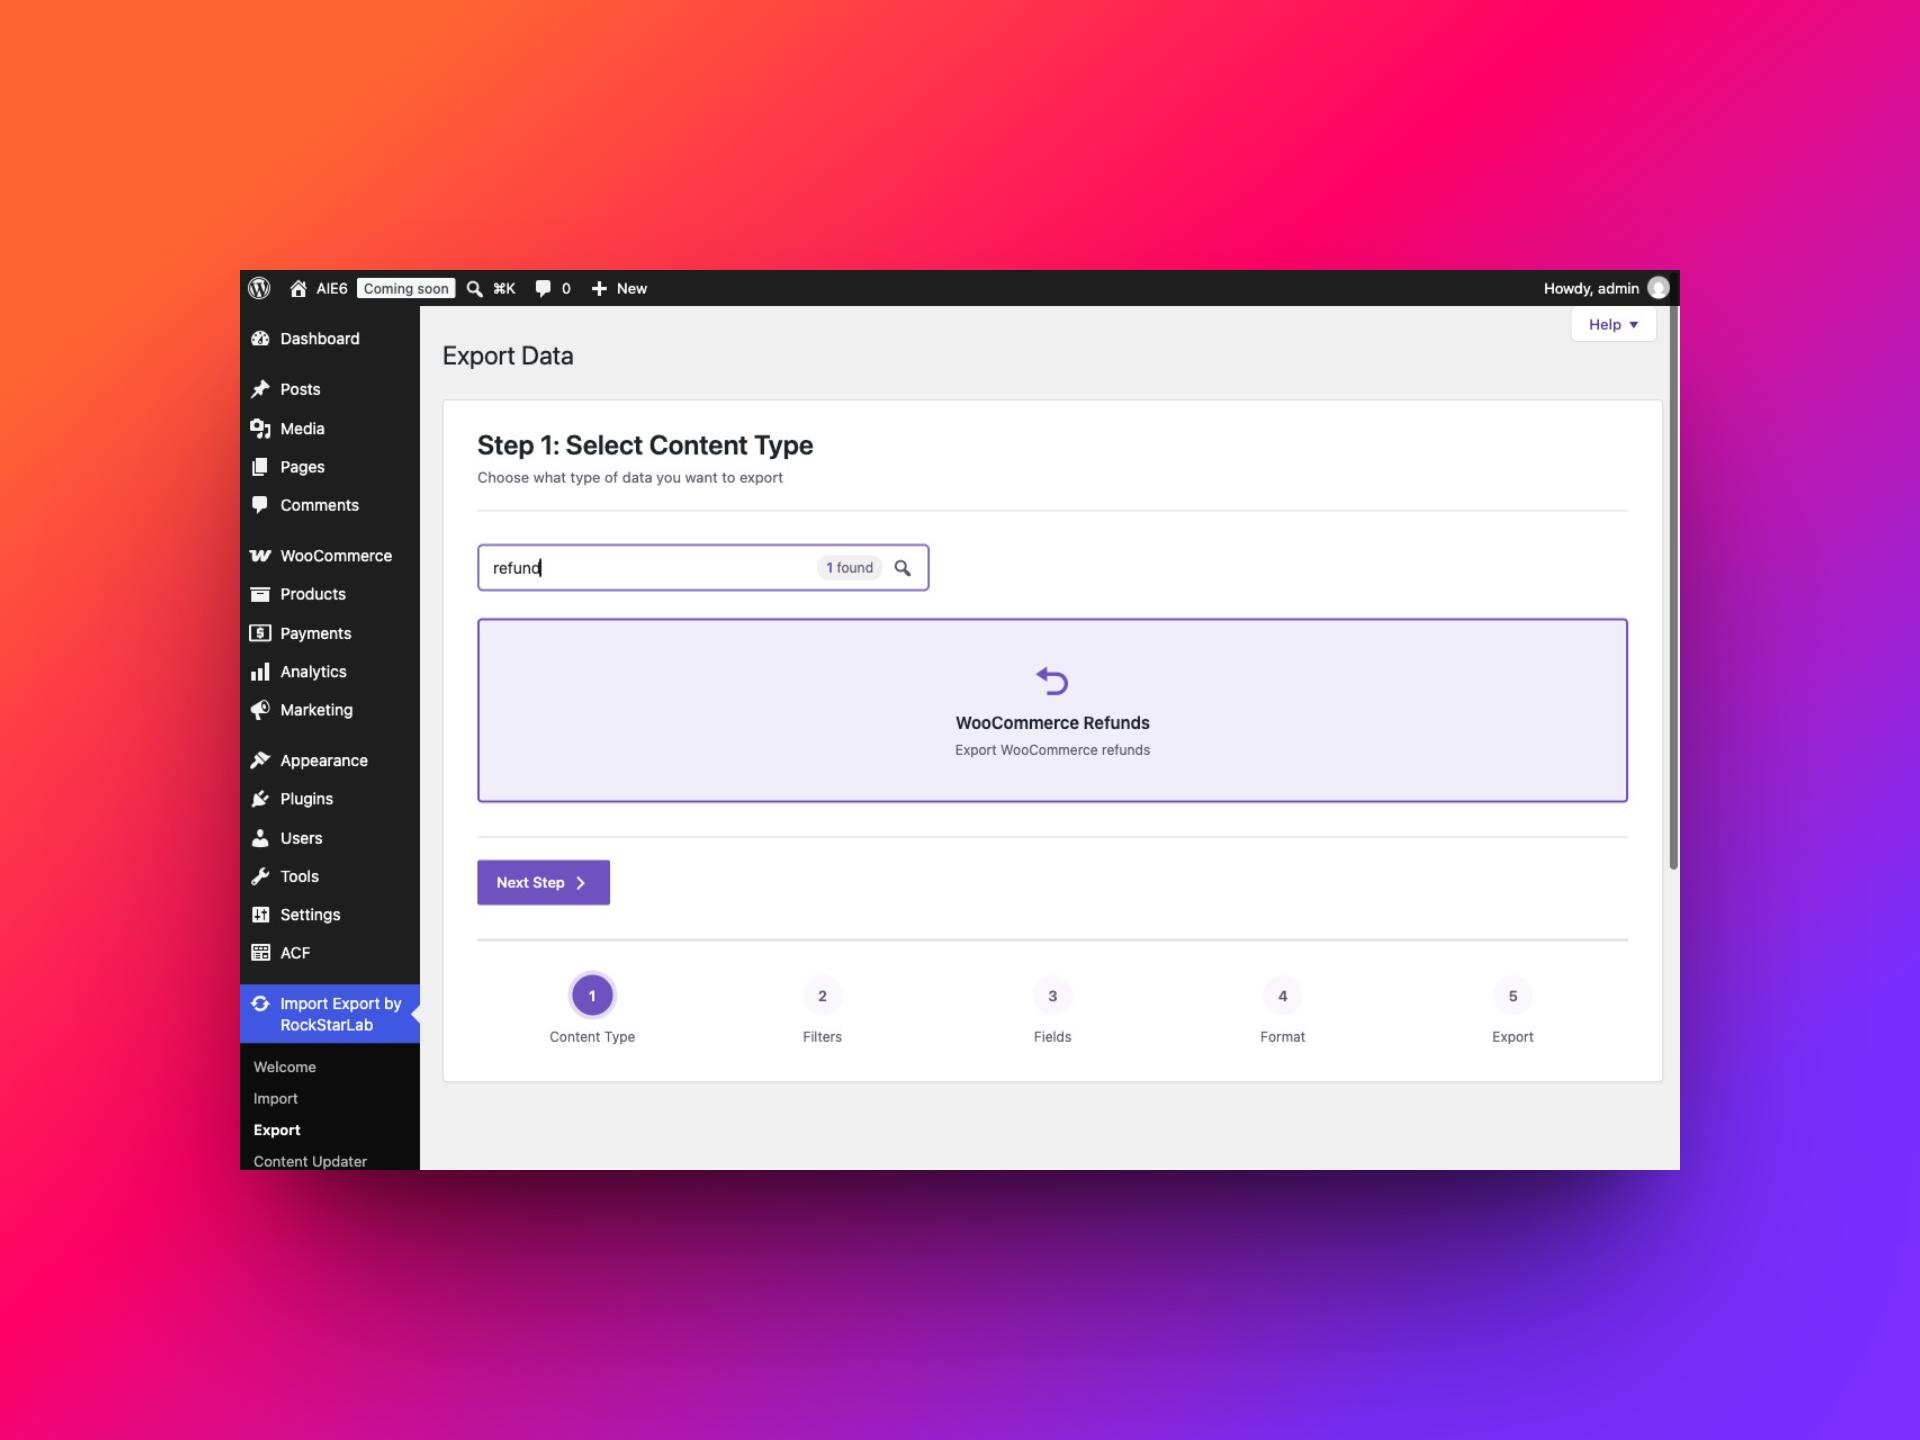
- In Step 1: Select Content Type, search for refund.
- Select WooCommerce Refunds.
- Click Next Step.
Step 2: Export all refunds or narrow the selection
For a complete refund export, leave Customize Filters empty. The Total Items Available counter tells you how many records the current selection includes. Use the refresh button beside it after changing filters and wait for the updated count before continuing.
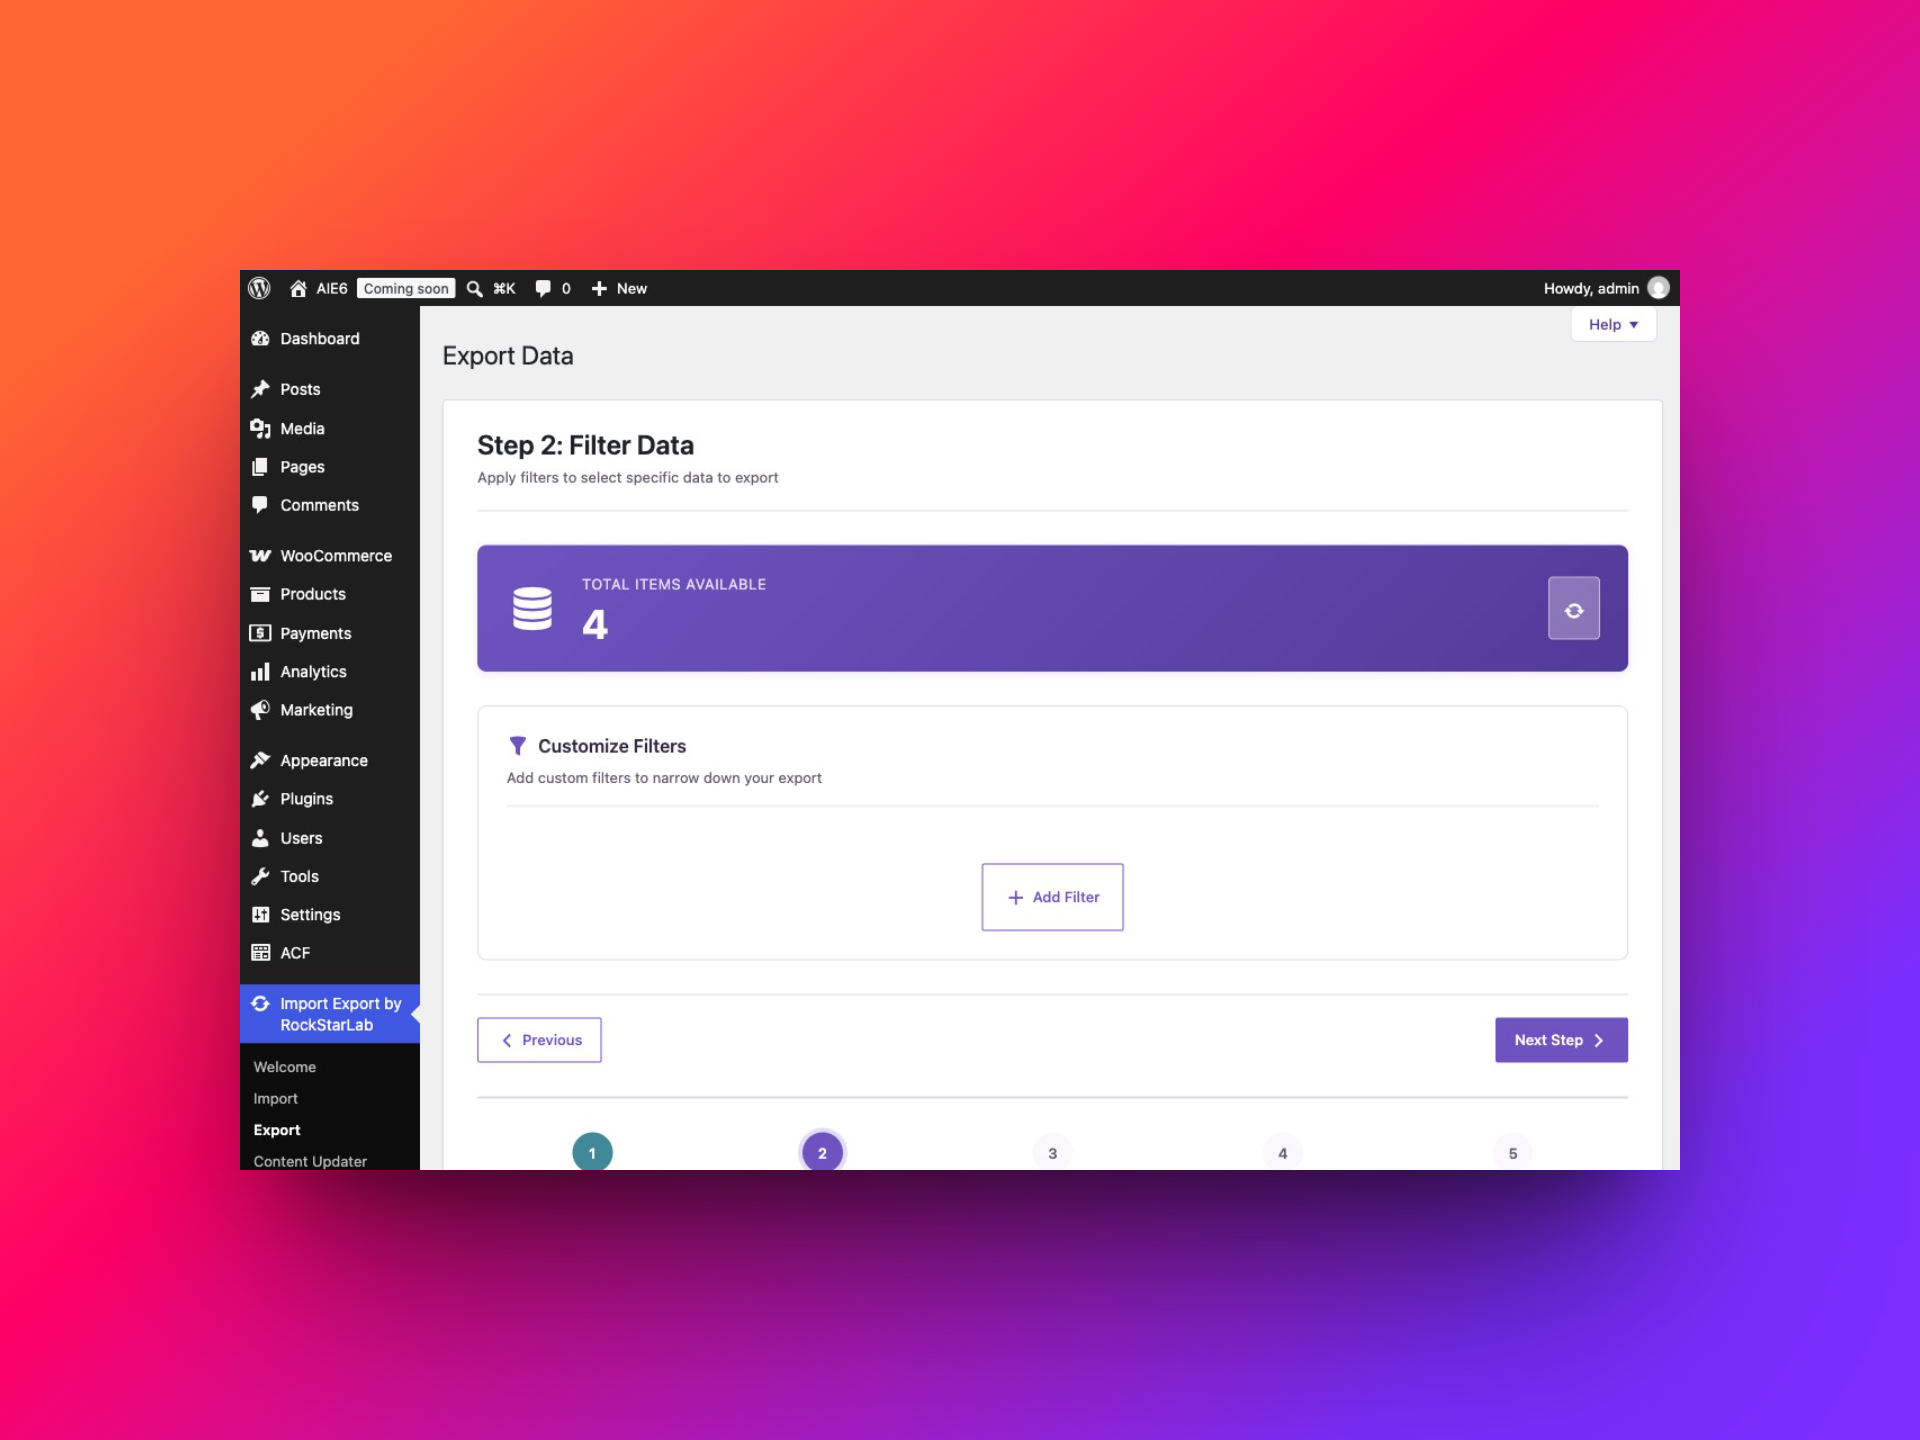
If you are preparing a specific report, click Add Filter. Each row has a Field, a Condition and a Value. Conditions depend on the selected field: amounts have numeric comparisons, while reasons support text conditions such as Contains.
Example 1: Refunds above a particular amount
Choose Amount → Greater or Equal → 100 to include refunds of 100 or more. Use Greater Than if a refund of exactly 100 should be excluded. Enter the number without a currency symbol.
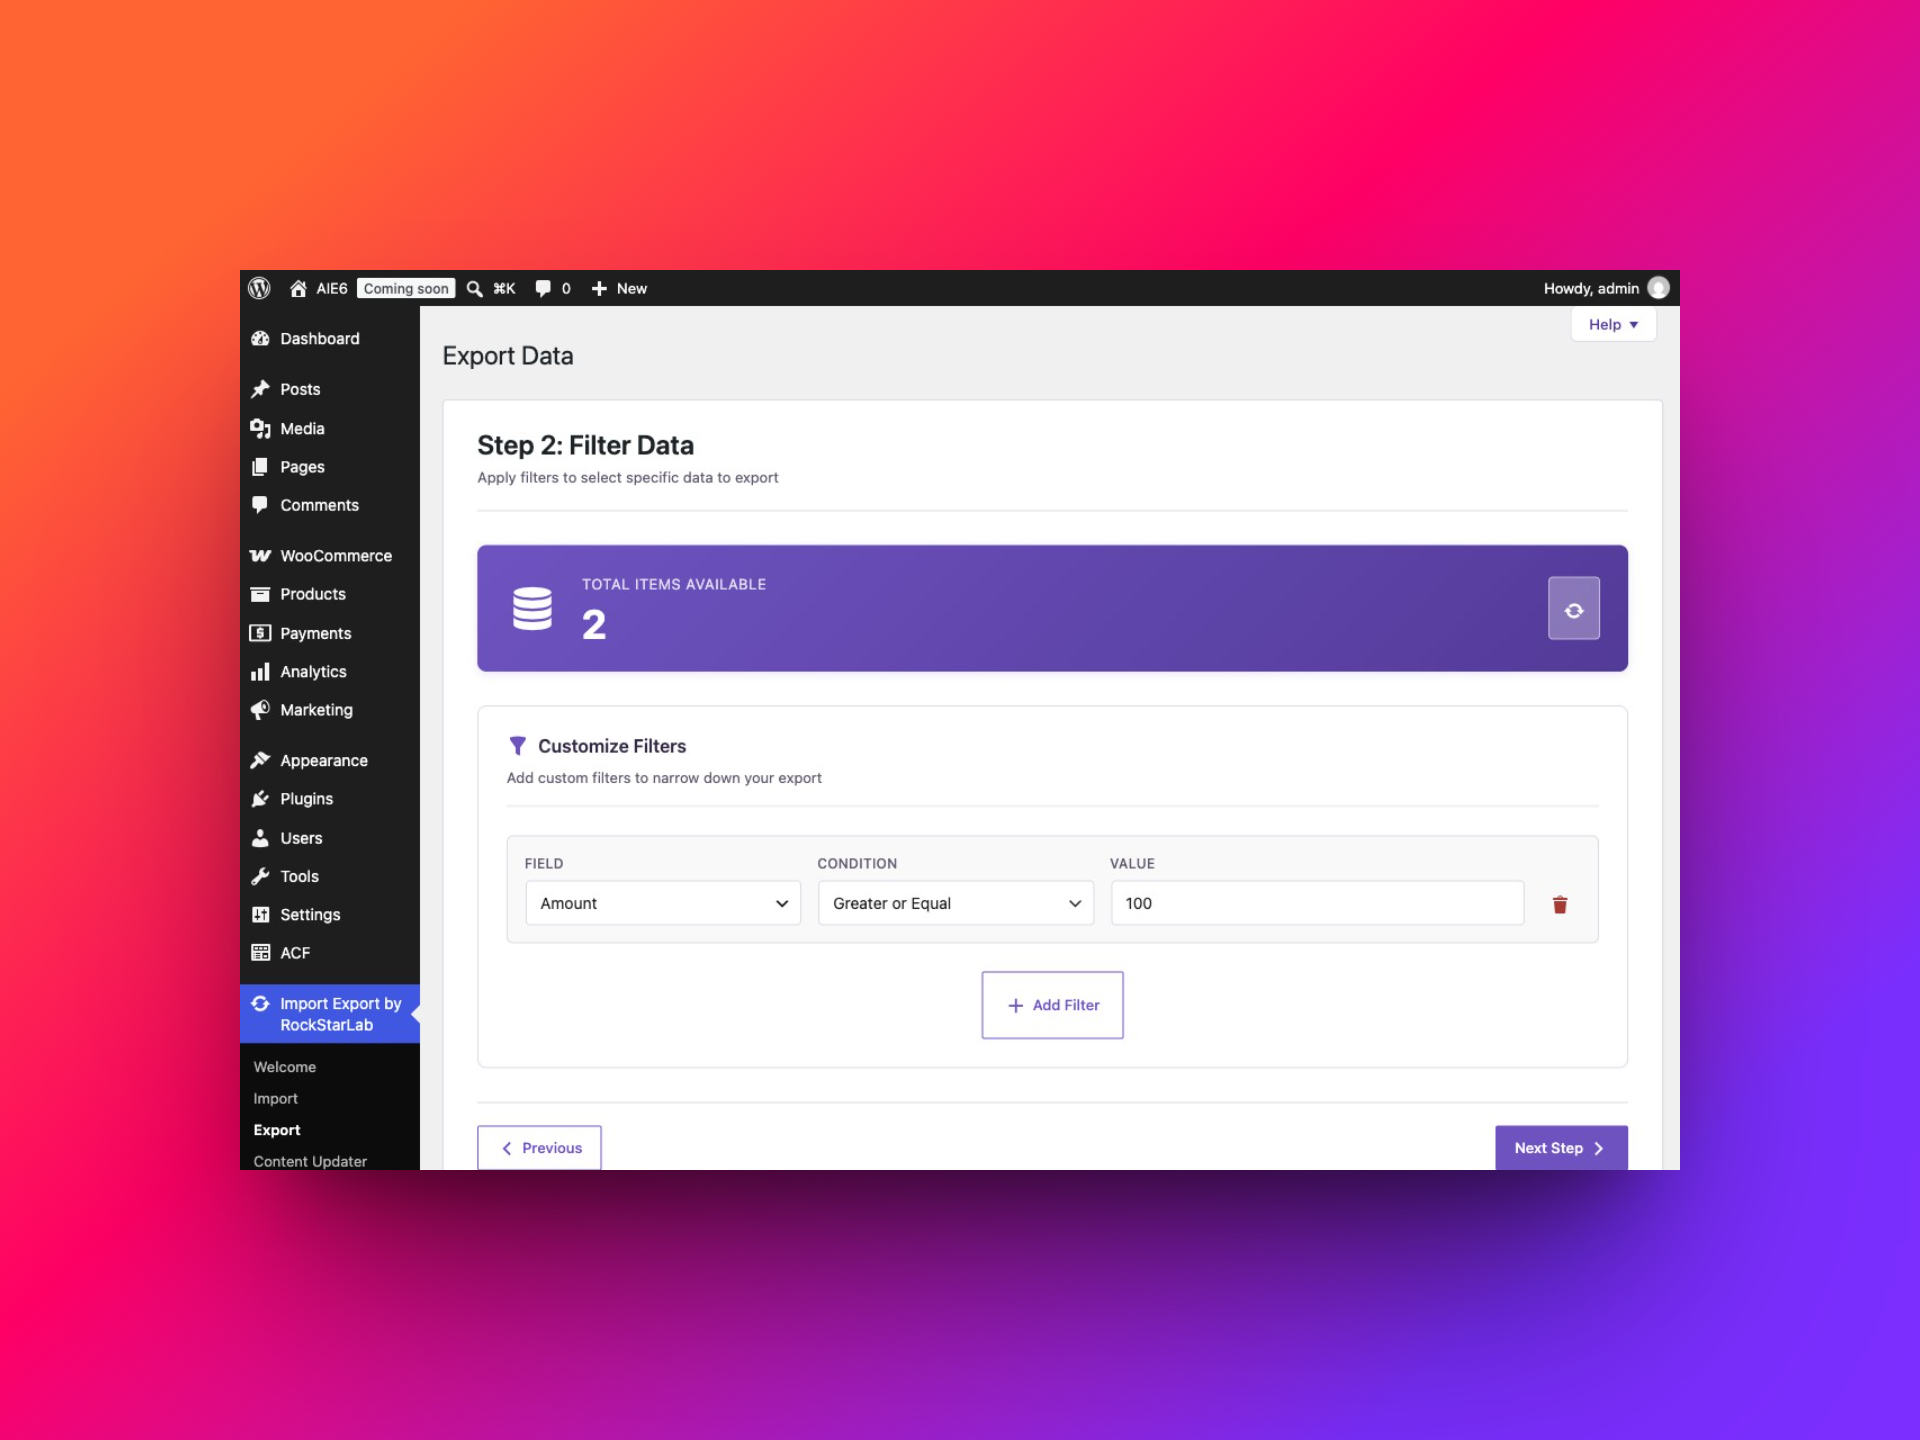
The four demonstration refunds were 49, 32, 315 and 181 GEL, so two meet a threshold of 100: 315 and 181 GEL. On a store that contains several currencies, add Currency → Equals → GEL, or the currency code you need, before comparing amounts. The same numeric amount in two currencies is not the same financial value.
Example 2: Refunds created during a month
To select refunds created in October 2026, add two rows:
- Date Created → Greater or Equal → 10026-10-01
- Date Created → Less Than → 2026-11-01
The first condition sets the start of the period. The second uses the beginning of the following month as the exclusive end. This makes the intended reporting window easier to read than a manually entered last-day time.
The October date range returns all four demonstration refunds, which were created on October 12. Wait for the counter to finish updating before checking the result. If your own selection returns zero, compare the date window with a known refund and confirm that you selected Date Created.
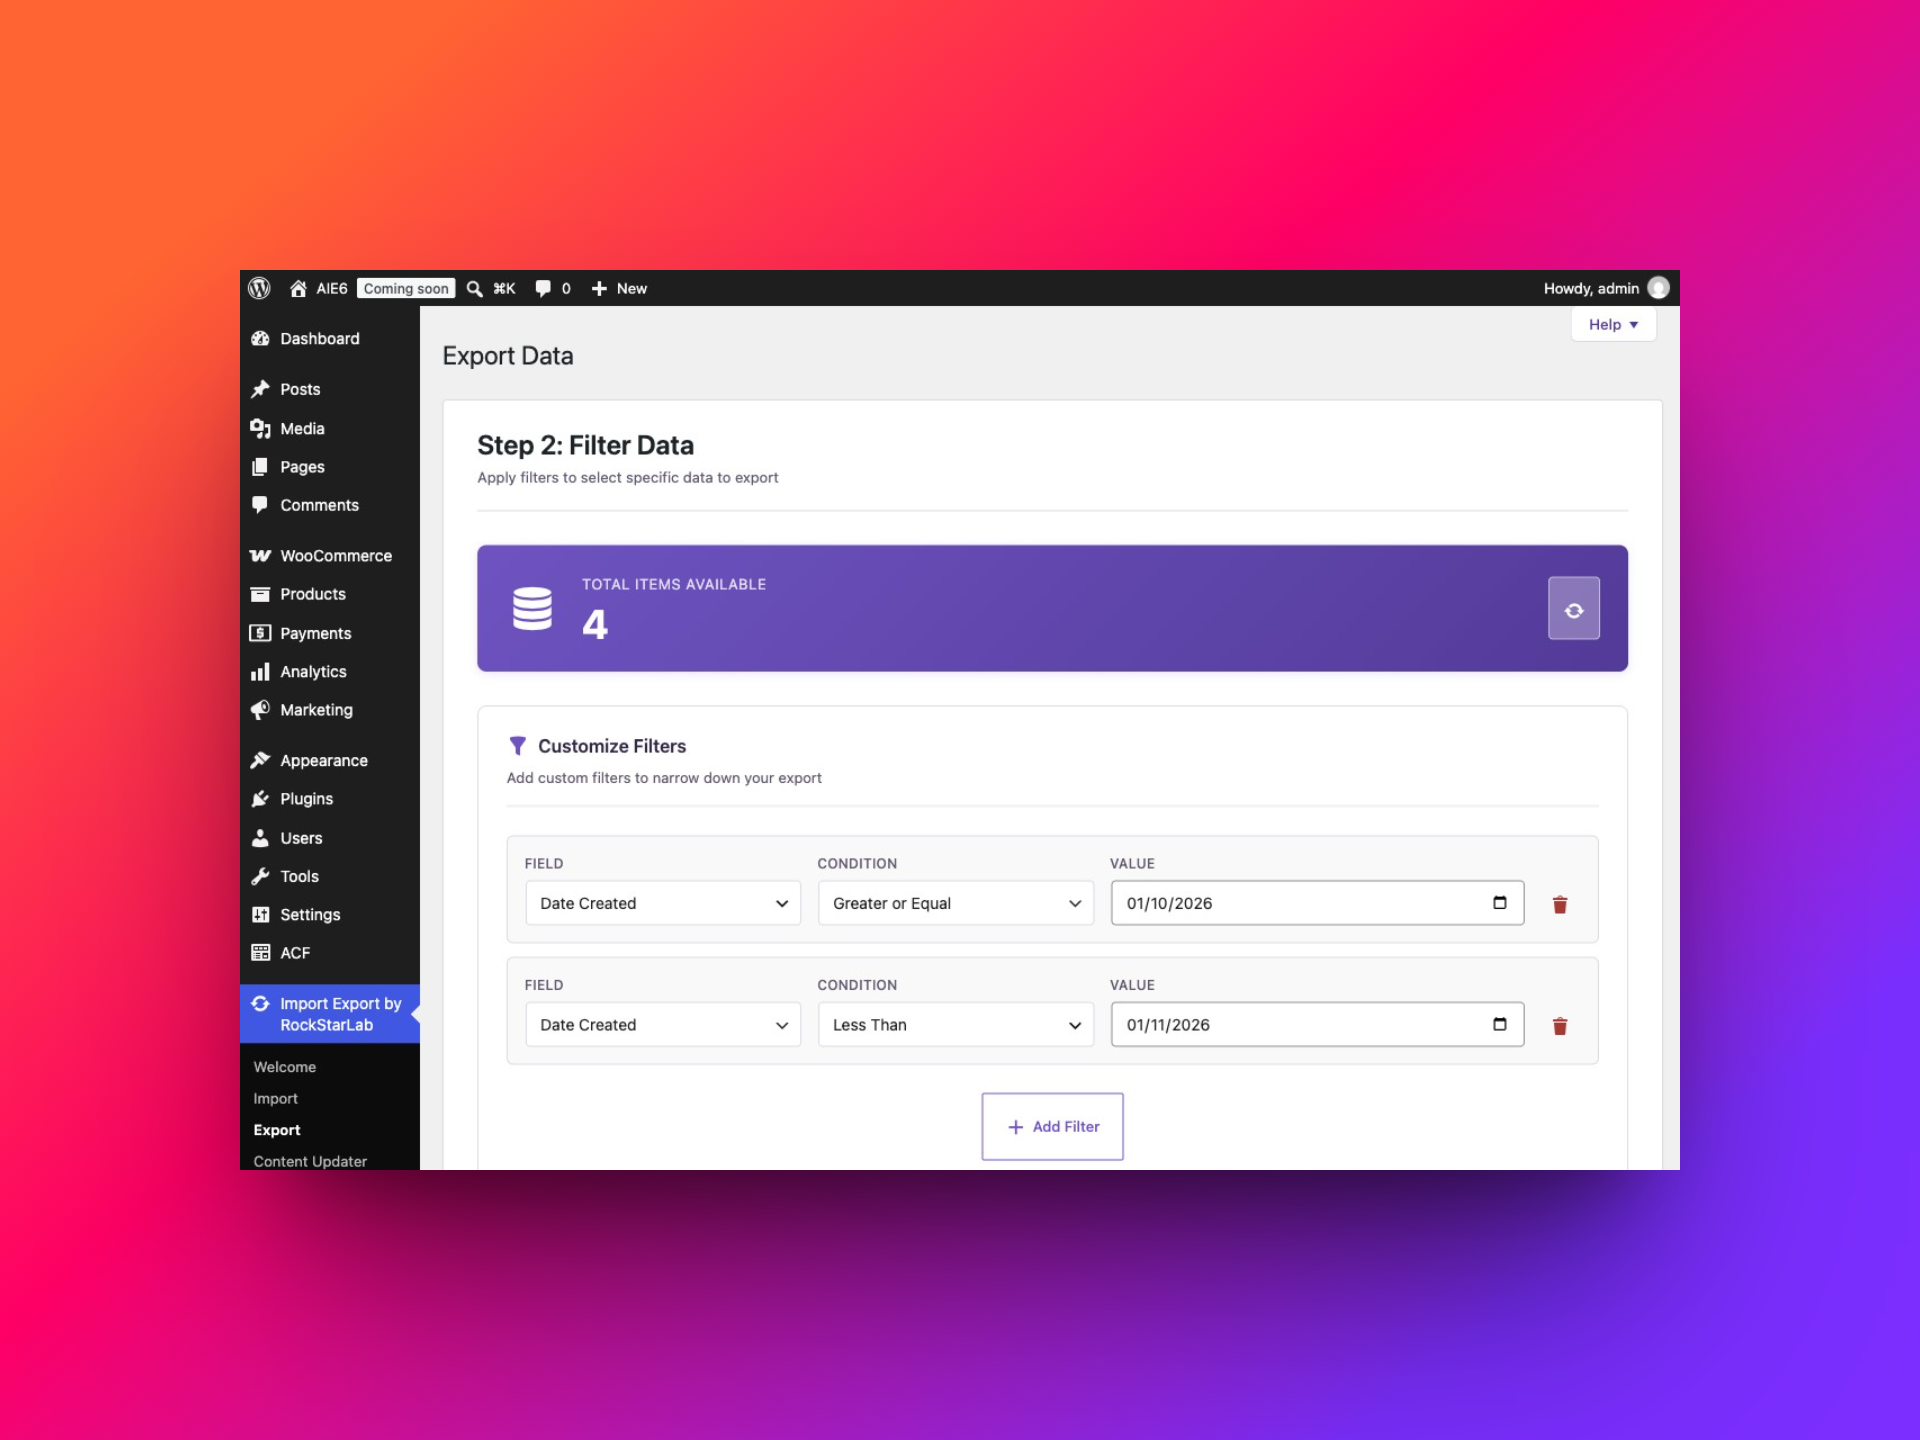
Filter on the refund creation date when your question is “Which refunds were recorded this month?” The original order may have been placed earlier. Check the exported timestamps against a known refund, especially if another reporting system uses a different time zone.
Example 3: Refunds with a particular reason
Choose Reason → Contains → fully refunded to find the reasons used in this demonstration. All four records contain “Order fully refunded.” Contains can match a phrase within a longer explanation. Use Is Empty when you need to review refunds without a recorded reason.
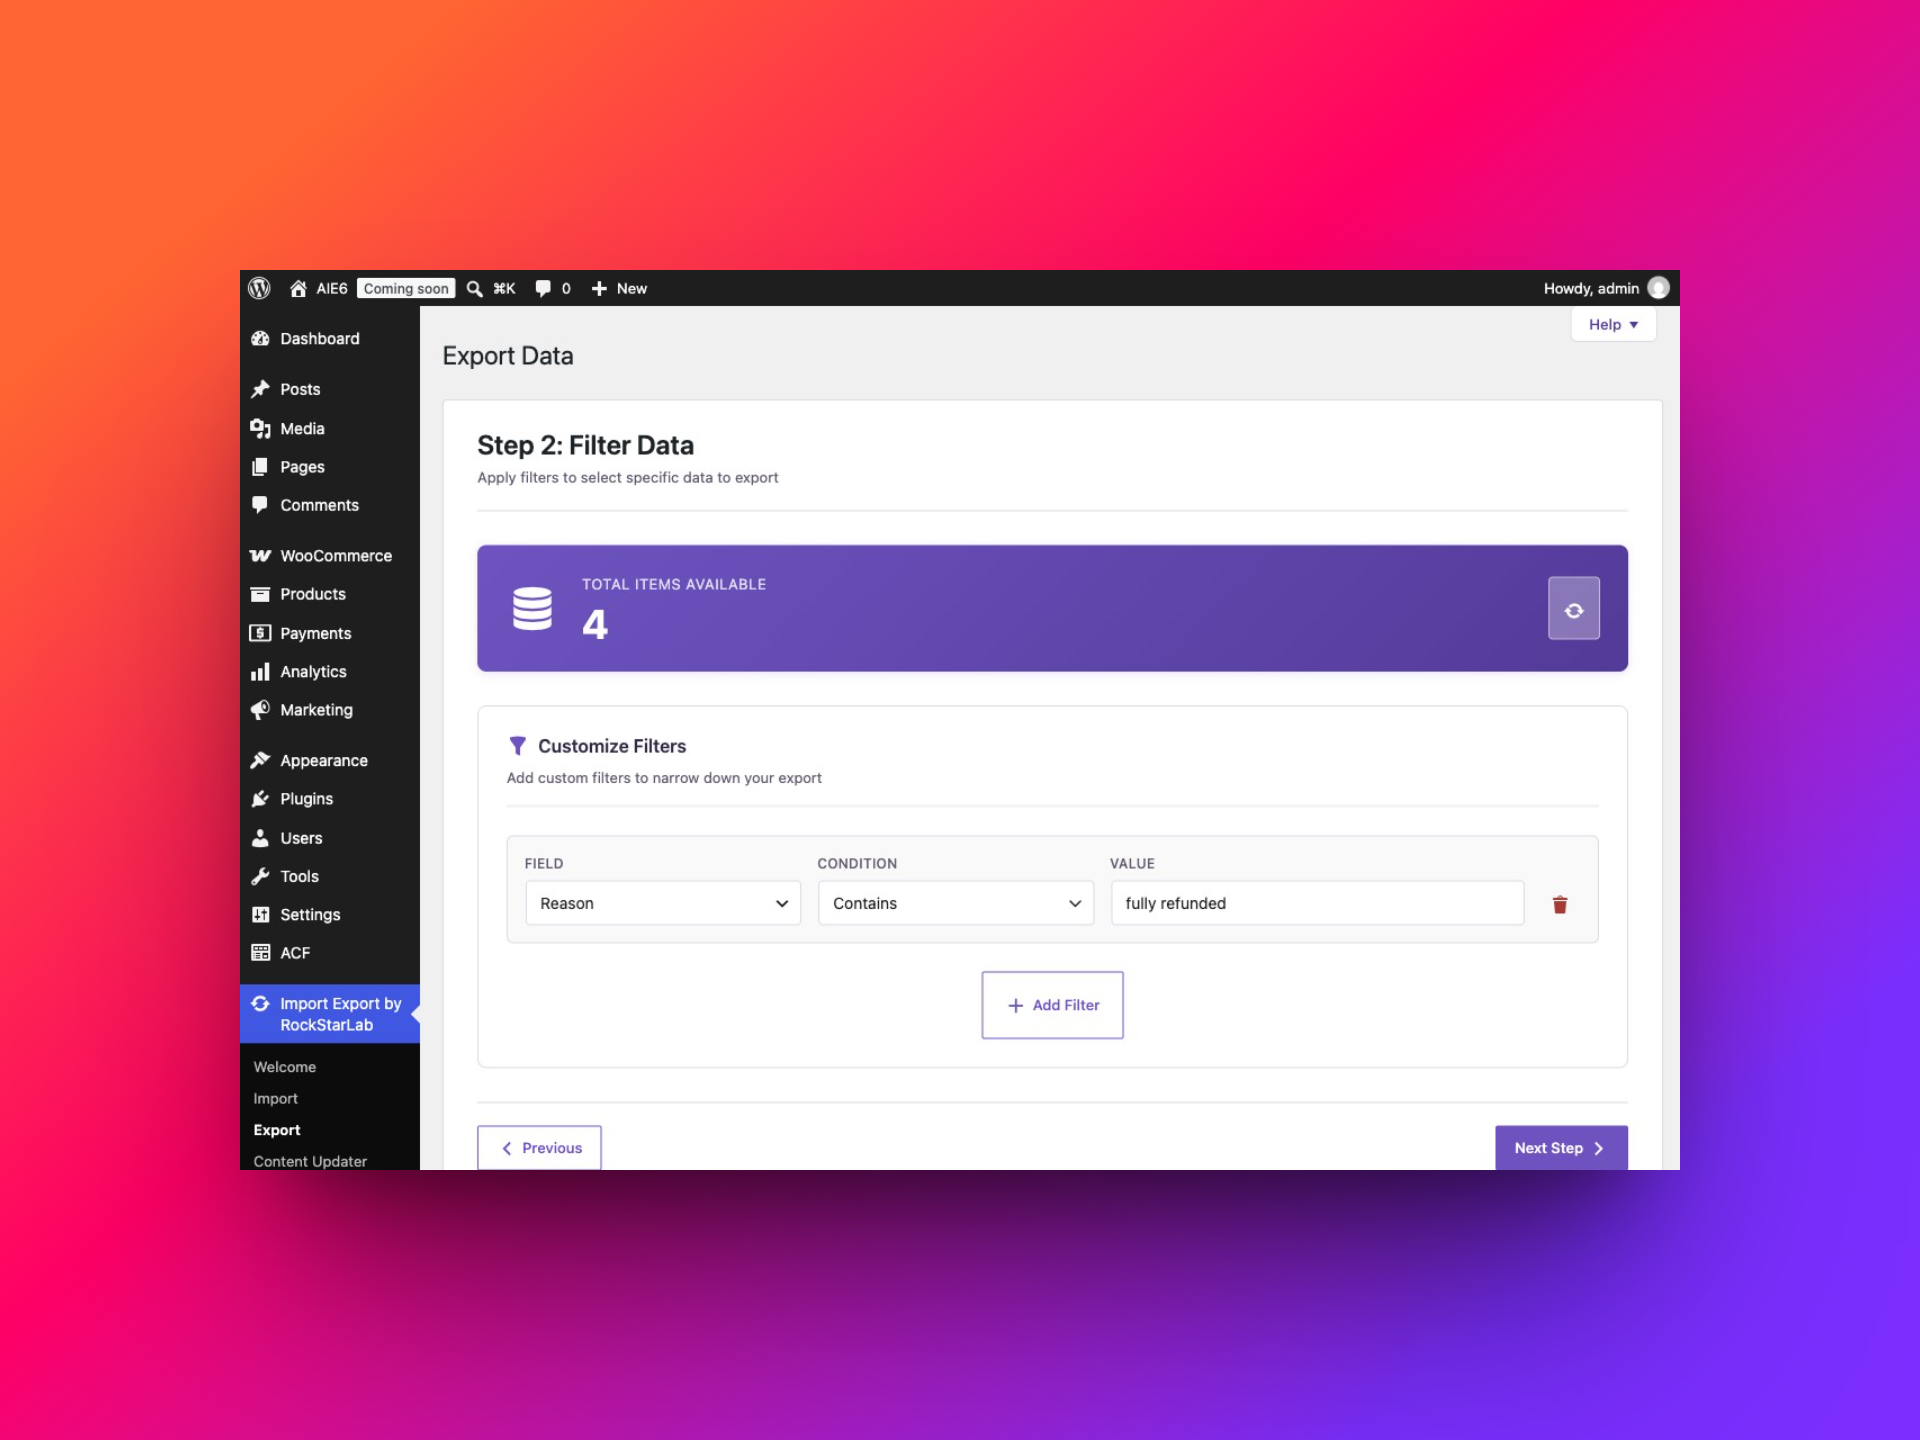
The completed count for this example is four. On another store, a keyword such as damaged can be useful if it appears in the recorded reasons. A keyword report will only be as consistent as the reason text entered in WooCommerce.
Example 4: Refunds belonging to a specific order
Select Parent Order ID (source/local fallback) → Equals and enter the order’s internal ID. In the demonstration data, parent order 315 has refund 316. Do not enter a refund ID into the parent order filter. If a separate plugin changes the order number displayed to customers, that number may differ from the internal order ID.
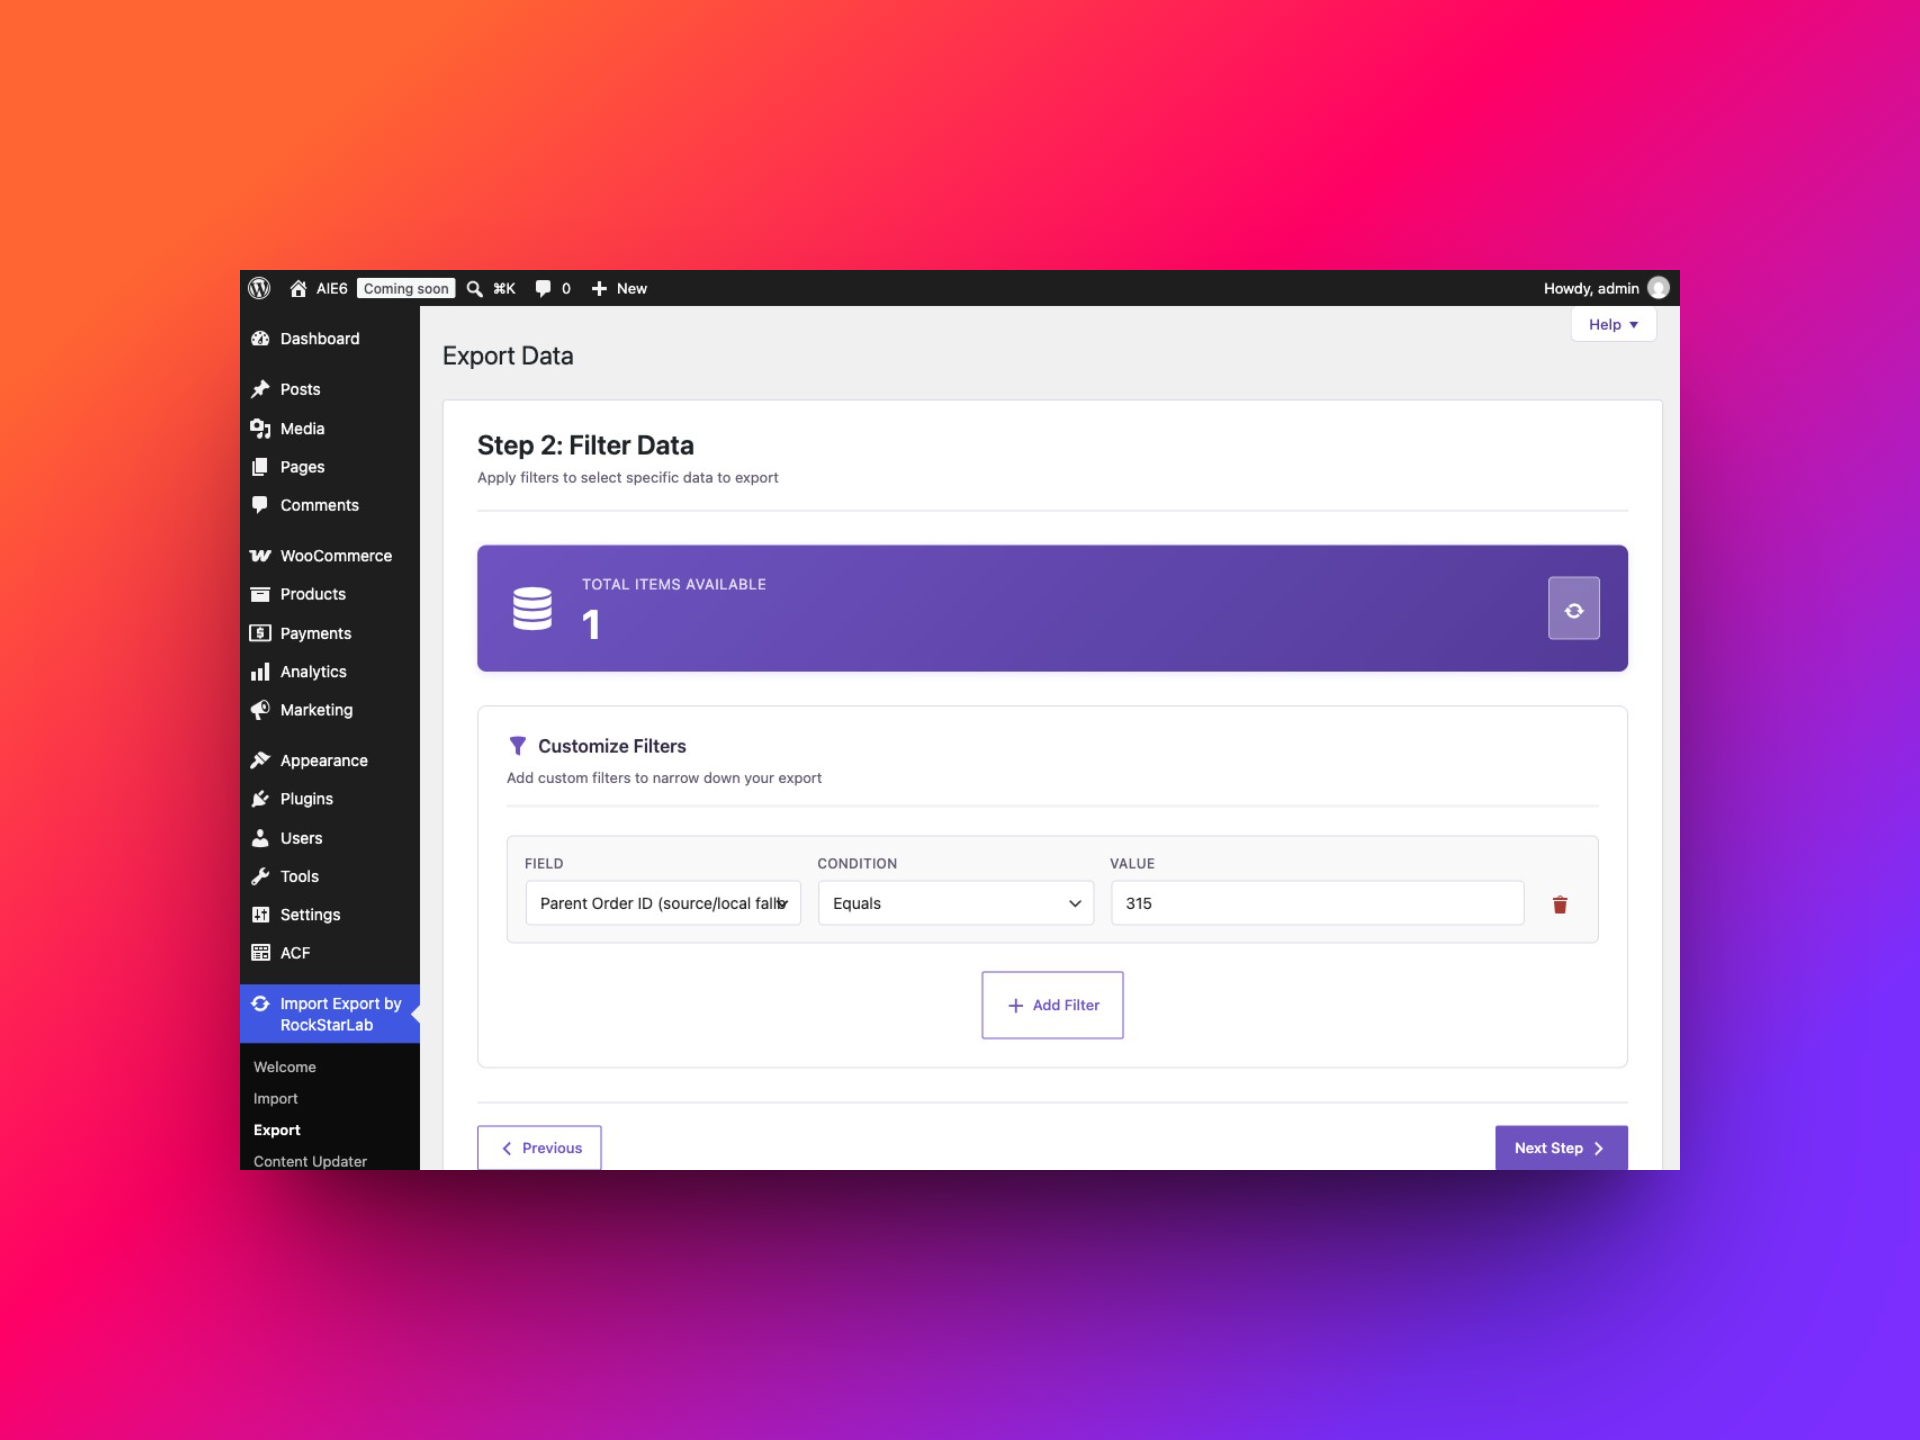
You can combine a parent order condition with an amount or date condition. For refund filters, each additional row narrows the selection. Remove the rows before continuing if you want the final file to contain all refunds.
Step 3: Choose the fields in the export file
In Select Fields, build the Export File Structure using the fields on the right. Click or drag individual fields into the structure, or choose Add all. Reorder columns to suit the person or system that will use the file.
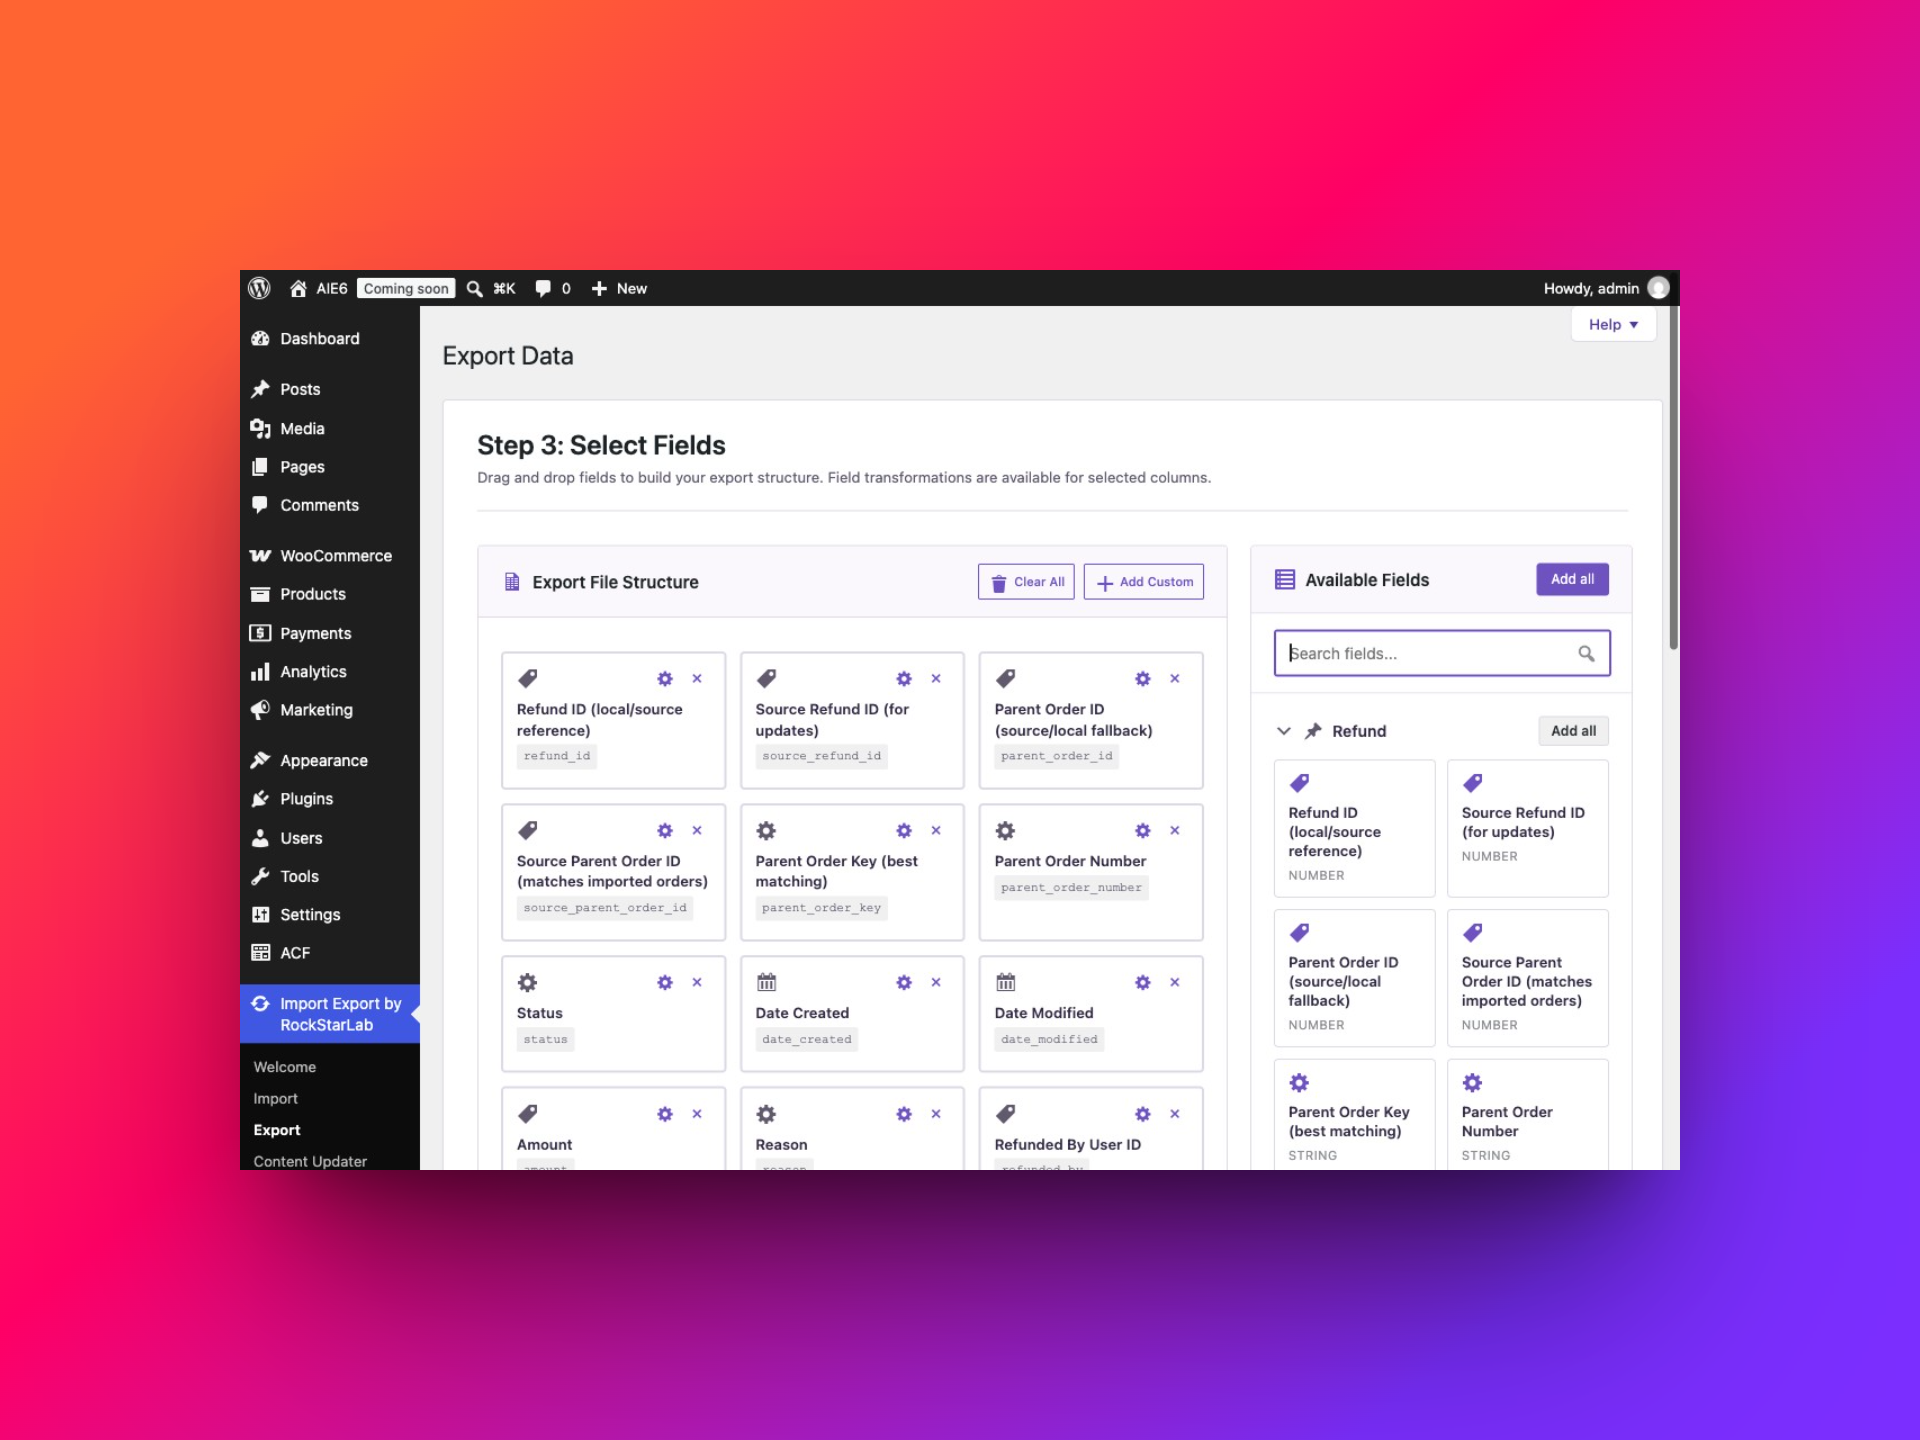
| Field | Use |
|---|---|
| Refund ID | Identify the individual refund and check for repeated rows. |
| Source Refund ID | Retain the source identity when a later import needs to recognize the same refund. |
| Parent Order ID / Source Parent Order ID | Connect the refund to the original order and retain its source reference. |
| Parent Order Key / Parent Order Number | Keep additional order matching and reporting references. |
| Status | Read the refund record’s status. Do not interpret it as the parent order’s current status. |
| Date Created / Date Modified | Report when the refund was created or last changed. |
| Amount / Currency | Read the refund value with its currency. |
| Reason / Refunded By User ID | Review the recorded explanation and user reference. |
| Line Items JSON | Preserve the refund’s item-level detail when it exists. |
| Meta JSON | Keep additional refund metadata for inspection or a compatible migration workflow. |
For a readable report, put the order number, refund ID, date, amount, currency and reason first. For a portable data file, keep the source IDs and order matching references too. An ID from one site is not automatically the same record on another site.
Line Items JSON is a structured value inside a column, not a promise of one spreadsheet row per refunded product. The test refunds had an empty array, [], in that field. That can happen when the refund record has no item-level breakdown. Check the order before assuming the export has lost information.
Optional: Use Functions to transform exported values
Selected columns have an Assign transformations control. It opens Field Transformations, where you can assign a library function, test it on a sample value and apply it to that column. When several functions are assigned, they run from top to bottom.
A sensible refund-report example is Trim Whitespace on Reason. It turns Item arrived damaged into Item arrived damaged without changing the wording. A Format Price function can make 49 appear as 49.00 when the receiving report requires two decimal places. Preview the result before using it, and remember that different currencies can use different decimal conventions.
Keep an untransformed export for archival or migration work. Do not add currency symbols to a numeric Amount column if another system expects a number, and do not turn IDs into formatted numbers with thousands separators. Export transformations change the outgoing values; they are not a reason to rewrite the underlying refund records.
The separate Functions section lets you work with reusable transformations. See the guide to transformation functions for more examples.
Step 4: Choose CSV, Excel or another export format
Choose CSV for a simple file that can be opened in spreadsheet applications or passed to another system. Choose XLSX when an Excel workbook is the preferred deliverable. ODS suits OpenDocument spreadsheet workflows; JSON and XML are available for systems that expect those formats.
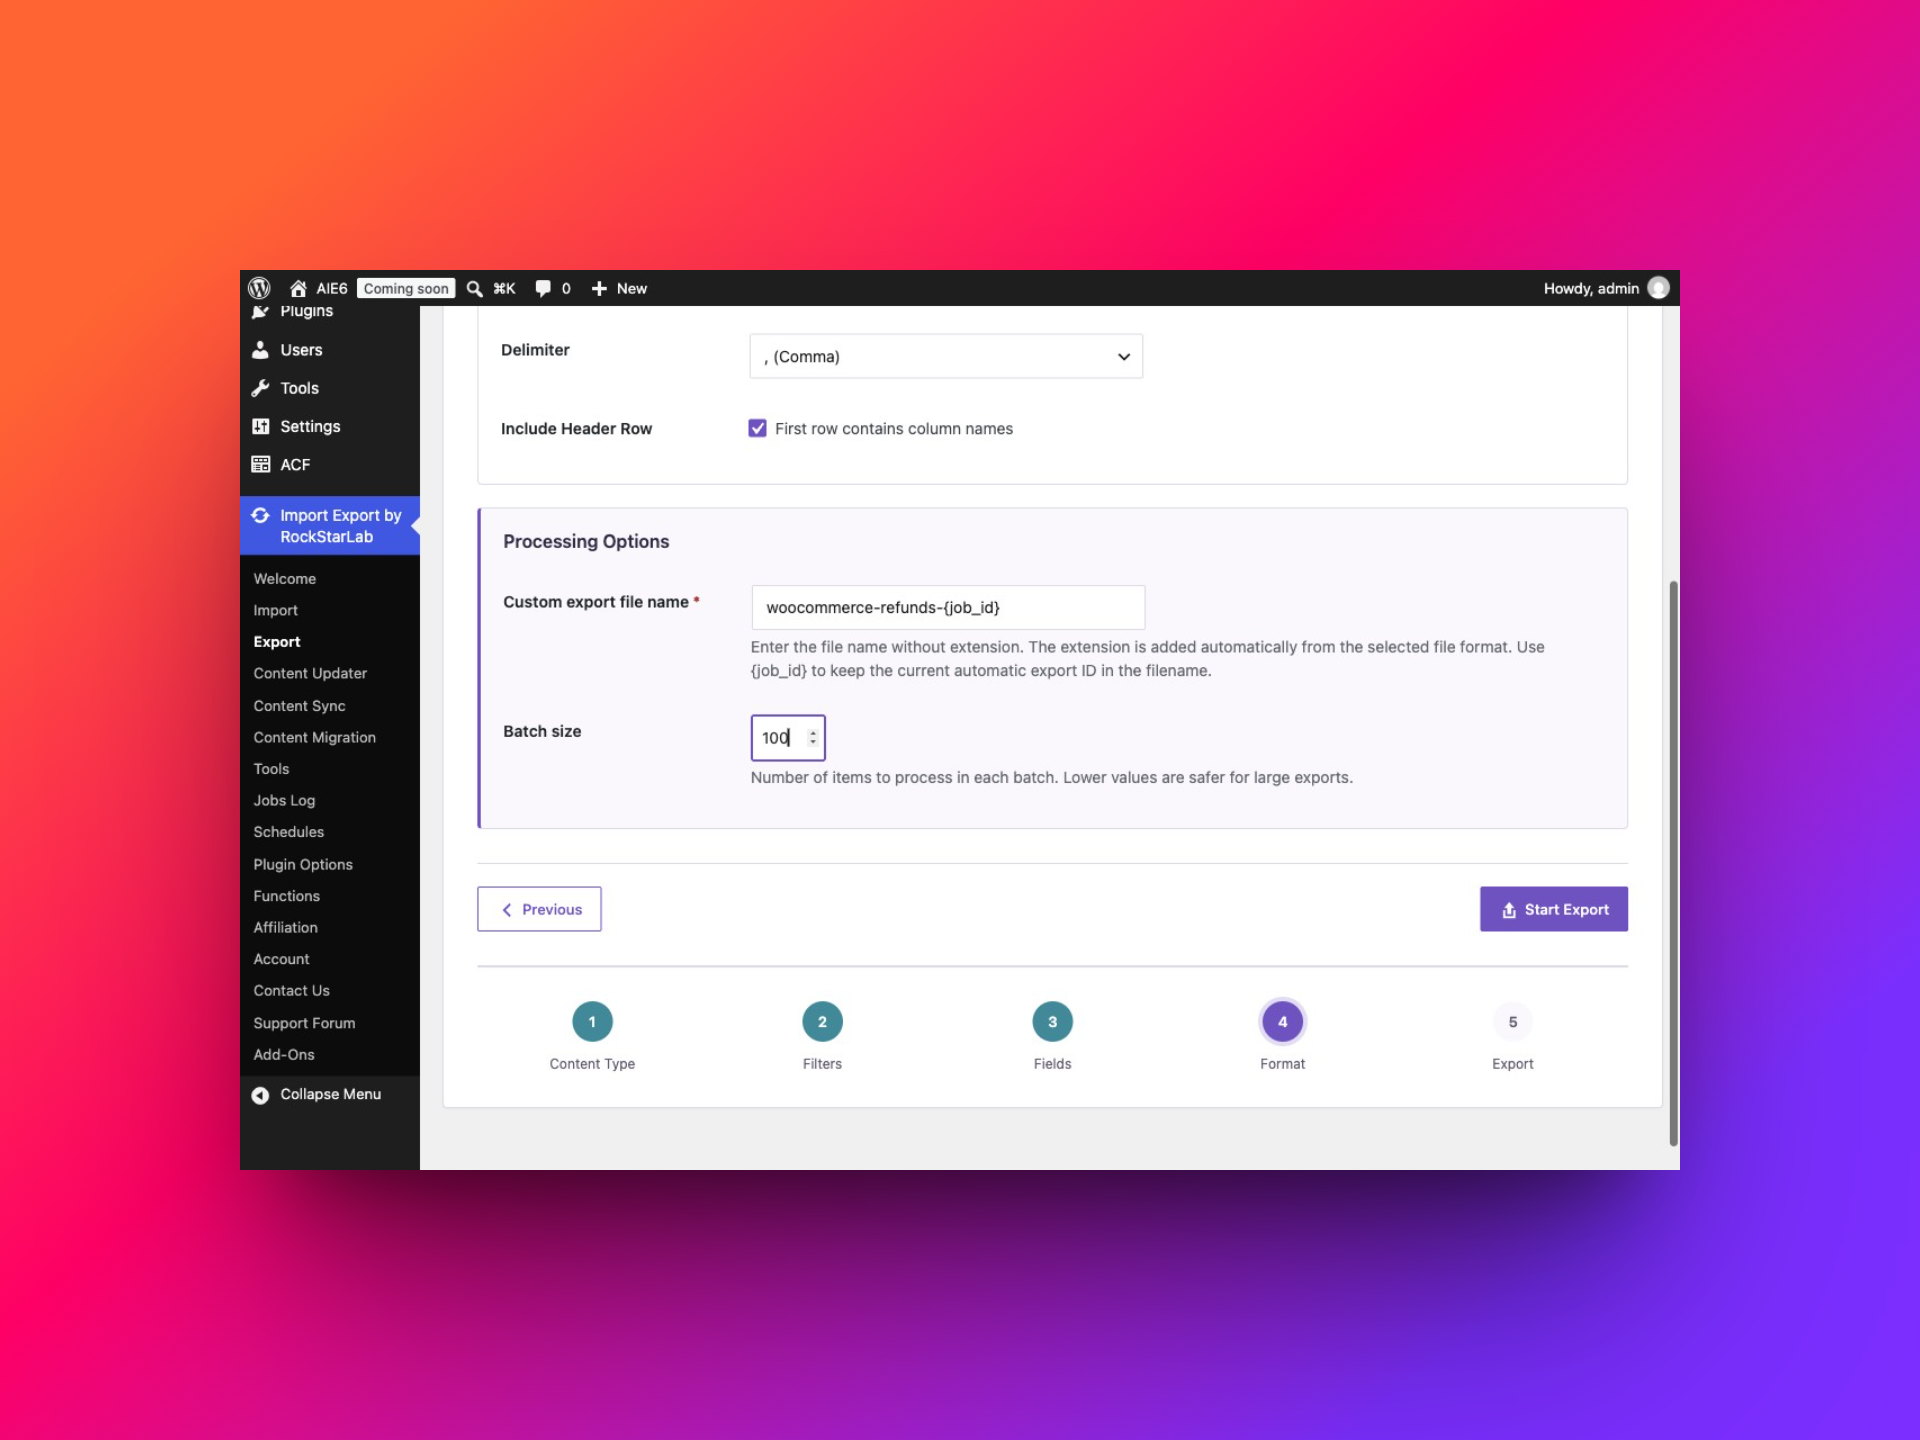
For CSV, select the delimiter the receiving application expects. The interface offers comma, semicolon, tab, pipe and a custom delimiter. Keep Include Header Row enabled so each column is identifiable.
Enter the custom file name without its extension. For example, woocommerce-refunds-{job_id} retains the job identifier in the filename; the plugin adds the extension for the format you selected.
Batch size controls how many records are processed in a batch. It is not a limit on the total number of refunds to export. Choose a value suitable for your hosting environment and validate the final file, particularly on an older plugin release or a large store.
Step 5: Run the export, download it and check the contents
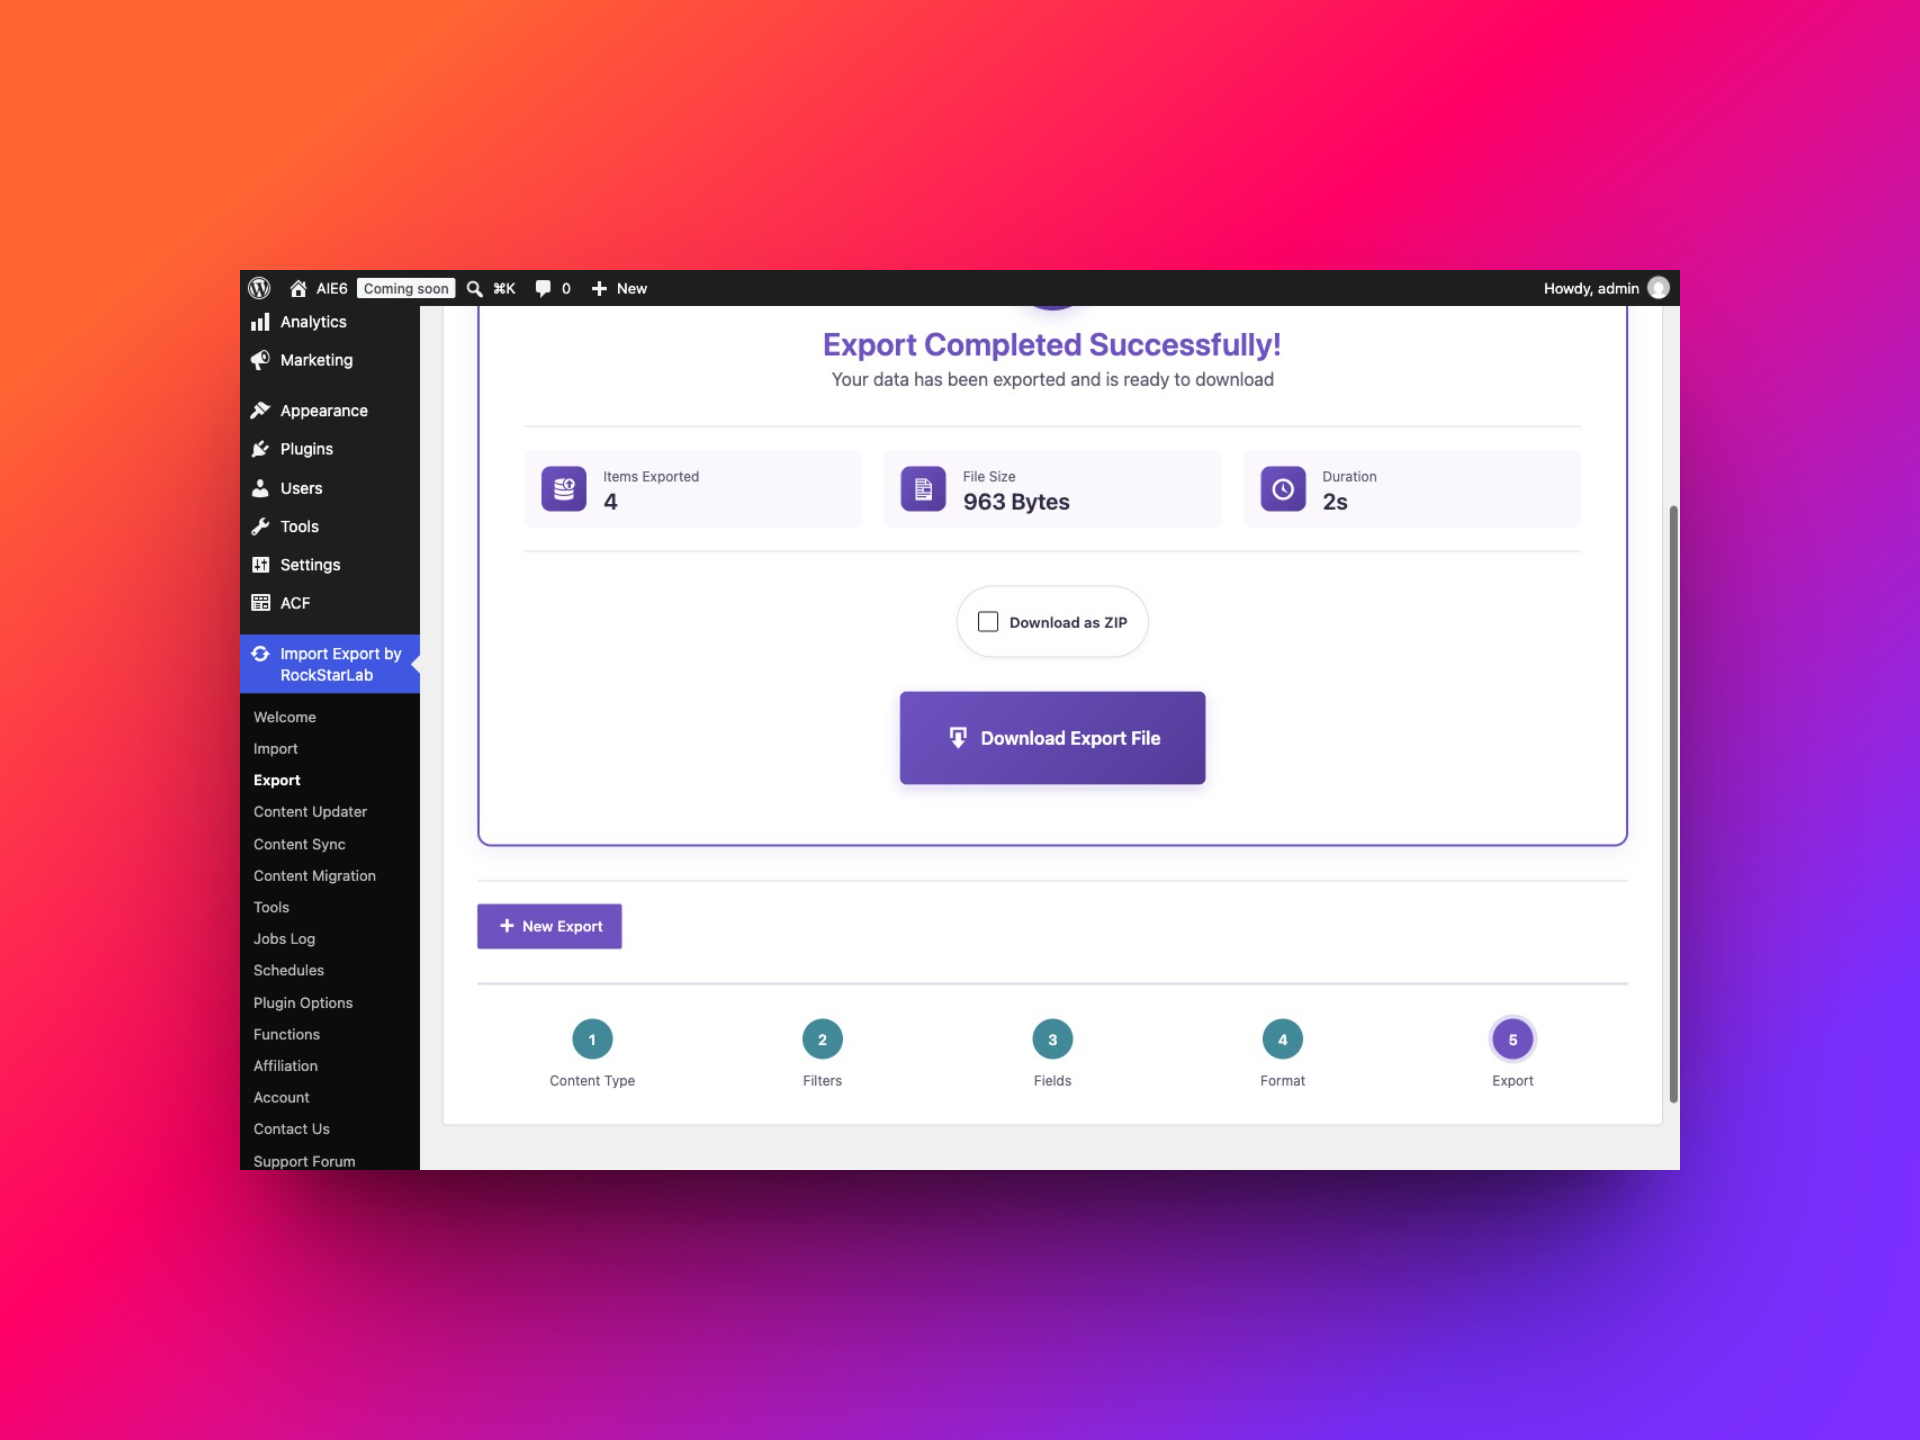
Click Start Export. When the job finishes, the completion screen shows the exported item count, file size and duration. Click Download Export File, or enable Download as ZIP first if you want a compressed download.
Open the file and check the following before using it:
- The number of data rows matches the expected refund count; do not count the header.
- Refund IDs are present and do not repeat unexpectedly.
- Each refund points to the intended parent order.
- Amounts and currencies match a few refunds opened in WooCommerce.
- Reasons containing punctuation remain in one cell.
- Dates and JSON columns have not been reformatted by the spreadsheet application.
In the test CSV, the four amounts were 49, 32, 315 and 181, all in GEL. Their total is 577 GEL. The amounts are exported as positive refund amounts, so do not assume that the Amount column contains negative sales transactions. Decide how your accounting worksheet represents refunds before combining this file with revenue data.
Find completed refund exports in Jobs Log
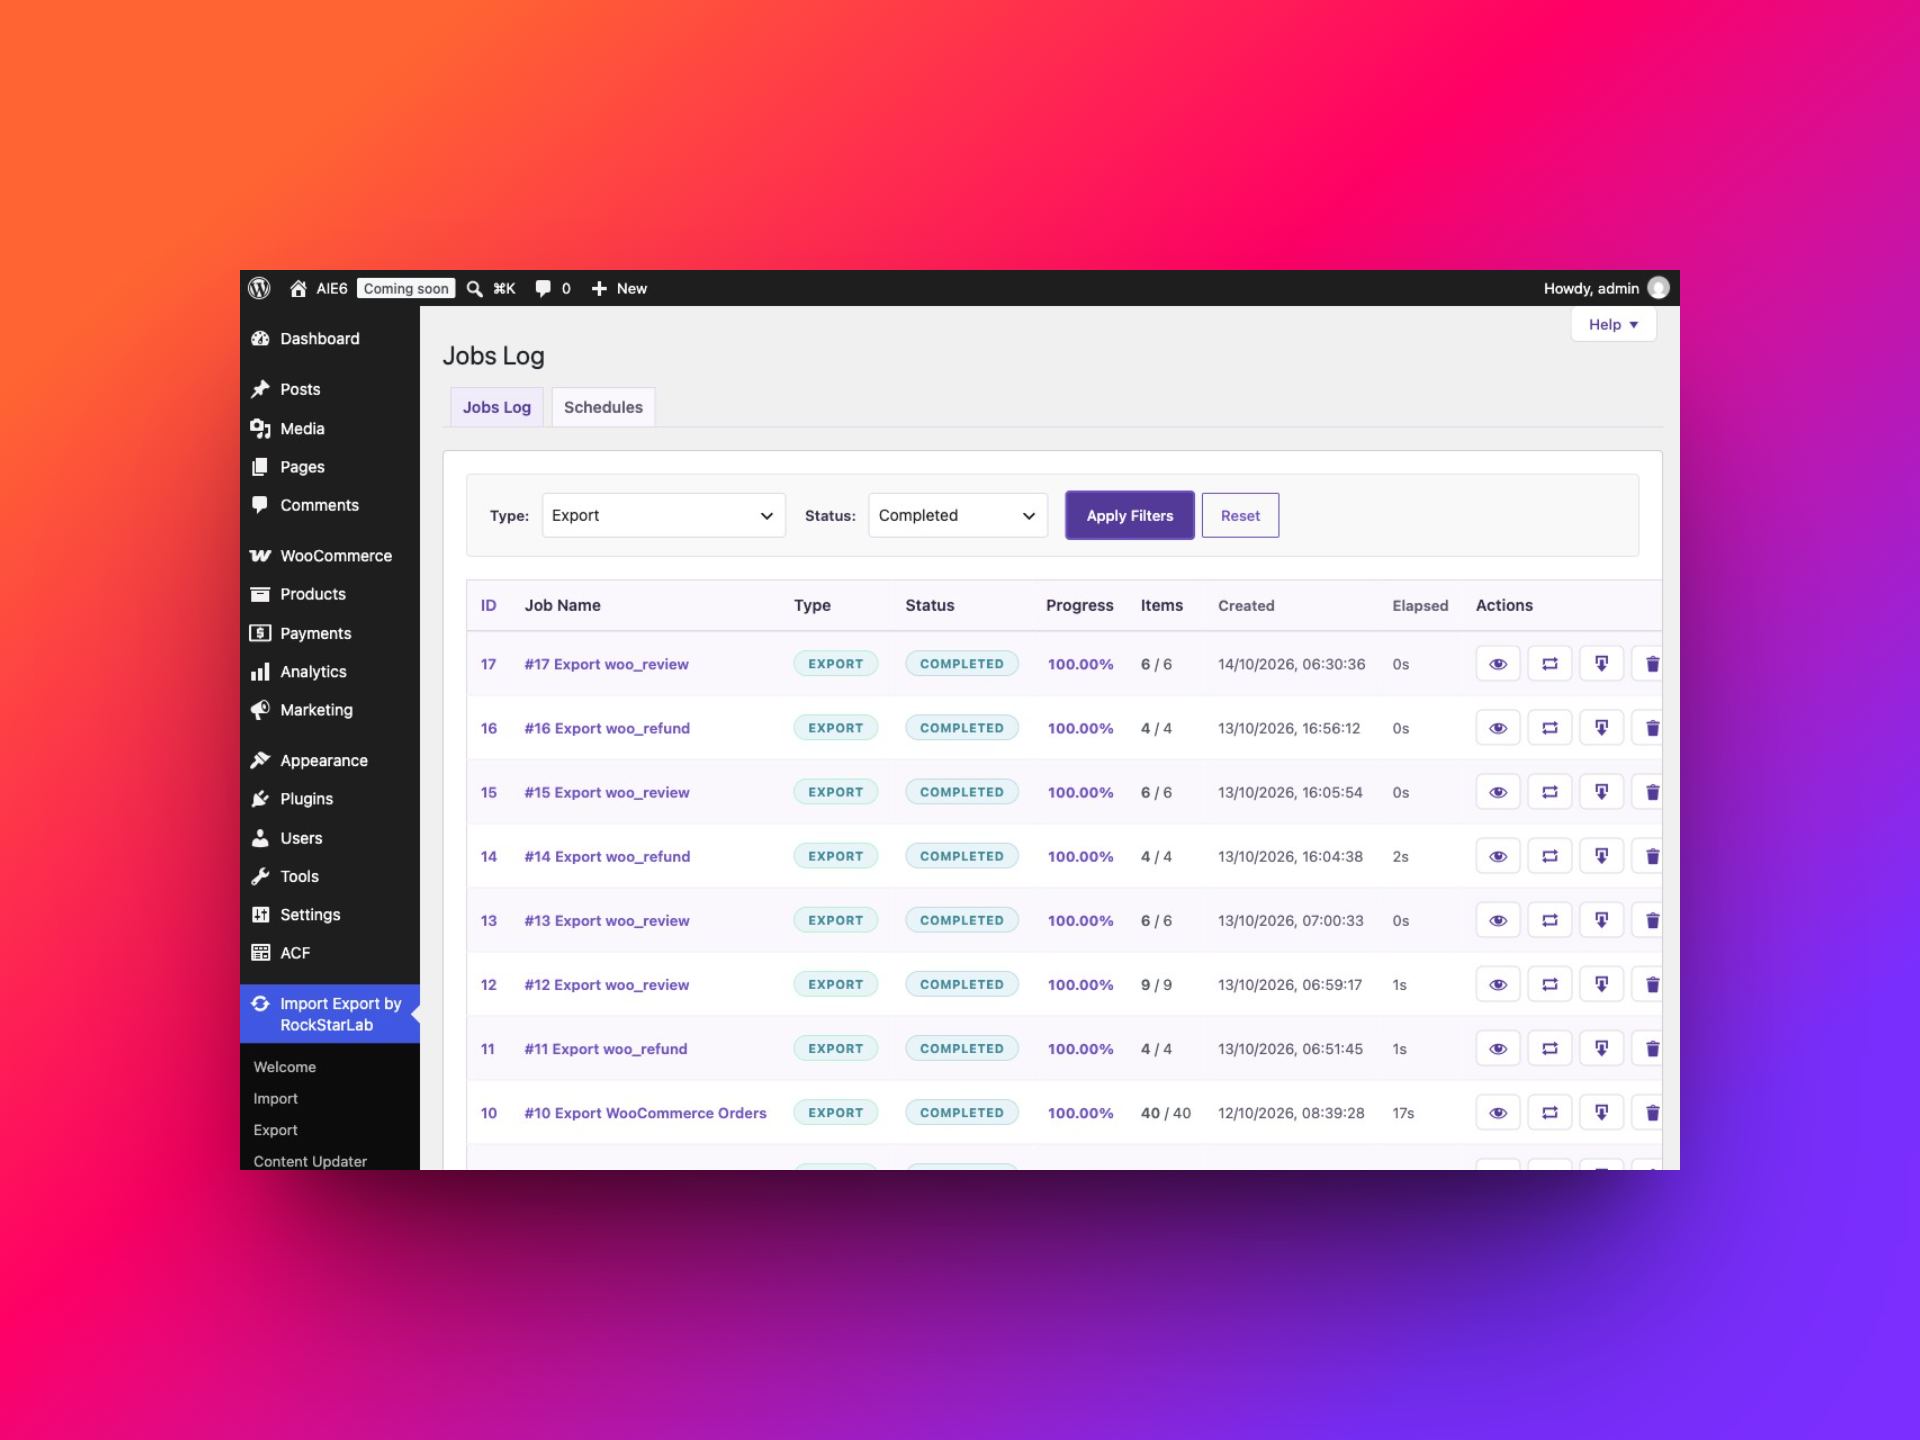
Open Import Export by RockStarLab → Jobs Log after an export. Filter the list by Export and, when helpful, Completed. Find the correct operation by its job ID and creation time.
The log gives you a place to check the job’s status and item counts after leaving the export wizard. Open its details to review the stored configuration and results. Use the download action while the export file remains available. If the job failed, read the details before running it again; repeating the same configuration does not resolve a bad filter or a processing error.
Keep a record of which job produced an important report. A later export may contain refunds that did not exist when the earlier file was generated. For the broader workflow, see how to use Jobs Log and schedules.
Set up a scheduled WooCommerce refund export
Once you have checked a successful export, its saved job can provide the configuration for a schedule. Open Schedules, name the schedule, choose the verified refund export as the Source Job, then choose a one-time or recurring run. Recurring intervals include hourly, twice daily, daily and weekly. Set the first execution in the time zone shown by the interface and add the schedule.
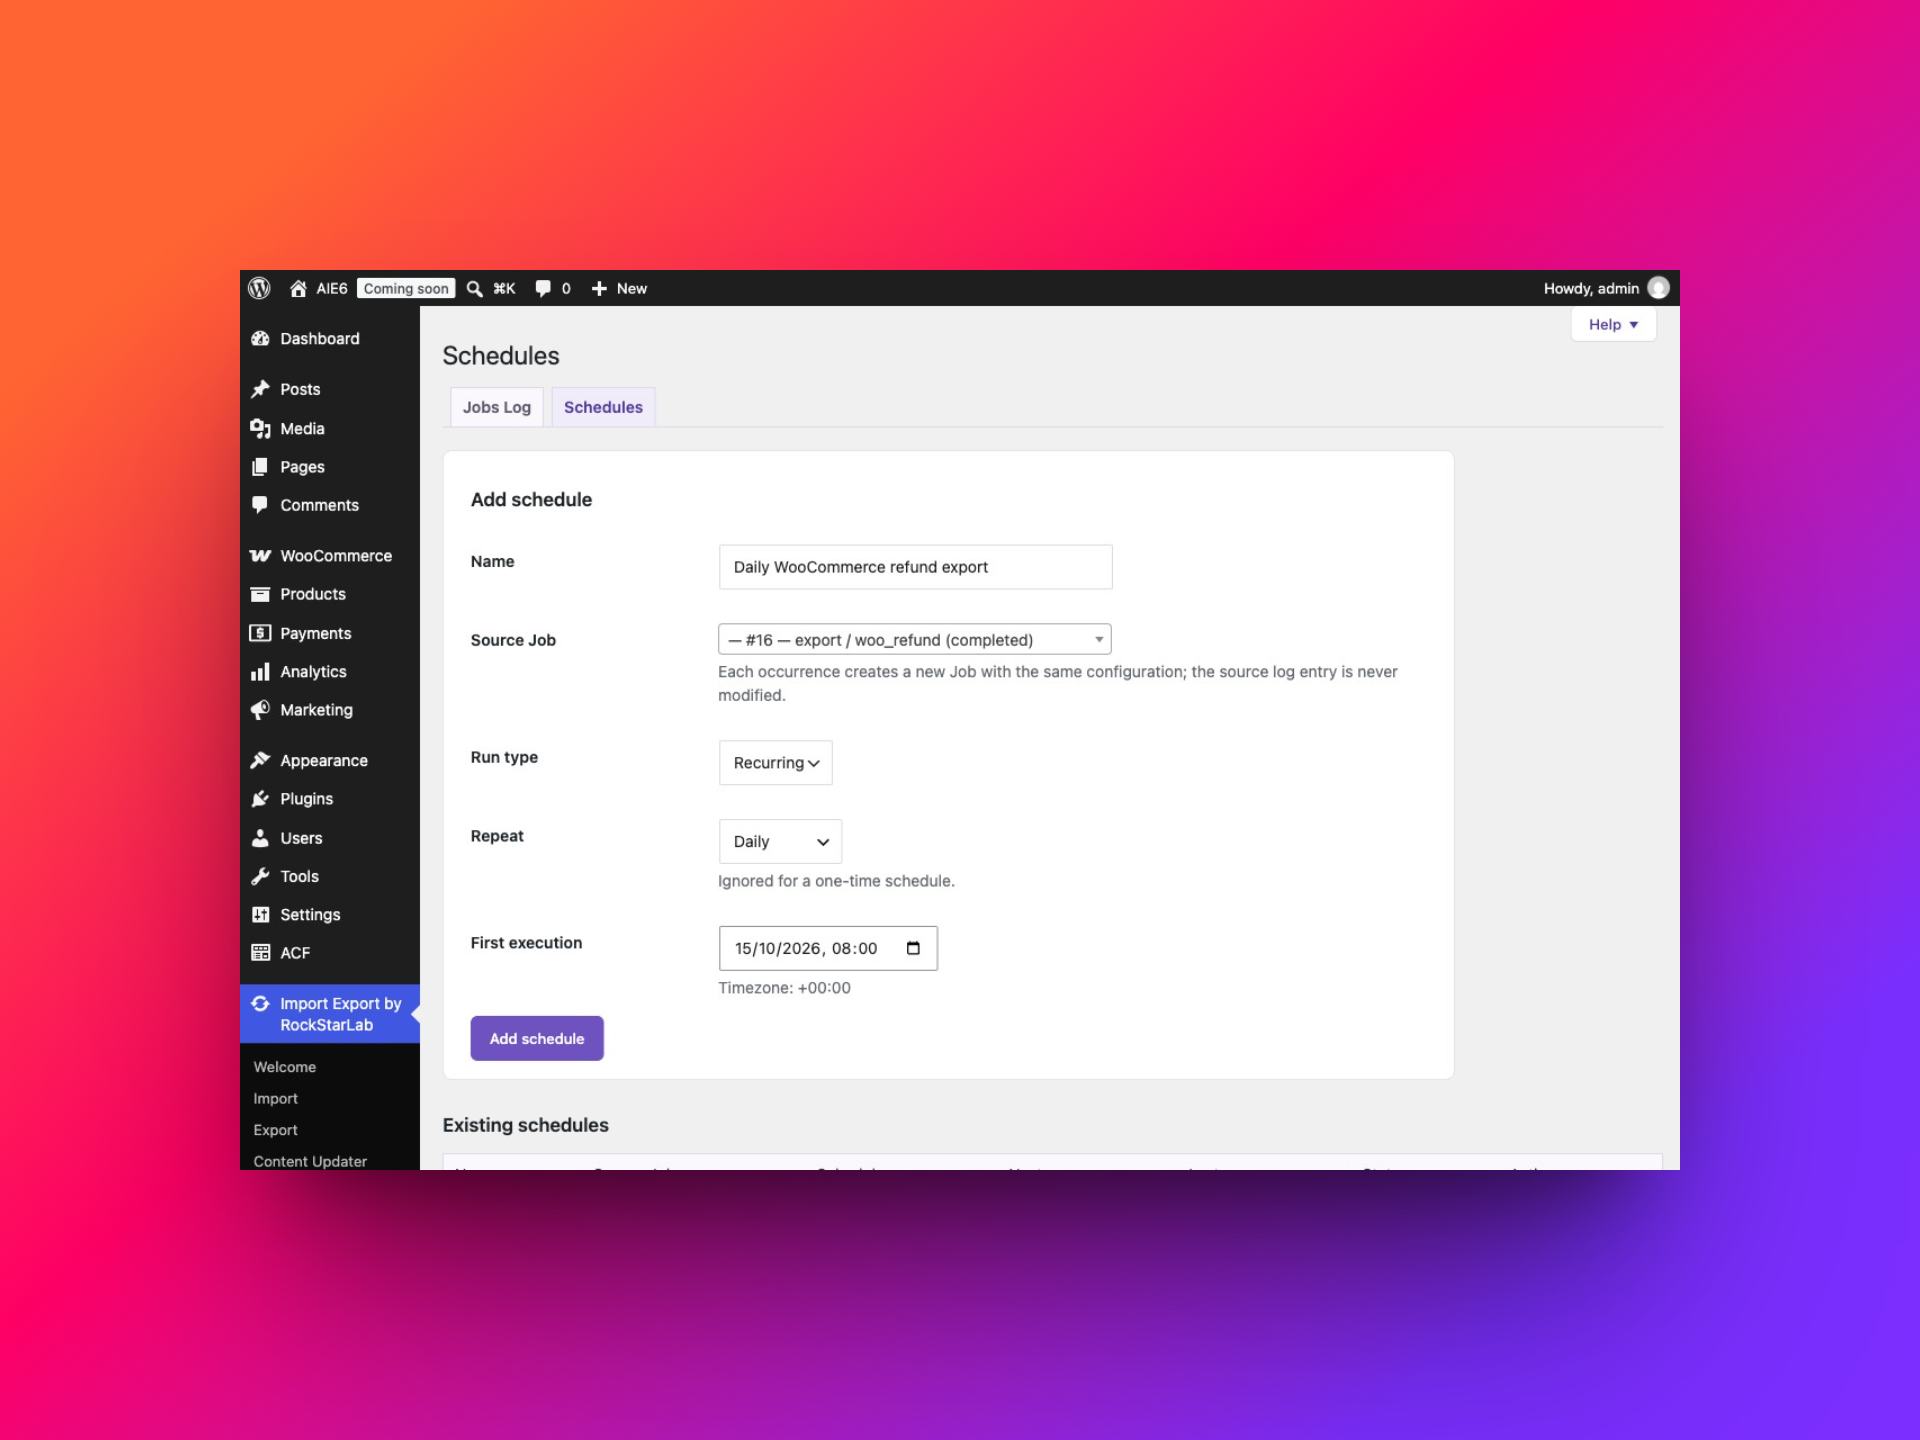
For example, a daily export with no filters can produce a fresh complete refund snapshot. A weekly report can reuse a deliberately chosen subset. Each scheduled occurrence creates its own job, so use Jobs Log to check the run and retrieve its output.
A saved absolute date filter remains an absolute date filter. Scheduling the October example every week does not automatically change it to “last seven days.” Use a full snapshot if that meets your needs, or update the reporting window deliberately. Do not describe a recurring full export as incremental: the same earlier refunds can legitimately appear in each new file.
WordPress scheduling depends on the site’s background processing and cron setup. Check the first scheduled result and investigate overdue jobs, especially on a low-traffic or local site. Scheduling an export also does not imply that the file is automatically emailed or sent to an external accounting service.
Frequently asked questions
Can I export WooCommerce refunds to Excel?
Yes. Select XLSX at the format step. You can also open a CSV in Excel, but choose the correct delimiter and preserve IDs as text when appropriate.
Will the export include partial refunds?
The refund content type works with refund records rather than only parent orders marked Refunded. Check the individual refund amount and order reference. The demonstration store contained full refunds, so its screenshots do not illustrate a partial-refund example.
Why does a refund show Completed instead of Refunded?
The exported Status belongs to the refund record. It should not be treated as the parent order’s status.
Why are some refund reasons or line items empty?
The export can only include what is recorded on the refund. Inspect the source order and refund. An empty reason or an empty line-items array is not automatically an export failure.
Can I export only one customer’s refunds?
The refund screen shown here does not provide a billing email filter. Export the order references and match them to an order report, or identify the customer’s relevant order IDs first and filter by parent order. Do not substitute Refunded By User ID; that is a different reference.
Where can I find more walkthroughs?
The Import Export video tutorials cover the broader export, mapping, transformation and scheduling workflows.