
If you upload files to your WordPress website through FTP, SFTP, hosting file manager, or another server-level tool, WordPress will not automatically register those files in the Media Library.
The files may exist on the server, but they will not appear in the WordPress admin until they are properly added as media attachments.
In this video, we show how to use Import Export by RockStarLab to scan a folder on your website, detect files, avoid duplicates, and register them in the WordPress Media Library.
When do you need Media Sync?
Media Sync is useful when files already exist on your server, but WordPress does not know about them yet.
This commonly happens when you:
- Upload files through FTP or SFTP
- Move files using a hosting file manager
- Migrate media from another website
- Copy an uploads folder manually
- Receive a folder of images, PDFs, audio files, or videos from a client
- Need to register existing server files in the WordPress Media Library
Instead of uploading everything again through the WordPress admin, you can scan the existing folder and register the files directly.
Example folder structure
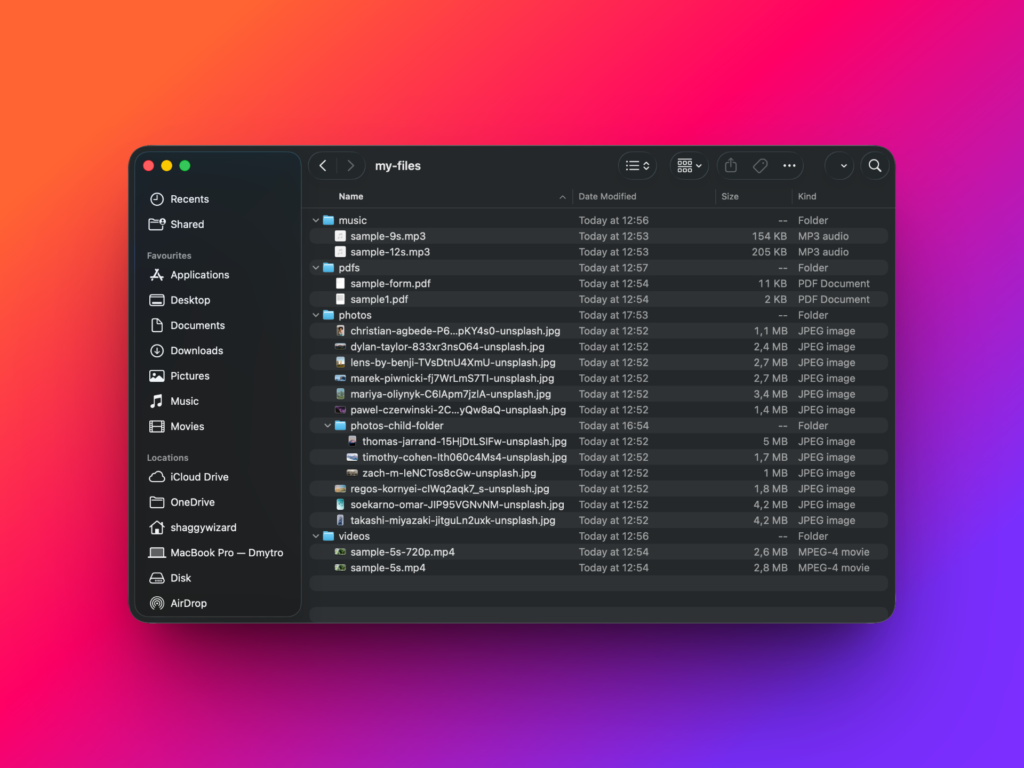
For this lesson, we use a test folder inside the WordPress uploads directory. The folder is called My Files, and it contains several subfolders:
- Music with MP3 files
- PDFs with PDF documents
- Photos with JPEG images
- Photos Child Folder with nested image files
- Videos with video files
The goal is to register all supported files in the WordPress Media Library and, optionally, preserve the same folder structure inside the Media Library.
Optional: Preserve folders with Real Media Library
WordPress Media Library does not include real folders by default. If you want to organize media into virtual folders, you can use a plugin such as Real Media Library.
This step is optional. Import Export by RockStarLab can register files in the Media Library without Real Media Library.
However, Real Media Library is useful when you want to keep media organized into folders, especially on websites with many images, PDFs, videos, or audio files.
When the Real Media Library option is enabled during Media Sync, the plugin can recreate the original server folder structure as virtual folders inside the WordPress Media Library.
Step 1: Build the Media Hash Index first
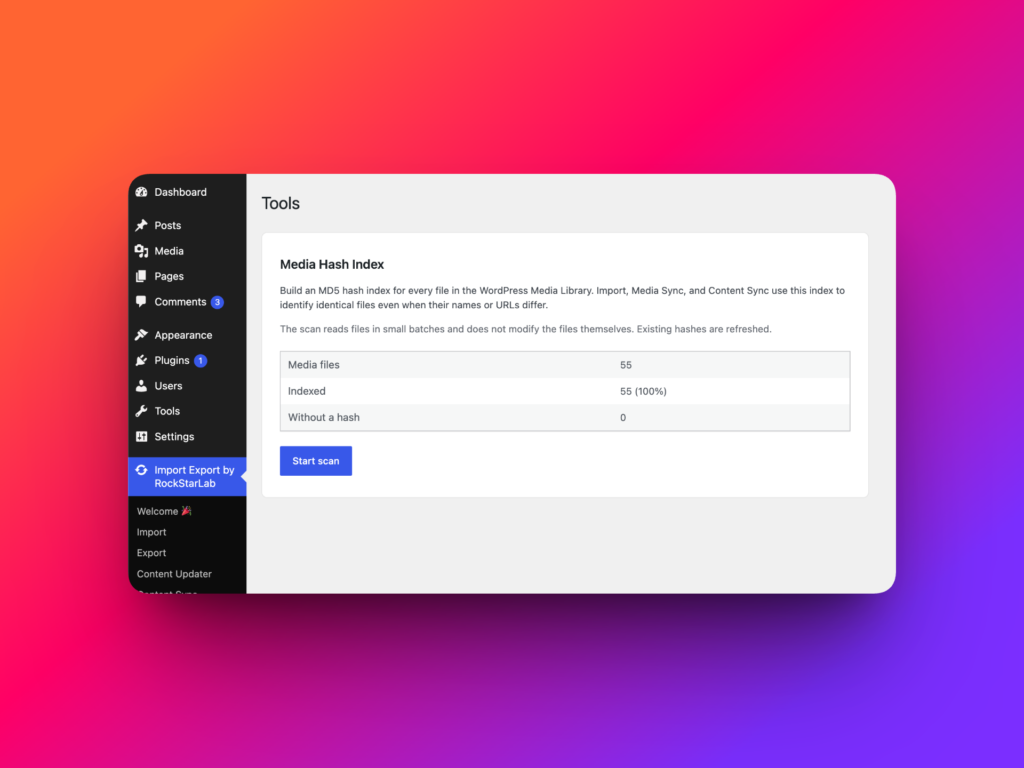
Before scanning a custom folder, it is a good idea to build the Media Hash Index.
Go to Import Export by RockStarLab → Tools.
On this screen, you will find Media Hash Index.
This tool scans files that are already registered in the WordPress Media Library and creates an MD5 hash for each file.
The hash helps the plugin detect duplicates more accurately during Media Sync. Instead of relying only on file names, the plugin can compare actual file content.
This is important because two files may have the same filename but different content, or the same content but different filenames.
Click Start scan and wait until the index is created.
Step 2: Open Media Sync
After the Media Hash Index is ready, go to Import Export by RockStarLab → Media Sync.
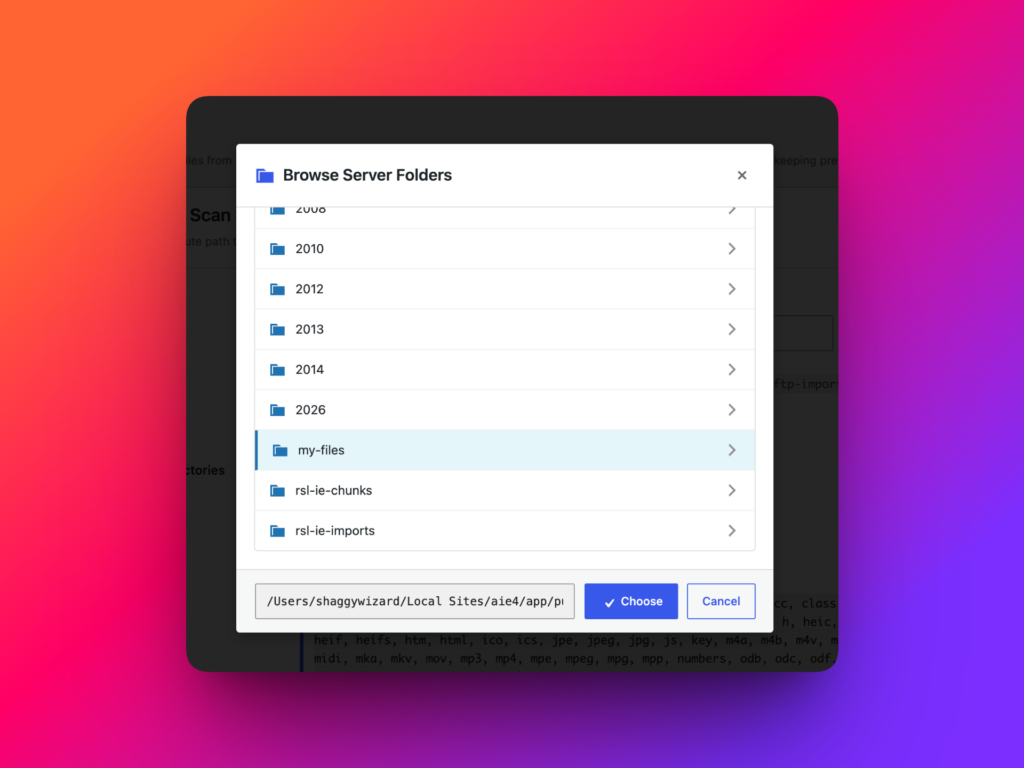
The first step is to choose the server folder you want to scan.
Click Browse. By default, the folder browser opens the wp-content/uploads directory.
Select the folder you want to sync. In this example, we select My Files, then click Choose.
Step 3: Choose scan options
Next, review the scan options.
If your folder contains nested folders, keep Scan Subdirectories enabled. If you only want to scan the top-level folder, you can turn this option off.
You can also choose which file types to scan. By default, the plugin scans file formats allowed by WordPress.
You can scan:
- All allowed media types
- Images only
- Videos only
- Audio only
- Documents only
- Custom extensions
For this example, we want to sync all supported file types from the folder, so we keep the default option and click Scan Folder.
Step 4: Review detected files
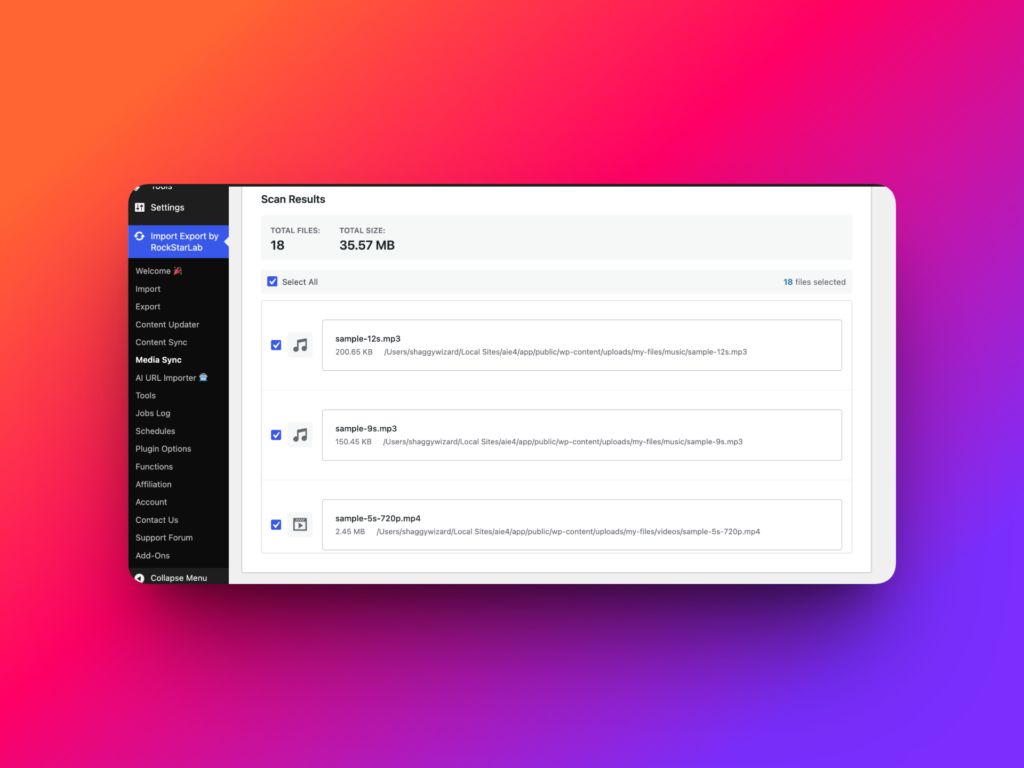
After scanning, the plugin shows the files it found in the selected folder.
You can review the list before adding anything to the Media Library. If needed, you can exclude specific files from synchronization.
In this example, we want to add all discovered files, so we continue to the synchronization options.
Step 5: Configure duplicate detection
On step 2, choose how duplicates should be detected and handled.
For duplicate detection, the recommended option is MD5 Hash. This is the most accurate option because it compares file content.
Other available methods include filename, or filename plus filesize. These can be useful in some workflows, but they are not as reliable as hash-based detection.
For example, filenames can repeat in different folders, and filesize alone does not guarantee that two files are identical.
Step 6: Choose duplicate handling
Duplicate handling controls what happens if the plugin finds a file that already exists in the Media Library.
You can choose to:
- Skip the duplicate file
- Overwrite the existing file
- Rename the new file and keep both versions
Choose the option that best fits your website and workflow.
Step 7: Choose file operation settings
Media Sync also lets you decide what should happen to the original files in your custom folder.
You can:
- Keep files in the original folder
- Copy files into the standard WordPress uploads structure
- Move files into the WordPress uploads structure and remove them from the original folder
Choose carefully, especially if your original folder is used by another script, system, or manual workflow.
Step 8: Set batch size
Batch size controls how many files are processed at one time.
If your files are small and your server has enough memory, you can use a larger batch size.
If you are syncing large images, high-resolution photos, large PDFs, or video files, use a smaller batch size.
For large media files, a batch size between 1 and 3 is usually safer. If files are very large, use batch size 1.
This may make synchronization slower, but it can reduce memory problems on limited hosting environments.
Step 9: Preserve folders with Real Media Library
If you use Real Media Library, enable the Real Media Library option before starting synchronization.
This allows Import Export by RockStarLab to recreate the scanned folder structure as virtual folders inside the WordPress Media Library.
In this example, the Media Library will show folders such as My Files, Music, PDFs, Photos, Photos Child Folder, and Videos.
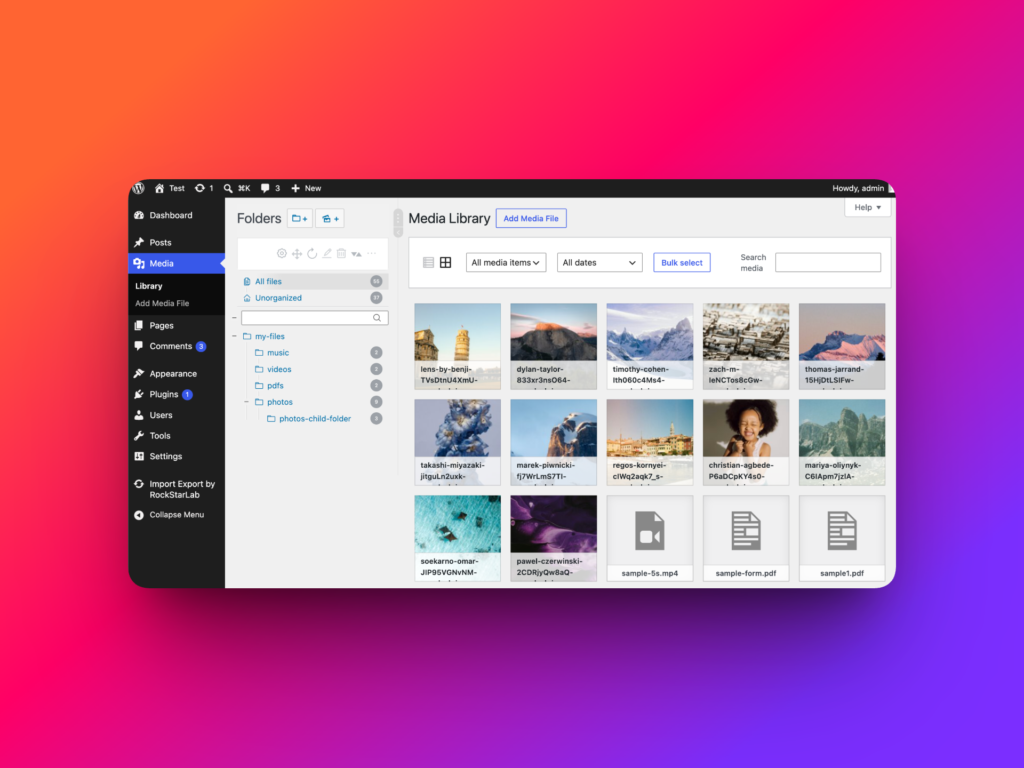
Step 10: Start synchronization
When the settings are ready, click Start Synchronization.
The plugin will process the files in batches and show progress on the screen.
The time required depends on the number of files, file size, server performance, and selected batch size.
After the process is complete, open the WordPress Media Library.
You should now see the manually uploaded files registered in WordPress. If Real Media Library integration was enabled, the virtual folder structure should also match the original folder structure.
Why Media Sync is useful
Media Sync is helpful when working with migrations, FTP uploads, client-provided file folders, media cleanup, and large websites where uploading files manually through WordPress would take too much time.
It also helps reduce duplicate media problems when used together with Media Hash Index and MD5-based duplicate detection.
This makes the workflow safer and more organized when adding existing server files to the WordPress Media Library.
Recommended links
FAQ
Can WordPress automatically detect files uploaded by FTP?
No. If files are uploaded directly to the server through FTP, SFTP, or hosting file manager, WordPress does not automatically register them in the Media Library.
What does Media Sync do?
Media Sync scans a selected server folder, detects supported files, and registers them as media attachments in the WordPress Media Library.
Should I build the Media Hash Index before syncing files?
Yes. Building the Media Hash Index first helps the plugin detect duplicates more accurately using MD5 hashes.
What is the best duplicate detection method?
MD5 hash detection is usually the most accurate method because it compares actual file content instead of relying only on filenames.
Can I scan nested folders?
Yes. Enable Scan Subdirectories to scan nested folders inside the selected server directory.
Can Media Sync preserve the folder structure?
Yes, if you use Real Media Library. Import Export by RockStarLab can recreate the scanned folder structure as virtual folders inside the Media Library.