
In this tutorial, you will learn how to bulk update WordPress content using the Content Updater feature in Import Export by RockStarLab.
Content Updater helps you change many records at once by applying transformation functions to selected fields. You can use it to update page titles, clean imported content, normalize custom fields, adjust SEO metadata, format WooCommerce data, update taxonomy terms, and even transform values inside MySQL database tables.
This feature is available in the PRO version of the plugin. You can activate PRO completely free for your first month, with no credit card required.
Always Create a Backup Before Bulk Updates
Before running any bulk update on a production website, create a fresh backup.
Content Updater can modify many records very quickly. A backup gives you a restore point if you choose the wrong content type, apply the wrong filter, select the wrong field, or use a transformation function that does not produce the expected result.
If you are not sure how to create and restore a WordPress backup, watch our previous backup lesson before using bulk update tools on a live website.

What Is Content Updater?
Content Updater is a PRO tool inside Import Export by RockStarLab that allows you to apply transformation functions to existing WordPress data.
Instead of editing every post, page, product, user, term, or database row manually, you can select a content type, optionally filter the records, choose fields, assign transformations, review the summary, and start the update.
In the previous lesson, we covered Transformation Functions in detail. We explained how the function library works, how to create custom functions, how to use AI Generator, how to test functions, and how to chain multiple transformations together.
In this lesson, we use those functions inside a real Content Updater workflow.
What Can You Bulk Update?
Content Updater can be used for many WordPress data types, not only standard pages.
| Data Type | Example Use Case |
|---|---|
| Pages | Update page titles, clean page content, normalize custom fields |
| Blog Posts | Clean imported posts, update metadata, format titles or excerpts |
| Custom Post Types | Update listings, directories, events, products, portfolios, or other structured content |
| Comments | Clean comment content, normalize author names, validate email fields |
| Users | Update display names, clean user metadata, validate or format user fields |
| Taxonomy Terms | Normalize category names, clean term slugs, update term descriptions |
| MySQL Tables | Apply transformations to fields inside custom database tables |
Example: Replace a Word in WordPress Page Titles
For this lesson, we use a simple example: replacing the word Page with the word Test in multiple WordPress page titles.
On the demo website, there are 23 test pages. Many of them contain the word Page in the title. We will create a transformation function that replaces this word, then apply that function to all selected page titles using Content Updater.
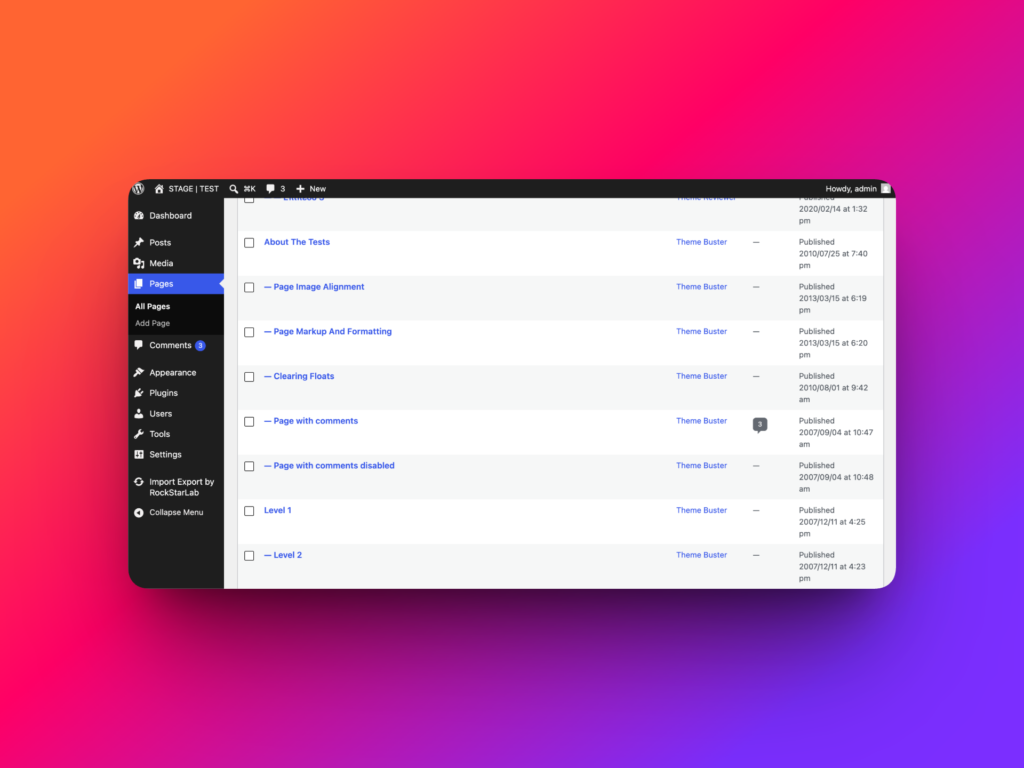
Step 1: Create a Transformation Function
Before using Content Updater, we need a transformation function.
Go to:
Import Export by RockStarLab → Functions
On the Functions screen, you can use existing built-in functions or create your own. In this example, the built-in library does not contain the exact function we need, so we create a custom one.
Click New Function.
For the function name, enter:
Replace Page to Test
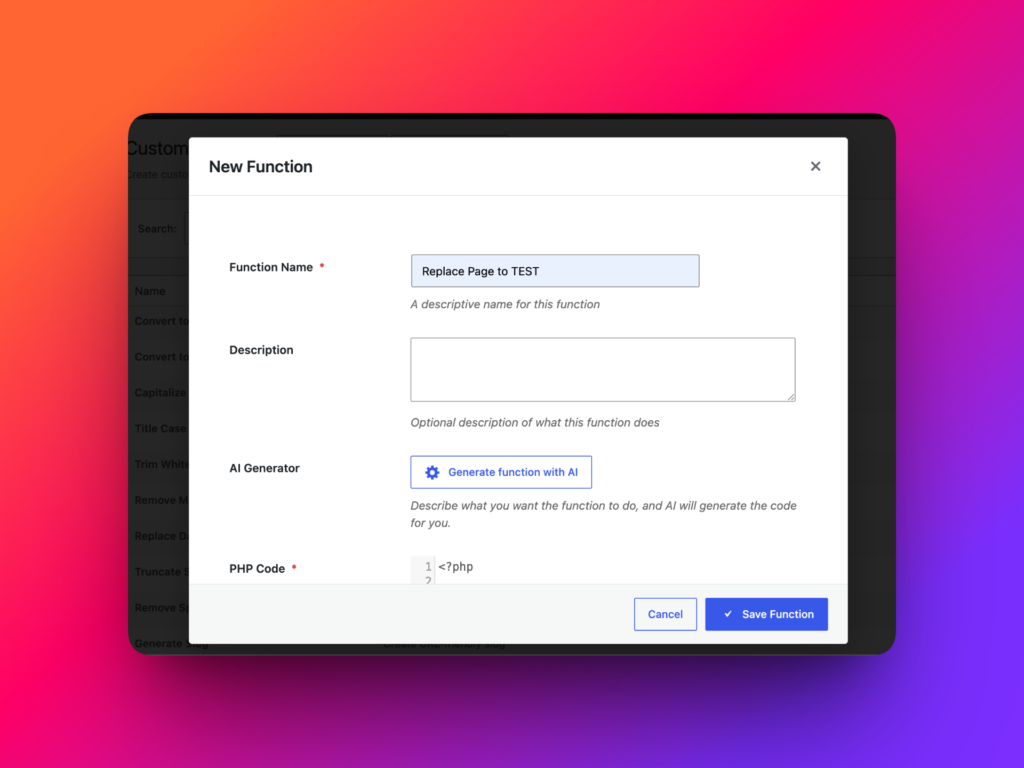
Step 2: Generate the Function with AI
You can write the PHP code manually, but in this lesson we use the AI Generator.
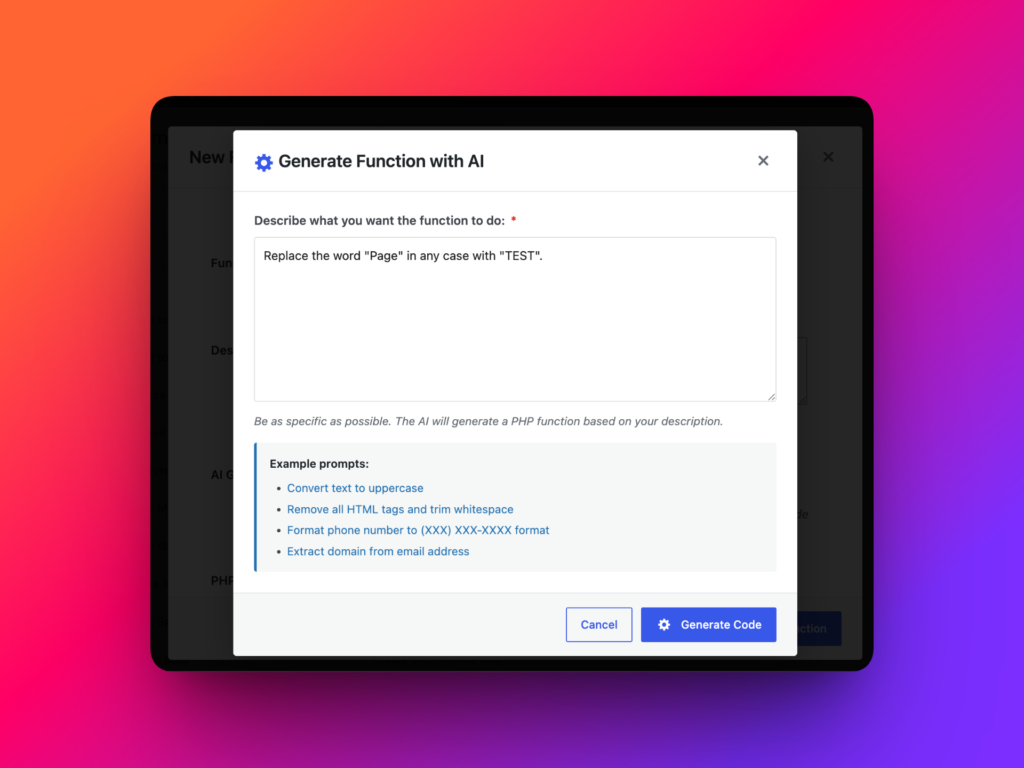
Click Generate function with AI and describe what you want the function to do:
Replace the word "Page" in any case with "TEST".This tells the AI Generator to replace Page, page, PAGE, or any other capitalization with Test.
Click Generate Code. The AI Generator will create the function code for you.
To use AI Generator, your OpenAI API key must be connected in WordPress Connectors. We explained that setup in a previous AI lesson.
Step 3: Test and Save the Function
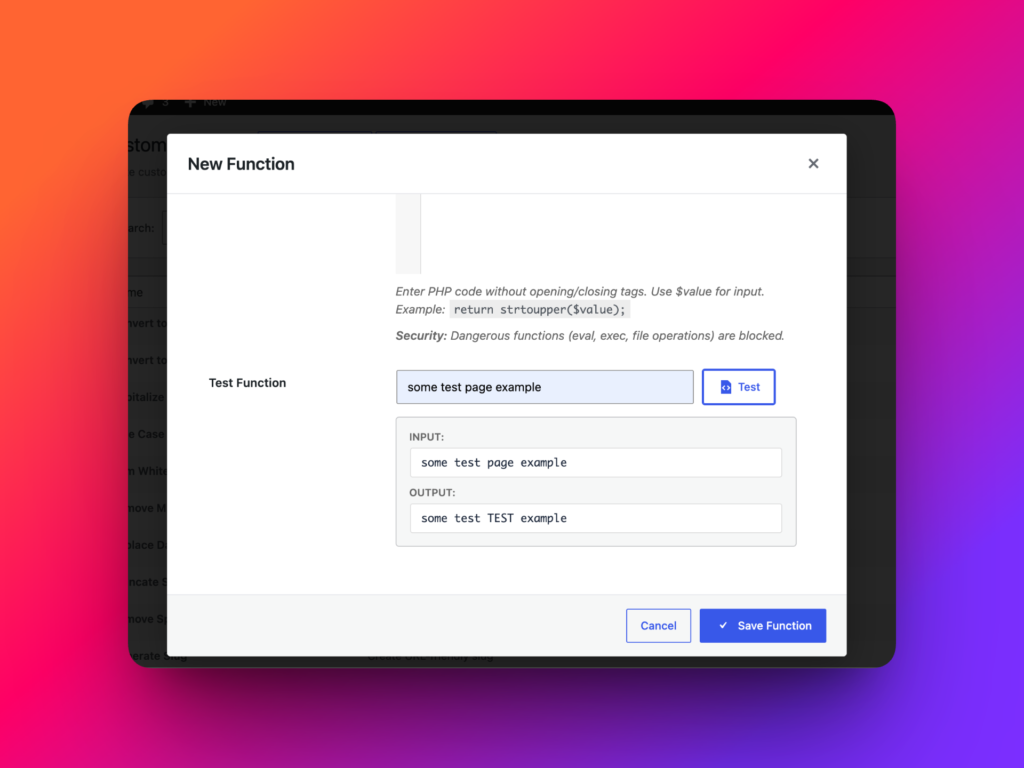
Before using the function in a real update, test it with a sample value.
For example, enter:
Some test page exampleClick Test.
If the function works correctly, the word page should be replaced with Test.
After confirming the output, click Save Function. The function is now ready to use inside Content Updater.
Step 4: Open Content Updater
Now go to:
Import Export by RockStarLab → Content Updater
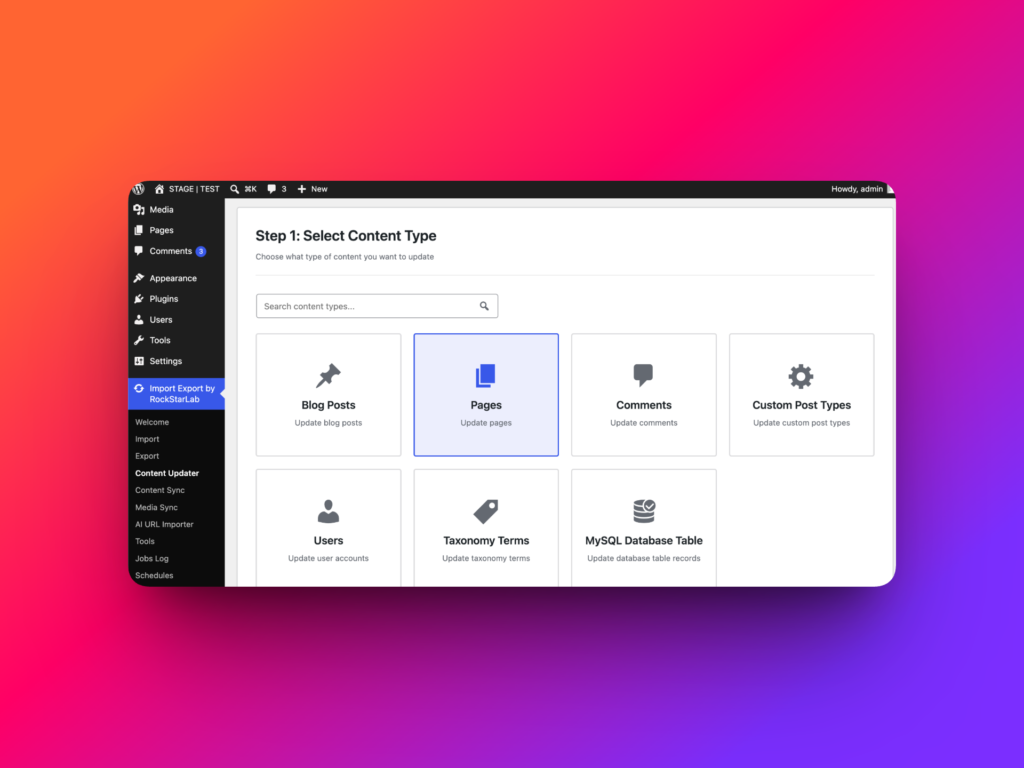
Content Updater uses a step-by-step wizard. The first step is selecting the content type you want to update.
For this example, choose Pages, then click Next Step.
Step 5: Optional Filters
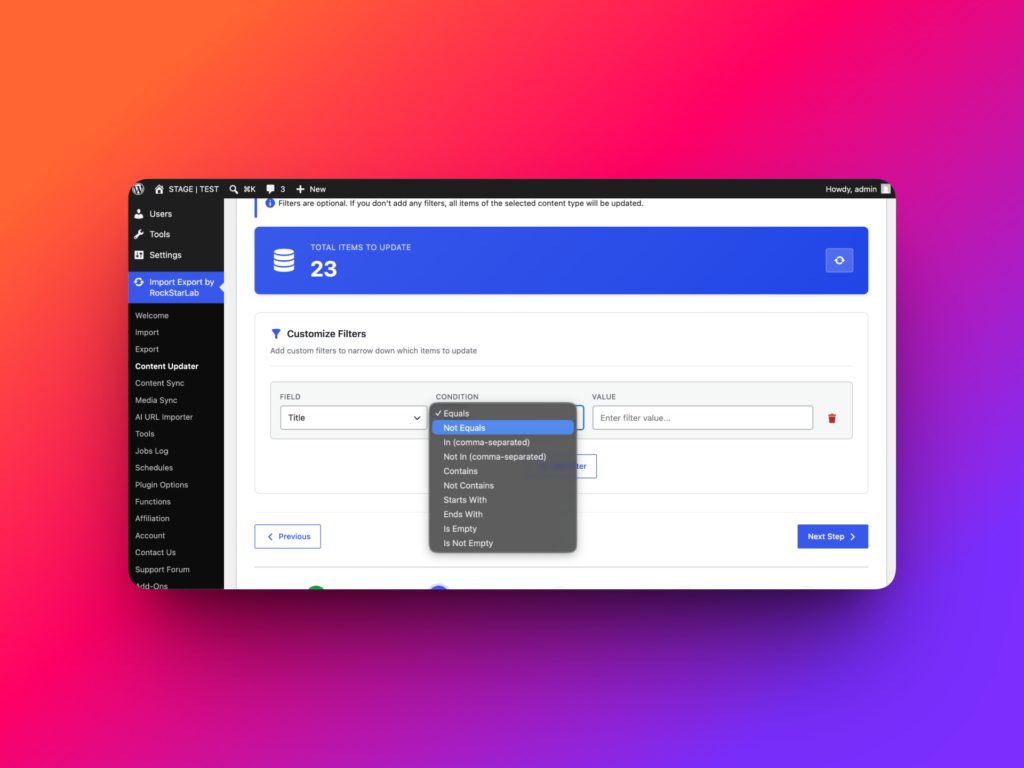
On the next step, you can add filters to control exactly which records should be updated.
Filters are useful when you do not want to update everything. For example, you can filter by ID, title, author email, author name, creation date, update date, or other available fields.
You might use filters to update only pages created during a specific date range, only posts from a specific author, or only records matching a specific title pattern.
In this example, we want to update all available demo pages, so we do not add filters and simply click Next Step.
Step 6: Select Fields to Update
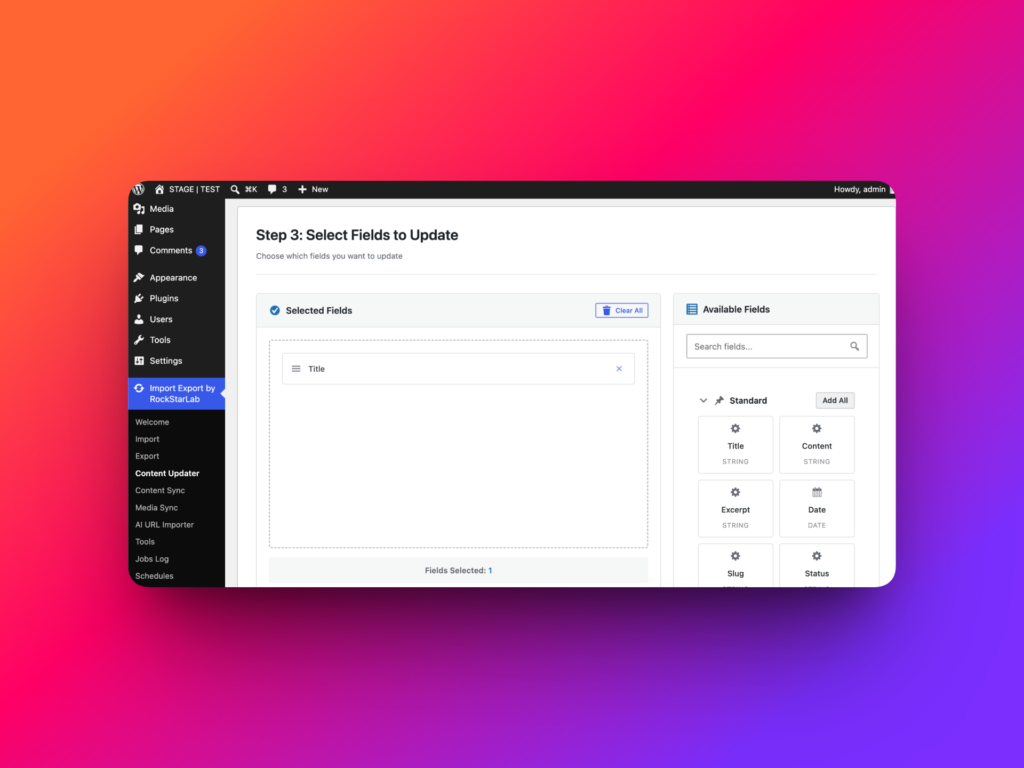
Next, choose the fields that should be updated.
Because we want to update page titles, select Post Title and add it to the selected fields.
The available fields can depend on your content type and installed plugins. If you use Advanced Custom Fields, registered ACF fields can appear here. If your site uses SEO plugins such as Yoast SEO, supported SEO fields can also be available for update.
Step 7: Assign Transformation Functions
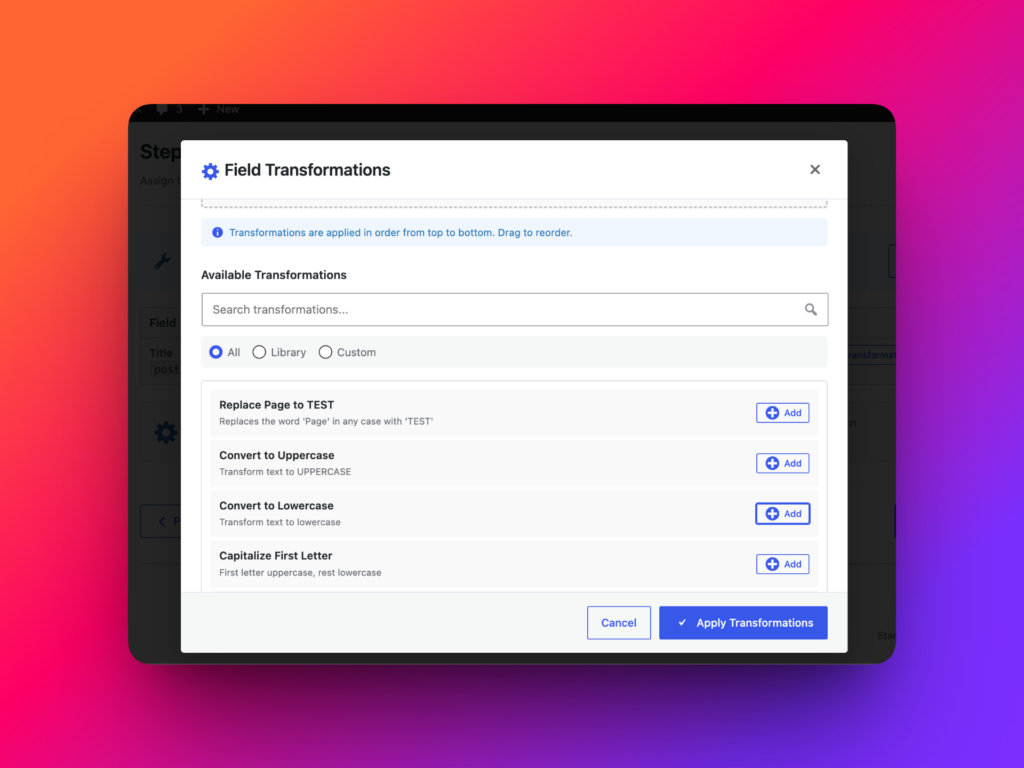
On the transformation step, click Assign Transformations for the selected Post Title field.
Select the custom function we created earlier: Replace Page to Test.
To demonstrate function chaining, also add Convert to Lowercase after the replacement function.
This means the plugin will first replace the word Page with Test, and then convert the final title to lowercase.
You can assign multiple functions to the same field, and they will run one by one in the order you choose.
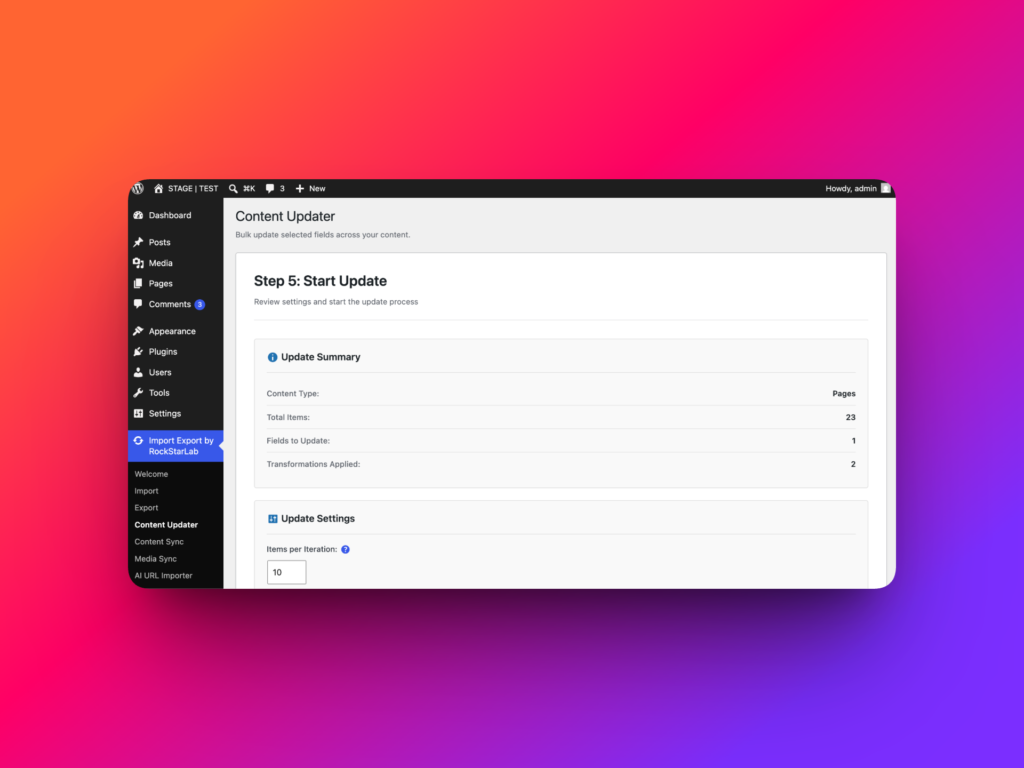
Step 8: Review the Summary
Before starting the update, review the summary carefully.
In this example, the plugin shows:
- 23 pages are available for update.
- 1 field will be updated.
- 2 transformation functions will be applied.
You will also see the Items per operation setting. This controls how many records WordPress processes in each batch.
If you are updating many records or using complex transformations, you can reduce this number to help avoid server timeouts. For smaller updates, the default value is usually fine.
Step 9: Start the Bulk Update
When everything looks correct, click Start Update.
The plugin will process the selected records and apply the assigned transformation functions.
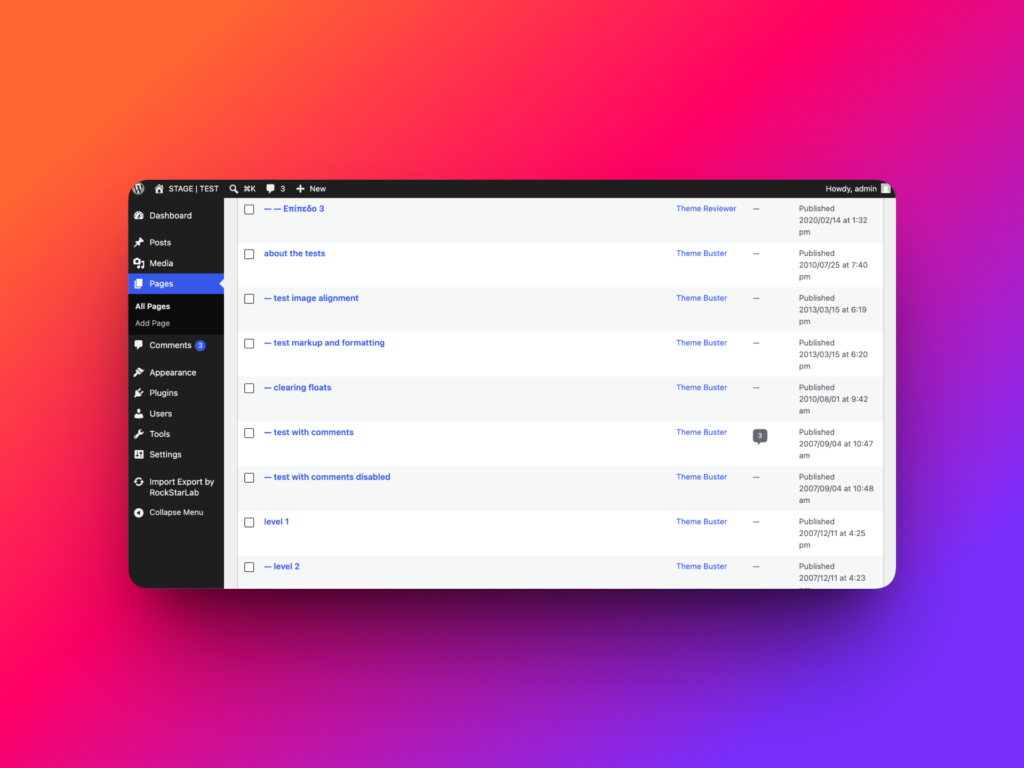
After the update is complete, return to the Pages screen and check the result.
The pages that previously contained the word Page now contain the updated value, and the titles are lowercase because both transformation functions were applied successfully.
More Practical Content Updater Examples
| Use Case | Example Transformation | Where It Helps |
|---|---|---|
| Clean imported content | Decode HTML Entities → Strip HTML Tags → Trim Whitespace | Posts imported from old websites, feeds, or external systems |
| Normalize WooCommerce prices | Clean Price → Convert to Float → Round to 2 Decimals | Product data imported from supplier files |
| Update SEO fields | Add brand suffix, remove duplicated words, trim descriptions | SEO titles and meta descriptions |
| Normalize custom fields | Map yes, Yes, YES, and 1 into one consistent value | ACF fields, custom fields, directories, listings, catalogs |
| Clean taxonomy terms | Trim whitespace, generate slugs, title case names | Categories, tags, product attributes, custom taxonomies |
| Update user data | Validate emails, format display names, clean metadata | User lists, membership sites, CRM-style workflows |
| Transform MySQL table data | Apply custom transformations to selected database fields | Custom plugins, directories, booking systems, catalogs |
Best Practices for Bulk Content Updates
- Create a fresh backup before making bulk changes on a live website.
- Test transformation functions with realistic values before using them.
- Use filters when you only want to update specific records.
- Review the summary before clicking Start Update.
- Reduce Items per operation for large jobs or complex transformations.
- Check the updated content after the process finishes.
Conclusion
Content Updater in Import Export by RockStarLab gives you a flexible way to bulk update WordPress content using transformation functions.
You can update standard pages and posts, custom post types, comments, users, taxonomy terms, ACF fields, SEO fields, WooCommerce-related data, and even MySQL database tables.
Whether you need to clean imported content, normalize metadata, update titles, fix formatting, or apply custom logic to structured data, Content Updater can save a significant amount of manual work.
Learn more about the WordPress import export plugin
FAQ
What is Content Updater in Import Export by RockStarLab?
Content Updater is a PRO feature that lets you bulk update existing WordPress data by applying transformation functions to selected fields.
Can I bulk update WordPress pages and posts?
Yes. You can bulk update pages, blog posts, custom post types, comments, users, taxonomy terms, and even MySQL database tables.
Can Content Updater update ACF fields?
Yes. If Advanced Custom Fields is installed and active, supported ACF fields can appear in the field selection step.
Can I use multiple transformation functions on one field?
Yes. You can assign multiple functions to one field, and they will run one by one in the order you choose.
Should I create a backup before using Content Updater?
Yes. Always create a fresh backup before running bulk updates on a production website, because bulk updates can modify many records at once.