
Local (LocalWP) is a comfortable place to build pages: no hosting delays, no risk for visitors, everything on a laptop. The awkward part comes when the new pages have to reach the live site. Local’s own deployment, Local Connect, only works with Flywheel and WP Engine, and it pushes site files and the database rather than individual pages. For other hosts, Local’s documentation points to a full-site migration, which replaces the live database together with orders, comments and users that arrived there in the meantime.
Import Export by RockStarLab moves only the selected pages and posts from a Local site to a live site. The test ran under the condition that matters for Local: the live server cannot see the laptop at all. Below you’ll also see what happens with an export file instead, and how the same push works through an AI agent.
Short Answer
Install the free plugin on the Local site and on the live site. On the Local site, add the live site under Content Sync with the live site’s API key, tick the pages or posts, click Sync Content → Push to Site and confirm the mapping. The Local site sends the content and the image files itself, so the live server never has to reach the laptop. Links that point to the .local address are rewritten to the live address on the way.
Why the Direction Matters
A Local site has an address like mysite.local that exists only on the laptop. The laptop can open the live site, but the live server cannot open the Local site. Any method in which the live site downloads something from the Local site fails, and images are usually the first casualty.
To test that properly, every request from the live test site to the Local test site was blocked, so that it failed with the same Could not resolve host error a real server would return. Then three things were tried:
| Method | Content | Images | Links to the .local address |
|---|---|---|---|
| Content Sync push from Local (Free) | Arrived | Arrived, files uploaded by the Local site | Rewritten to the live address |
| Content Sync pull into Local (Free) | Arrived | Arrived | Rewritten to the Local address |
| Export file from Local, import on live (Free) | Arrived | Missing: the live site could not download them | Rewritten only with Replace links |
The push is the method of choice for Local. The rest of the guide follows it step by step and explains the export file case at the end.
What You Need
- Import Export by RockStarLab (Free) on the Local site and on the live site. The installation guide covers the first setup.
- An administrator account on both sites.
- A Local site that can open the live site in the browser. Nothing has to be opened in the other direction: no tunnel, no public URL for the laptop.
Pages and posts are included in the free version. Custom post types, WooCommerce products and menus need the PRO addon.
The screenshots were taken with plugin version 2.1.2. The Local site is shown as mysite.local and the live site as www.example.com.
Step 1: Connect the Local Site to the Live Site
On the live site, open Import Export by RockStarLab → Content Sync, click Show Details in This Site Configuration and copy the API key. Treat it like a password.
On the Local site, open the same screen, click Add New Site, enter a name, the live URL and the key, and save. The connection appears with the status Active.

The live site needs no connection back to the Local site. In the test, its own list of connected sites was empty. If the Local site was created by pulling a copy of the live site, it starts with the live site’s key and with a connection pointing to itself; the staging-to-live guide shows how to clean that up in two clicks.
Step 2: Select the New and Changed Pages
In the test, one new page was built on the Local site: a workshop announcement with an image and two links to existing pages. The Services page got an extra paragraph with a link to the new page. A blog post with a featured image was added as well.
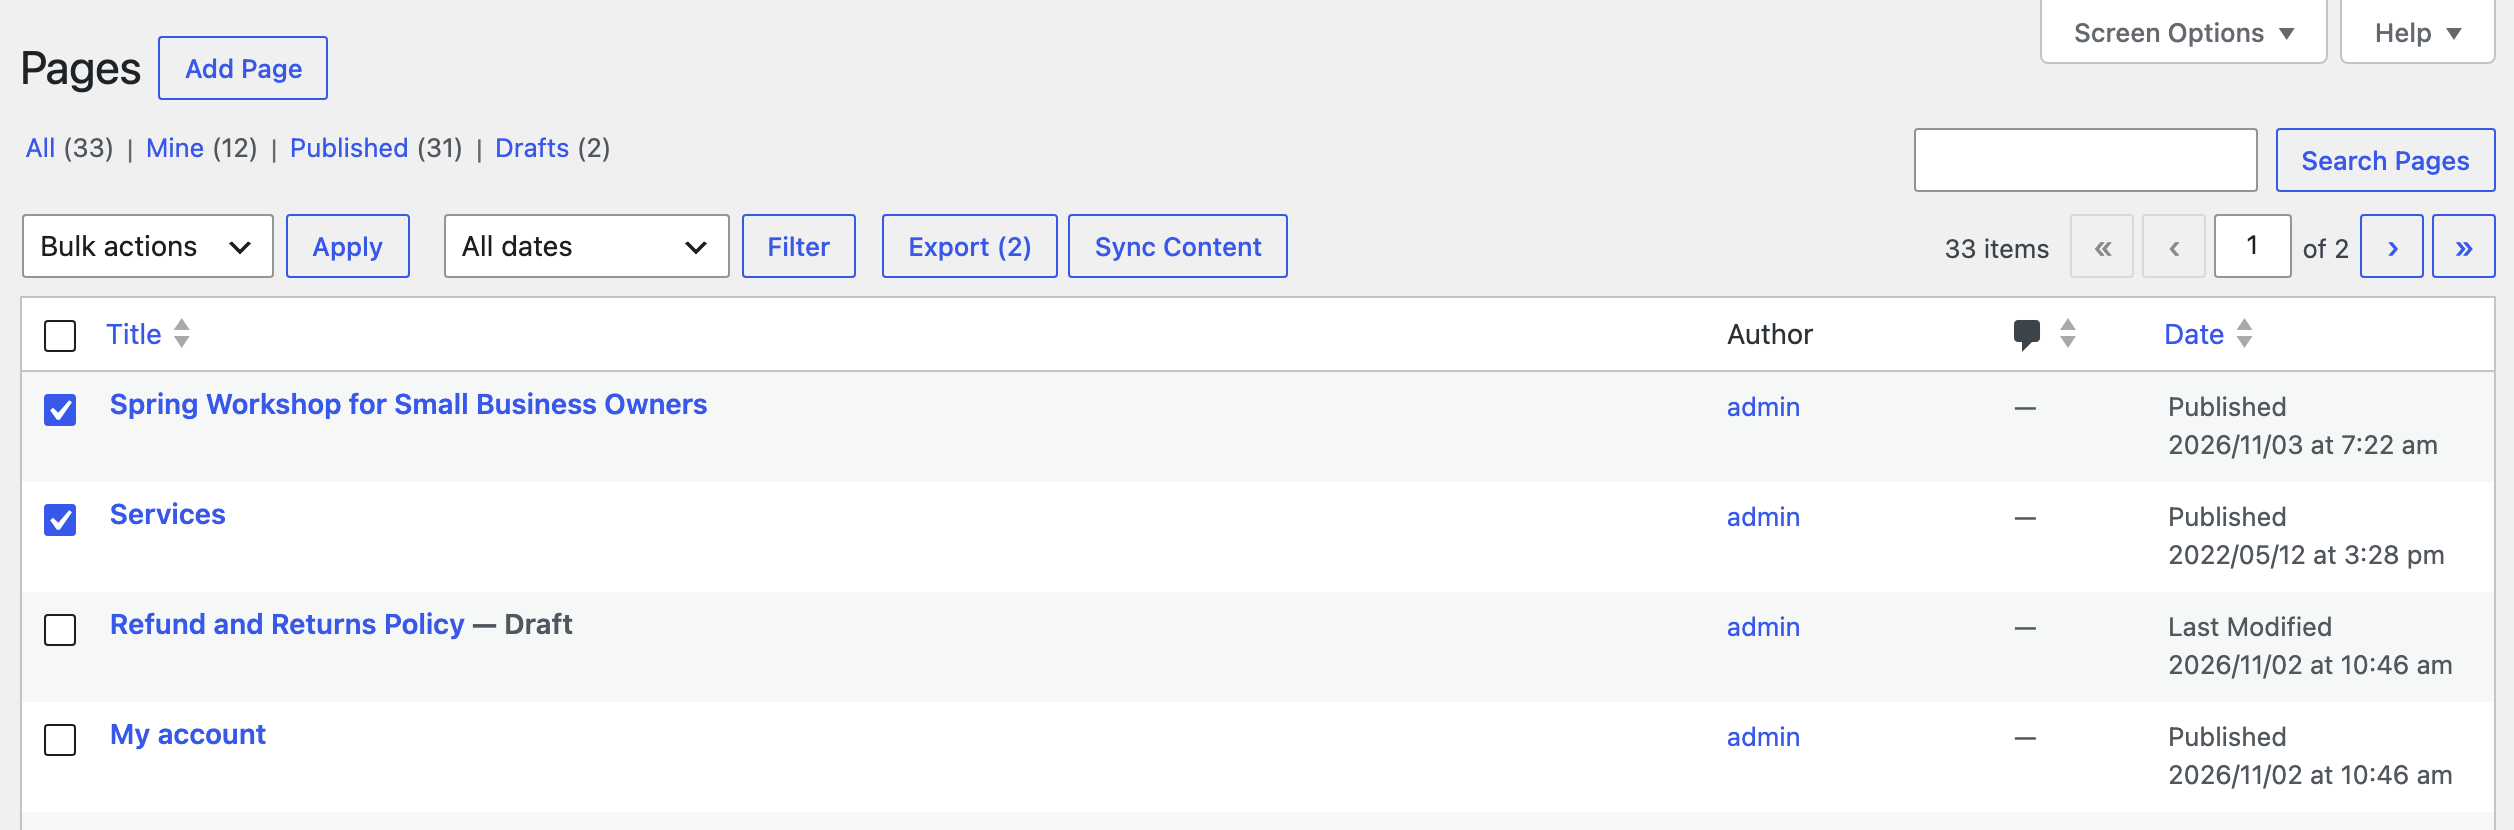
Open Pages on the Local site and tick the pages to publish. Sorting by the last change helps find them: adding &orderby=modified&order=desc to the address of the Pages list puts the most recently edited pages on top.
Step 3: Push to the Live Site
Click Sync Content, choose the live site and click Push to Site.
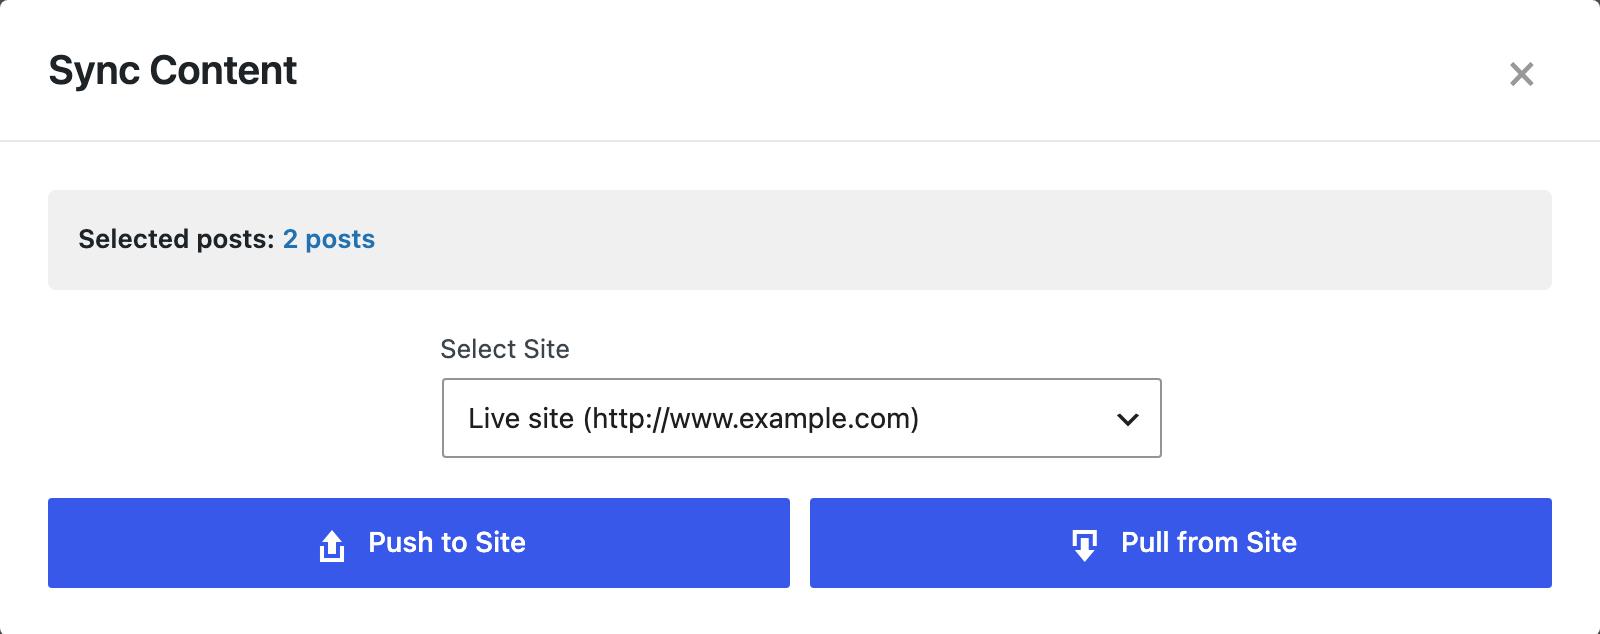
In the mapping dialog, Auto-match by Title pairs pages that already exist on the live site. Here it took about six seconds: the new page stayed on Create New Post, and Services was set to update the live Services page.

Check this dialog before confirming. A row set to update replaces the text of that live page with the Local version, so a page that was also edited on the live site in the meantime should be left out or merged by hand.
Confirm & Sync sends the pages. Pushing the two pages took 44 seconds, mostly because the Services page contains seven images that are checked against the live Media Library. Files that already exist there are reused, not uploaded again.

Posts go the same way from the Posts list. The blog post arrived with its category, tag and featured image, and the image is attached to the post in the live Media Library.
Step 4: Check the Live Site
On the live site, the new page shows its image, and both links point to live pages.

In the HTML of the page, the image now comes from the live /wp-content/uploads/ folder, and the links that pointed to http://mysite.local/services/ and /contact-us/ point to the same pages on the live domain. The same happened to the link from the Services page to the new page and to the link inside the blog post. None of this needed a search and replace afterwards.
Everything that was not selected stayed as it was on the live site. That is the main difference to Local Connect or a full migration, which would also overwrite comments, users and settings on the live site.
Pulling Live Content Into Local
The same connection works in the other direction, and it also only needs the Local site to reach the live site. Before editing a page on Local that has changed on the live site since the copy was made, refresh it: tick it in the Local Pages list, click Sync Content and choose Pull from Site. In the test, the live Contact Us page was pulled into Local with its four images while the block was still in place.
Why an Export File Is Not Enough From Local
Exporting the page from Local and importing the file on the live site looks like an alternative. The text does arrive. The images do not, because the importer downloads them from the addresses in the file, and those addresses point to the laptop.
Since version 2.1.2, the import says so. Instead of a plain success message, it reports Import Completed with Warnings and lists every image that could not be downloaded, with the reason.
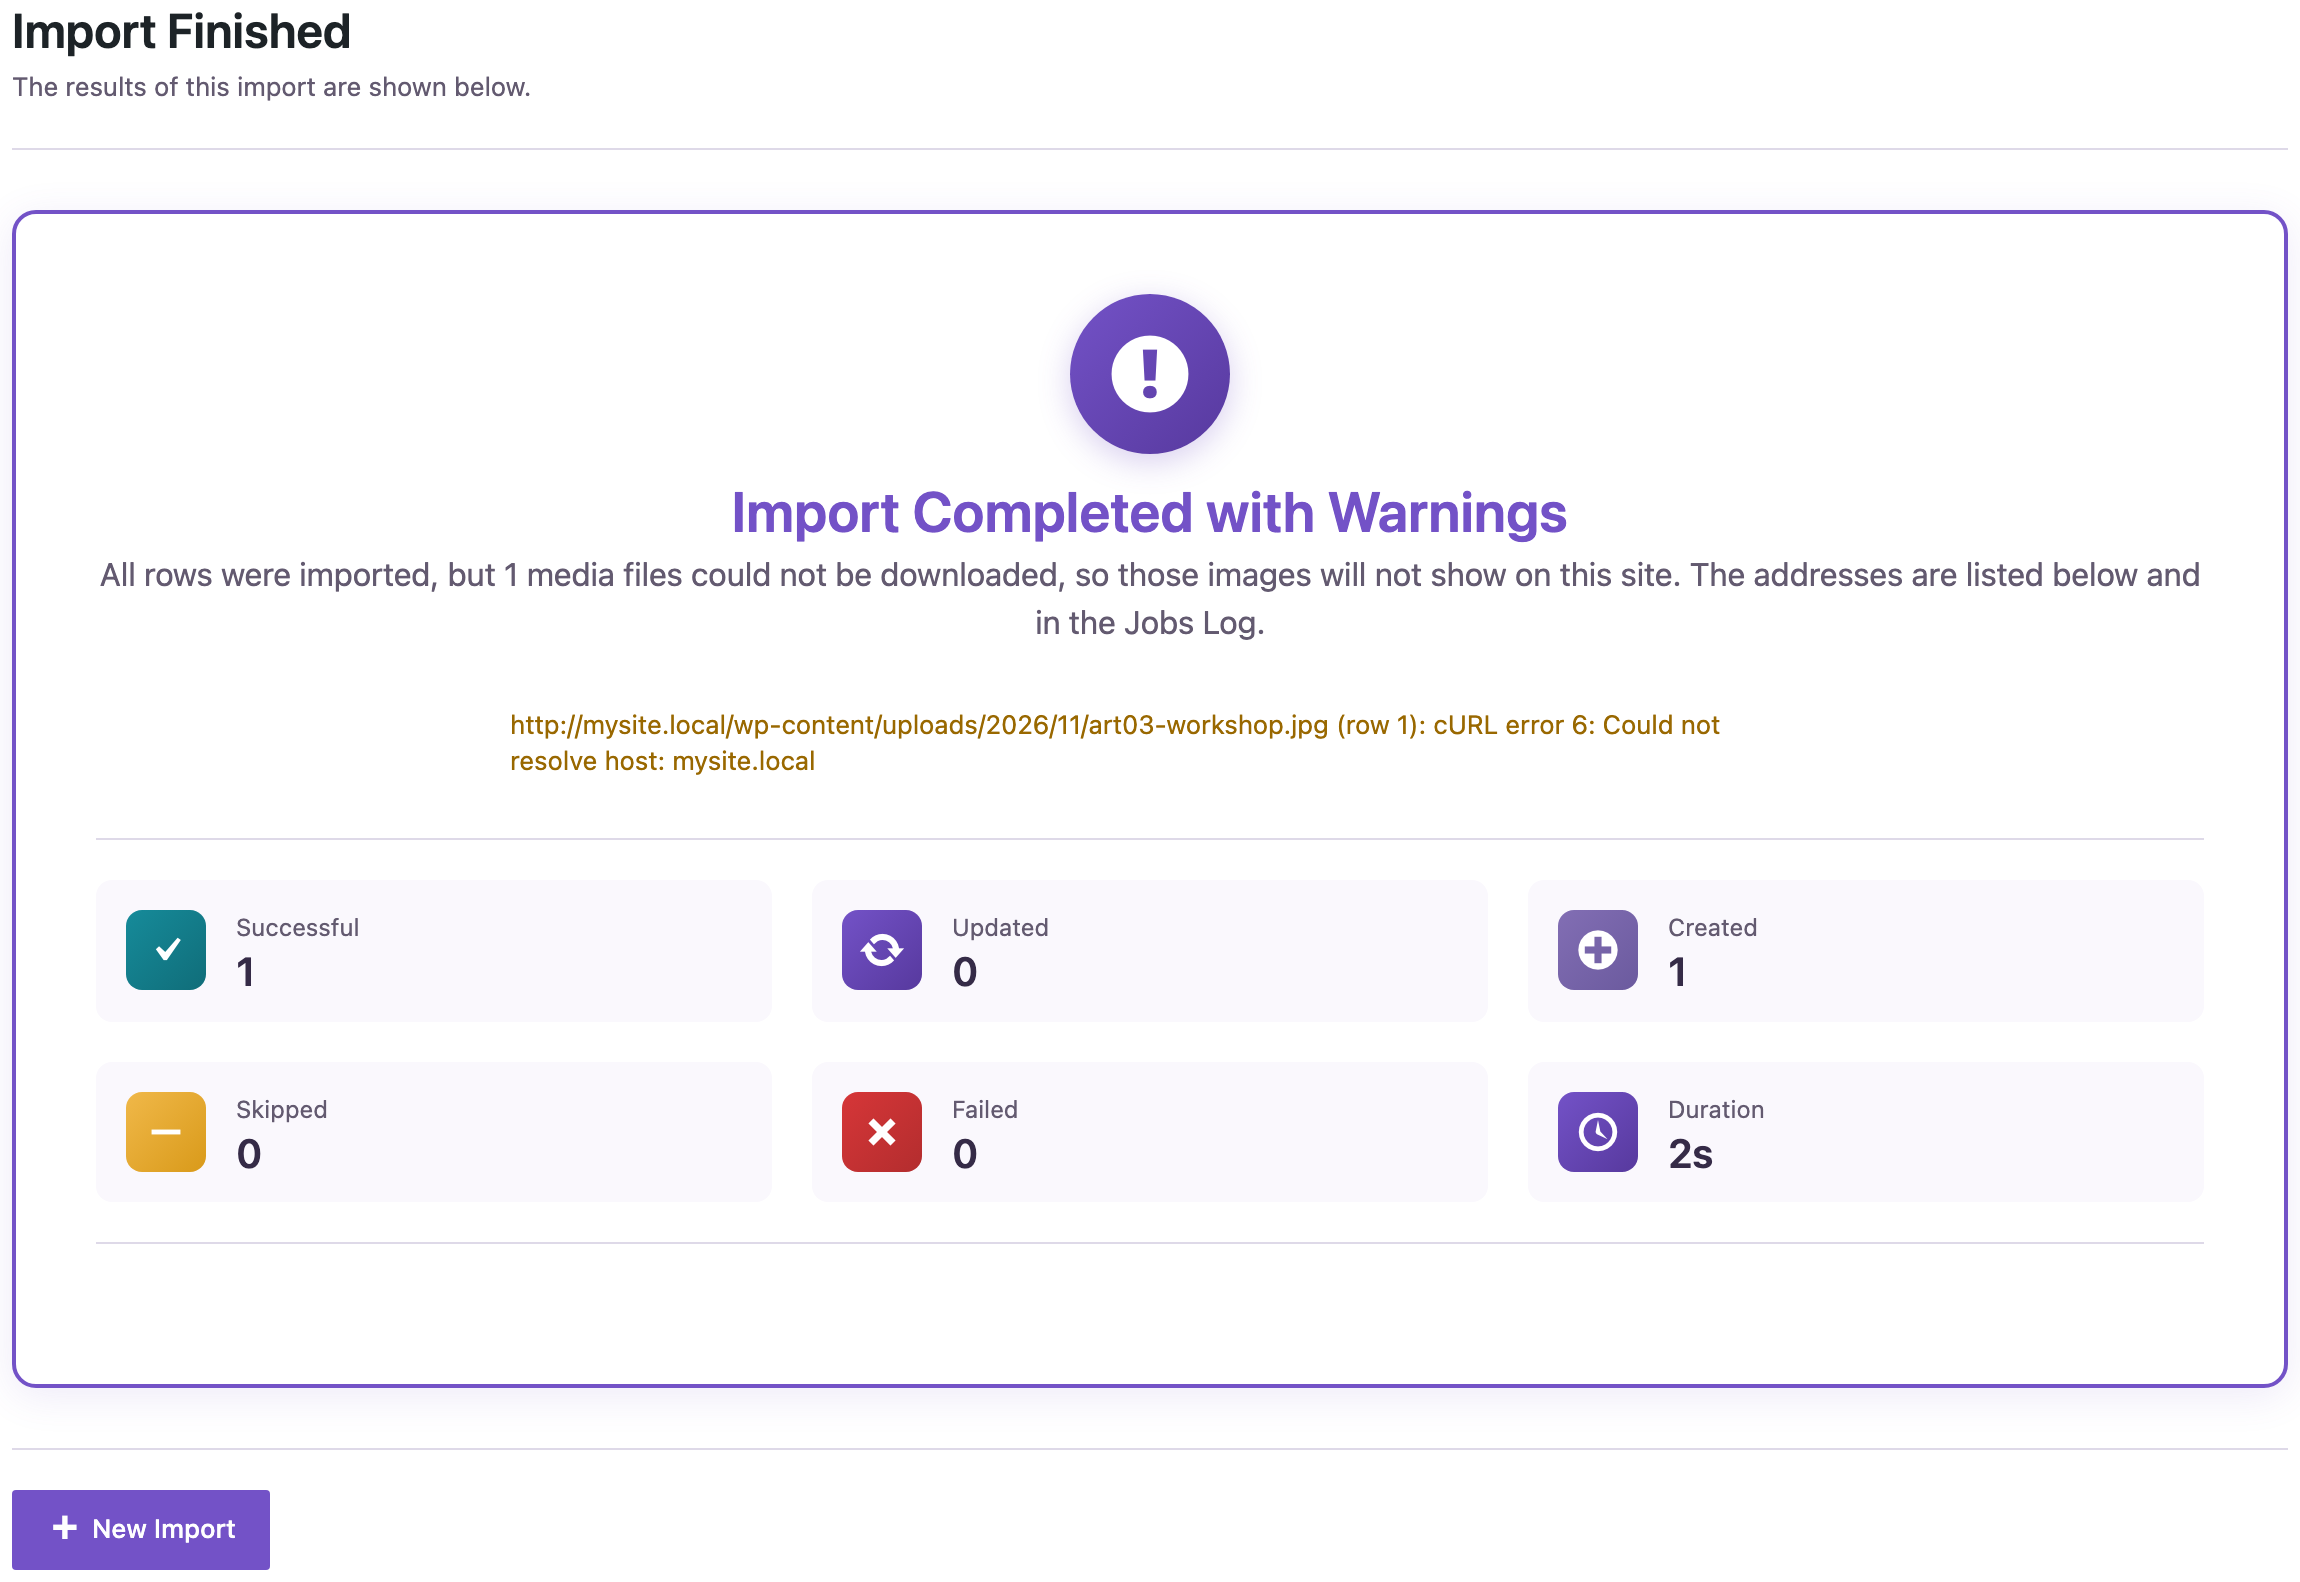
Version 2.1.2 also fixed a combination that used to lose images silently: with Replace links switched on, the addresses of images in the text were rewritten to the new domain before the download and were then skipped as if they were already local. Now the importer downloads them from the original address. That helps between two sites on the internet, but not from Local: the original address is still on the laptop. For Local, the push stays the reliable way.
Push From Local With an AI Agent
All the steps are also available as WordPress Abilities. With the Abilities API (WordPress 6.9 and later) and the MCP Adapter plugin on the Local site, an agent such as Claude Code, Cursor, Codex, GitHub Copilot or Gemini CLI can do the push. Enable Enable Abilities API under Plugin Options → AI Agent Connection on the Local site. The full setup is in the Abilities API guide.
A Local site is a good fit for an agent because no password or open port is needed. The MCP server runs through WP-CLI on the same computer:
wp mcp-adapter serve --server=mcp-adapter-default-server --user=admin
WP-CLI works out of the box in Local’s Open site shell. For an agent that starts the server by itself, a small wrapper script that calls WP-CLI with Local’s PHP and the site’s database socket does the same; that is how the test machine was set up. The connection to the live site from Step 1 is reused, so the agent needs no access to the live site of its own.
The prompts below were run by an AI agent (Claude, connected to the Local site this way) with the live site still unable to reach the laptop. The agent used rsl-ie/connection-list, rsl-ie/connection-test, rsl-ie/export-preview, rsl-ie/sync-auto-map and rsl-ie/sync-push.
1. Check the connection
Test the connection from this Local site to "Live site". Do not change anything.
2. Find what changed
List the pages and posts on this site that were changed today. Show ID, type, title and status.
Ignore items whose last change is dated in the future.
The last line is there for a reason. A filter “changed from today” also matched an old test post whose modification date is set to 2030. With the line in the prompt, the agent kept the three items that were really edited: the new page, Services and the new post.
3. Check the live site without writing
Check which of these already exist on "Live site", matching by title. Do not write anything.
4. Push
Push them to "Live site": create the ones that do not exist, update the ones that do.
Report what was created and updated and how many images were transferred.
Result: pages 1 created and 1 updated with 8 images, the post created with its featured image. The live site ended up exactly as after the push from the admin screens. The step that writes, rsl-ie/sync-push, is marked as destructive in the Abilities API, which MCP clients use to ask for confirmation first.
Common Problems and Fixes
The connection test fails on the Local site
The Local site has to reach the live site’s REST API. A firewall, a security plugin or HTTP authentication on the live site can block it. The error appears in the Content Sync screen; allowing the plugin’s REST routes on the live site fixes it.
Images are missing after an import
The file was imported on the live site, so the live server tried to download the images from the Local address. Use the push instead, or check the warning list on the import result screen for the affected files.
A page shows up twice on the live site
The page was renamed on Local, so Auto-match by Title found no partner and created a new page. Pick the live page by hand in the mapping dialog for renamed pages.
A live page lost changes made on the live site
A push replaces the text of every page set to update. The previous version is still in the page’s Revisions on the live site. Pull such pages into Local before editing them there.
FAQ
Does this work with Local’s Live Links or a tunnel?
It does not need them. Only the Local site opens connections, so the laptop can stay invisible from the internet.
Does the push replace the live database?
No. Only the selected pages or posts are created or updated, together with their images, terms and custom fields. Users, orders, comments on other content and settings on the live site are not part of the transfer.
What happens to the .local links inside the content?
They are rewritten to the live address during the push, in links and in image addresses. In the test, every link to mysite.local in the pushed pages and post pointed to the live domain afterwards.
Can a whole Local site be moved this way?
For moving a complete site, Content Migration in the same plugin creates one package of all content. Its images are also downloaded from the source address during the import, so for a site on Local the push of individual pages and posts is the safer route.
Should the live site be backed up first?
A backup before the first push is a sensible habit. The backup and restore guide shows how to make one with the same plugin.
Related Guides
- How to push WordPress staging to live without overwriting the database
- How to copy only new posts from staging to production
- How to sync WordPress posts and pages between multiple sites
- How to export and import WordPress media files without duplicates
- How to use the WordPress Abilities API with AI agents
Import Export by RockStarLab is free on WordPress.org.

Comments 0
Have a question or a tip to share? Leave it below.