
Import Export by RockStarLab is a WordPress import export plugin for moving website data through import and export workflows. In this first lesson, you will learn how to install the plugin from the WordPress dashboard or by uploading the plugin ZIP file manually.
This guide also includes the video walkthrough, written steps, transcript, FAQ, and structured data so you can follow the installation process in the format that works best for you.
What this video covers
- How to install Import Export by RockStarLab from the WordPress dashboard.
- How to find the plugin from
Plugins -> Add New. - How to install and activate the plugin.
- How to download the plugin ZIP file from WordPress.org.
- How to upload and install the plugin manually.
- Where to go after installing a WordPress import export plugin.
What is Import Export by RockStarLab?
Import Export by RockStarLab is a plugin for WordPress import and export tasks. It helps site owners, agencies, developers, and content teams move WordPress data using supported import and export formats.
After installation, the plugin adds import and export tools to the WordPress admin area. Depending on your active setup, you can work with posts, pages, custom post types, media, users, WooCommerce data, custom fields, ACF fields, MySQL tables, URL exports, jobs, schedules, and other supported workflows.
In other words, if you are looking for a WP import export plugin or a WordPress import plugin, Import Export by RockStarLab is built for those data workflows.
Method 1: Install from the WordPress dashboard
The easiest way to install Import Export by RockStarLab is directly from your WordPress admin dashboard.
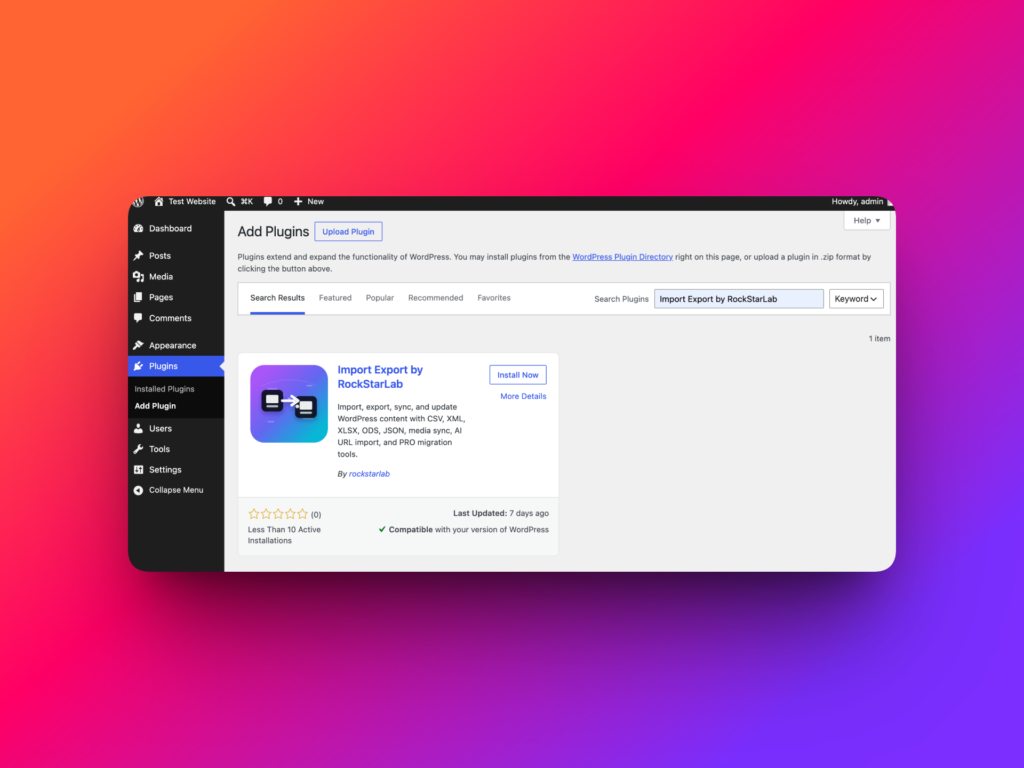
- Log in to your WordPress admin area.
- Go to
Plugins -> Add New. - In the search box, type Import Export by RockStarLab.
- When the plugin appears in the search results, click Install Now.
- After installation finishes, click Activate.
Method 2: Upload the plugin ZIP file
You can also install the plugin manually by downloading the ZIP file from WordPress.org and uploading it to your website.
- Open the Import Export by RockStarLab plugin page on WordPress.org.
- Download the latest plugin version as a ZIP file.
- Return to your WordPress admin dashboard.
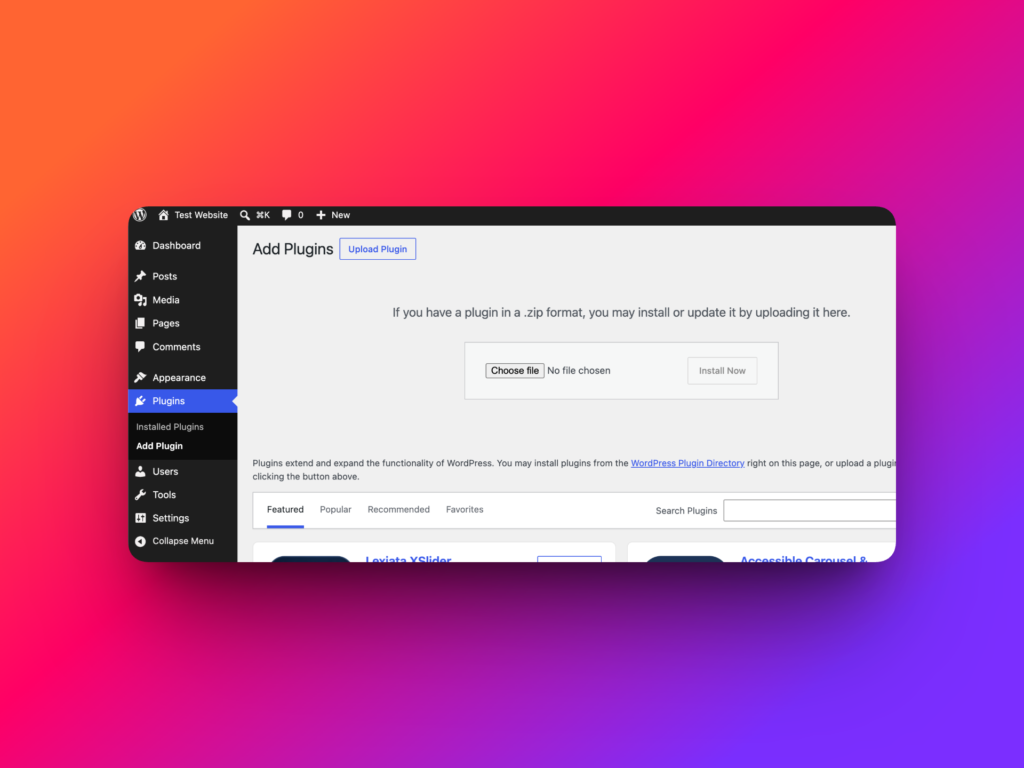
- Go to
Plugins -> Add New. - Click Upload Plugin.
- Choose the ZIP file you downloaded.
- Click Install Now.
- When installation is complete, click Activate Plugin.
What happens after activation?
After activation, Import Export by RockStarLab is ready to use. The plugin adds a WordPress import export workspace to the admin area, where you can start with an import, export, or another supported data workflow.
You can use the plugin to import supported file formats, export WordPress data, map fields, review jobs, and manage repeatable data operations depending on the features available in your active setup.
Why use a WordPress import export plugin?
A WordPress import export plugin is useful when you need to move data instead of copying content manually. This can include migrations, content updates, product data, media records, custom post types, user data, SEO fields, ACF fields, database tables, and URL inventories.
Manual copy-and-paste work is slow and easy to break. A plugin-based workflow gives you a repeatable process for uploading files, choosing content types, mapping fields, exporting selected data, and reviewing the job result.
Video transcript
In this video, I’ll show you how to install Import Export by RockStarLab, a brand-new and powerful WordPress plugin that makes importing and exporting your website data fast and easy.
We’ll cover two installation methods. You can install the plugin directly from your WordPress dashboard, or download it from WordPress.org and upload it manually.
Let’s start with the easiest method. Open your WordPress admin dashboard and go to Plugins -> Add New. In the search box, type Import Export by RockStarLab. When the plugin appears in the search results, click Install Now. Once the installation is complete, click Activate.
That’s it. The plugin is now installed and ready to use.
Now let’s look at the second installation method. Visit the plugin page on WordPress.org and download the latest version as a ZIP file. Return to your WordPress dashboard and go to Plugins -> Add New. Click Upload Plugin at the top of the page. Choose the ZIP file you just downloaded, then click Install Now. When the installation is finished, click Activate Plugin.
And that’s all there is to it. Import Export by RockStarLab is now installed and ready to use.
In the next video, we’ll take a quick tour of the plugin interface and create our first import and export.
Recommended internal links
FAQ
What is the plugin called?
The plugin is called Import Export by RockStarLab. It is a WordPress import export plugin for moving website data through supported import and export workflows.
Is Import Export by RockStarLab a WP import export plugin?
Yes. Import Export by RockStarLab is a WP import export plugin designed for WordPress data workflows such as imports, exports, field mapping, jobs, and supported content type operations.
How do I install Import Export by RockStarLab?
Go to Plugins -> Add New, search for Import Export by RockStarLab, click Install Now, and then click Activate.
Can I upload the plugin manually?
Yes. Download the plugin ZIP file from WordPress.org, then go to Plugins -> Add New -> Upload Plugin and upload the ZIP file.
Do I need FTP to install the plugin?
No. Most users can install the plugin directly from the WordPress dashboard or by uploading the ZIP file through the admin area.
What should I do after activating the plugin?
After activation, open the Import Export menu in the WordPress admin area and choose whether you want to start with an import, export, or another supported workflow.
Can this plugin help if I searched for a WordPress import plugin?
Yes. If you need a WordPress import plugin, Import Export by RockStarLab can help with supported import workflows, file uploads, field mapping, and data processing depending on your active setup.