
Import Export by RockStarLab includes a dedicated Plugin Options screen where you can configure AI integration, customize the WordPress admin menu, and enable helpful tools for hierarchical content workflows.
In this video, we walk through the available plugin options and explain how they can help you set up the plugin for your own site, client websites, AI-powered workflows, and content sync operations.
What this video covers
This lesson focuses on the Plugin Options screen inside Import Export by RockStarLab.
You will learn how to:
- Open the Plugin Options screen from the WordPress admin menu
- Configure AI Integration for OpenAI-powered features
- Install and use the WordPress OpenAI Connector
- Create an OpenAI API key
- Understand which plugin features use AI
- Customize the plugin menu name in WordPress admin
- Hide unused submenu links
- Enable the Show tree action for hierarchical content lists
How to open Plugin Options
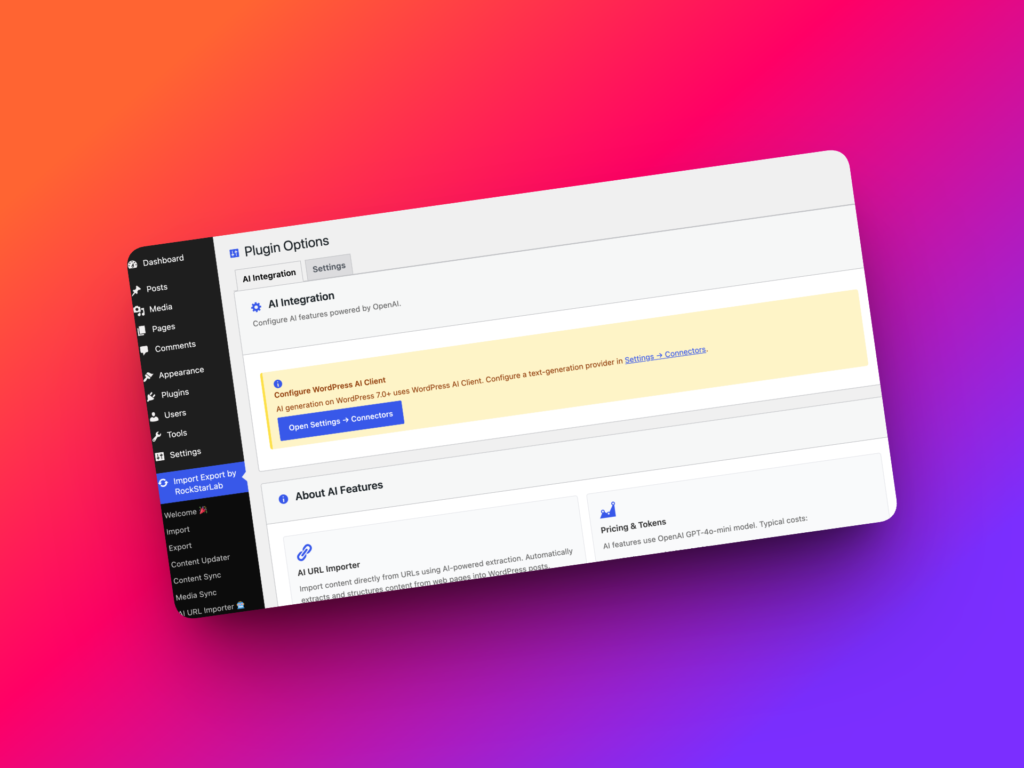
To open the settings, go to your WordPress dashboard and find the Import Export by RockStarLab menu.
Then click Plugin Options.
This screen contains the main configuration areas for the plugin, including AI integration and admin menu settings.
AI Integration
The first tab is AI Integration. This is where you can configure AI features used by the plugin.
The AI key is used for features such as:
- AI URL Importer, which helps import clean content from public URLs
- Functions AI Generator, which helps generate transformation functions from plain-language descriptions
Please note that Functions AI Generator is available in the PRO version of the plugin.
Using WordPress Connectors
Starting with WordPress 7.0, AI connector settings are managed globally for compatible plugins and addons.
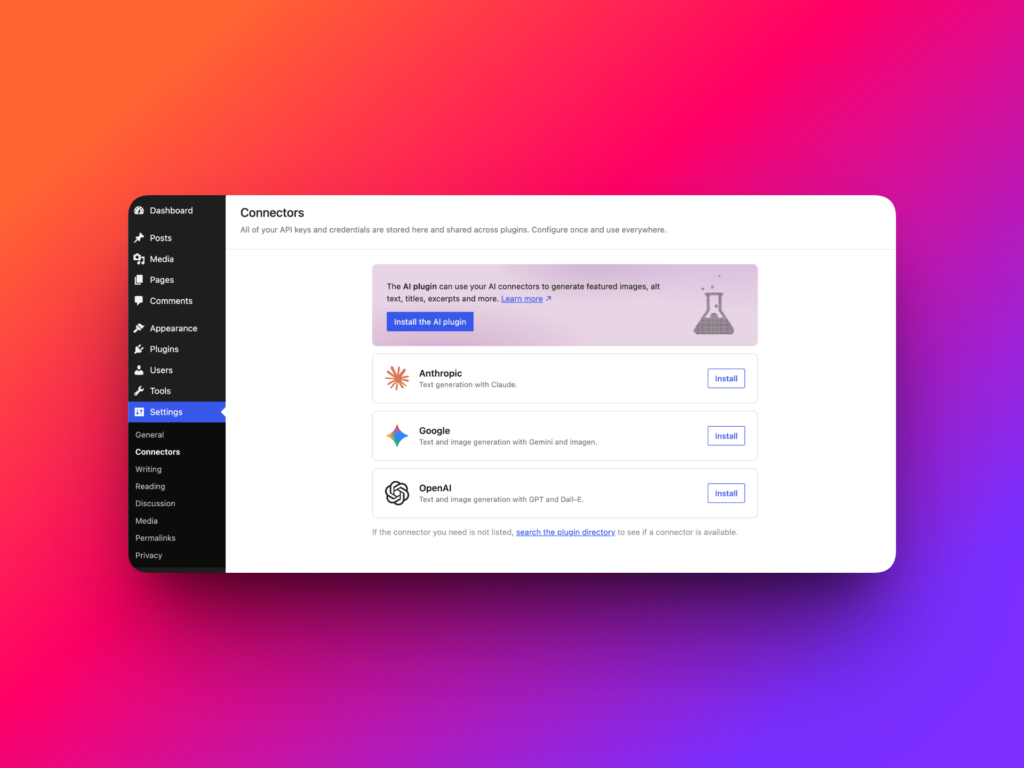
Instead of configuring the OpenAI key separately in every plugin, you can click Open Settings → Connectors.
This opens the WordPress Connectors page, where you can install and configure the OpenAI connector.
How to create an OpenAI API key
To use OpenAI-powered features, you need an OpenAI API key.
Open the OpenAI API keys page:
https://platform.openai.com/api-keys
In the top right corner, click Create new secret key.
You can enter a name for the key if you want. This is optional, but it can help you remember where the key is being used.
Then click Create secret key.
Copy the generated key, return to the WordPress OpenAI connector settings, paste it into the API key field, and click Save.
After saving the key, AI-powered features in Import Export by RockStarLab are ready to use.
AI usage and pricing
AI features use OpenAI directly based on your usage. You pay OpenAI directly, not through the plugin.
The plugin uses the OpenAI GPT-4o-mini model for AI-powered workflows.
As an example, importing one page through AI URL Importer usually costs around $0.001–$0.005 per page, depending on the amount of content.
You can monitor your costs in your OpenAI dashboard.
Admin Menu settings
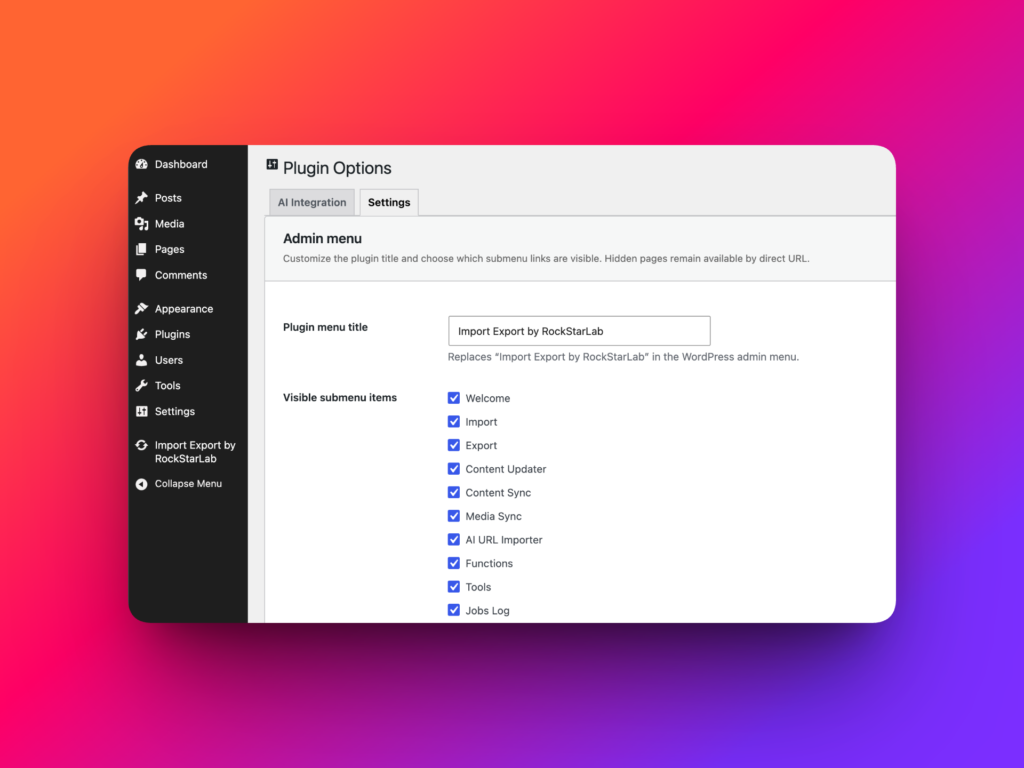
The next important section is Admin Menu.
Here, you can customize how the plugin appears in the WordPress admin panel.
You can rename the plugin menu item and hide unused submenu links. This can be helpful if you are setting up a website for a client and want the admin area to look cleaner or more customized.
For example, instead of showing the full plugin name, you may want the menu to appear as:
- Content Tools
- Migration Tools
- Import Export
- Data Tools
You can also hide sections that are not needed for a specific client or workflow. This helps reduce clutter in the WordPress admin menu.
Hierarchical Content Lists
The final option is Hierarchical Content Lists.
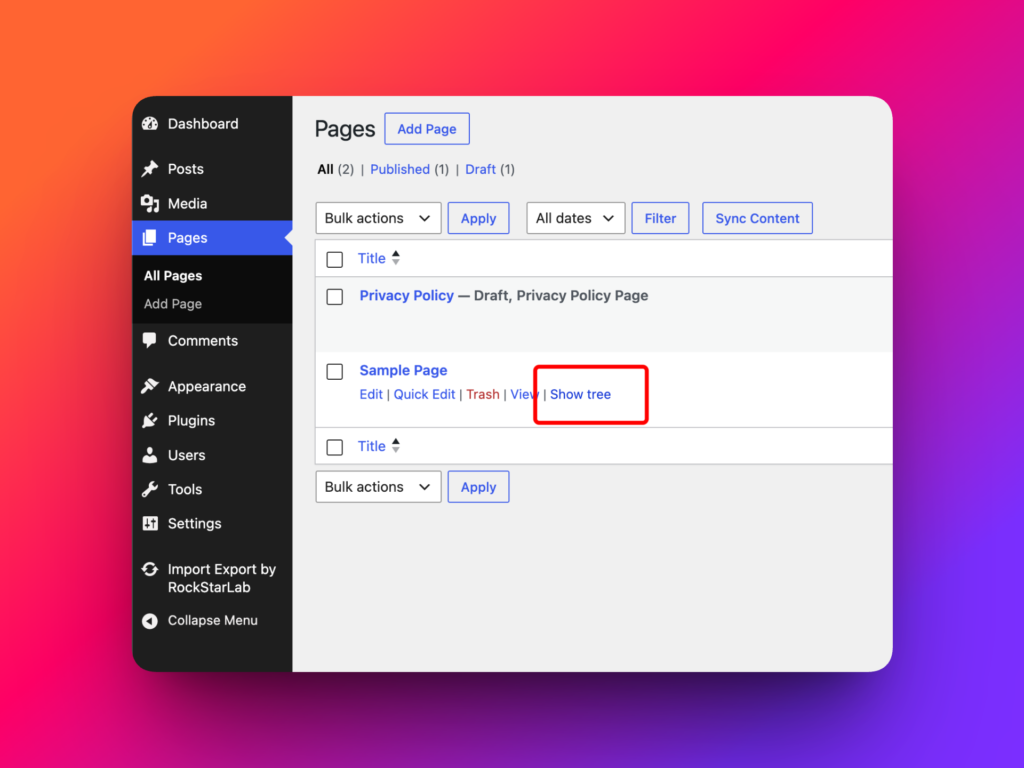
If you enable the checkbox called Show the “Show tree” row action, the plugin adds an additional Show tree link to hierarchical post types.
This applies to pages and any custom post type that supports hierarchy.
When you click Show tree, WordPress filters the list so you can see only the selected parent item and all of its child items.
This is especially useful when working with large page structures, documentation sections, service pages, landing pages, or any site where content is organized in parent-child relationships.
Why Show tree is useful for Content Sync
The Show tree option is especially helpful when syncing content between WordPress sites.
For example, if you have a large website and only want to sync one section from staging to production, you can use Show tree to display one parent page and all of its child pages.
This makes it easier to select the correct content and avoid scrolling through a long list of unrelated pages.
We will cover Content Sync in more detail in future tutorial videos.
Summary
The Plugin Options screen helps you configure Import Export by RockStarLab for your workflow.
You can connect OpenAI for AI-powered features, customize the WordPress admin menu, hide unused sections, and enable tools that make hierarchical content easier to manage.
These settings are especially useful for agencies, client websites, content teams, and anyone who works with structured WordPress data across multiple environments.
Recommended links
FAQ
Where are Plugin Options located?
You can find Plugin Options in the Import Export by RockStarLab menu inside the WordPress admin dashboard.
Which features use AI integration?
AI integration is used by AI URL Importer and, in the PRO version, by Functions AI Generator.
Do I need an OpenAI API key?
Yes. To use OpenAI-powered features, you need to configure an OpenAI API key through WordPress Connectors or the plugin settings.
Does the plugin charge for AI usage?
No. AI usage is billed directly by OpenAI based on your API usage. You can monitor costs in your OpenAI dashboard.
What is the Admin Menu setting used for?
The Admin Menu setting lets you rename the plugin menu item and hide unused submenu links in the WordPress admin area.
What does Show tree do?
Show tree adds a row action for hierarchical post types, allowing you to filter the list to a selected parent item and its child items.