
Google Merchant Center needs a product file before your products can appear in Google Shopping and free listings. The file has to use Google’s column names (id, title, price, availability and so on) and Google’s value formats. A price must look like 49.00 USD, and stock must say in_stock rather than WooCommerce’s instock. Variable products have to be split into one row per variation.
Import Export by RockStarLab builds that file. You don’t need a separate feed plugin. You choose the products, rename the columns to Google’s attribute names, fix the value formats with transformations and export a tab-separated file that Merchant Center accepts. Exporting WooCommerce products and transformations need the PRO add-on, which you can get for free.
What goes into the file
These are the columns used in this guide and where each one comes from in WooCommerce:
| Google attribute | WooCommerce field | Notes |
|---|---|---|
| id | SKU | Must be unique and stay the same over time. |
| title | Product name | Variations get names like “Hoodie – Red”. |
| description | Description | HTML tags removed. |
| link | Permalink | Variation links pre-select the color or size. |
| image_link / additional_image_link | Featured image URL / gallery | A variation uses its own image when it has one. |
| price / sale_price | Regular price / sale price | Formatted as 49.00 USD. |
| availability | Stock status | in_stock, out_of_stock or backorder. |
| item_group_id | Parent SKU | Groups variations of one product. |
| brand, condition, identifier_exists | Fixed values | The same value on every row. |
Use identifier_exists = no only for products without a GTIN (barcode), such as your own merchandise or handmade goods. If your products have GTINs, add them as a gtin column from the custom field where you store them.
Step 1: Create two transformations
Transformations are small functions that change a value during export. The library has 48 ready-made ones. For Google you need two of your own. Go to Import Export → Functions → New Function and create:
Price for Google turns 49 into 49.00 USD, using your store currency. An empty price stays empty, so products that aren’t on sale get an empty sale_price.
$value = trim( (string) $value );
if ( '' === $value ) {
	return '';
}
return number_format( (float) $value, 2, '.', '' ) . ' ' . get_woocommerce_currency();
Availability for Google converts WooCommerce stock statuses to Google’s values:
$map = [
	'instock'     => 'in_stock',
	'outofstock'  => 'out_of_stock',
	'onbackorder' => 'backorder',
];
return $map[ $value ] ?? 'out_of_stock';
If you’ve connected an AI key, you can also describe the function in the AI Generator box instead of pasting code. Either way, check the result with Test before you save.
Step 2: Choose the products
Go to Import Export → Export, choose WooCommerce Products and click Next Step. Add two filters:
- Status equals
publish, so drafts and private products stay out of Google. - Product Type not equals
grouped. A grouped product has no price of its own; the products inside it are exported as their own rows anyway.

The counter shows 16 products for this store.
Step 3: Add the columns and give them Google’s names
Add these fields to Export File Structure: SKU, Product Name, Description, Permalink, Featured Image URL, Gallery Images, Regular Price, Sale Price, Stock Status and Parent SKU.
Click the pencil icon on each column and enter the name Google expects: id for SKU, title for Product Name, link for Permalink, and so on (see the table above). The small gray label under each name shows which WooCommerce field fills it.
Then click Add Custom three times for the columns that are the same for every product. Enter the column name first, then the value: brand = your brand, condition = new, identifier_exists = no.
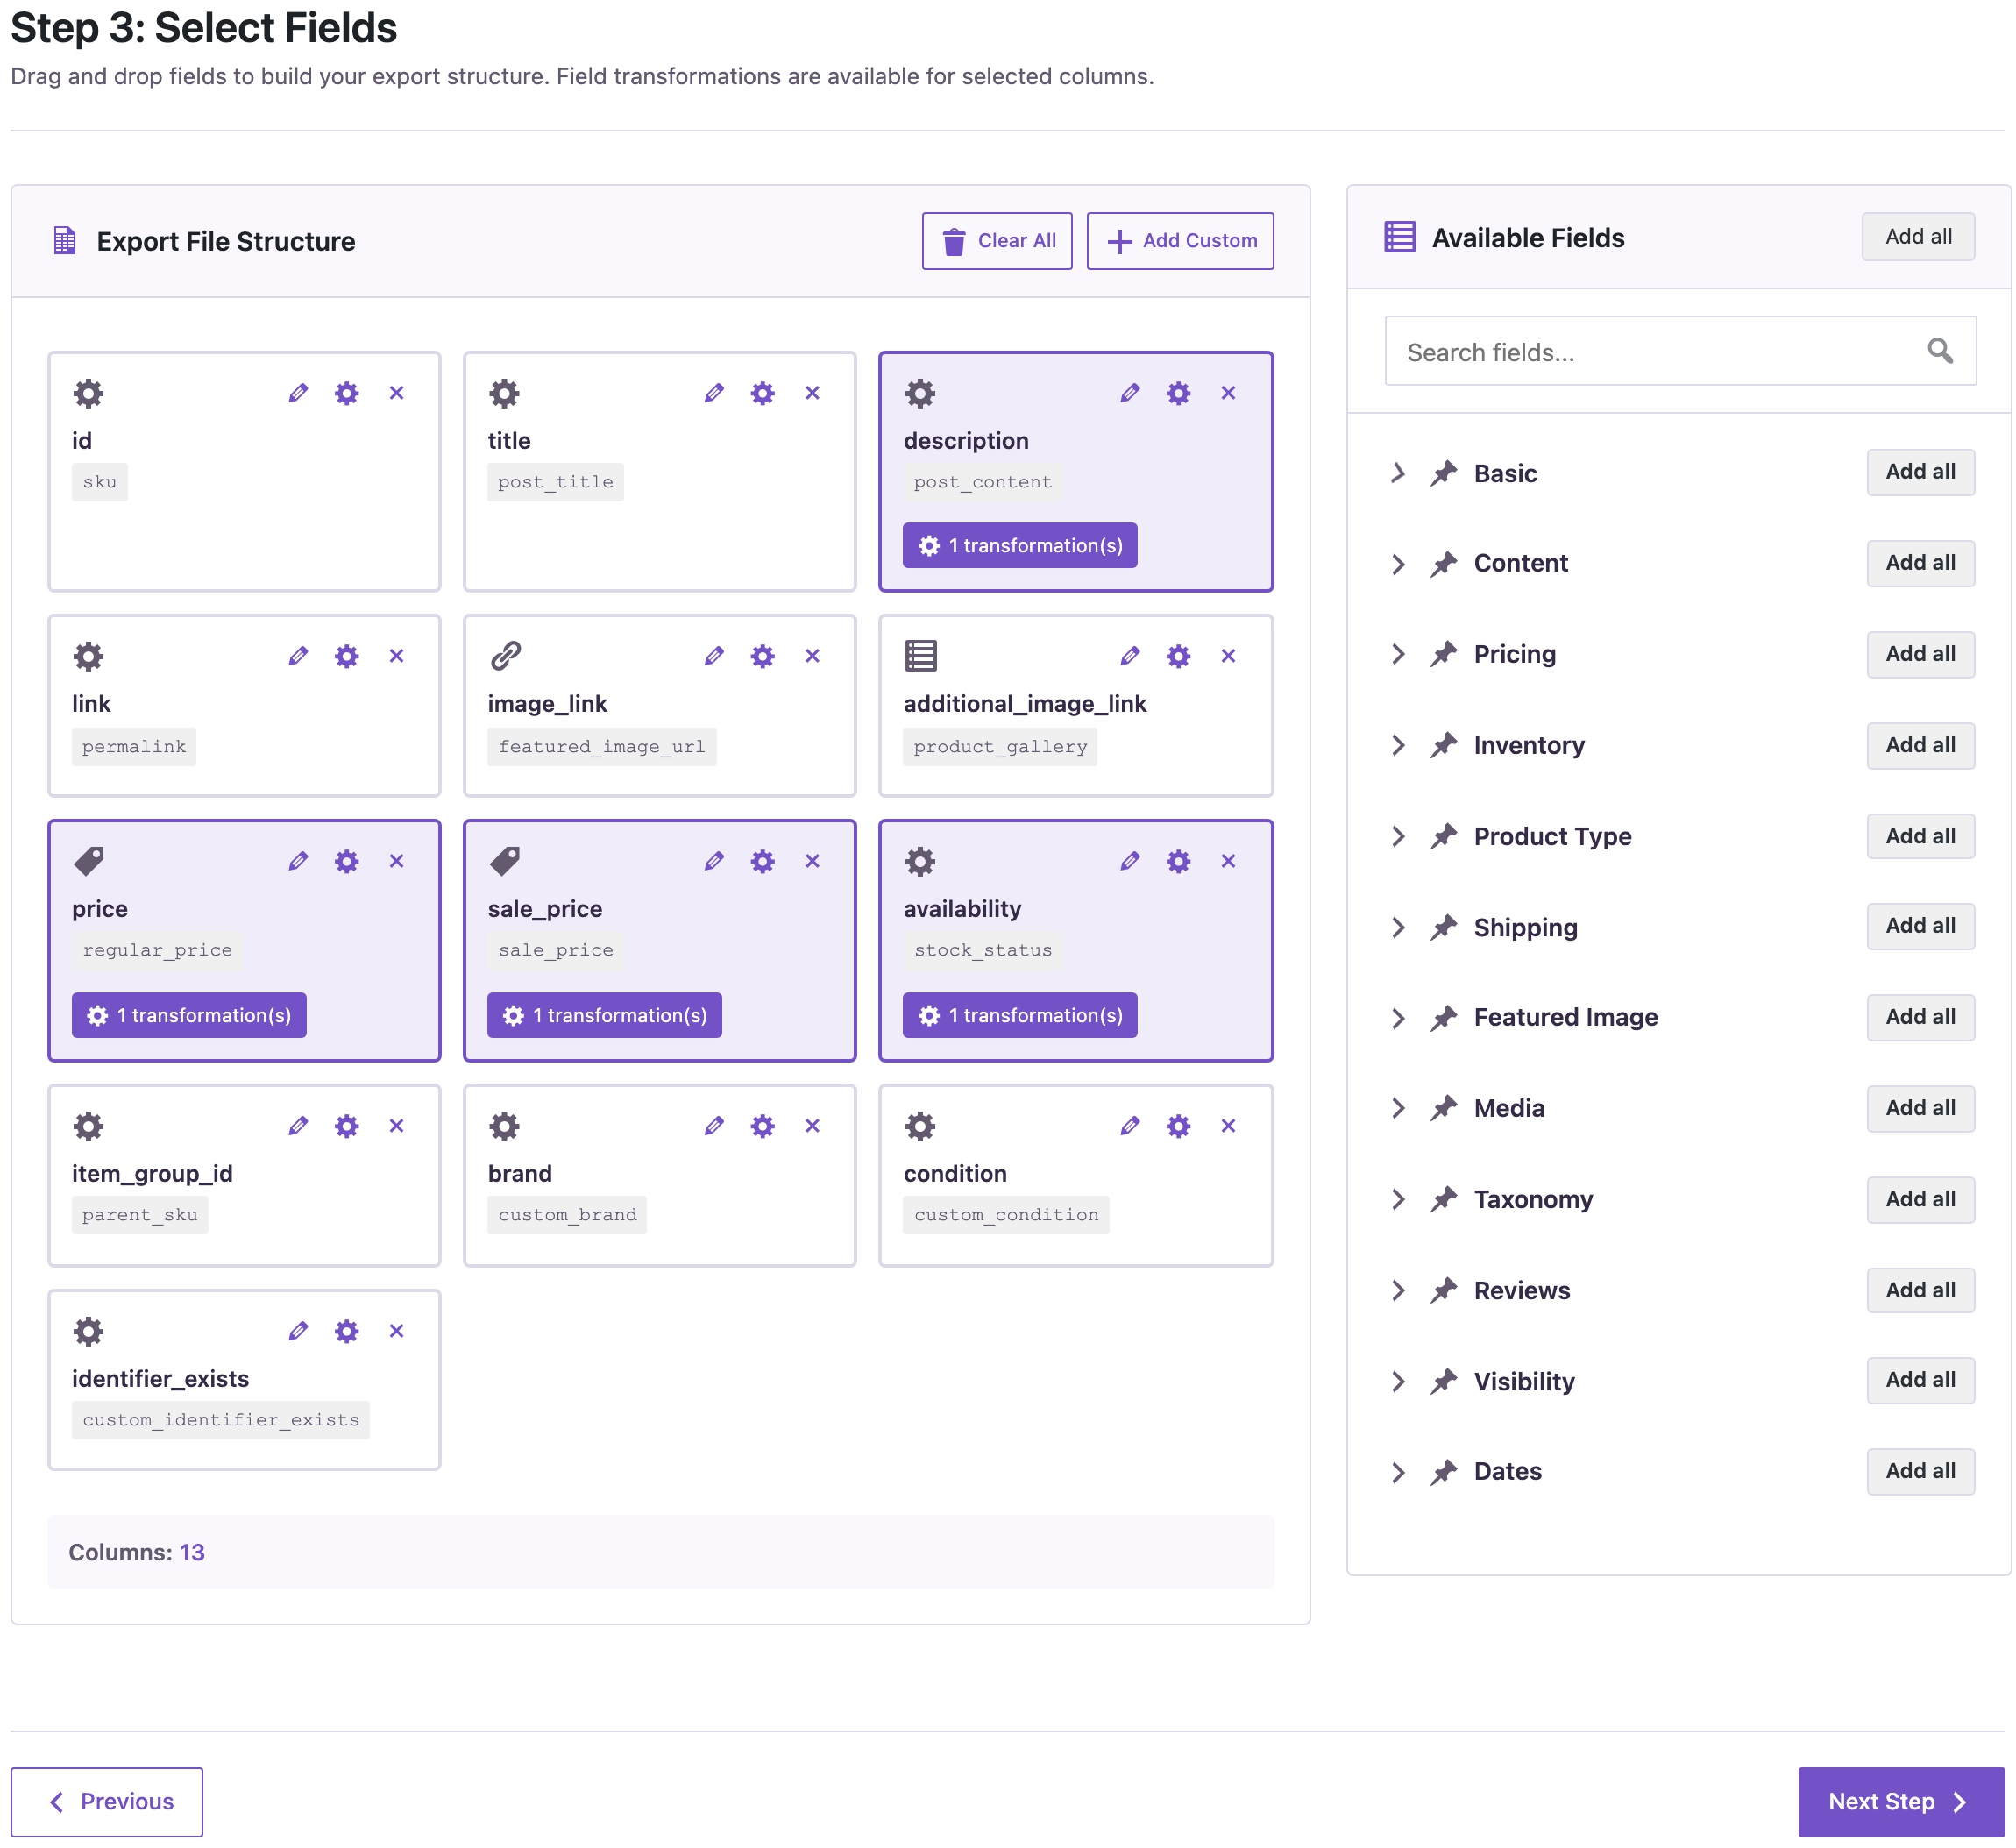
Now assign the transformations with the gear icon on the column:
- description: Strip HTML Tags (from the library)
- price and sale_price: Price for Google
- availability: Availability for Google

Type a value into Test Value and click Test Pipeline to see the result before you export: 49 becomes 49.00 USD.
Step 4: Export a tab-separated file with one row per variation
On Export Format, choose CSV and set Delimiter to Tab. Merchant Center accepts tab-separated .txt and .tsv files, and a tab-delimited export is saved as .tsv. Keep First row contains column names on.
Under Variations, check One row per variation. Each variable product is replaced by its enabled variations. Each variation row gets its own SKU, price, stock status, image and link, and item_group_id holds the parent’s SKU. Disabled variations are left out.

Enter a file name and click Start Export, then Download Export File.
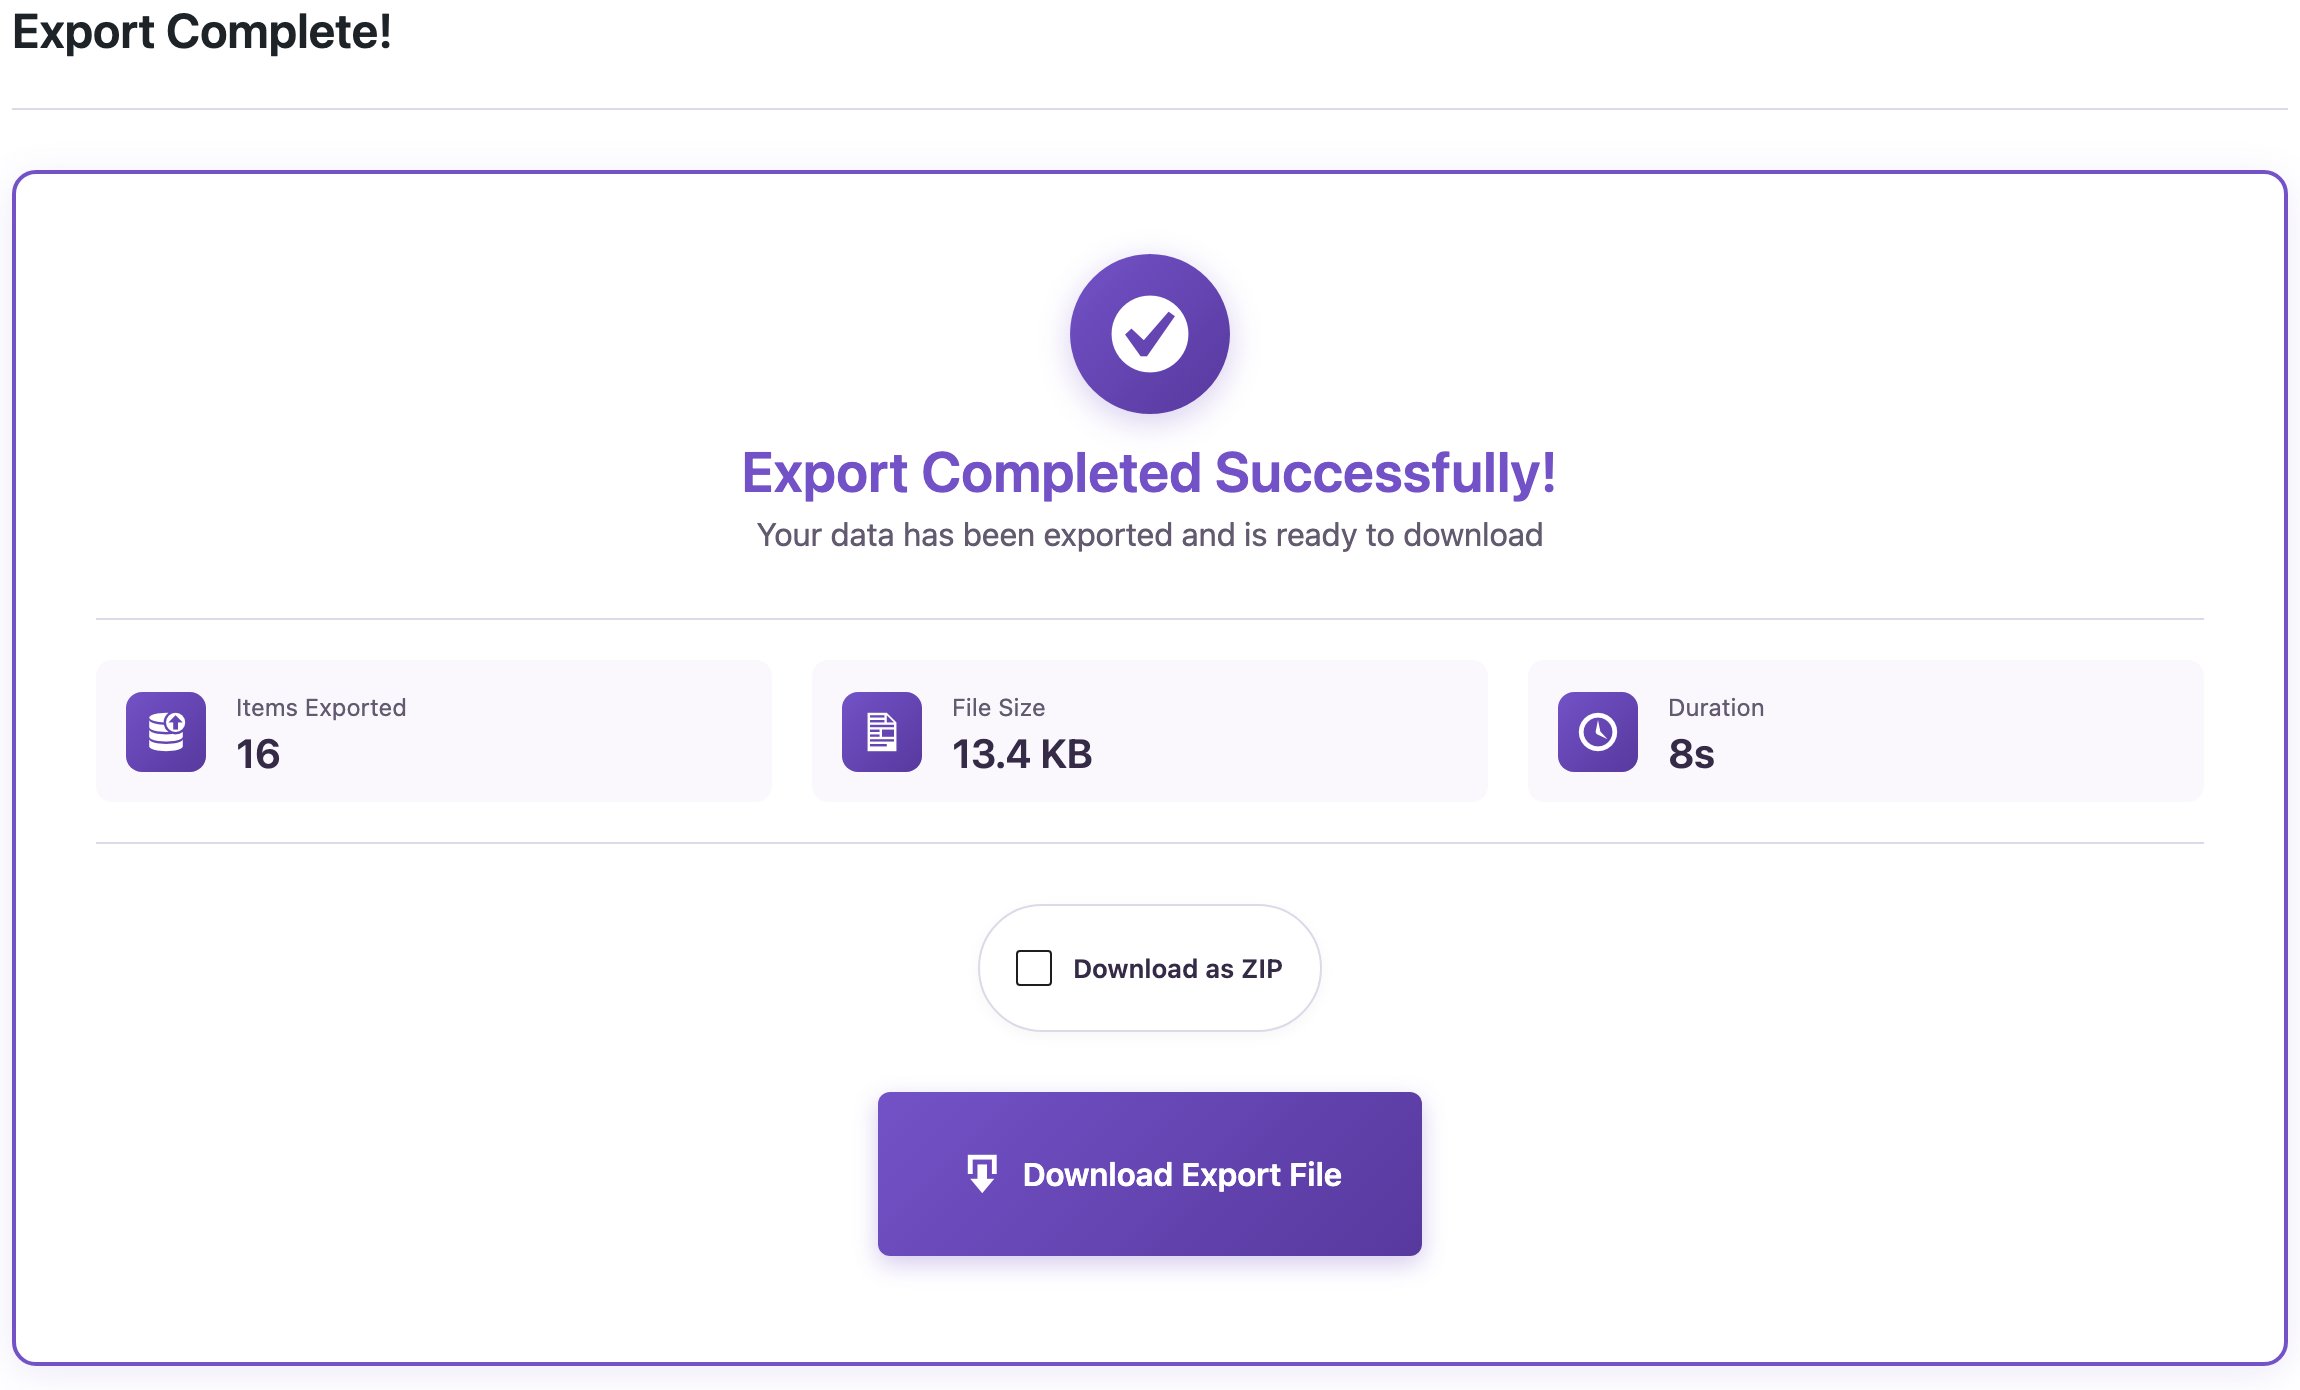
The counter shows 16 products. The file has 21 rows because the two variable products became seven variation rows.

The V-Neck T-Shirt is now three items, each with its own color in the link, and the red hoodie keeps its sale price. Every row has a price with the currency and a Google availability value.
Step 5: Upload the file to Merchant Center
In Merchant Center, go to Settings → Data sources and click Add product source. Choose Add products from a file, then Upload a file from your computer, and select the .tsv file. Google processes it and lists any problems under Products.
A file uploaded from your computer doesn’t update by itself. When prices or stock change, run the same export again and upload the new file to the same data source. Because id is the SKU, the same products are updated rather than added twice.
Google may also ask for more attributes depending on your products and country, for example gtin, google_product_category, or color and size for clothing. Add them the same way: a field or custom field from your products, a renamed column, and a transformation if the format needs changing. Check Google’s product data specification for what your category needs.
Common problems
- “Invalid price”: the price column has no transformation, so it contains
49instead of49.00 USD. Assign Price for Google to both price columns. - “Invalid value [availability]”:
instockwasn’t converted. Assign Availability for Google to the stock status column. - Variable products have no price: One row per variation was off. A variable product doesn’t have a price of its own, only its variations do.
- Duplicate or missing id: some products or variations have no SKU. Add SKUs in WooCommerce, or fill them in bulk.
- Drafts in the feed: add the Status = publish filter from Step 2.
The same file works for other catalogs too. For a general product export to CSV or Excel, see exporting WooCommerce products. For more about transformations, see how transformation functions work.
With an AI agent
With PRO, an AI agent connected through the WordPress MCP Adapter (see connecting Claude Code to WordPress) can build the whole feed. It creates the two transformations with rsl-ie-pro/function-create and runs the export with rsl-ie-pro/export-start, using column_headers for Google’s names, custom_values for brand, condition and identifier_exists, field_functions for the transformations and variation_rows for one row per variation. A prompt:
Create a Google Merchant Center product file: published products except
grouped ones, one row per variation, Google column names, prices like
49.00 USD, Google availability values, brand "Example Store", condition
new, identifier_exists no, tab-separated. Create the transformations you
need and tell me how many rows the file has.
In our run on the same store, the agent created “Price for Google” and “Availability for Google”, added the library function Strip HTML Tags to the description, and started the export with the Tab delimiter. The job processed 16 products and the file google-merchant-feed.tsv had 21 rows under the header id, title, description, link, image_link, additional_image_link, price, sale_price, availability, item_group_id, brand, condition, identifier_exists. Every row had its price as, for example, “14.00 USD” and an availability like in_stock.
FAQ
Which file format does Merchant Center accept?
Tab-separated text (.tsv or .txt) and XML. Choose CSV with the Tab delimiter; the file is saved as .tsv.
How do variable products appear in the file?
With One row per variation, each enabled variation is its own row with its SKU, price, stock, image and link, and item_group_id holds the parent SKU.
Do I need the PRO add-on?
Yes. Exporting WooCommerce products and using transformations are part of the PRO add-on.
How do I keep the products up to date in Merchant Center?
Run the same export again after prices or stock change and upload the new file to the same data source. Products are matched by id, so they are updated, not added again.
My products have GTINs. How do I add them?
Add the custom field that stores the GTIN as a column and rename it to gtin. Remove the identifier_exists column for those products.
Related Guides
- How to Export WooCommerce Products to CSV, Excel, or XML
- What Are Transformation Functions and How to Use Them During Import or Export
- WebToffee Product Import Export Alternative for WooCommerce
- How to Import WooCommerce Product Reviews from CSV

Comments 0
Have a question or a tip to share? Leave it below.