
Keeping a custom post type in step across two WordPress sites is a common part of a production workflow. You might prepare new portfolio projects on a staging site, publish them to production, or pull a production update back to staging before making changes.
This guide walks through both directions with a Portfolio post type, custom taxonomy terms, and Advanced Custom Fields (ACF). We’ll call the two sites Production and Stage. The same steps work with other registered post types, including pages and custom content types.
What to prepare before syncing custom content
Content Sync transfers content between connected sites; it does not set up your content model for you. Before you start, make sure the destination has the custom post type, taxonomies, and ACF field groups that the incoming posts use.
- Install and activate Import Export by RockStarLab on both sites, and make sure the Content Sync feature is available.
- Register the Portfolio post type on both sites. Keep its post type key compatible; matching keys are the most straightforward setup.
- Register the custom taxonomies on both sites. The destination needs the taxonomy that incoming terms belong to.
- Install ACF on both sites and create compatible field groups. Keep field names/keys aligned so values land in the intended fields.
- Check that any related posts, users, or media referenced by ACF fields are available on the destination, or plan to review those references after the sync.
The mapping dialog described below maps a source post to a destination post. It is not a field-mapping wizard and does not remap one post type, taxonomy, or ACF field key to another. If the two sites use different content-model keys, confirm compatibility before syncing rather than assuming the post-matching dialog will translate them.
Take a backup before syncing, especially on a live site. For a full rollback, back up both the database and uploaded files; a database-only backup does not restore files that may be added or changed during a transfer.
Step 1: Connect Production and Stage
Each site has its own Content Sync connection settings. To push from Production to Stage, add Stage as a connected site on Production. To pull from Production while working on Stage—or to sync in either direction—set up the reciprocal connection on Stage too.
- On the receiving site, open Import Export by RockStarLab → Content Sync and expand This Site Configuration.
- Use Show Details to access that site’s API key. Treat the key like a password; do not include it in screenshots, public documentation, or messages.
- On the site that will initiate the sync, choose Add New Site.
- Enter a friendly site name, the remote WordPress URL, and the remote site’s API key.
- Save the connection. In the Connected Sites table, use its Test Connection action to check the remote API key and connectivity.
- Repeat the setup in the other direction if you need to initiate syncs from both sites.
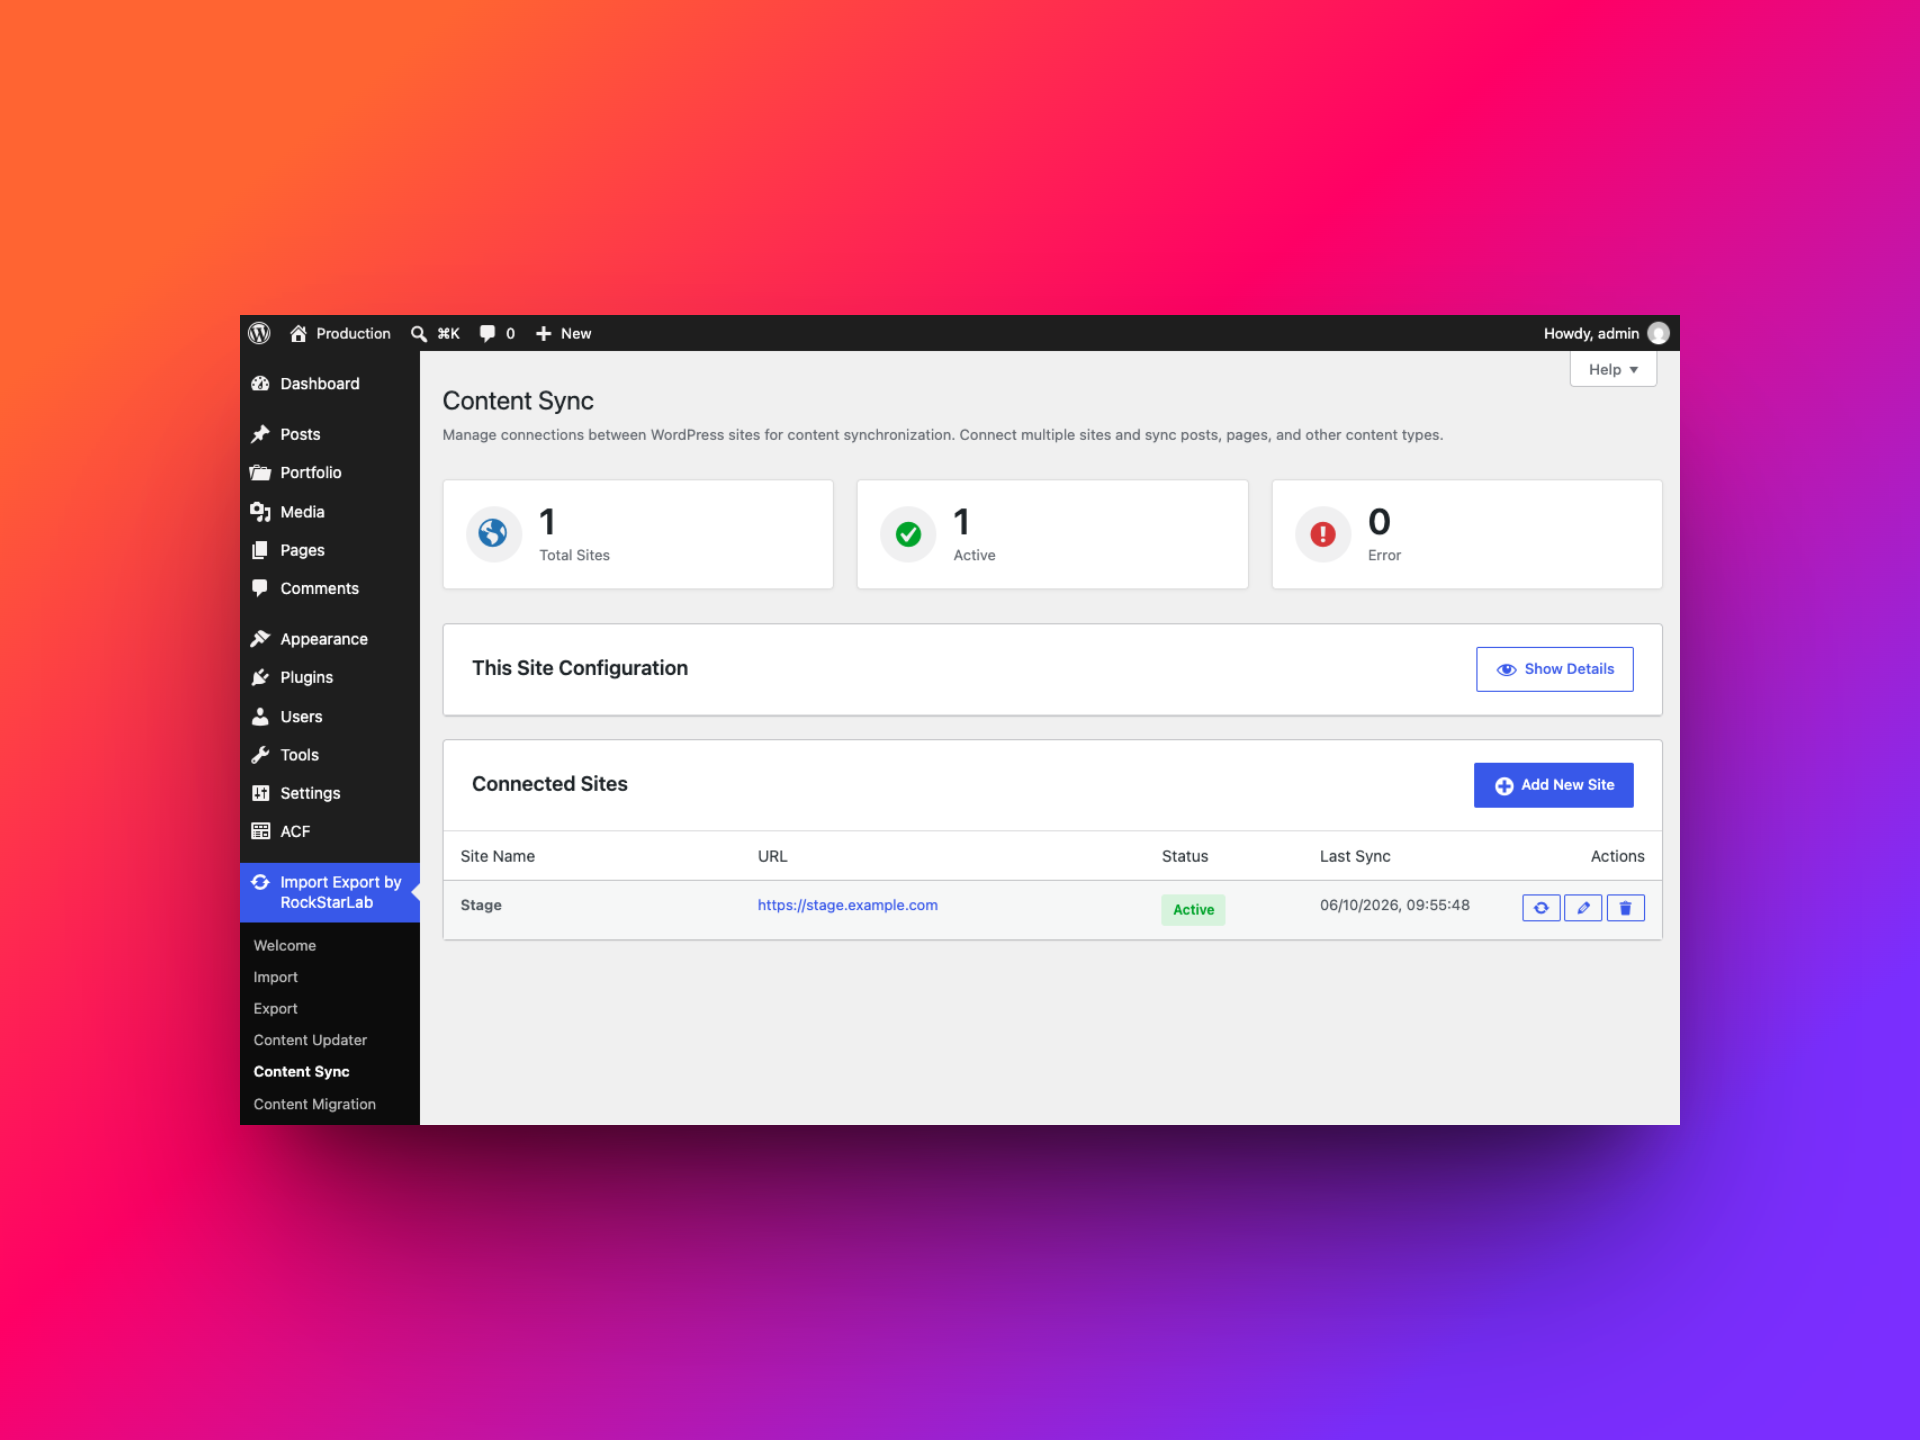
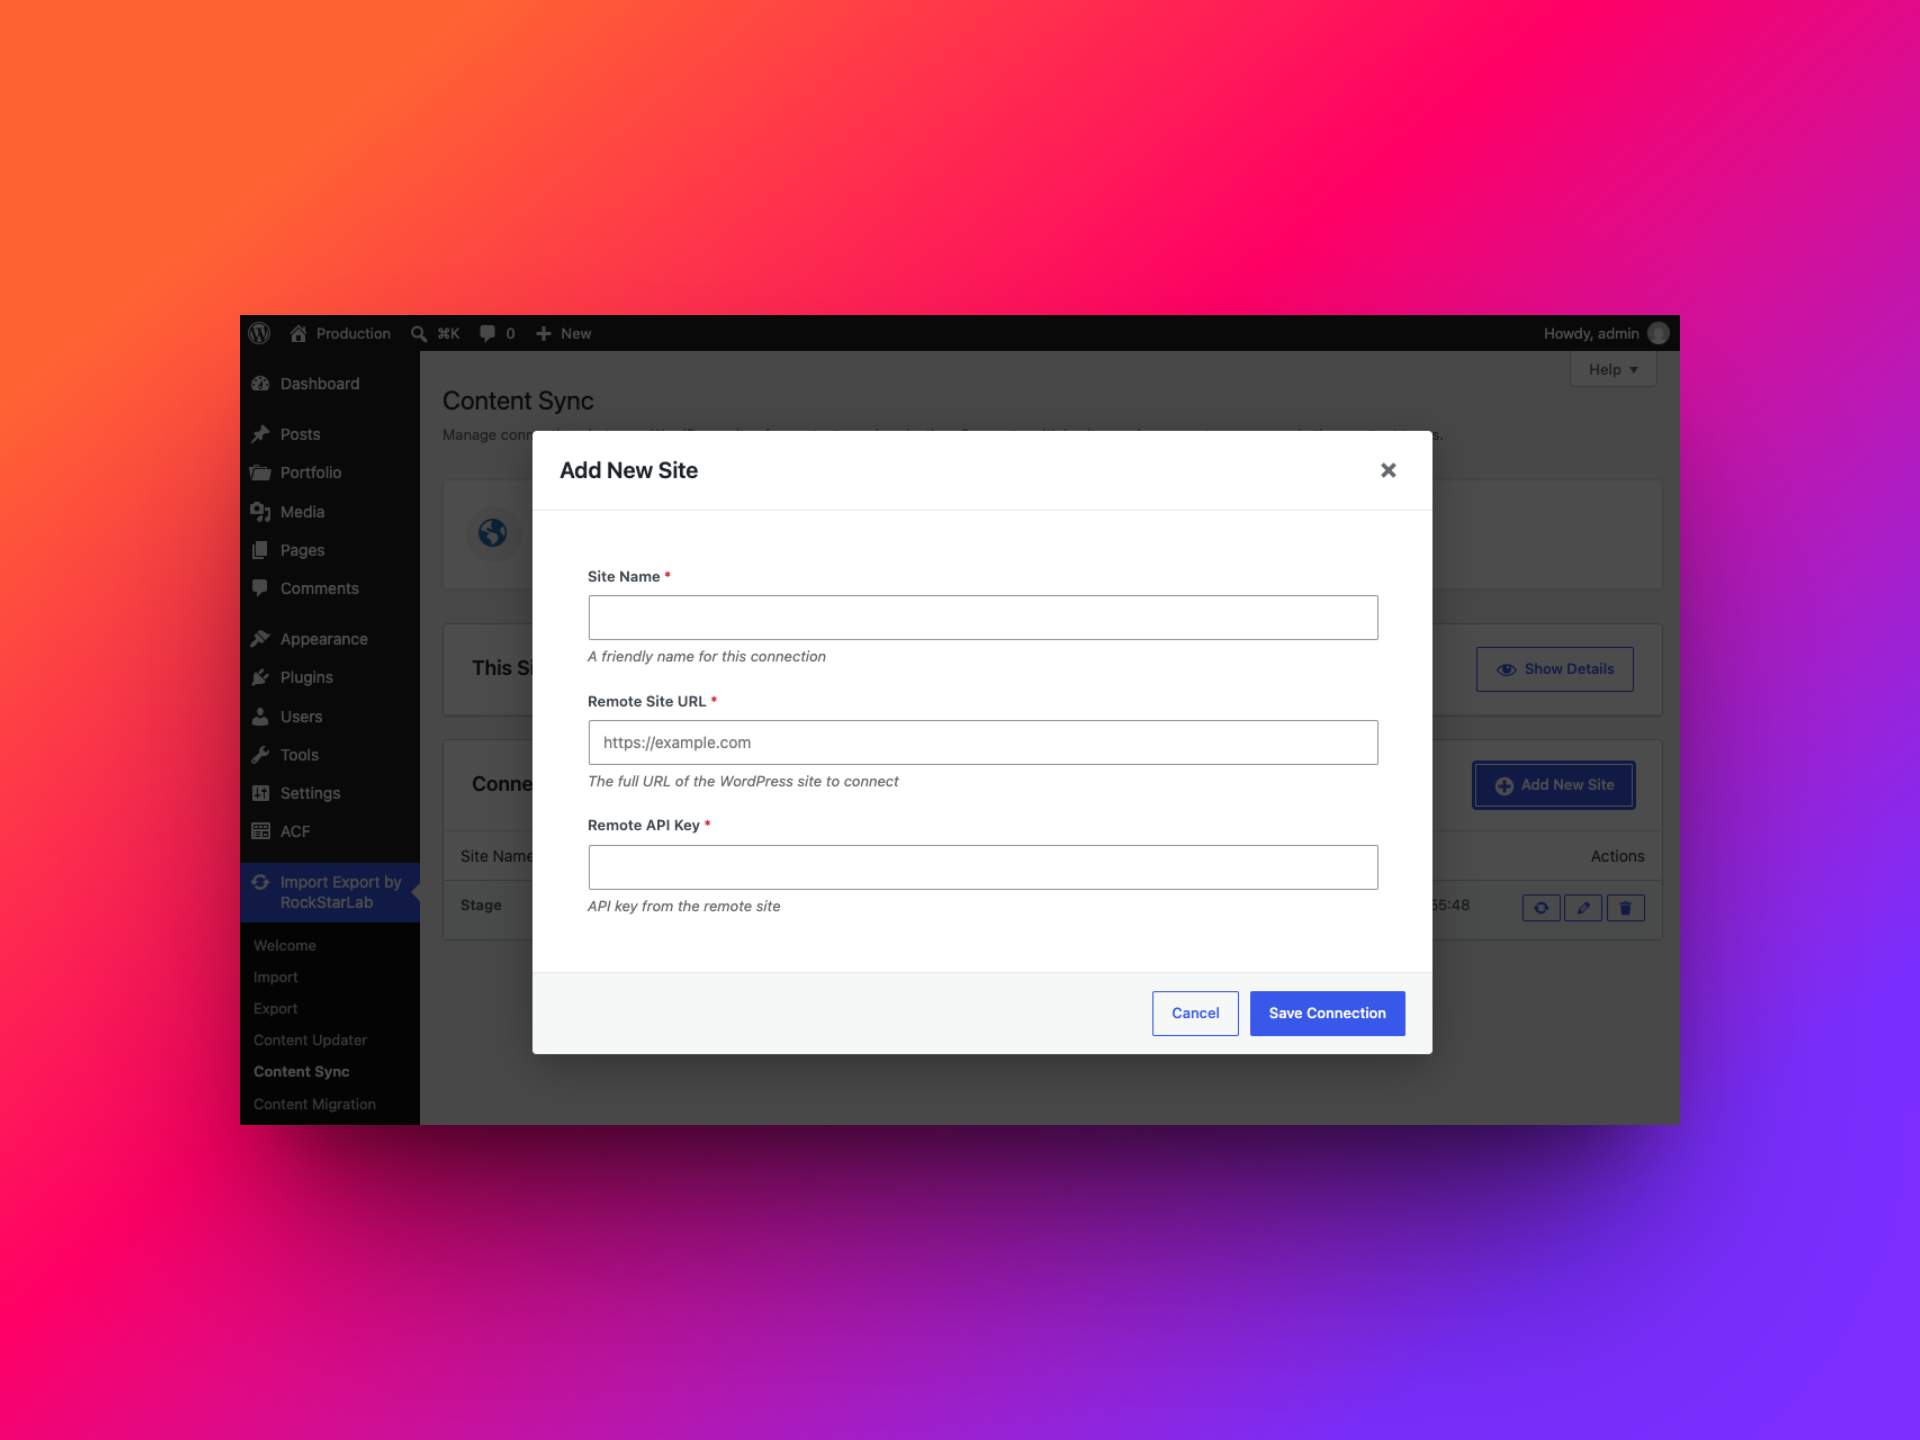
Testing confirms the connection; it does not transfer content. Once a connection is active, the plugin can use it in the sync dialogs. The direction is chosen when you start a sync: Push to Site sends from the site you are working on; Pull from Site brings content from the selected remote site into the current site.
Step 2: Pull a new Portfolio post from Production
Pull is handy when a post already exists on Production and you want to bring it into Stage—for example, to review the live version, test a layout change, or continue editing it in a staging environment.
- On Stage, open the Portfolio list. Leave the local posts unselected when you want to browse remote content.
- Choose Sync Content, then select Production from the site list.
- The Browse Remote Posts window opens. Search by title or narrow the list by status: All, Published, Draft, or Pending.
- Select the Portfolio post or posts to bring over, then choose Pull Selected Posts.
- When the operation finishes, open the new Portfolio item on Stage and review its content, taxonomy terms, ACF fields, and any linked values.
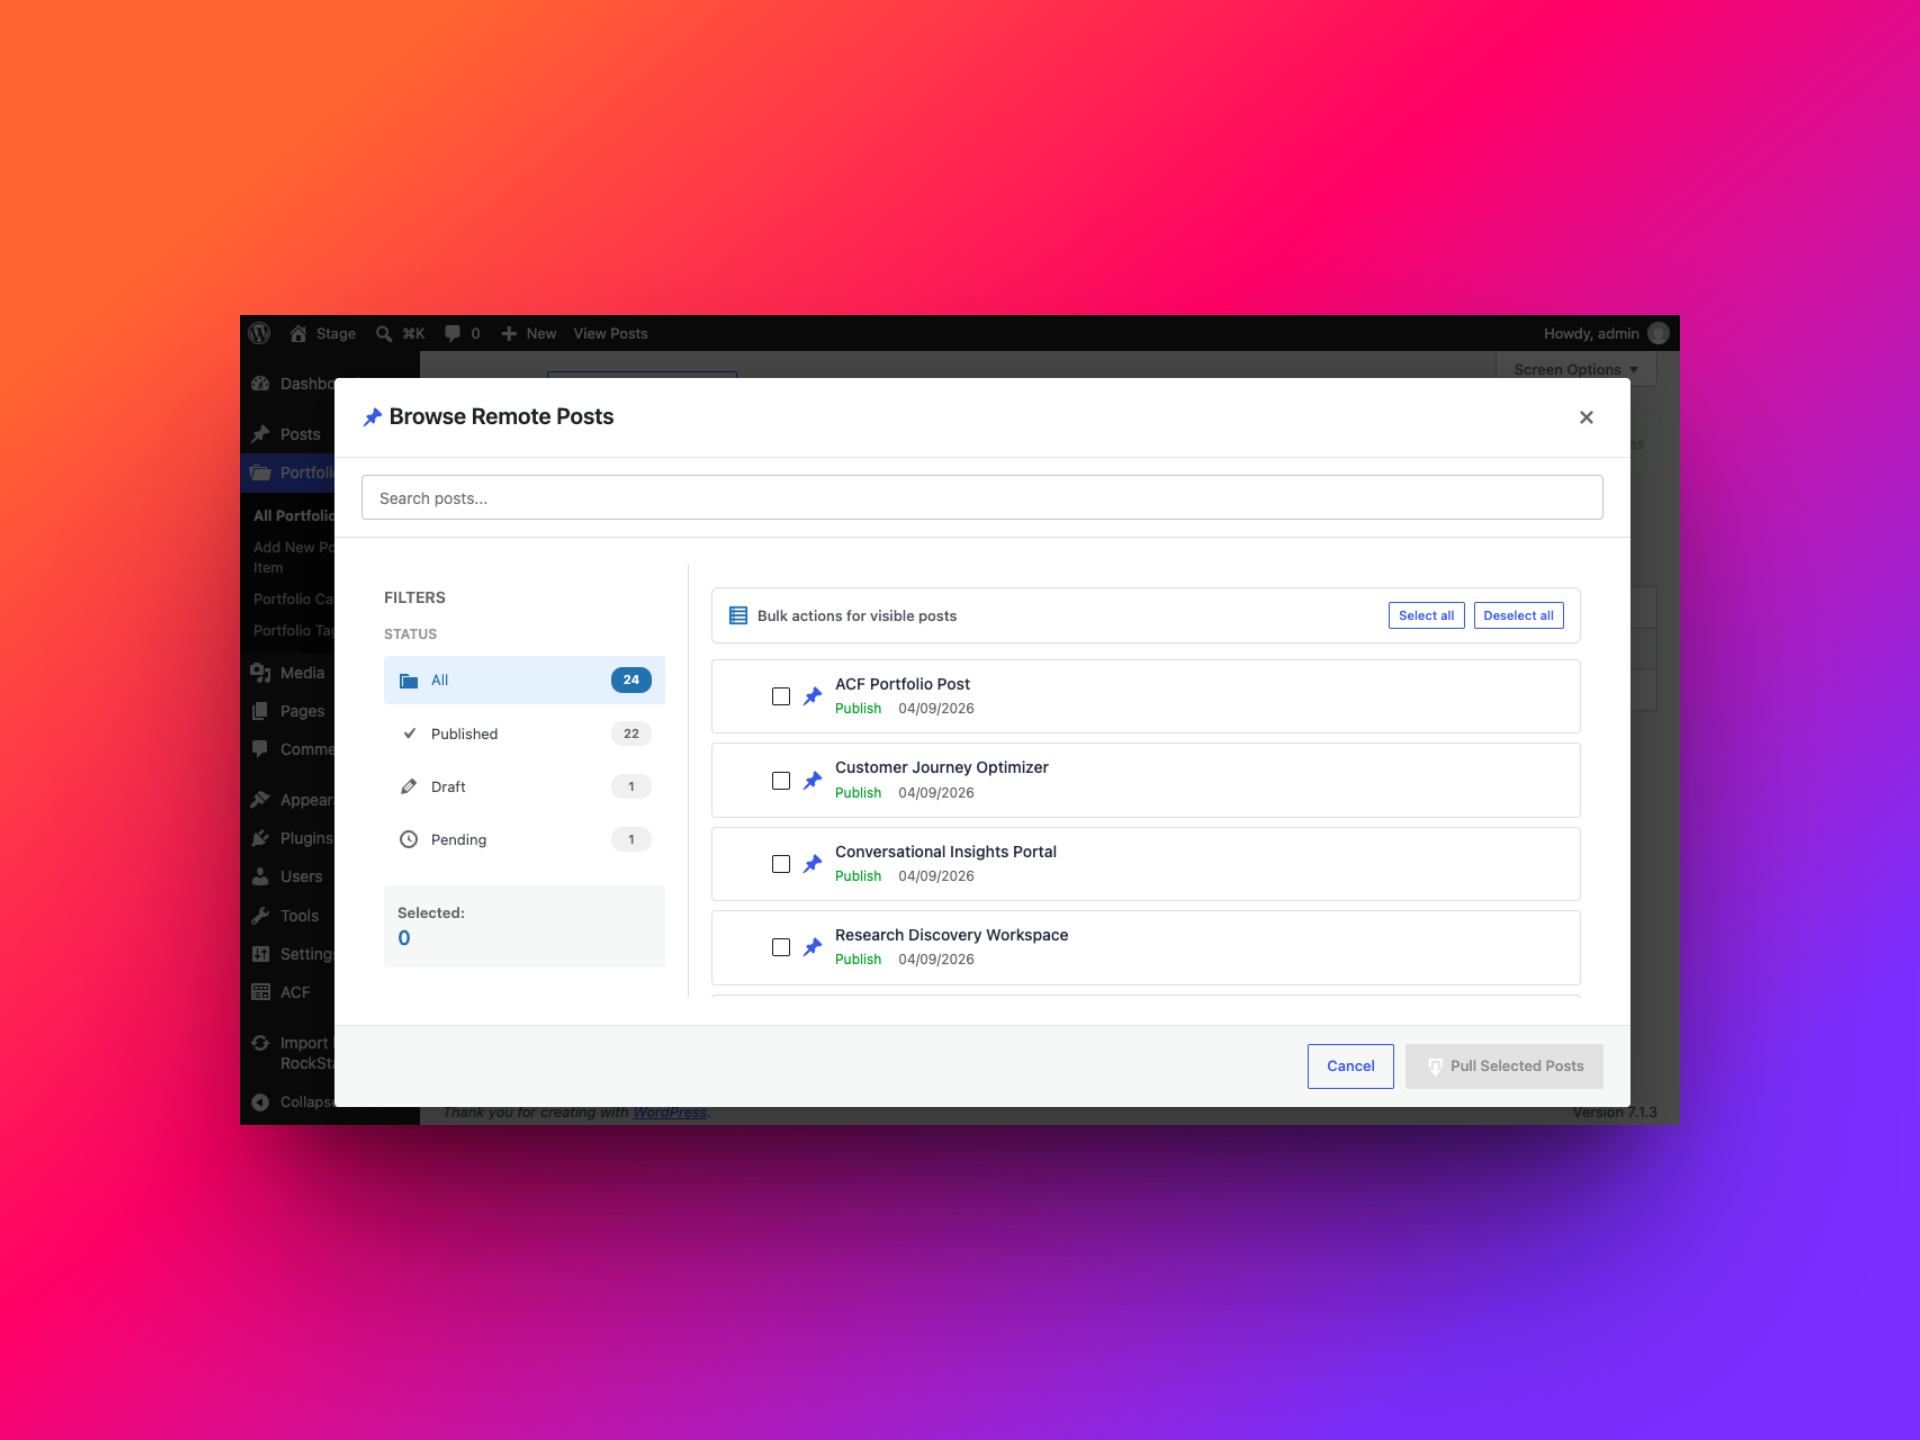
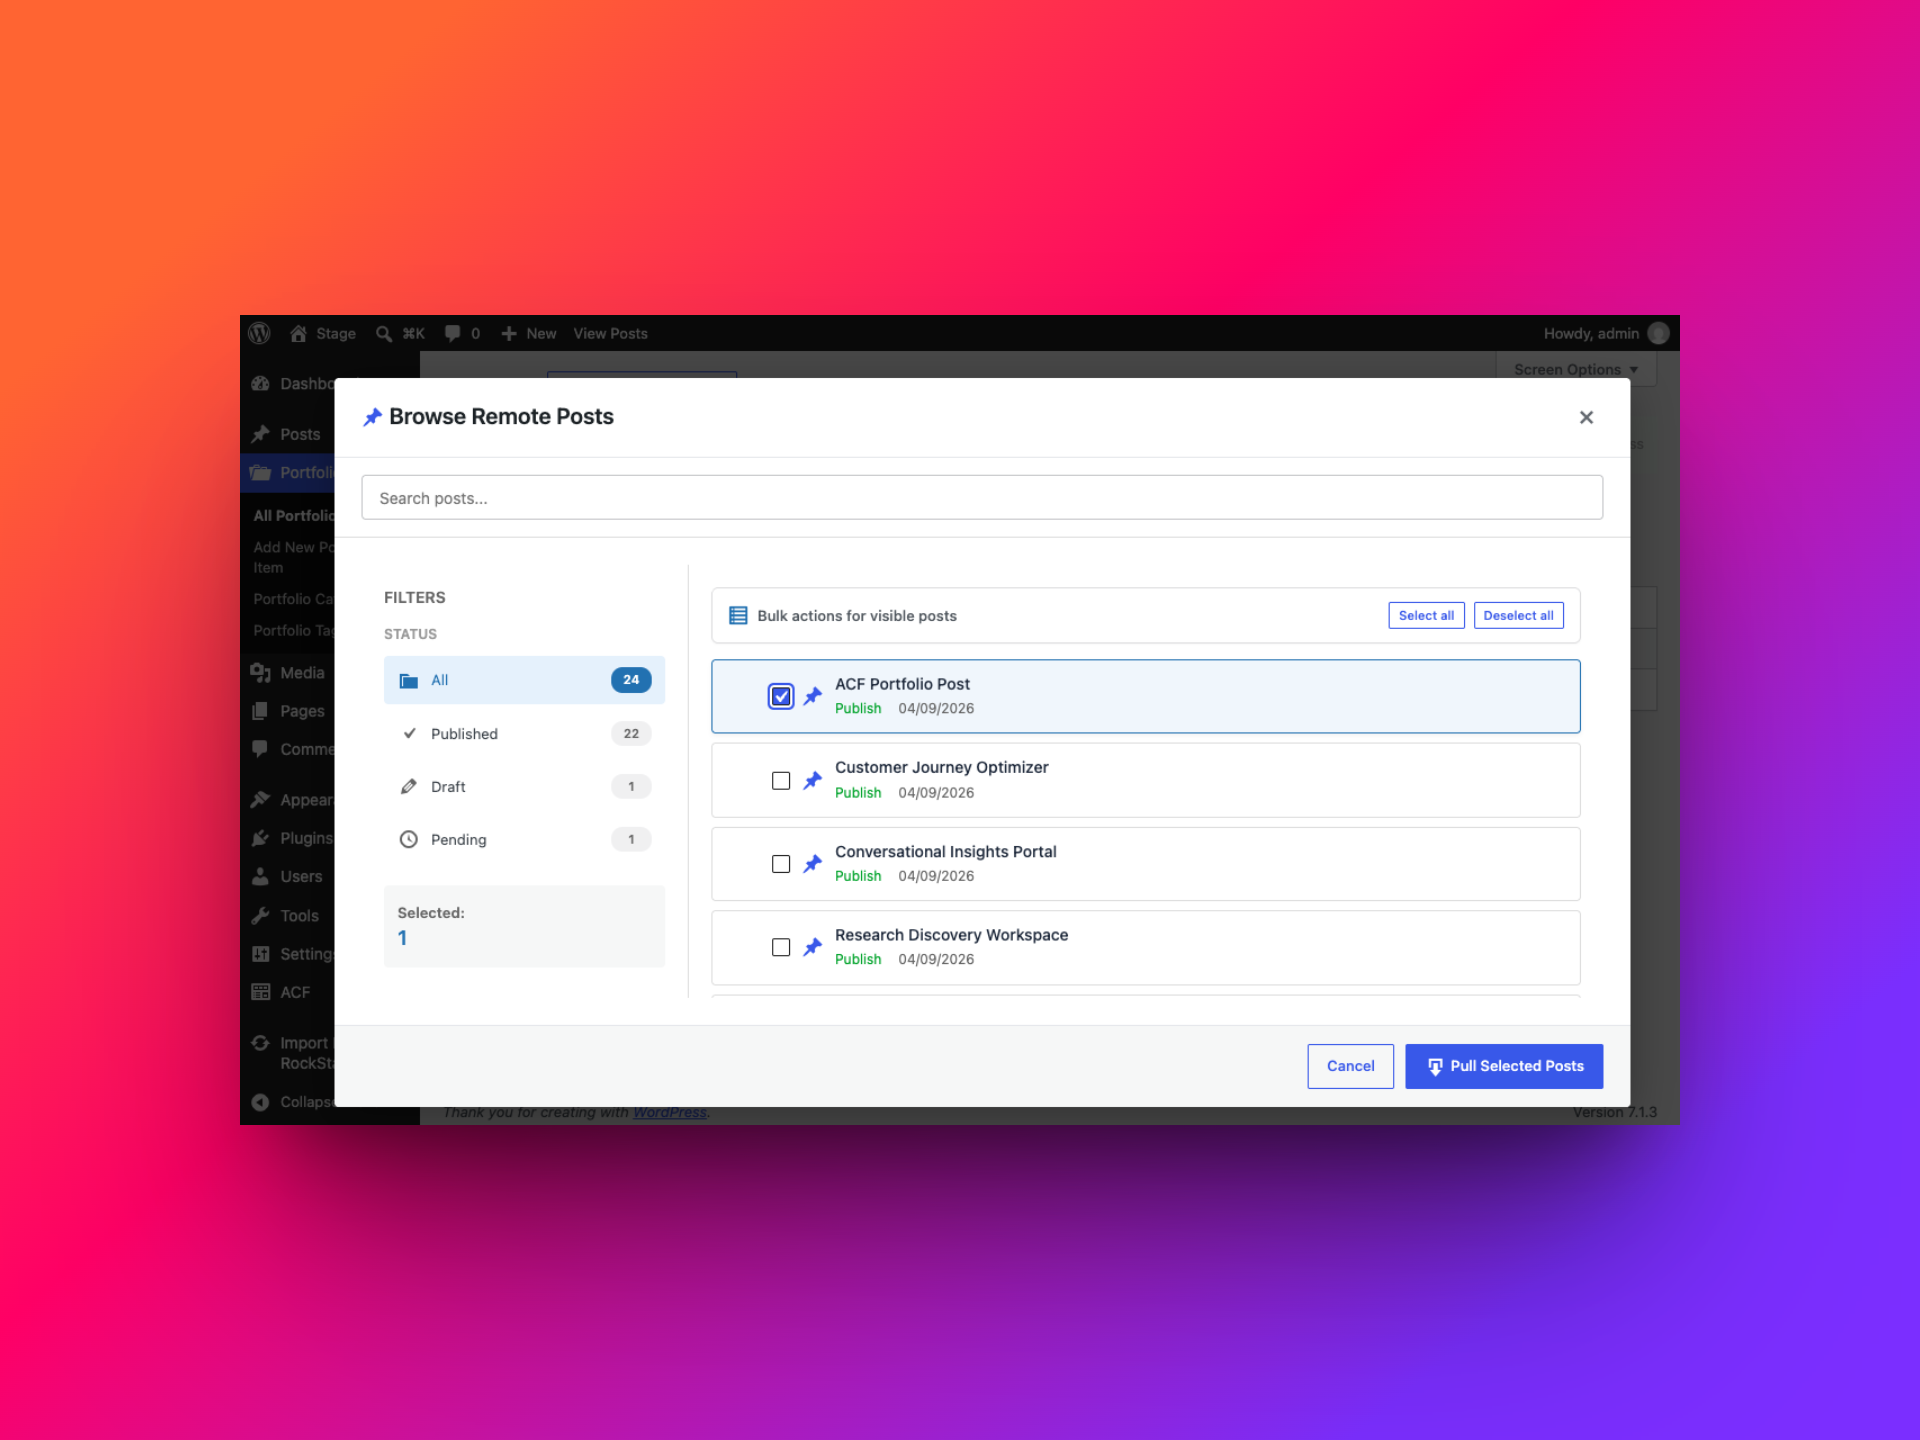
In this walkthrough, pulling the sample Portfolio post created it on Stage with its ACF data and taxonomy terms. The post editor is a useful final check: confirm the expected field values are visible and that linked objects make sense in the destination environment.
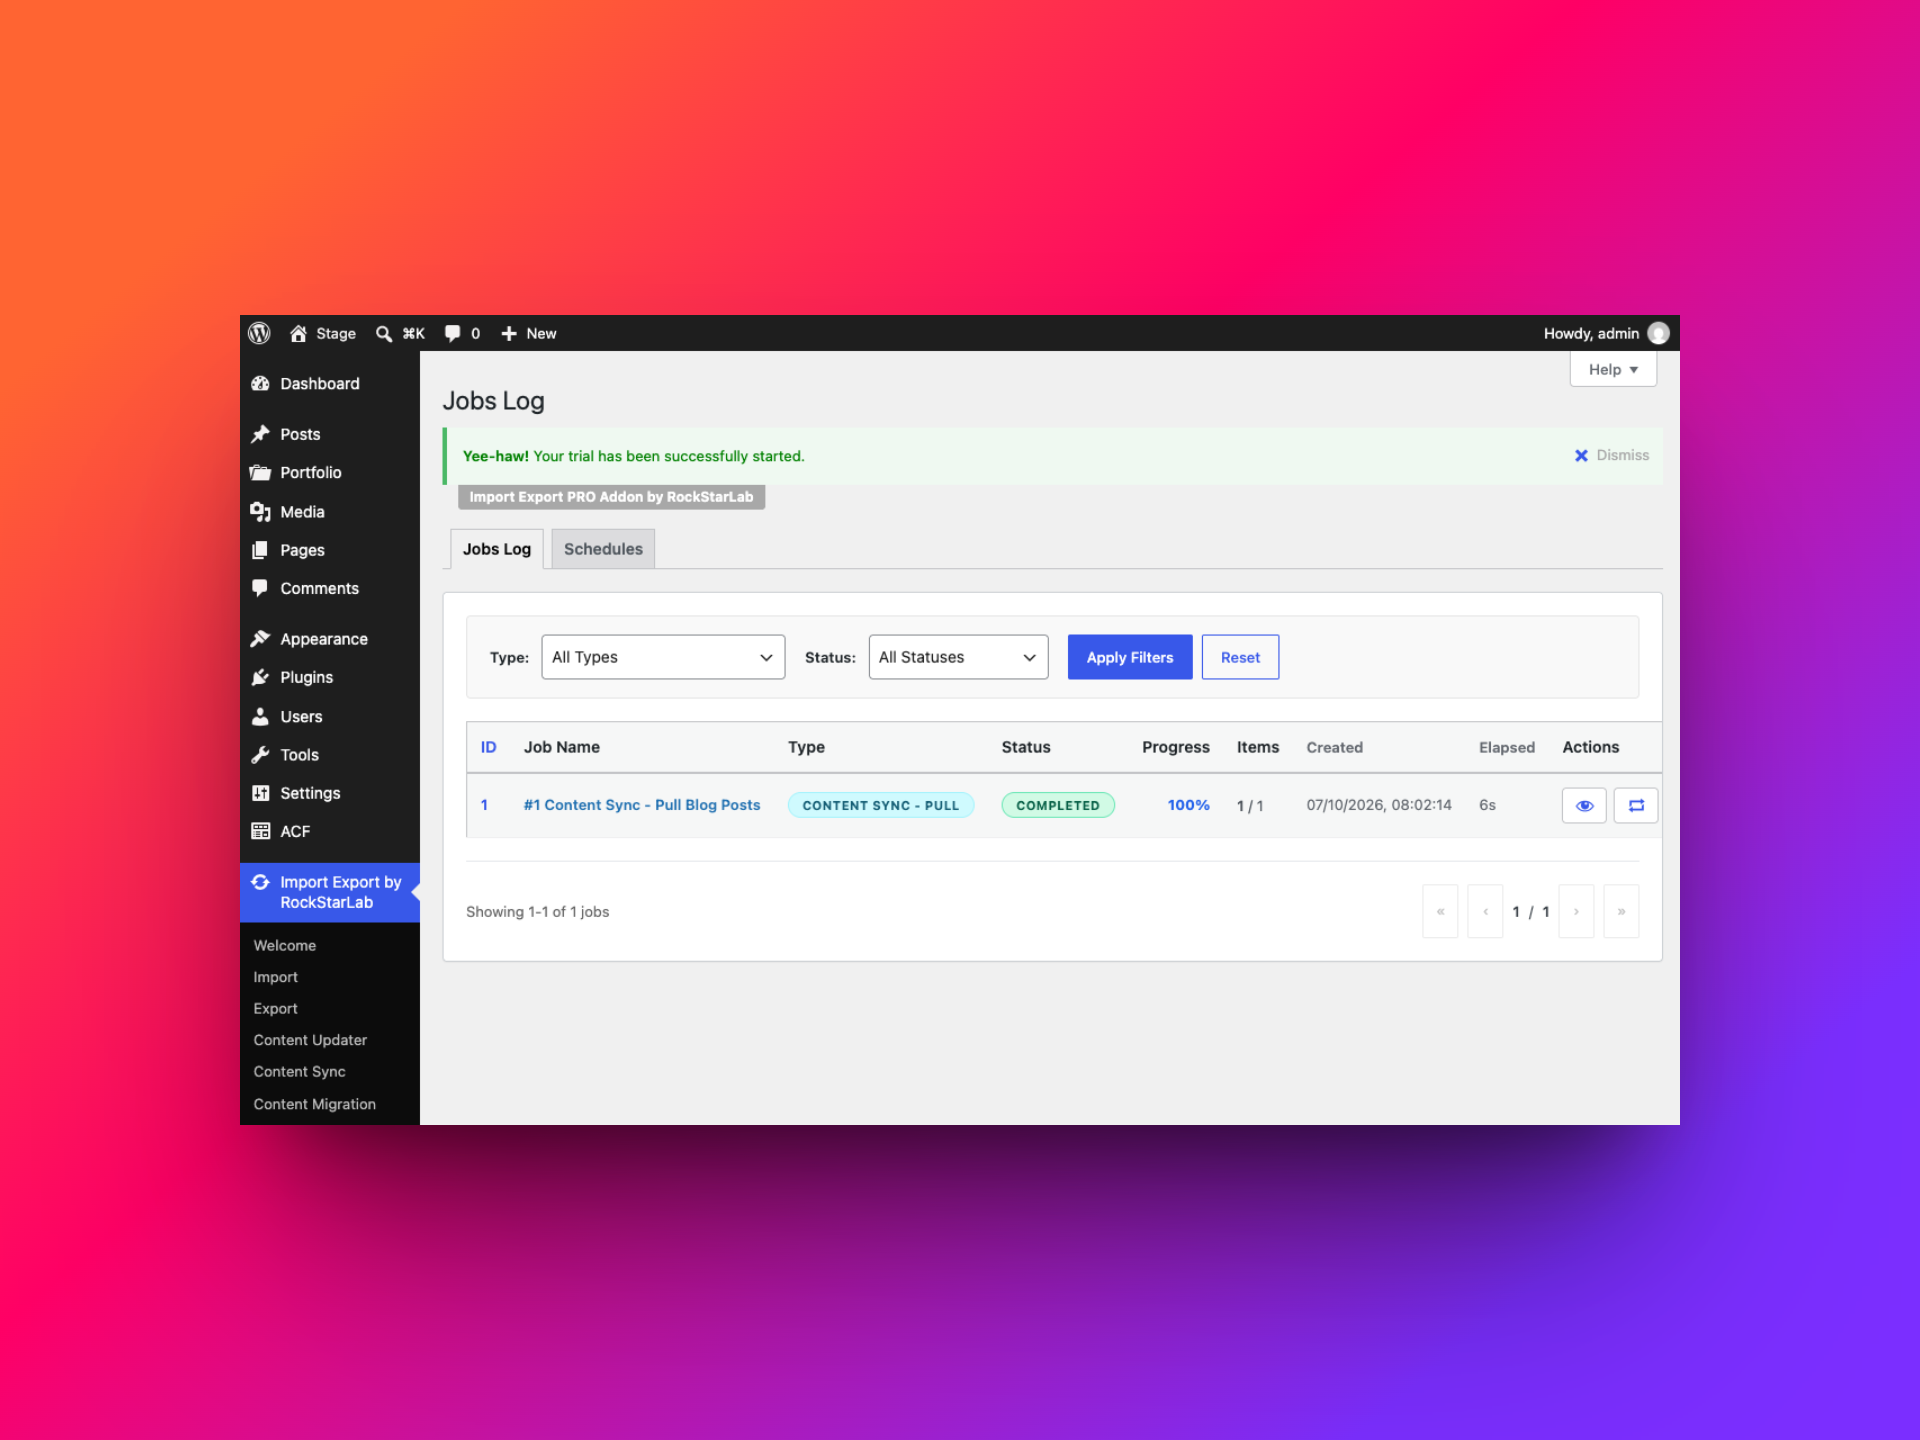
Content Sync also records jobs. A pull is logged on the site receiving the content—in this example, Stage.
Step 3: Update an existing post with Content Sync
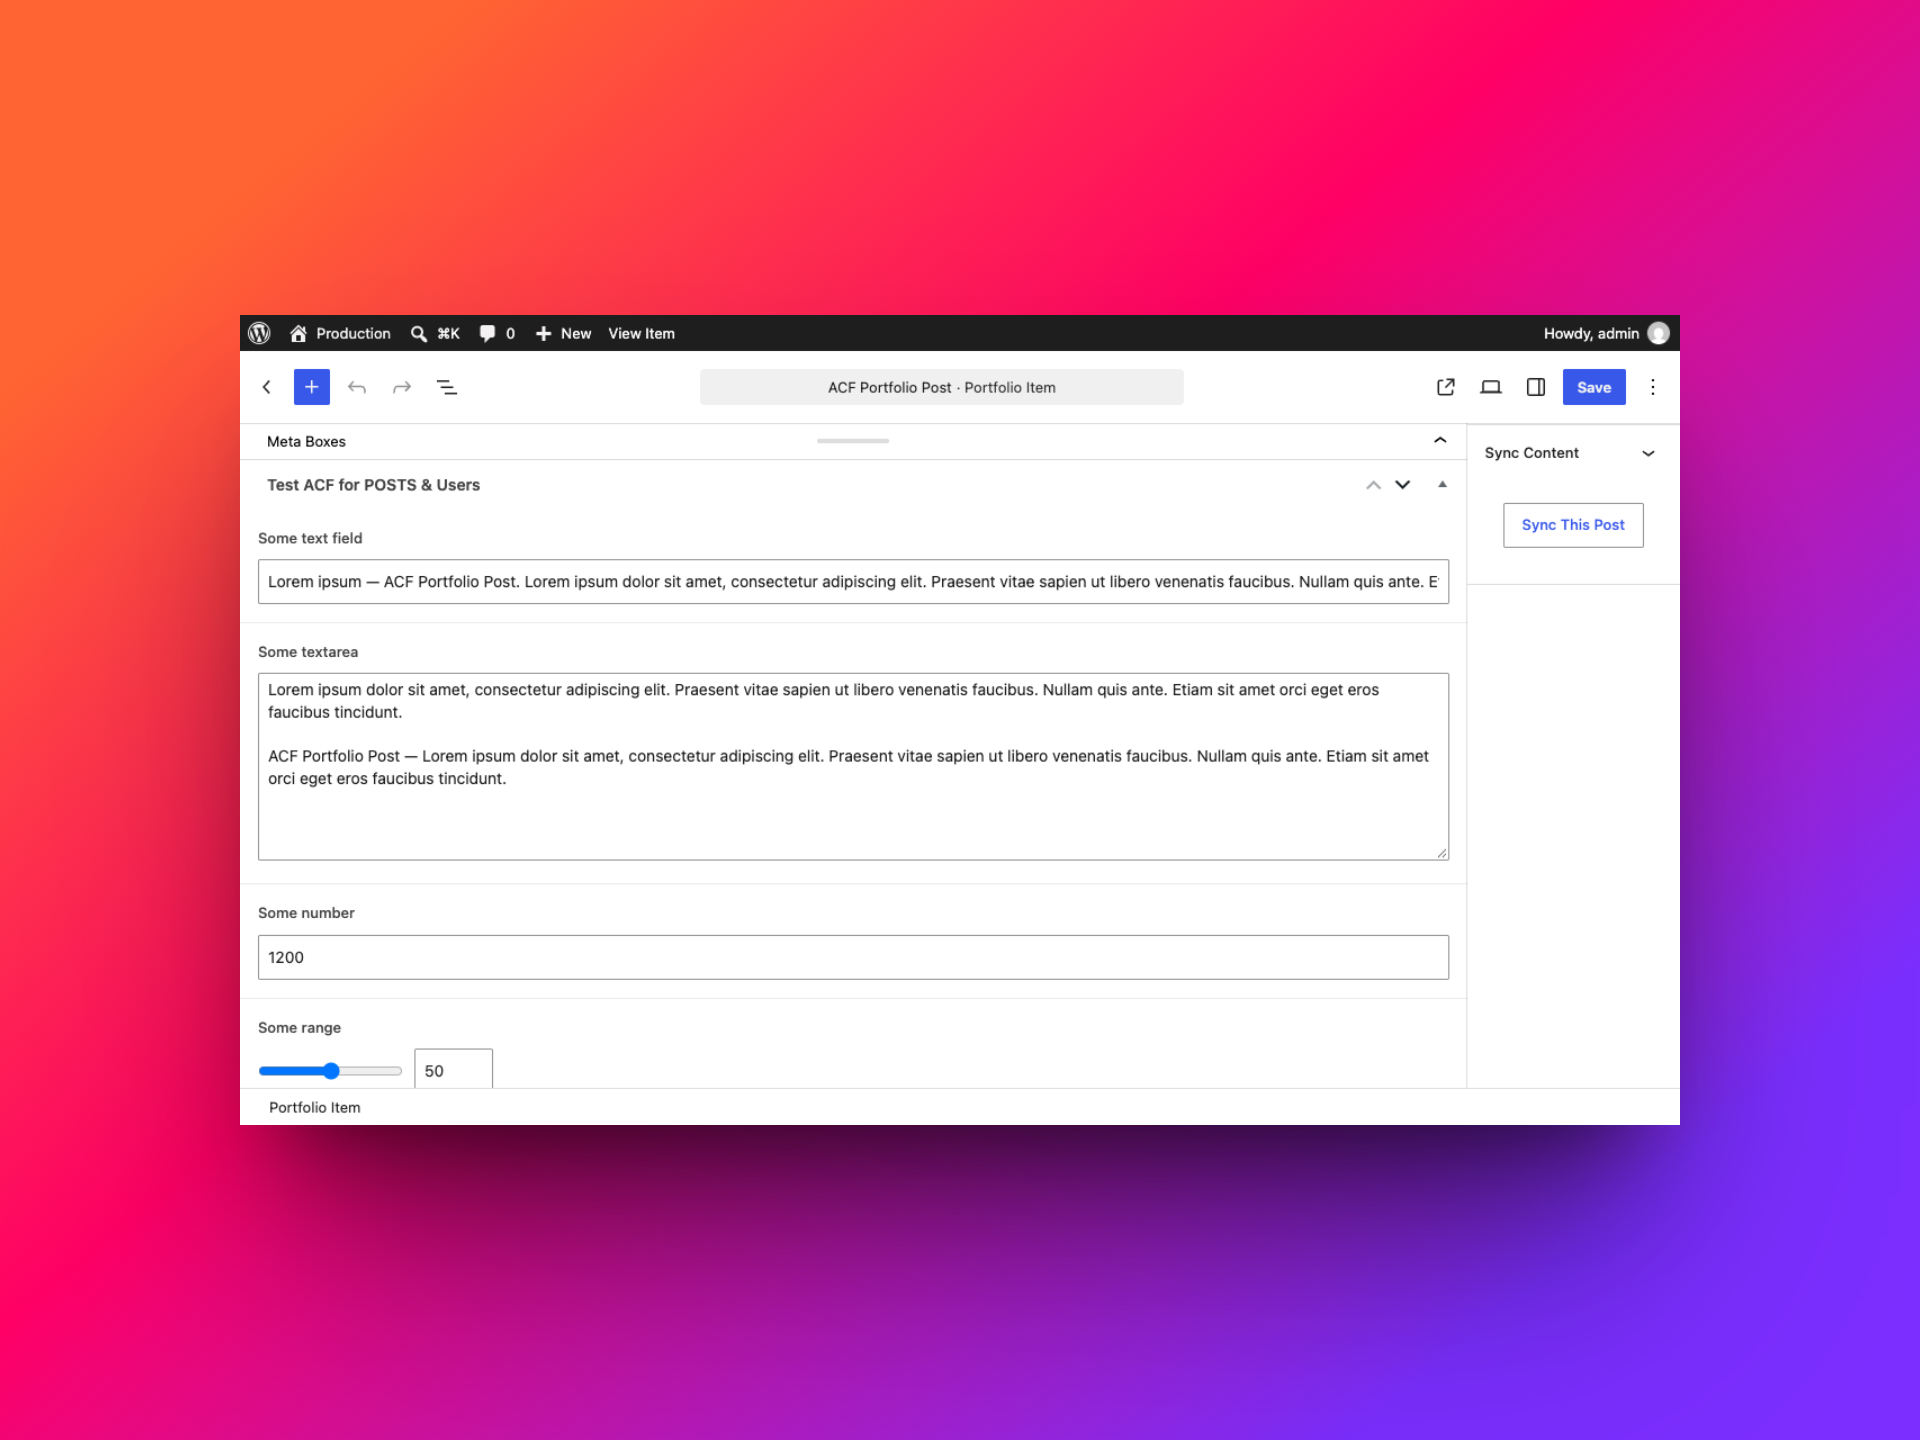
When both sites already have a version of a Portfolio post, start from the post editor and choose Sync This Post. The dialog lets you choose a connected site and a direction, then review which remote record should be updated.
- Open the Portfolio item on the site where you want to start.
- Choose Sync This Post in the Sync Content panel.
- Select the connected site, then choose Push to Site or Pull from Site.
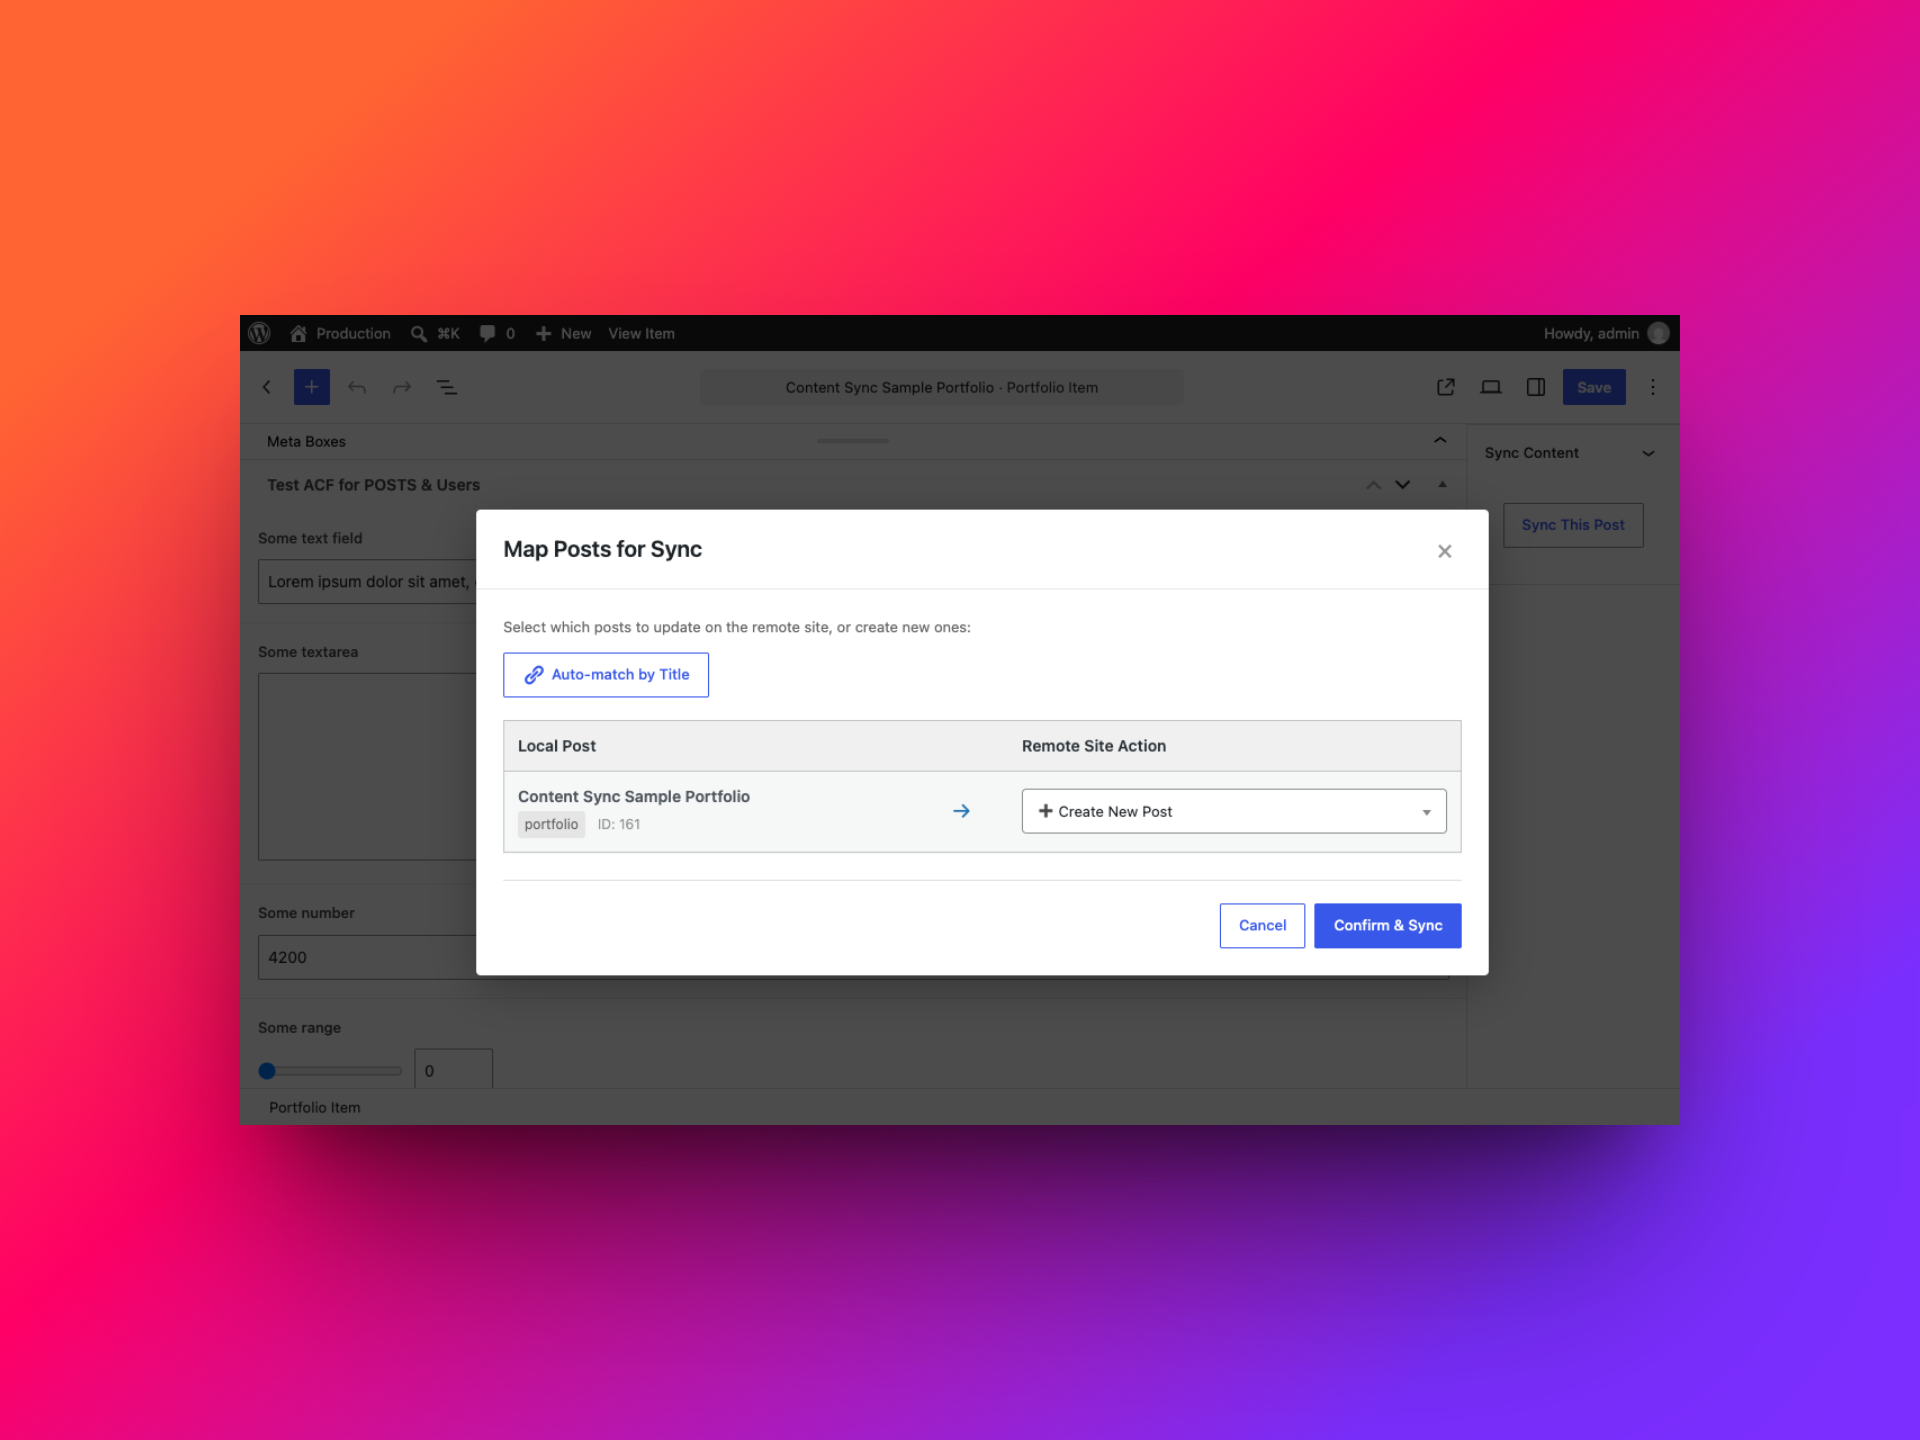
- In Map Posts for Sync, use Auto-match by Title to find a likely counterpart, or choose the destination action yourself.
- Review the selected row. Choose an existing destination post to update it, or choose Create New Post if there is no counterpart. Then select Confirm & Sync.
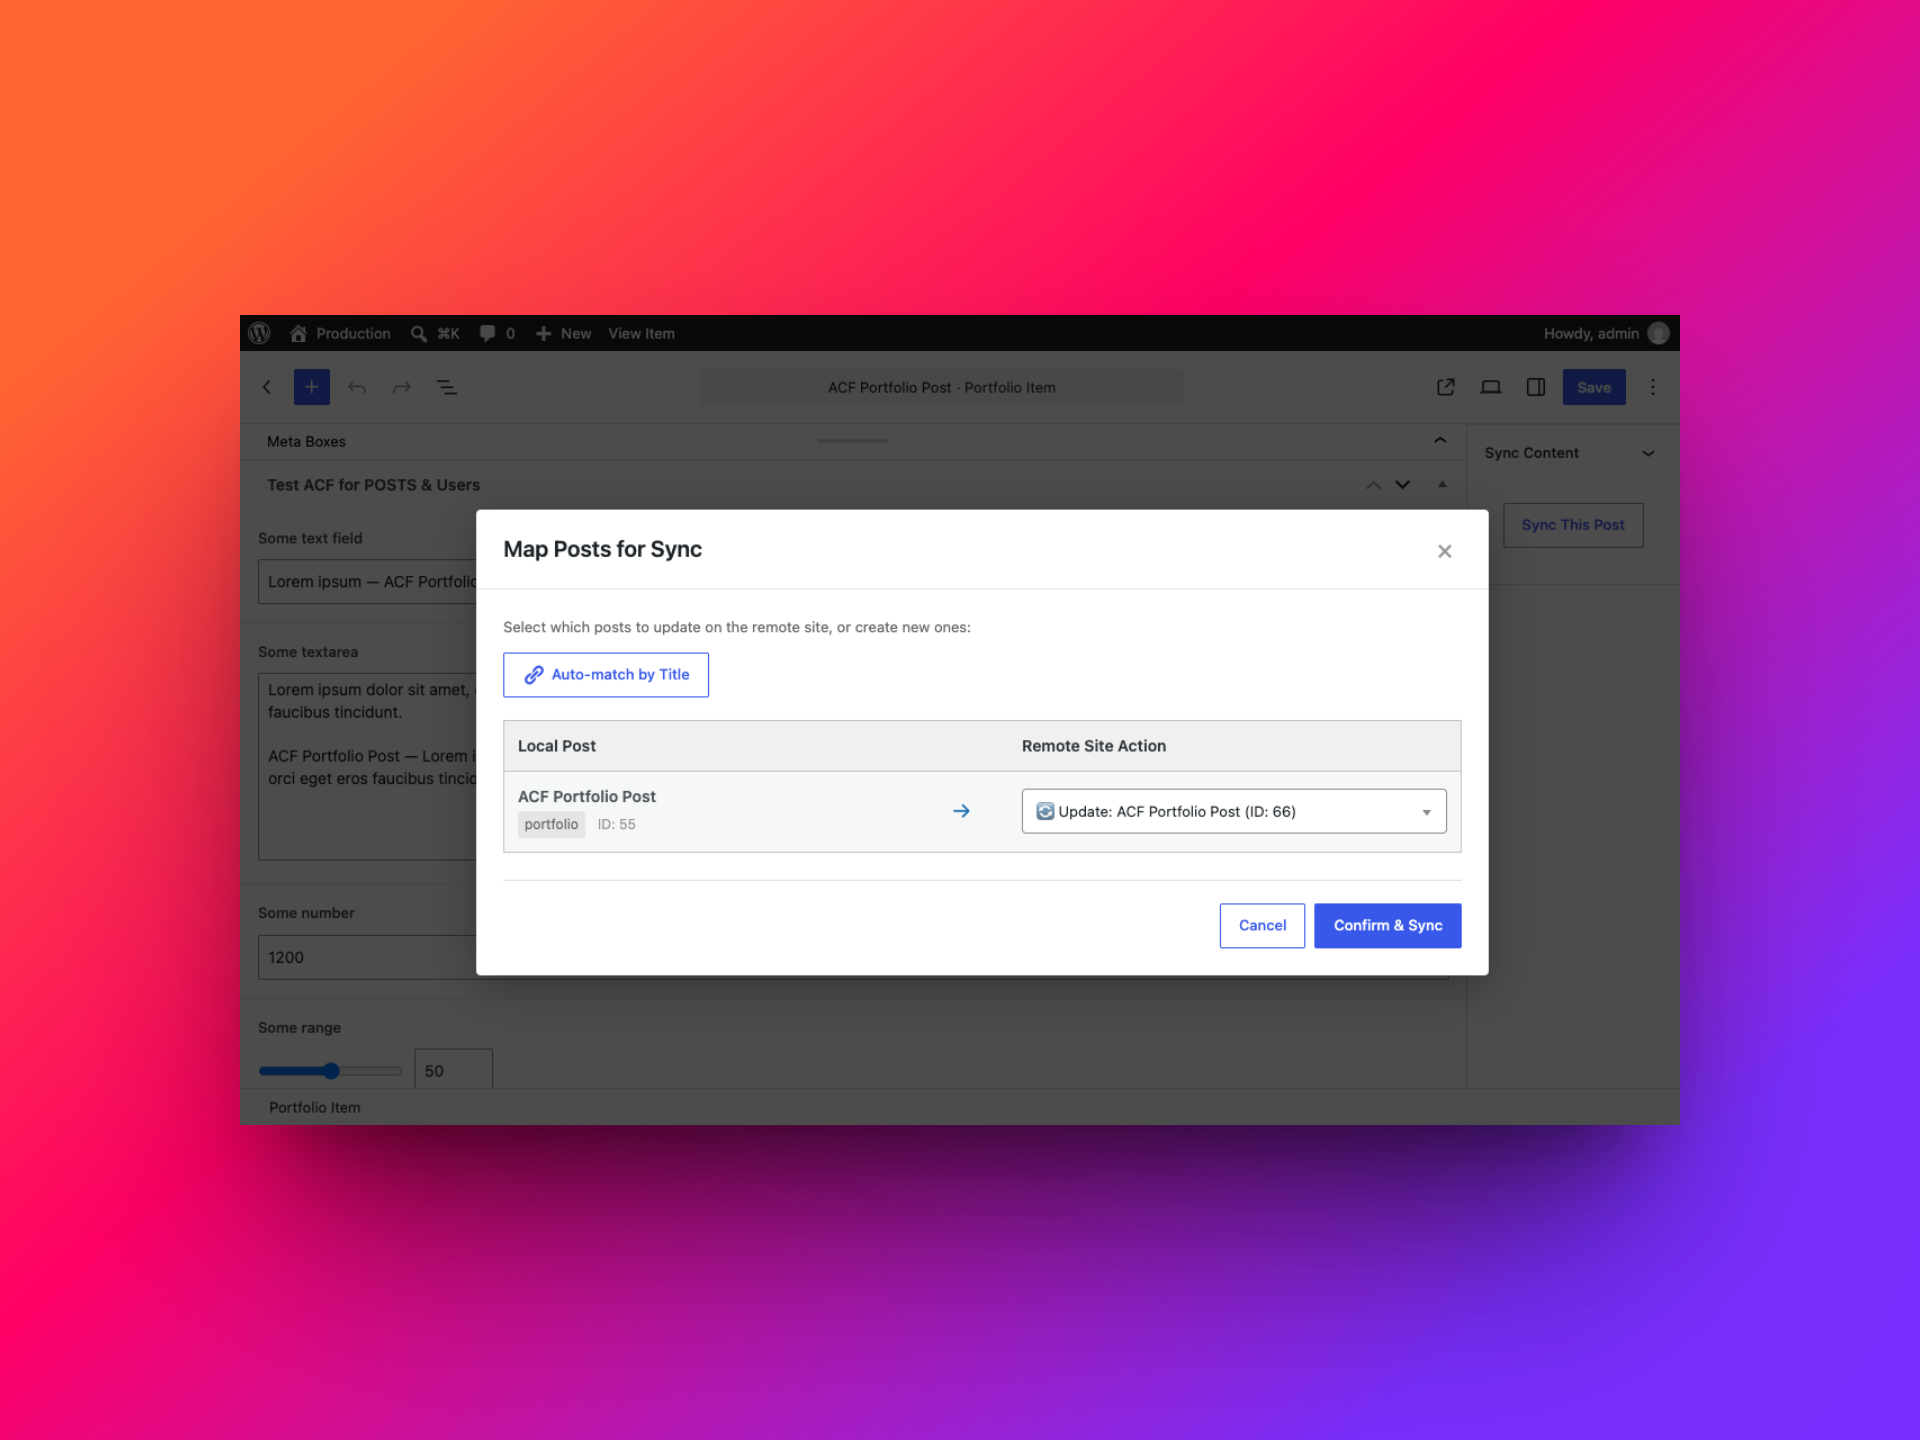
Auto-match is a convenience, not a substitute for checking the destination action. Titles can change or repeat, so confirm the record shown in each row before approving an update.
Step 4: Sync several pages or posts at once
For a batch, use the content list instead of opening each record individually. This works well when a group of pages needs to be copied or updated together.
- Open the relevant list, such as Pages → All Pages.
- Select the records you want to sync. In this example, two pages are selected.
- Choose Sync Content, select the destination, and choose the direction.
- Review the mapping row for every selected record. Auto-match by Title can find existing pages; set unmatched rows to Create New Post if that is what you intend.
- Check all actions, then choose Confirm & Sync.
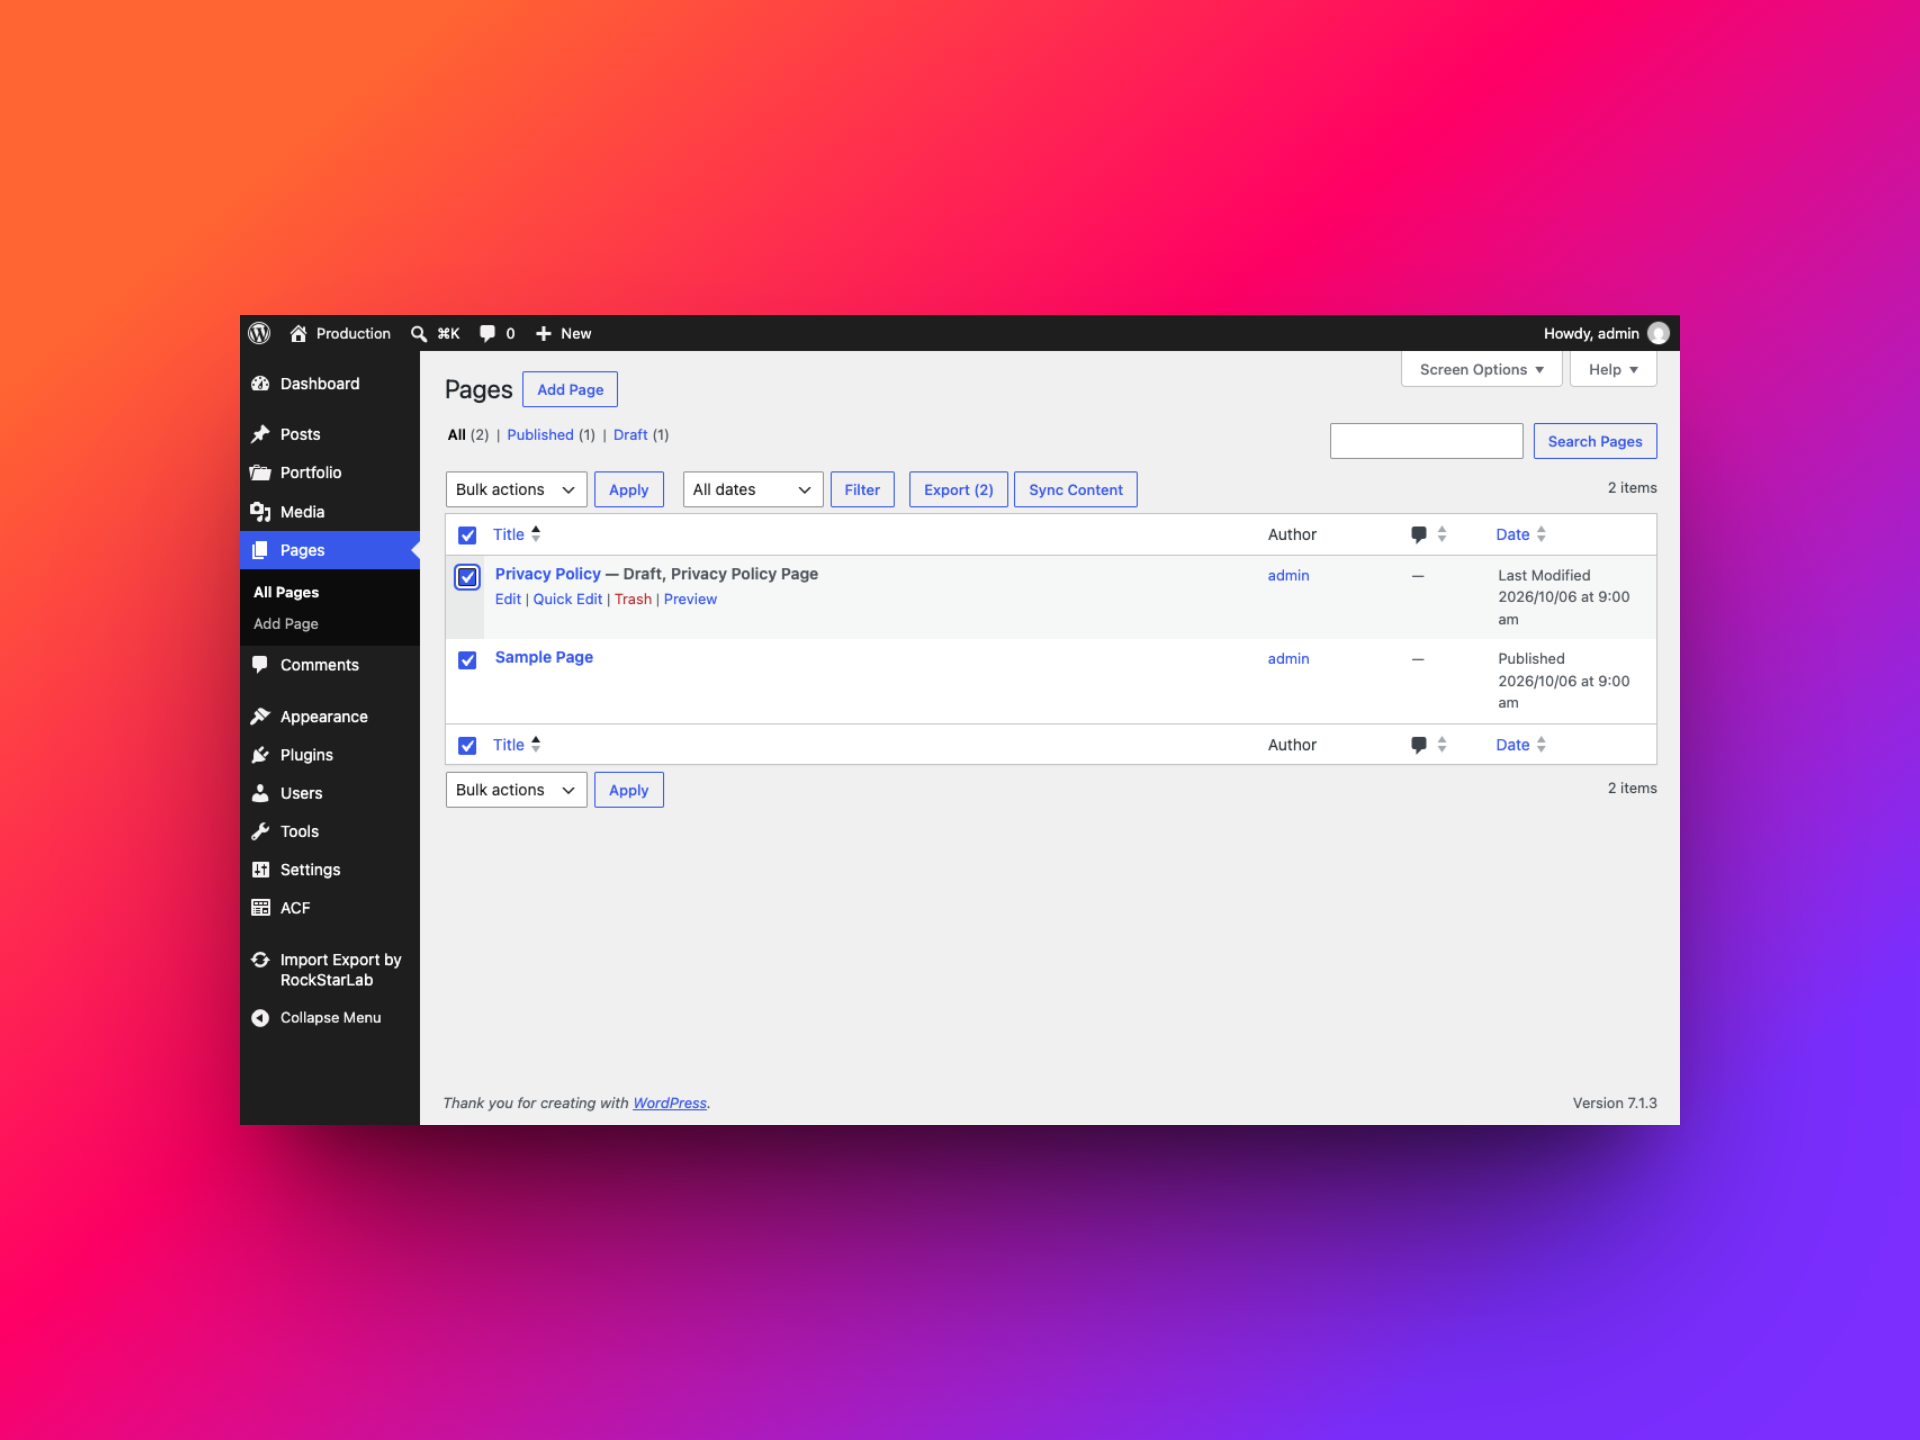
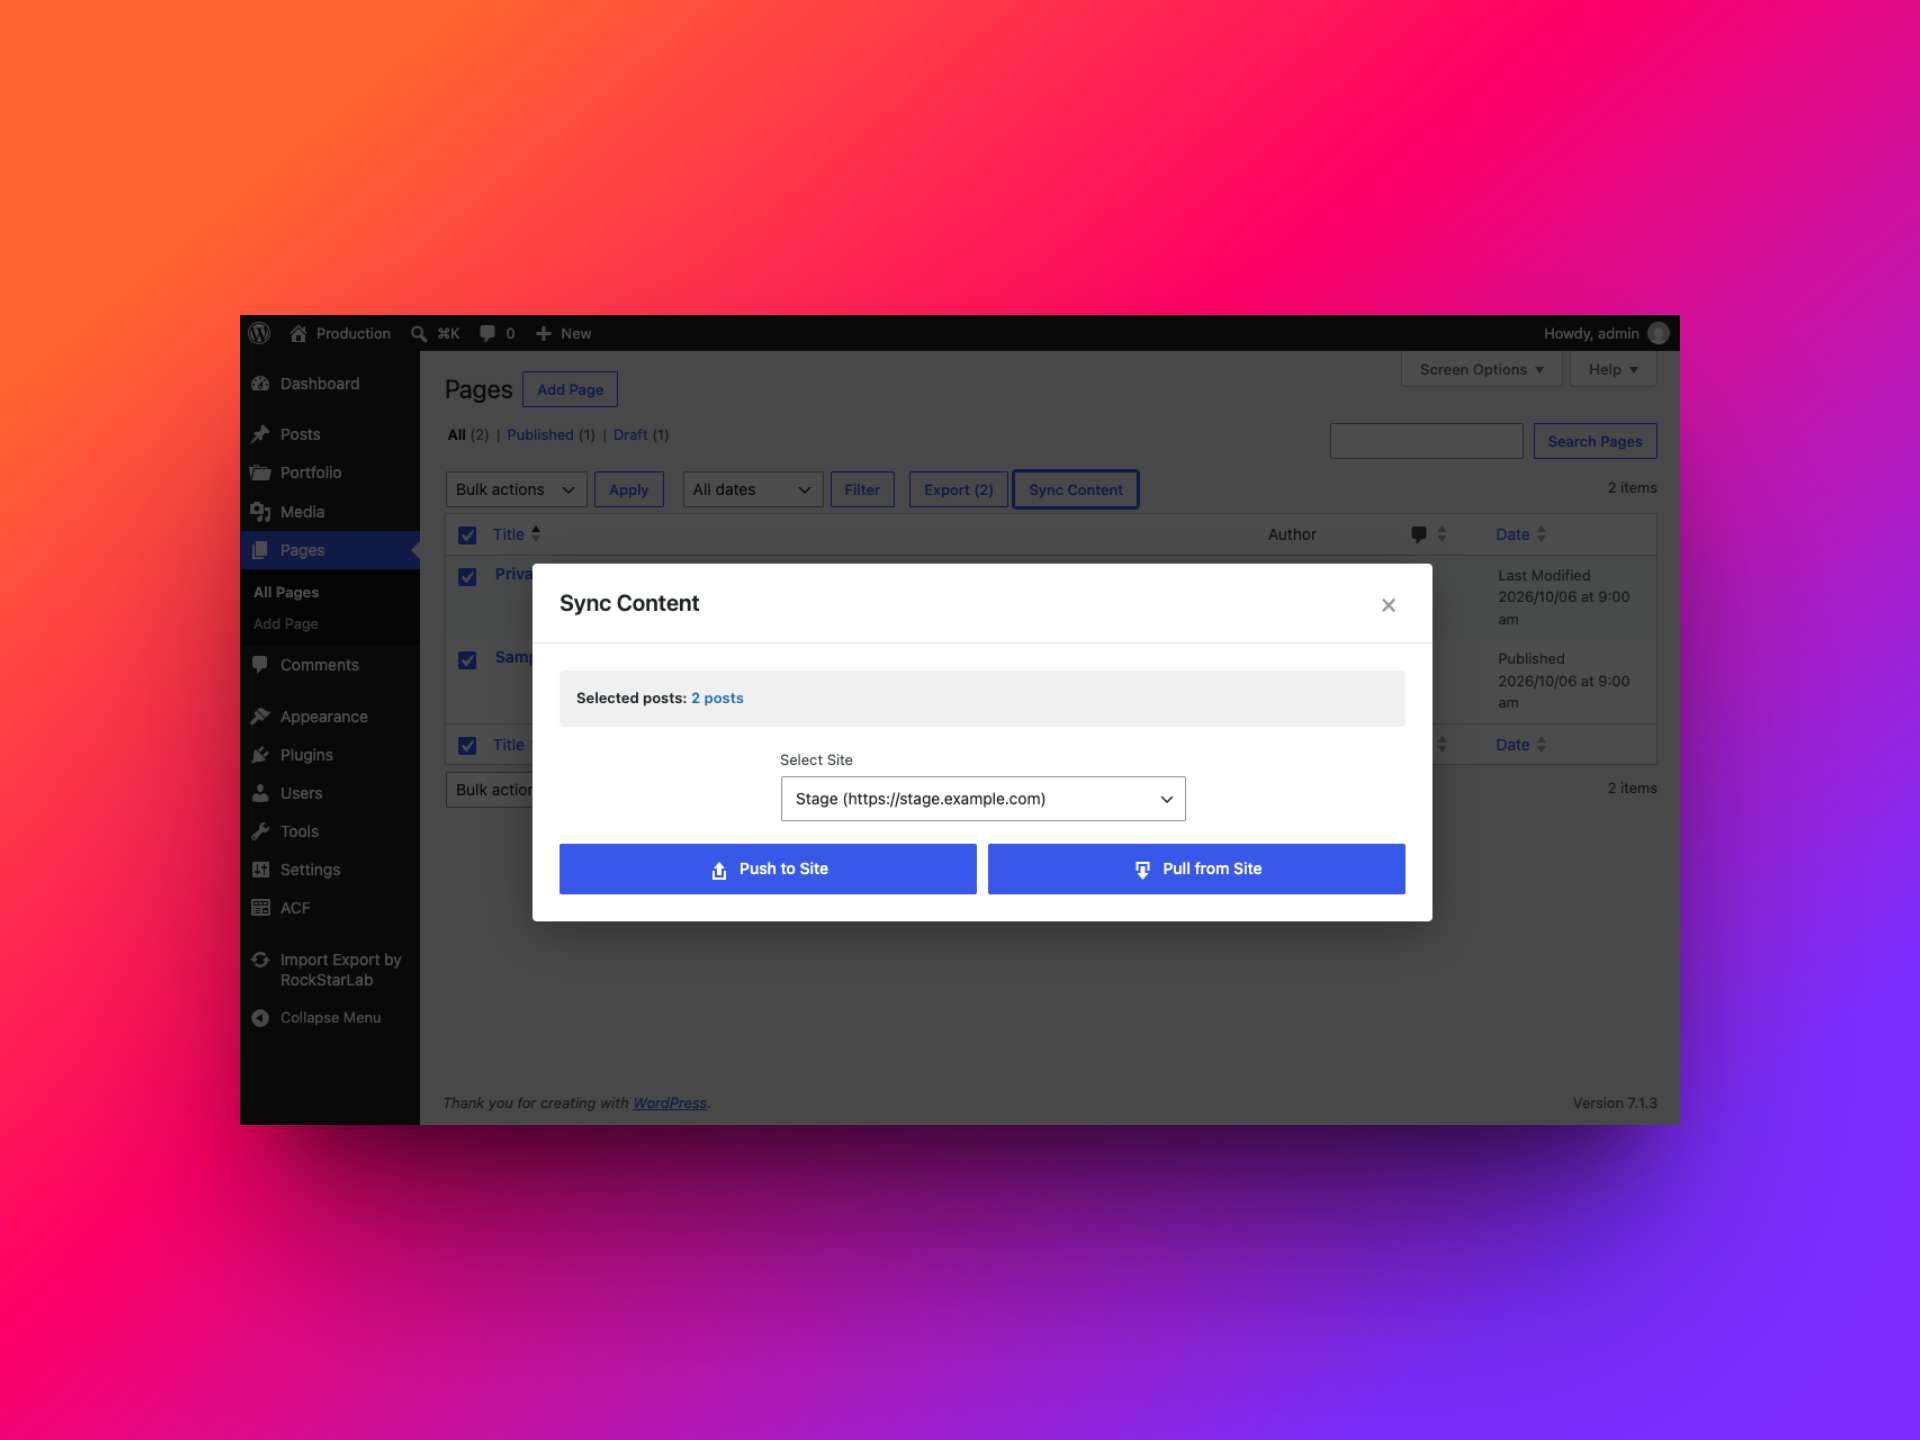
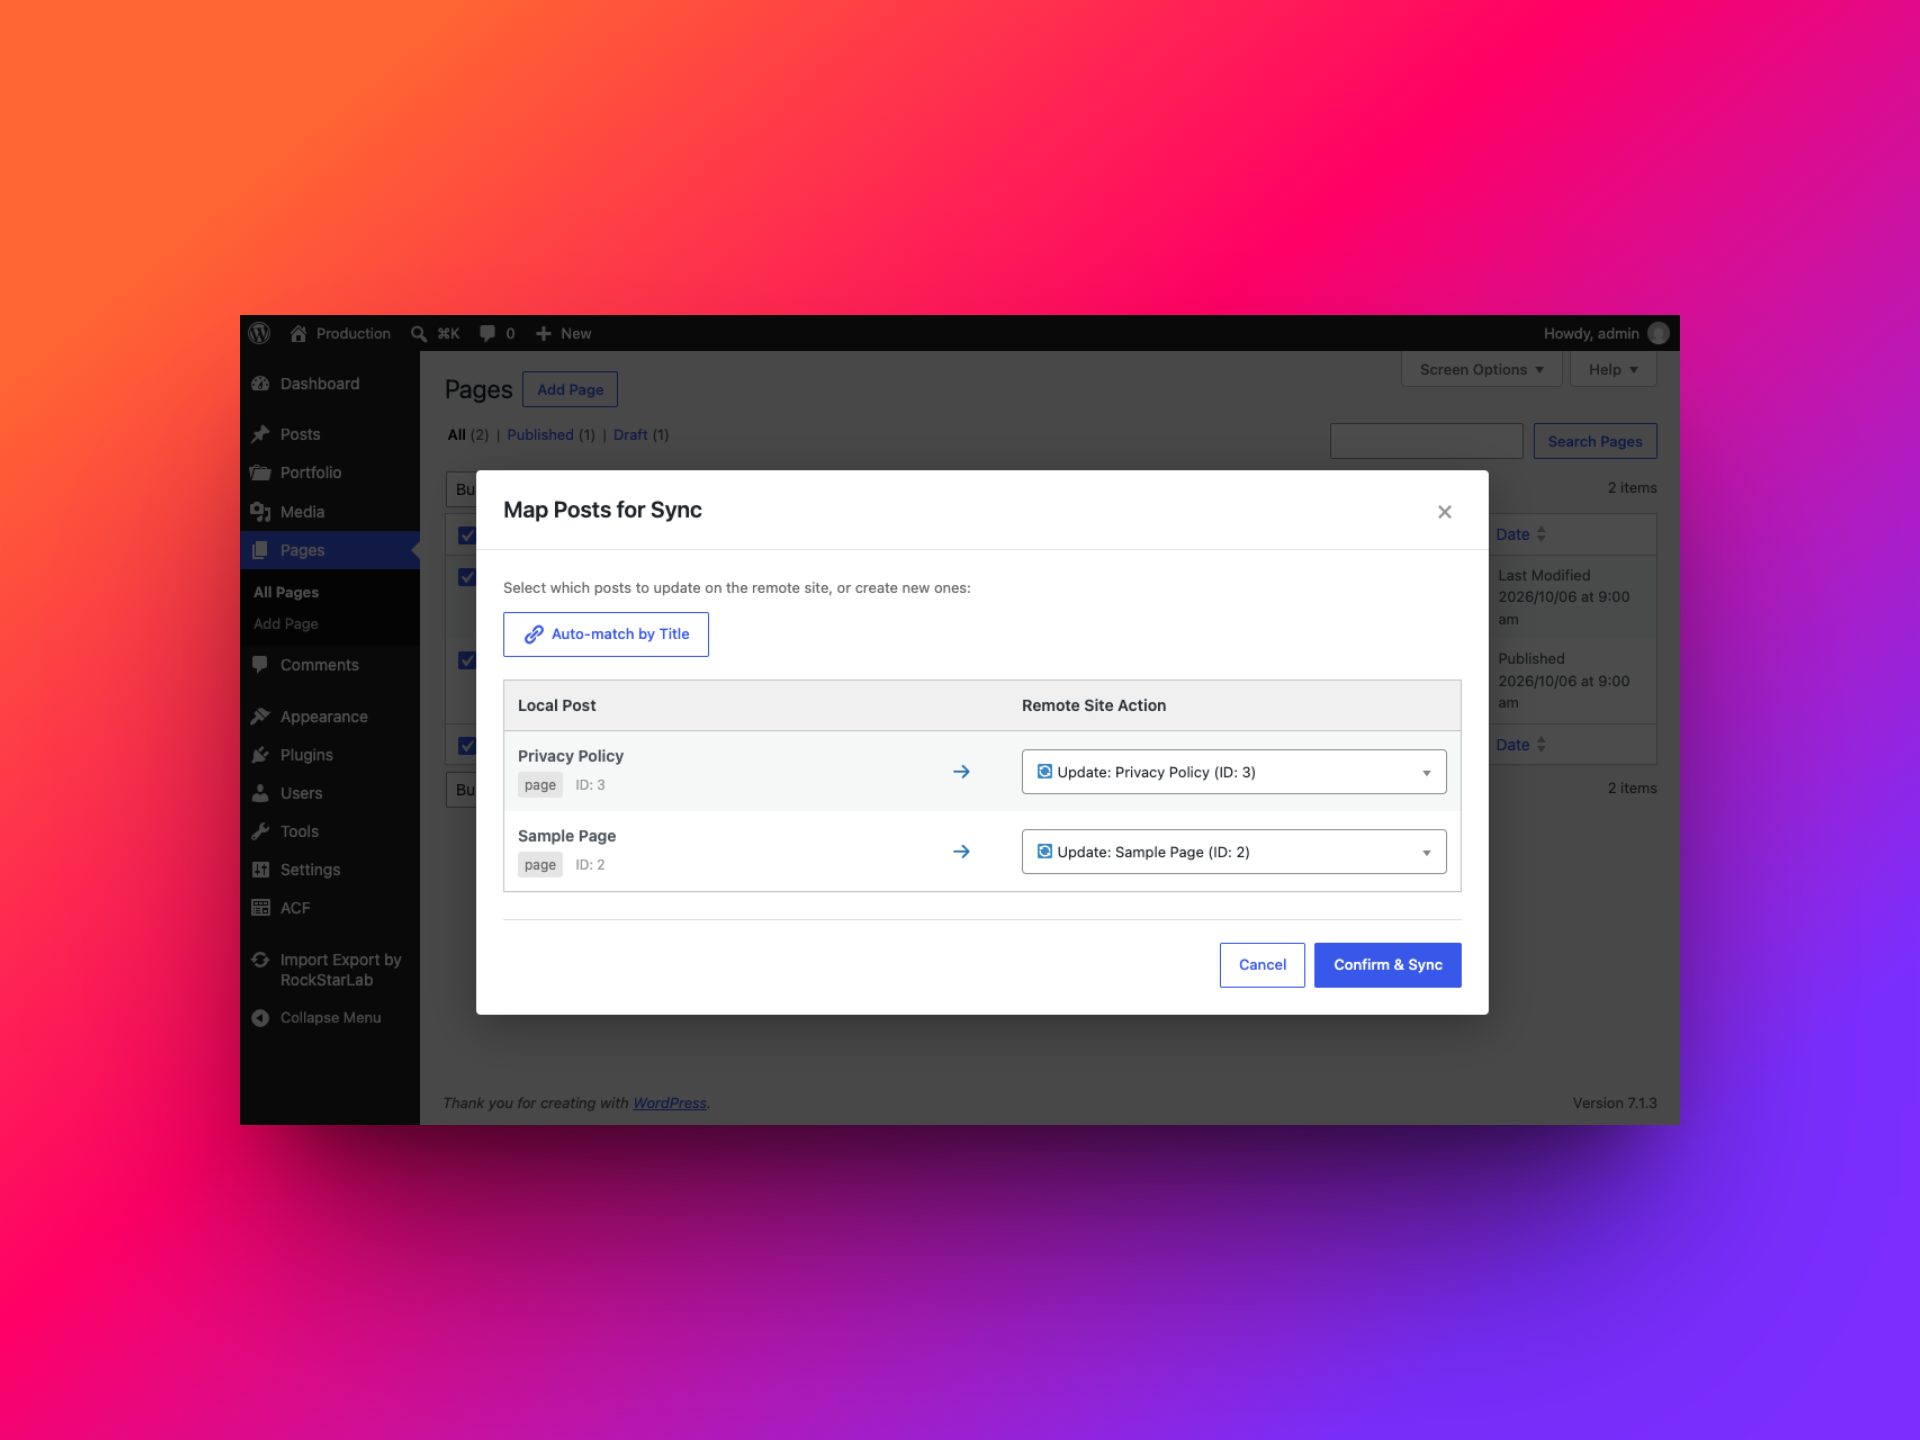
The mapping is per record. A bulk sync can update some remote records and create others, so check the action beside every row rather than assuming the whole batch will use one action.
Step 5: Push a brand-new Portfolio post to Stage
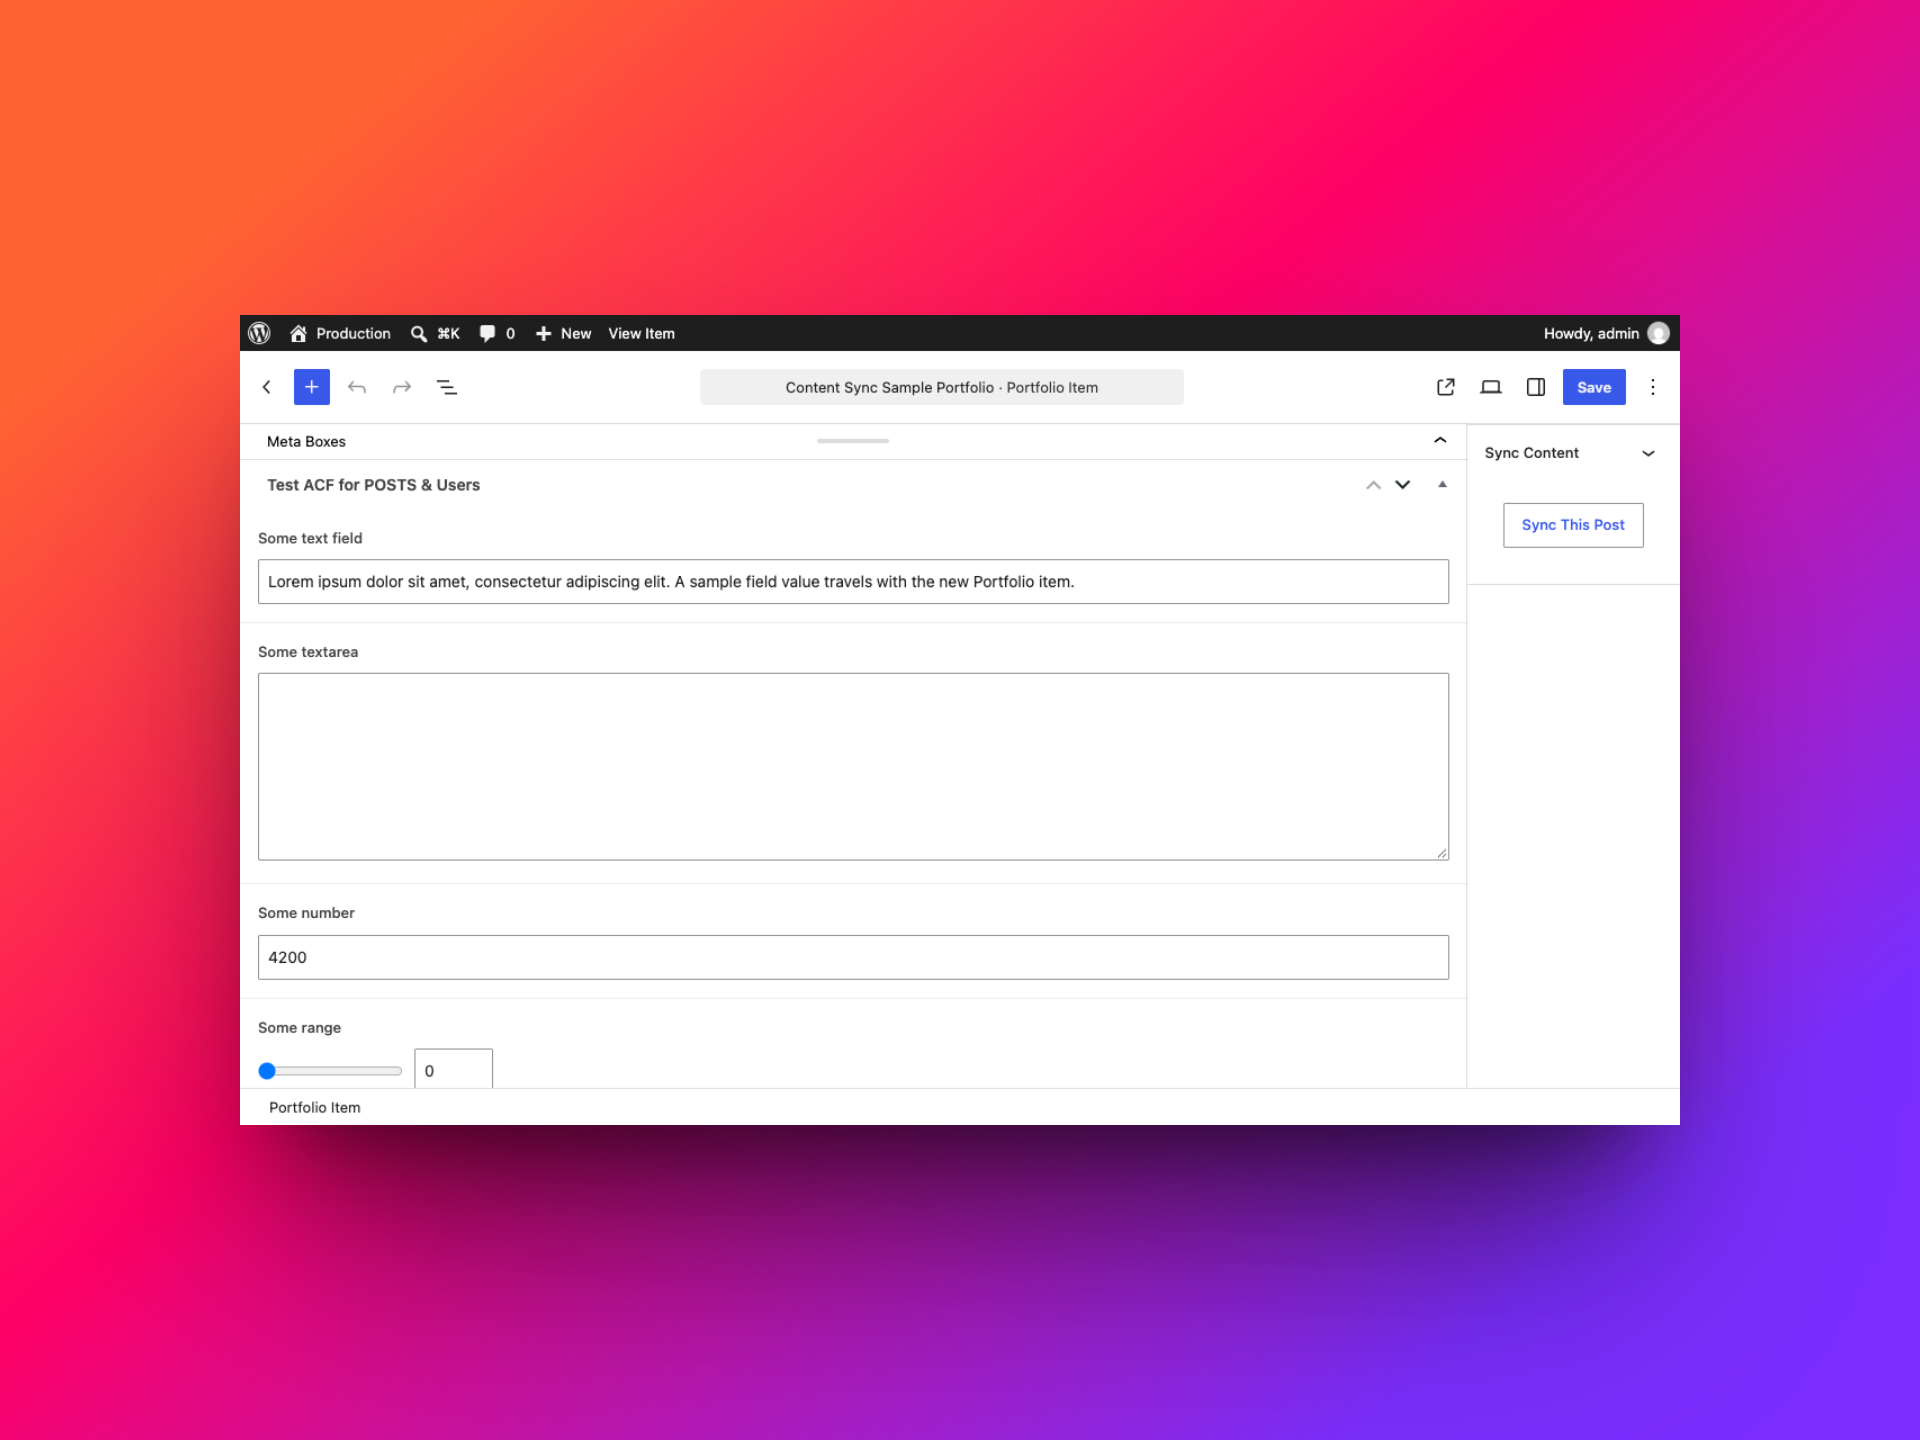
To send a new item the other way, create it on Production as you normally would, fill in its ACF fields and taxonomy terms, then push it to Stage.
- Create and save the new Portfolio post on Production.
- Fill in the fields that should travel with it and assign its custom taxonomy terms.
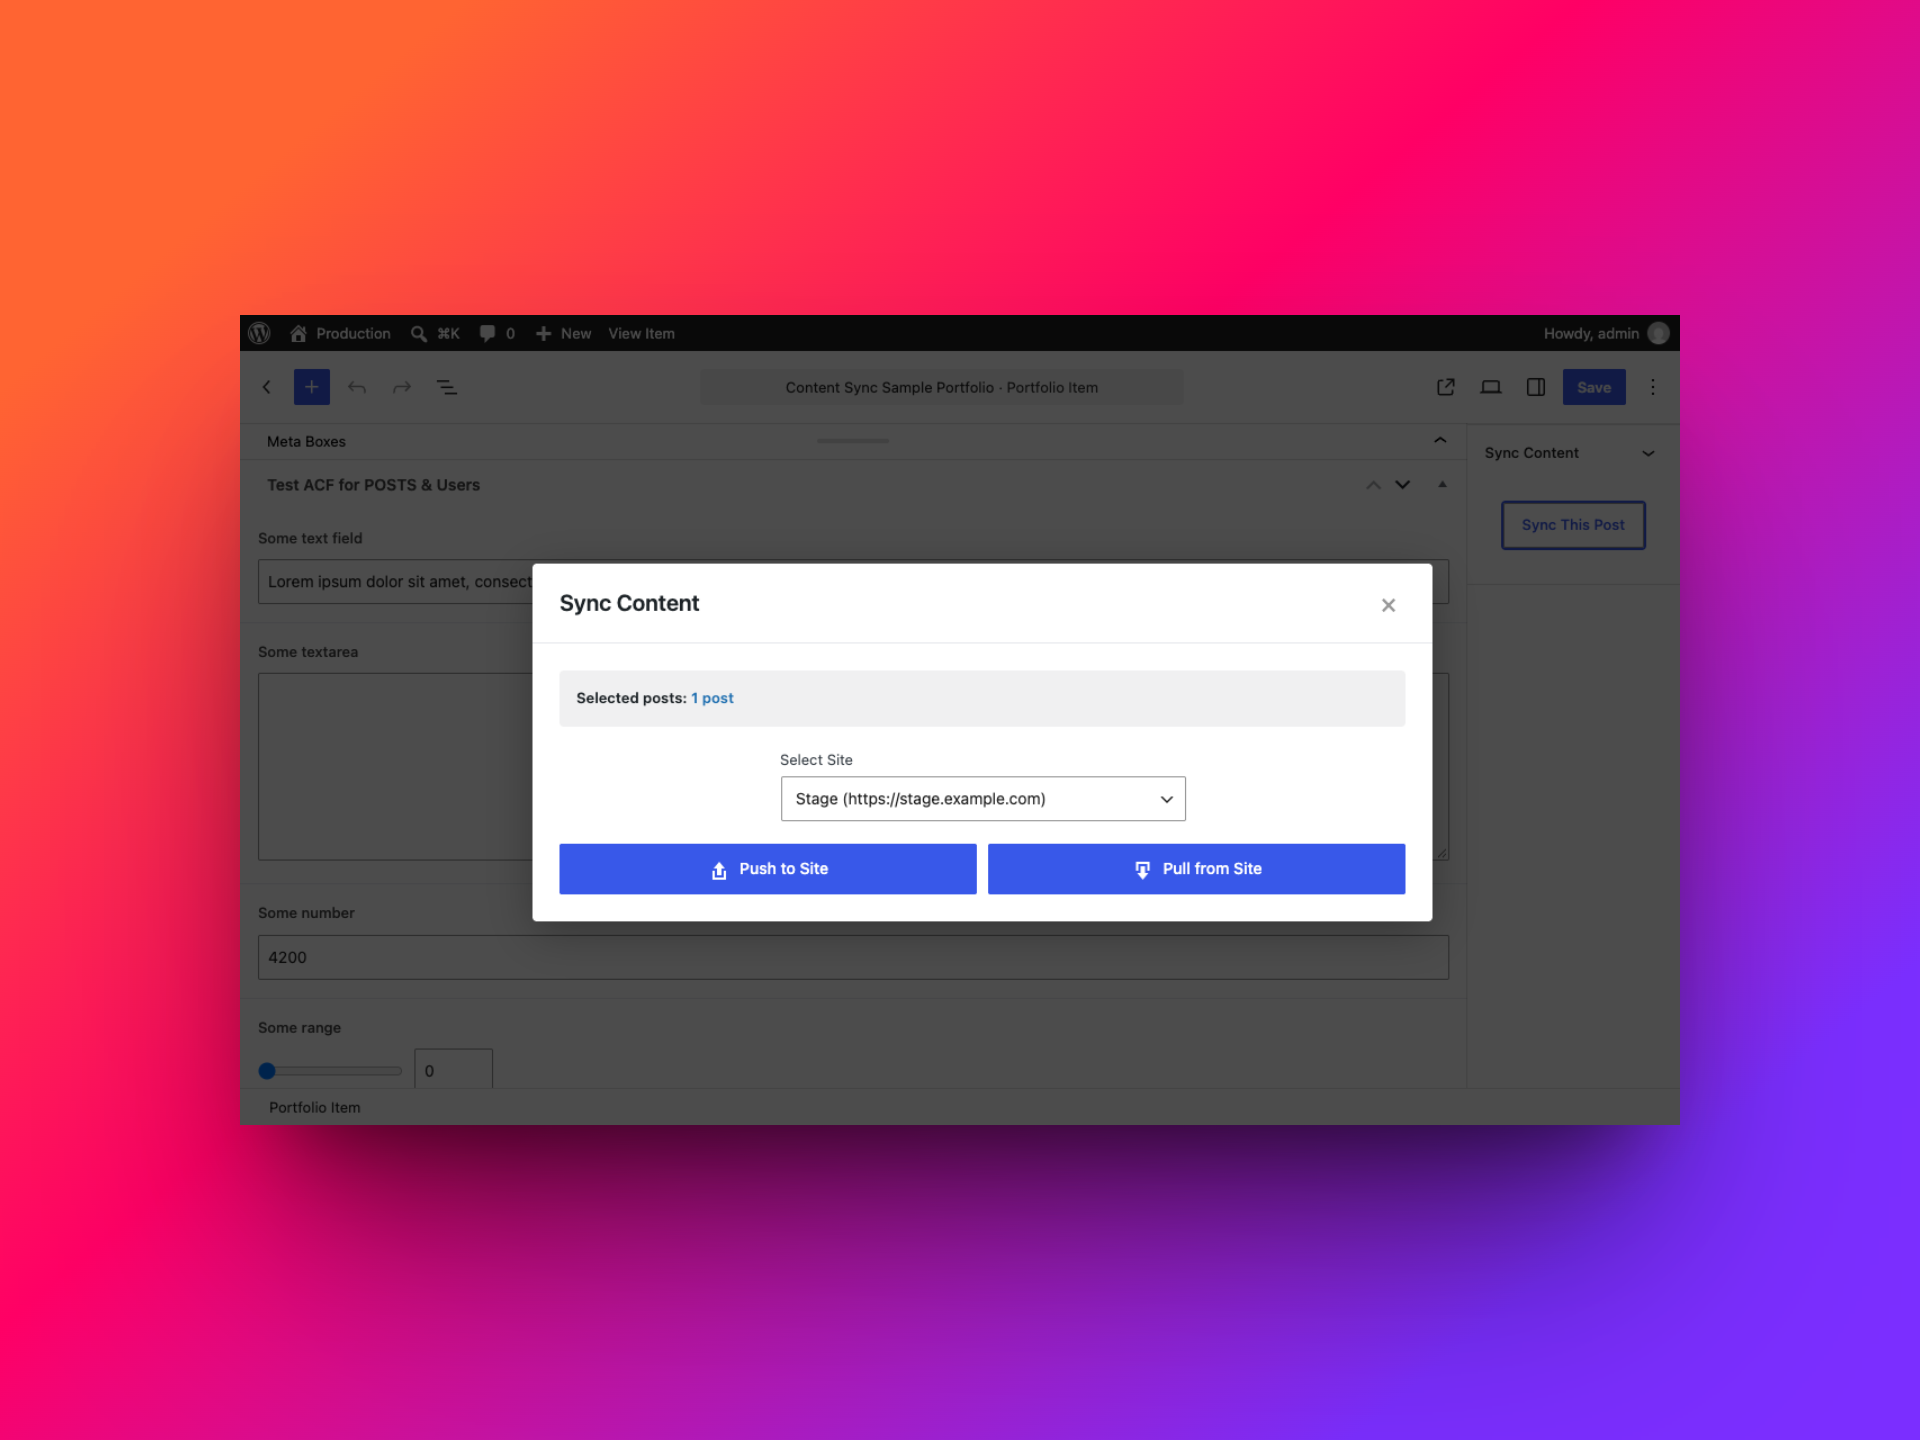
- Choose Sync This Post, select Stage, and choose Push to Site.
- In Map Posts for Sync, choose Create New Post if no matching destination record exists. If a counterpart does exist, select that record to update it.
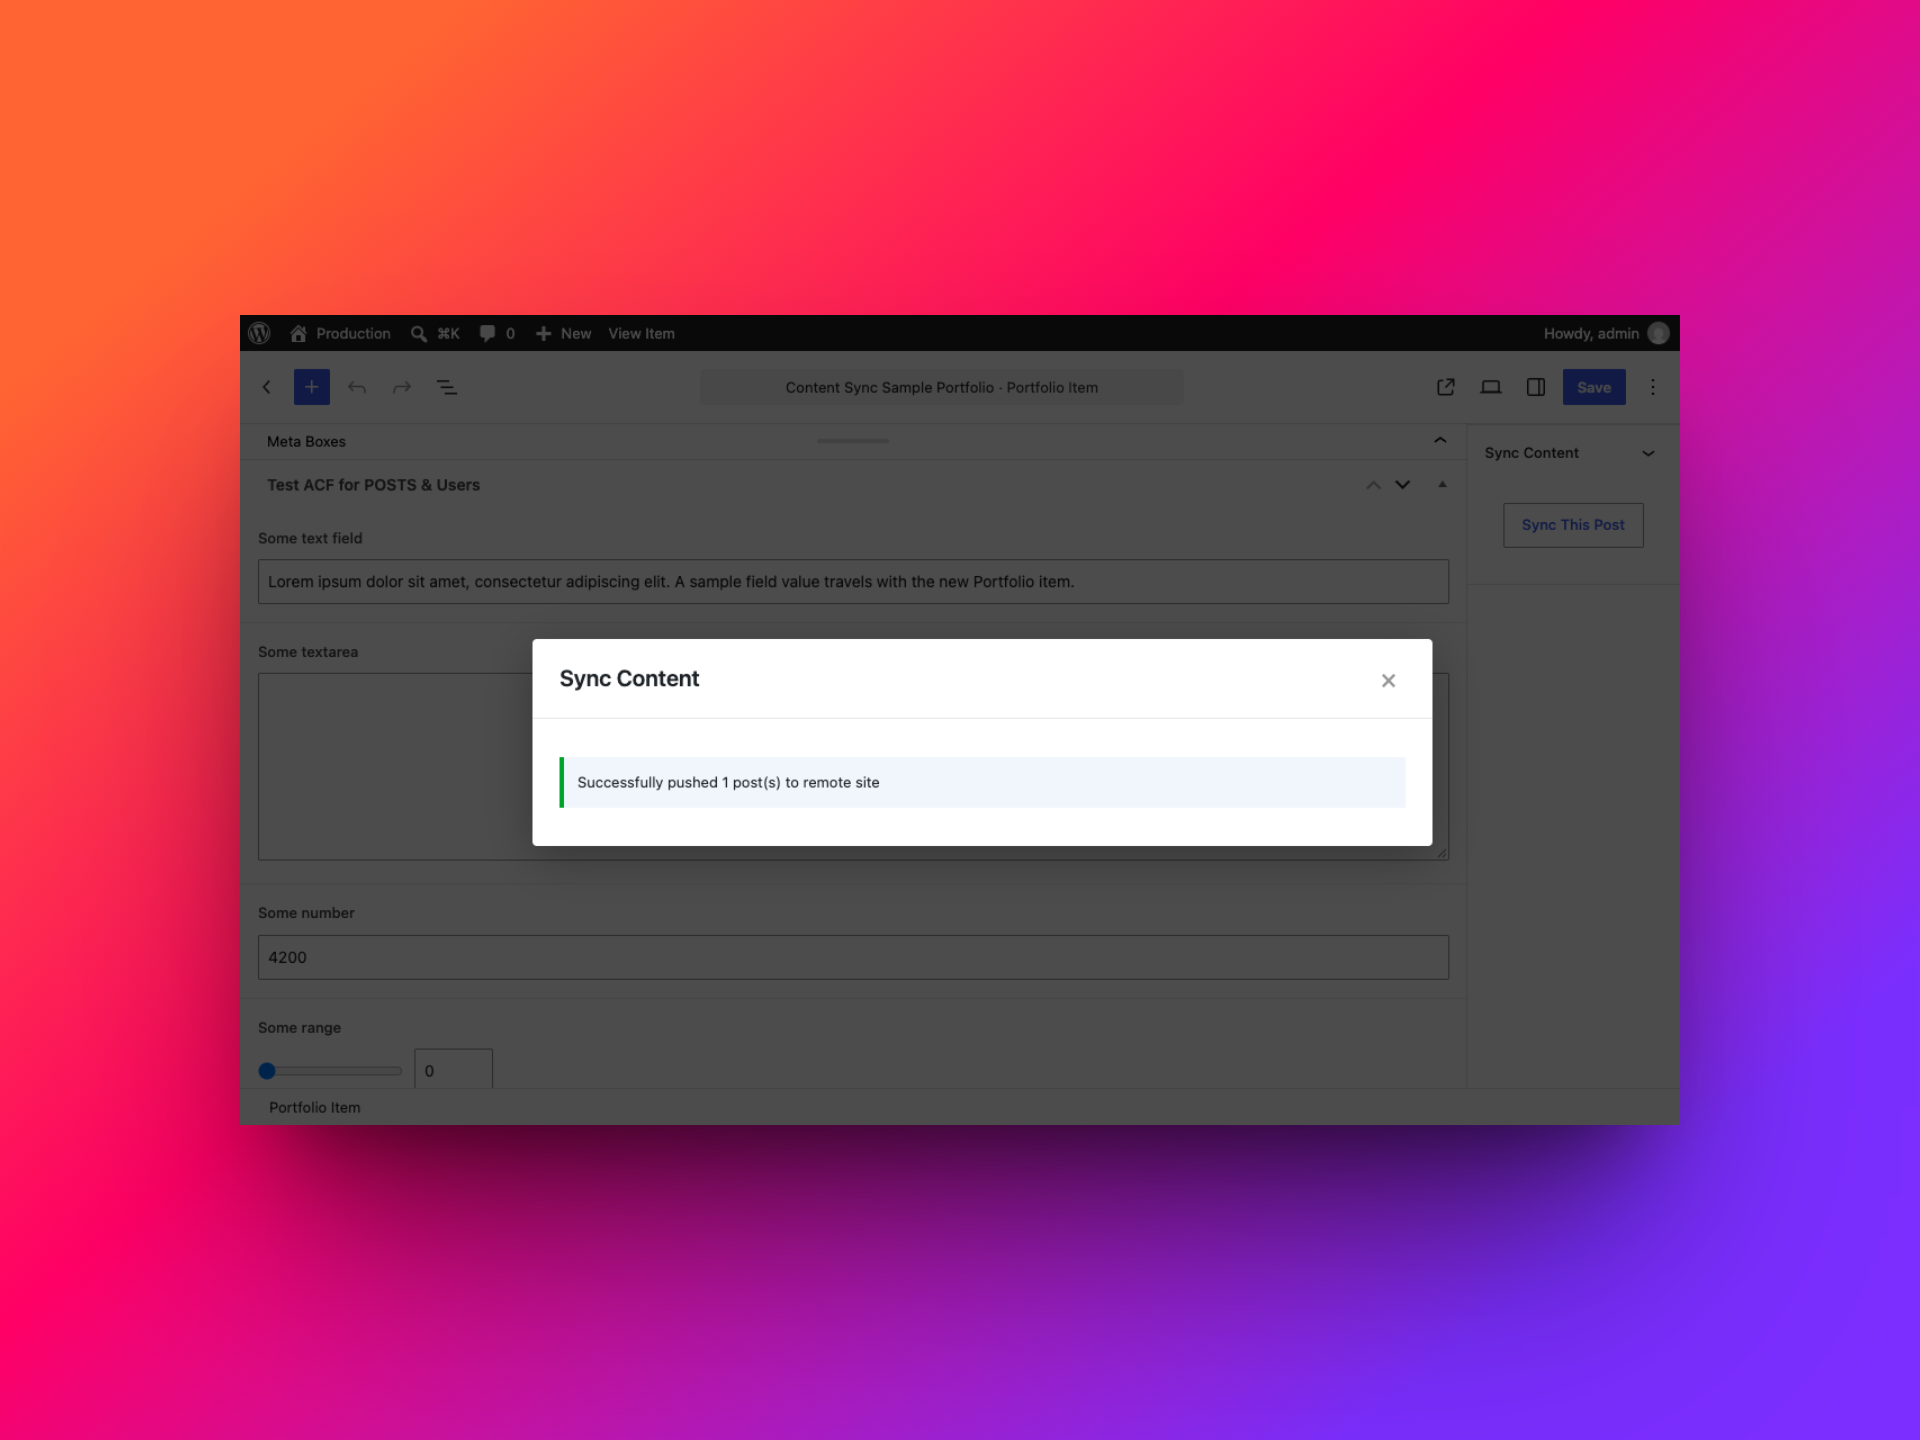
- Choose Confirm & Sync, then verify the new post on Stage.
How Content Sync handles ACF fields and custom taxonomies
Content Sync is designed to move post data along with its custom-field values and taxonomy assignments. It supports ACF Free and ACF PRO, including common field types and structured PRO fields such as Repeaters and Flexible Content. Group, Gallery, and relationship-style values can also be part of a post’s ACF data.
For the destination to display those values correctly, ACF and the corresponding field groups need to be active there. Keep the field definitions compatible across sites, and check media, post, user, and taxonomy references after syncing: a reference is only useful if the referenced object exists and resolves correctly on the receiving site.
Taxonomy terms travel with the post, but term IDs are local to each database. The taxonomy must be registered on the destination; after a pull or push, check the assigned term by its name or slug rather than comparing database IDs.
A helpful way to think about the mapping dialog is that it answers “Which remote post should this update?” It does not decide “Which ACF field should receive this value?” Prepare compatible post types, taxonomies, and field groups first.
Choose where Export and Sync buttons appear
Not every admin screen needs a quick action. Open Import Export by RockStarLab → Plugin Options → Export / Sync Buttons to control the Export and Sync buttons by location. The settings are separate: you can leave Export enabled while hiding Sync, or turn each one on or off for a supported location.
Depending on the site’s registered content, the page groups locations such as post types, taxonomies, and other admin screens. Posts, Pages, Categories, and Tags each have separate Export and Sync checkboxes; registered custom post types and taxonomies can appear as additional rows. For example, you can keep Sync available in the Portfolio list and hide it from an admin screen where your team does not use it. These settings control where the entry points appear; they do not alter the content or matching rules used by a sync.
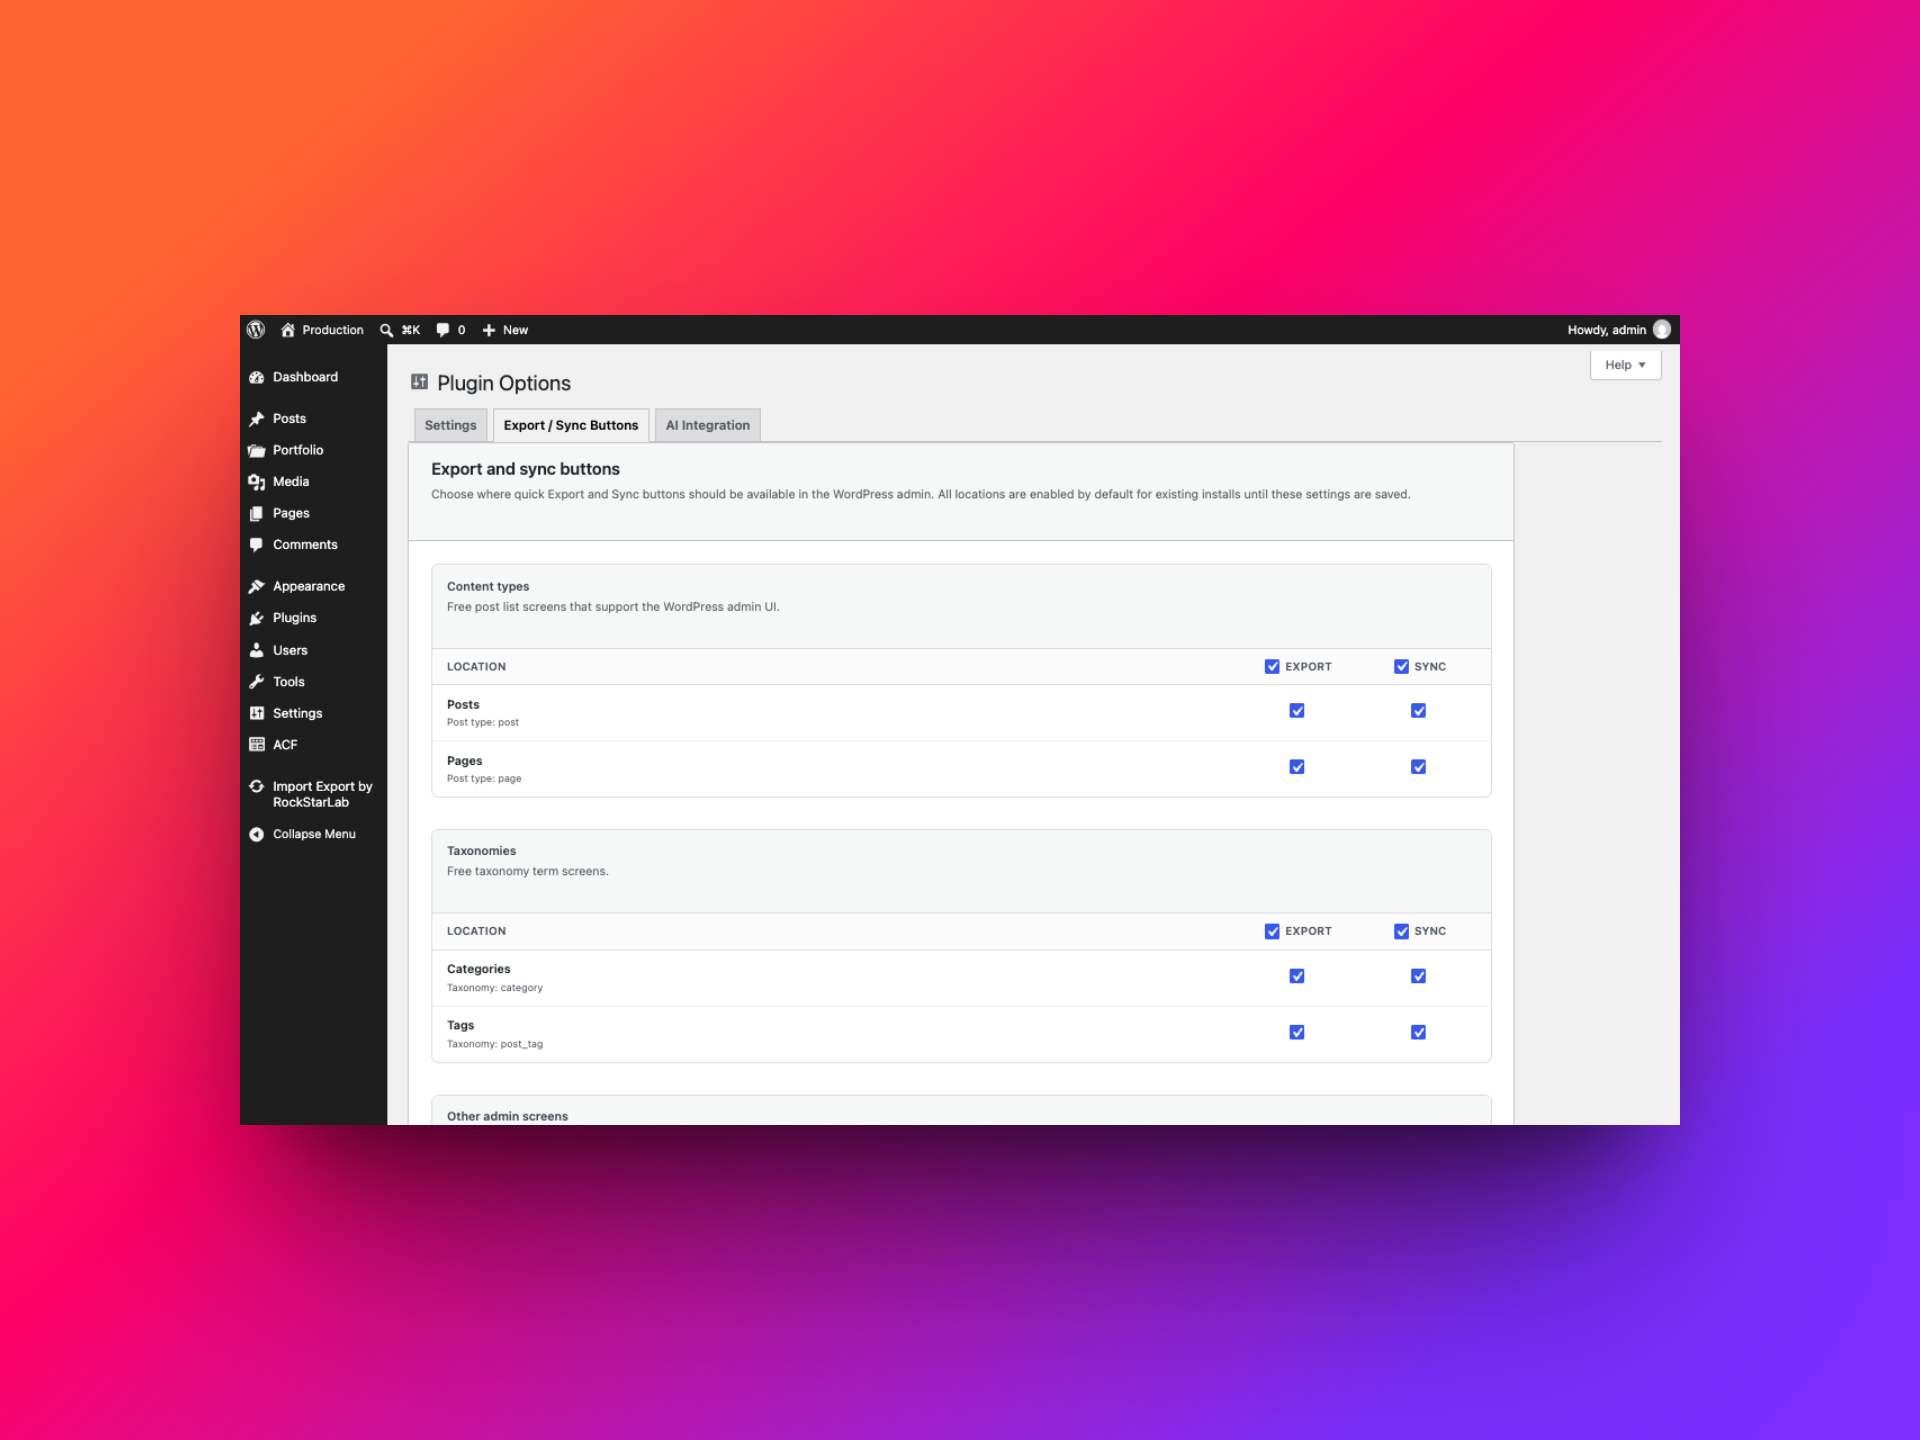
New or unsaved locations are enabled by default in the settings behavior, so review the page after adding a new post type or taxonomy if you want to limit where its buttons appear.
Confirm the result in Jobs Log
After a sync, open Import Export by RockStarLab → Jobs Log. The table shows the job type, status, progress, item count, and elapsed time. It’s a quick way to check that the plugin finished processing the records you selected.
Push jobs are recorded on the site that initiated the push; pull jobs are recorded on the site receiving the content. In the examples below, Stage records the pull, while Production records its single-post and bulk pushes.
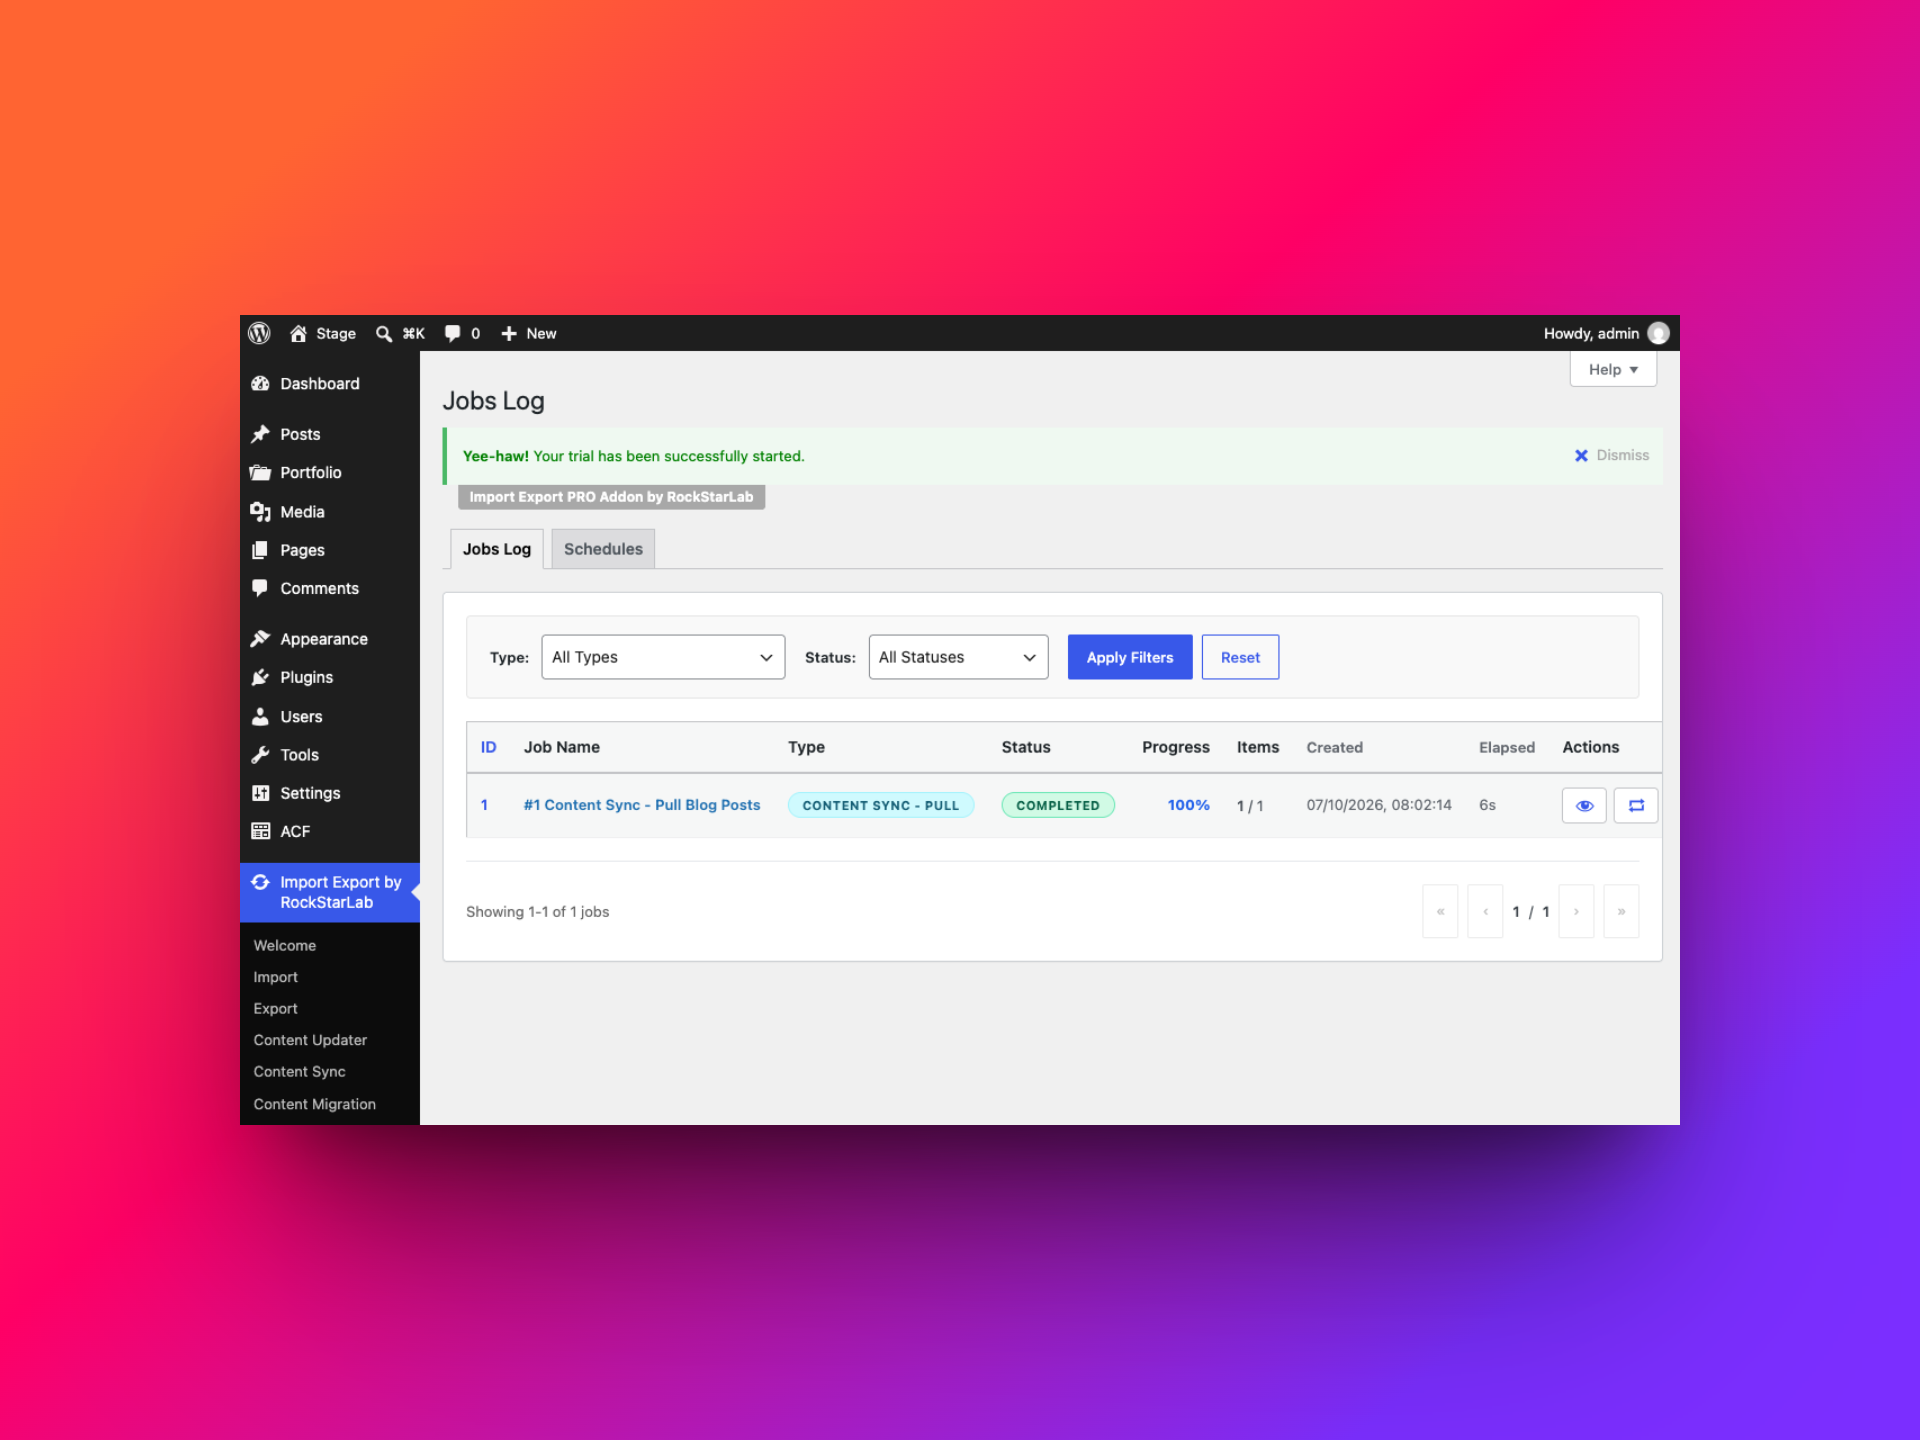
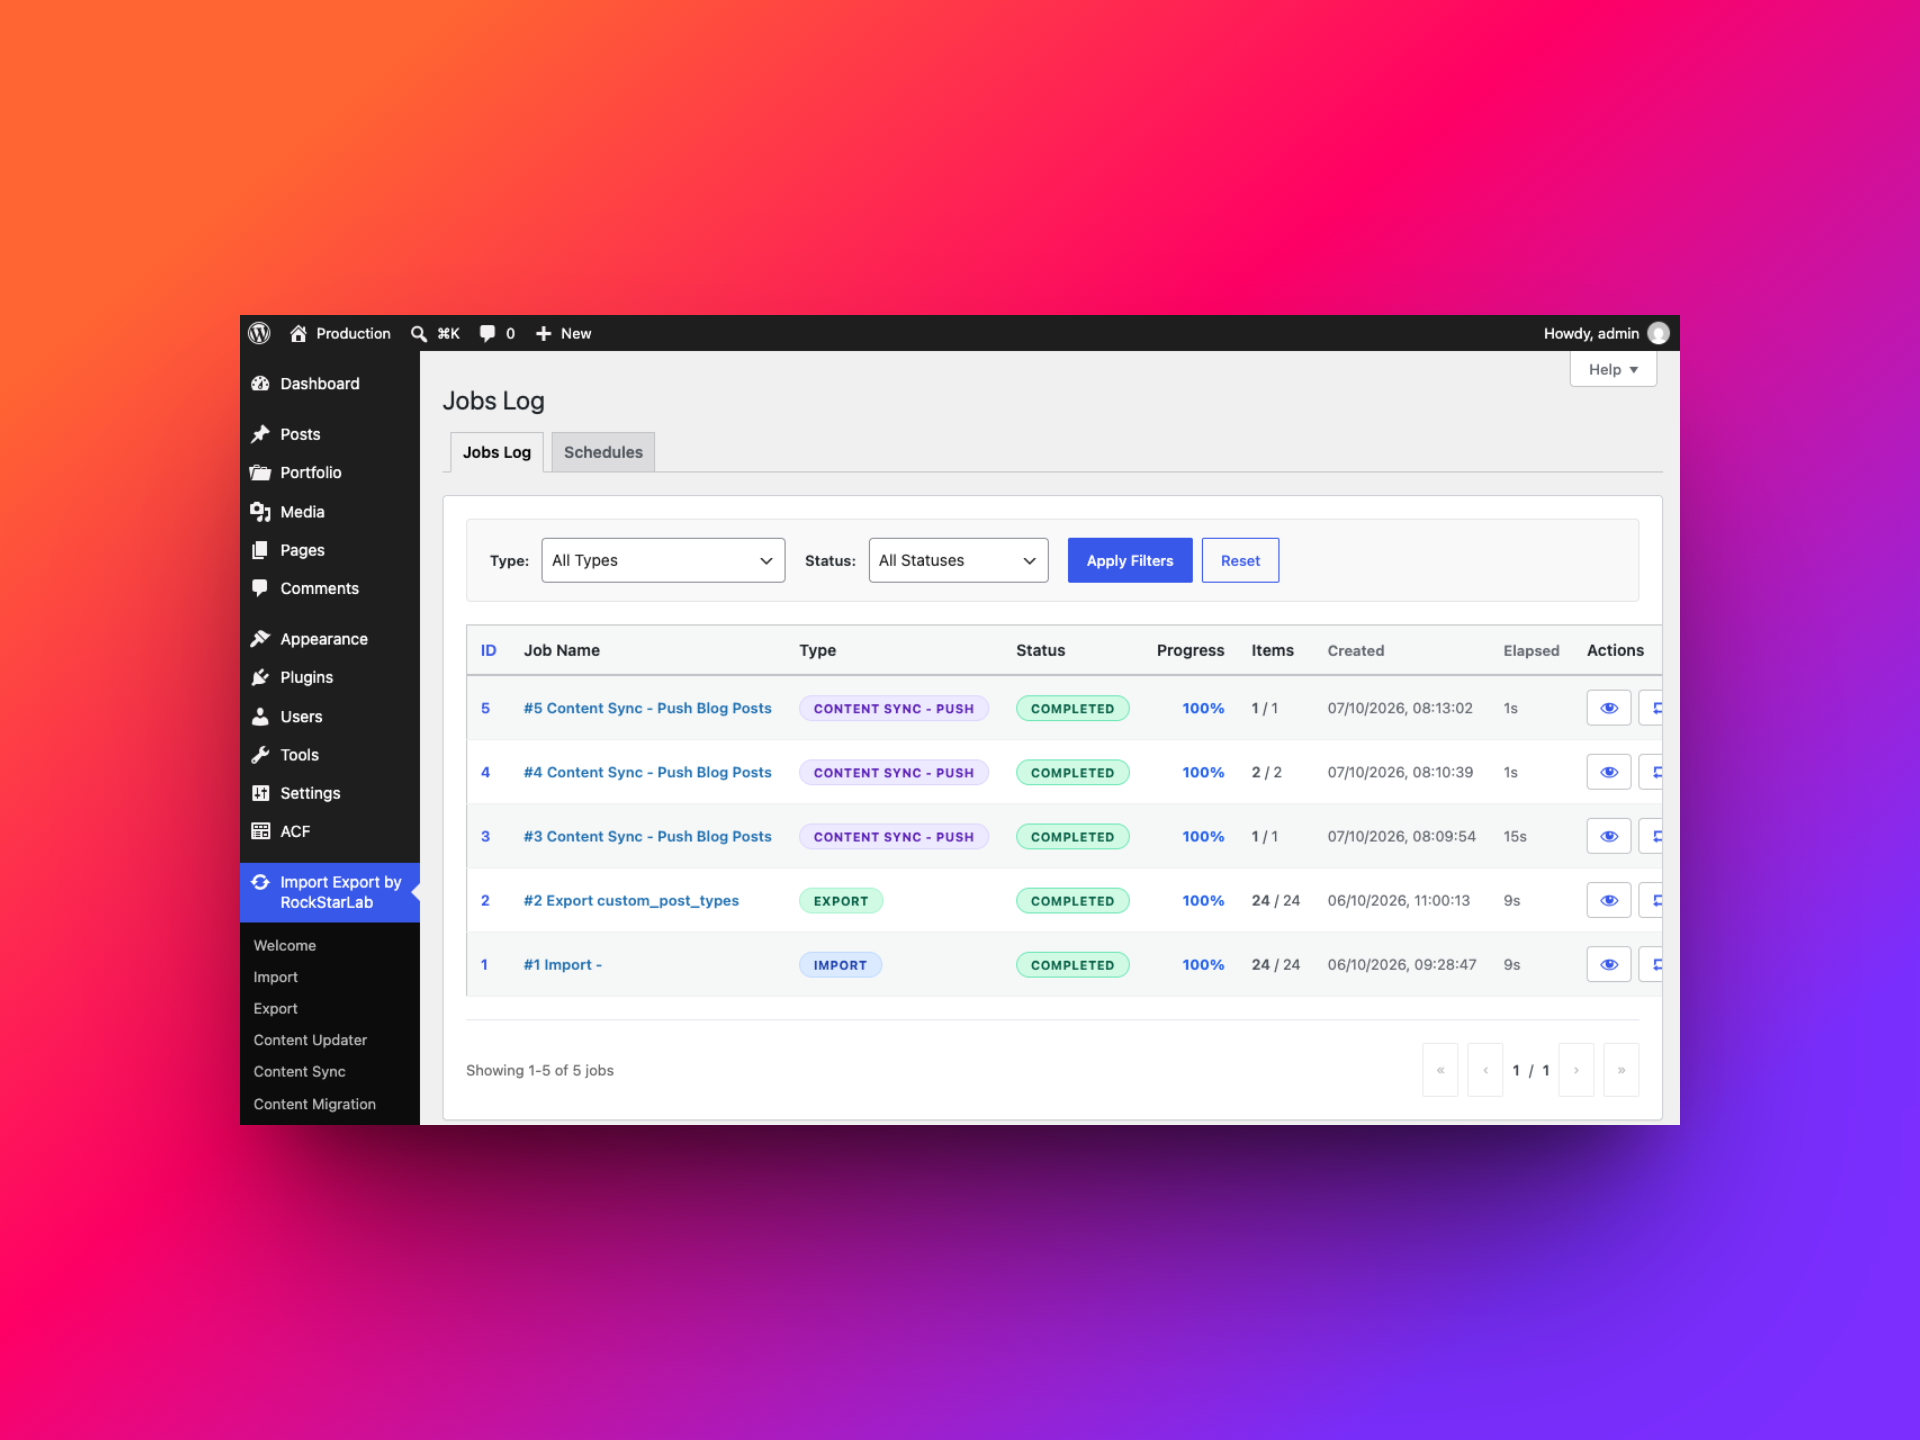
If the job did not complete, inspect its status and details before starting another sync. Checking the log helps avoid accidental duplicates and gives you a clear record of what the plugin processed.
Which sync dialog should you expect?
| Starting point | What the dialog does | Best for |
|---|---|---|
| One post editor → Sync This Post | Choose a connected site and push or pull the current post, then map it to an existing remote post or create a new one. | Updating or sending one item. |
| One or more selected rows → Sync Content | Choose a site and direction, then review a mapping action for each selected post or page. | Bulk updates and mixed create/update batches. |
| No local rows selected → Sync Content | Choose a remote site, browse its posts, filter or search, and pull selected remote records into the current site. | Finding and importing remote content that is not already selected locally. |
A straightforward way to keep both sites in sync
Once the sites are connected and their content models are compatible, the workflow is simple: choose the post or batch, select the direction, check the destination action, and verify the result. Content Sync gives you a route for pulling remote posts, updating existing records, and pushing new Portfolio content—including its ACF values and taxonomy terms—without exporting and importing a file for every change.
For the safest results, keep your backups current, review each mapping before confirming, and open the destination records after a sync to check the fields and relationships your site relies on.