
CSV imports become much more powerful when they recreate the full WordPress content model, not just titles and body text. ACF-powered sites often need custom fields, media fields, Flexible Content, Repeaters, and custom post type data imported together.
With WP Import Export by RockStarLab, you can import posts, pages, and custom post types with ACF PRO fields from a structured CSV workflow. The plugin supports CSV upload, delimiter selection, data preview, Auto Map, manual field mapping, transformation functions, media import, and update rules.
Short Answer
To import ACF fields, go to Import Export -> Import, choose Posts, Pages, or a Custom Post Type, upload a CSV file, preview the rows, map CSV columns to WordPress and ACF fields, choose import options, and click Start Import.
If the CSV was exported from WP Import Export, use Auto Map to match fields automatically. You can also map fields manually by dragging CSV columns from the left panel into the correct WordPress, custom field, media, Yoast SEO, or ACF field on the right panel.
When to Import ACF Fields
Use this workflow when your WordPress content depends on structured fields beyond the standard post title and content. Many modern WordPress sites use ACF to power templates, page sections, resource directories, product-like content, location pages, and custom post type layouts.
If you import only basic fields, the posts may exist in WordPress but still look incomplete on the frontend. Importing ACF fields keeps the data connected to the templates that display it.
You can learn more about Advanced Custom Fields from the official ACF documentation.
What WP Import Export Supports
| Import task | Supported? | Notes |
|---|---|---|
| Import posts from CSV | Yes | Choose Posts in Step 1. |
| Import pages from CSV | Yes | Choose Pages in Step 1. |
| Import custom post types | Yes, where available | Choose the registered custom post type in Step 1. |
| Import custom fields | Yes | Map CSV columns to custom field destinations during Step 4. |
| Import ACF fields | Yes, where supported | Registered ACF fields can be mapped during import. |
| Import ACF PRO fields | Yes, where supported | Supports advanced field structures such as Flexible Content and Repeater fields where supported by the active setup. |
| Auto Map exported CSV files | Yes | Use Auto Map when the CSV headers match fields from a WP Import Export export. |
| Transform CSV data during import | Yes | Assign transformation functions to mapped fields before import (PRO Add-on). |
| Automatically import media files | Yes | Download media URLs from CSV into the WordPress Media Library where supported. |
Before You Start
Before you import ACF fields, confirm that the destination WordPress site has the same content structure that the CSV expects. Posts, pages, custom post types, ACF field groups, ACF PRO fields, taxonomies, and templates should be available before import.
For complex ACF PRO structures, test the import on staging first. Flexible Content fields, Repeaters, nested Repeaters, galleries, and relationship-style fields can require careful CSV formatting and field mapping.
Prepare the CSV File
Your CSV should include a clear header row. Use column names that describe the destination fields, such as post_title, post_content, featured_image, acf_subtitle, acf_specs, or acf_flexible_content.
Keep values consistent. Dates should use one format, media fields should use stable URLs or expected identifiers, and repeated field data should follow the structure expected by the destination field.
Use a Staging Site First
Imports can create or update many records quickly. Always test with a small CSV sample before importing a full file into production.
A safe test should include one simple post, one post with media, one post with custom fields, and one post with the most complex ACF PRO structure in the file.
Step-by-Step Workflow
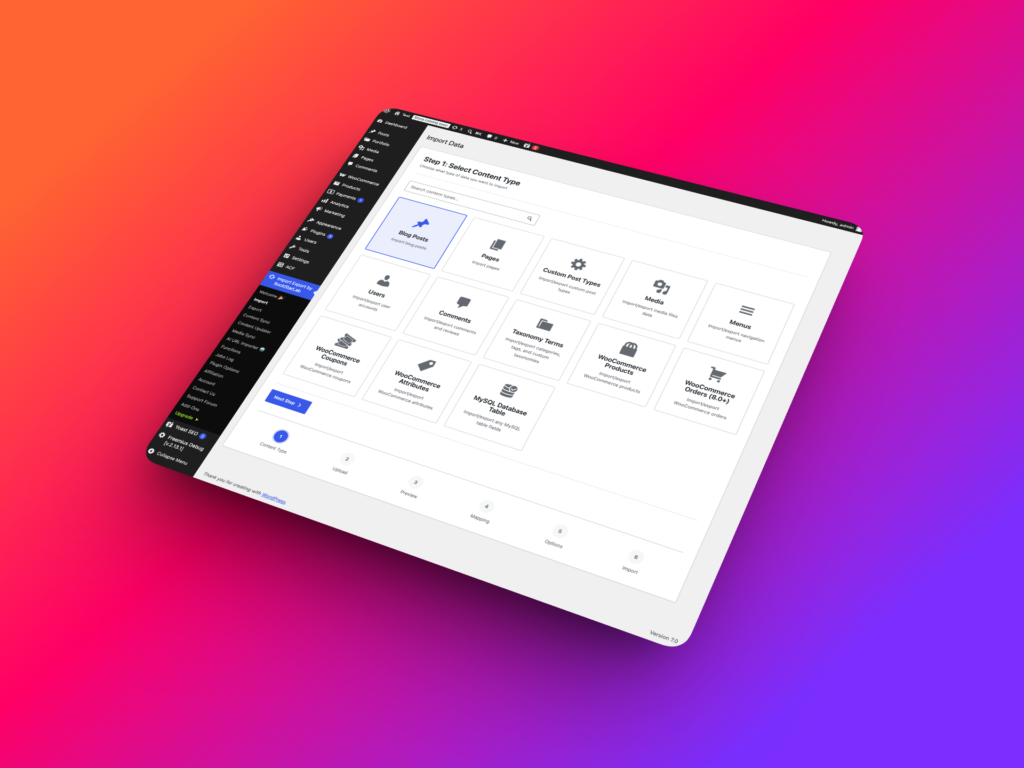
Step 1: Choose Posts, Pages, or Custom Post Types
Go to Import Export -> Import.
In Step 1, choose what you want to import. Select Posts, Pages, or a registered Custom Post Type, depending on where the imported content should be created or updated.
Choose Posts for blog articles, Pages for static site pages, or a custom post type for structured content such as resources, listings, locations, documentation entries, events, portfolios, or case studies.
Step 2: Upload the CSV File and Choose a Delimiter
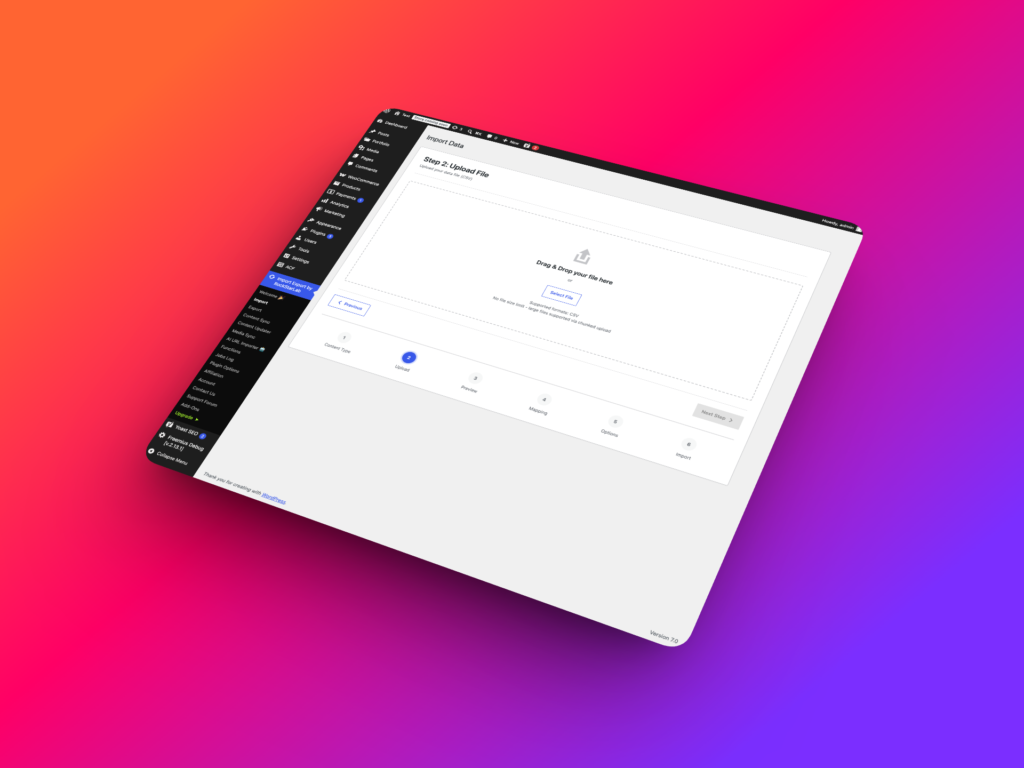
In Step 2, upload the CSV file that contains the import data. Then choose the delimiter used by the CSV file.
A comma is the most common delimiter, but some files use semicolons, tabs, or custom delimiters. For example, a semicolon delimiter is common in some European spreadsheet exports, while a pipe delimiter | can be useful when long text fields contain many commas.
WP Import Export supports large CSV import workflows. For large files, use clean columns, predictable formatting, stable identifiers, and conservative batch settings later in the workflow.
Step 3: Preview the Import Data
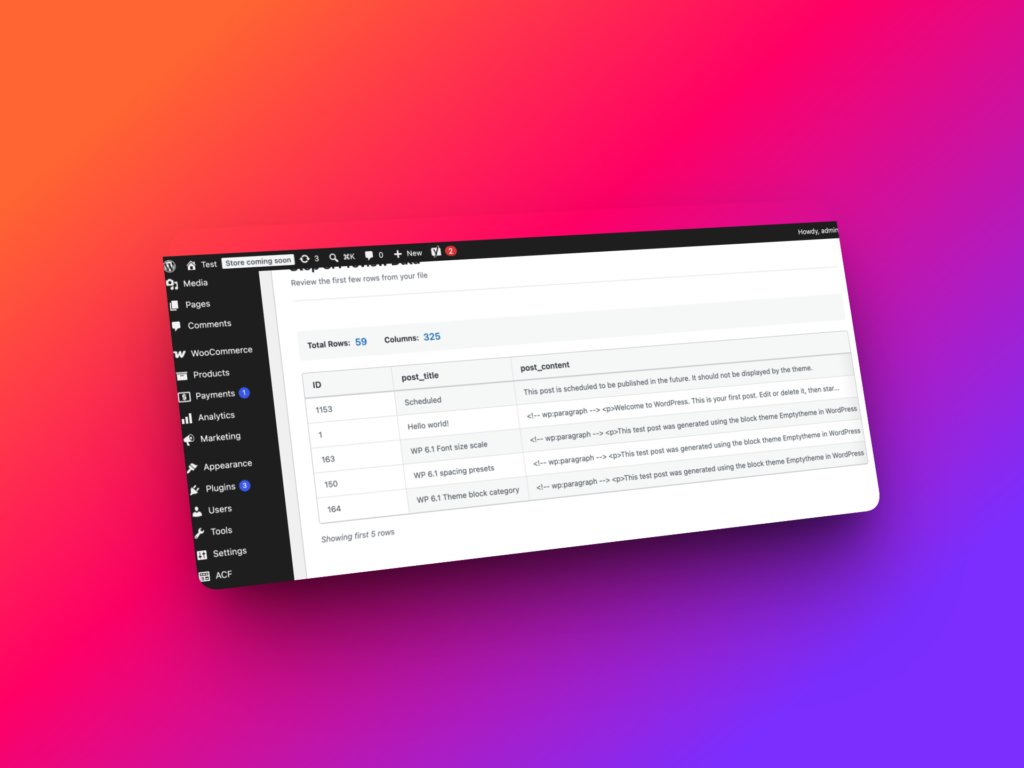
In Step 3, review the data preview. This step confirms whether the plugin can read the CSV columns and sample rows correctly.
If the preview looks wrong, the delimiter selected in Step 2 may be incorrect. Broken columns, merged values, missing headers, or strange row structure usually mean the CSV parsing settings should be checked before continuing.
Do not continue until the preview matches the file structure you expect. A clean preview makes field mapping much safer.
Step 4: Map CSV Columns to WordPress and ACF Fields
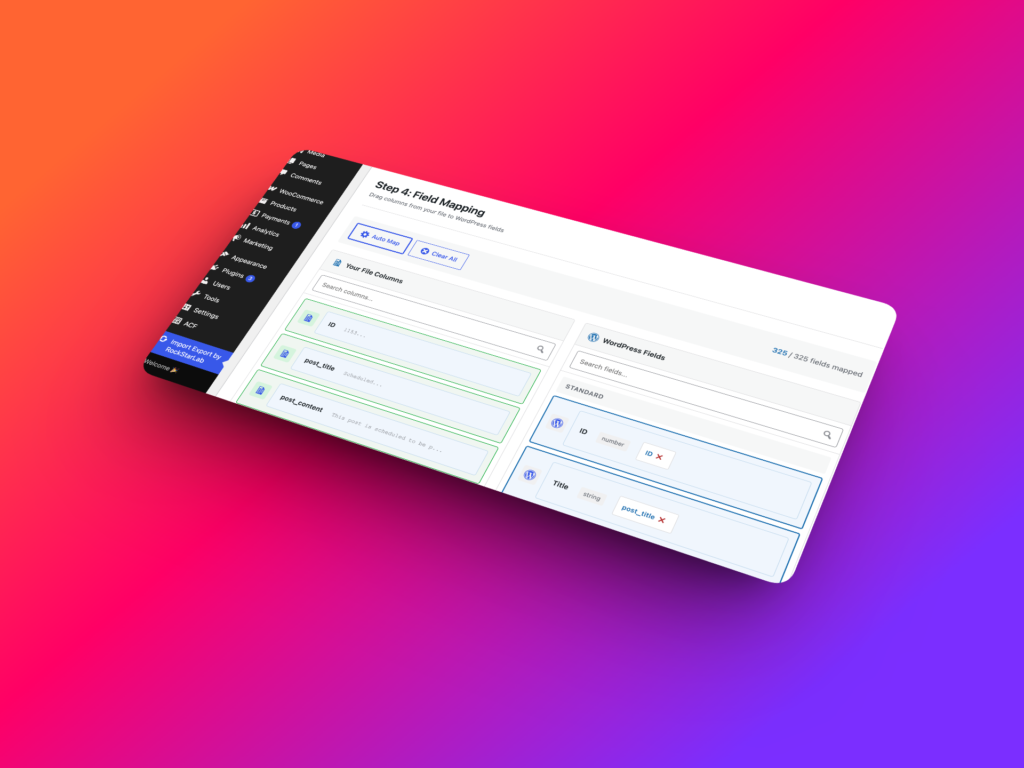
In Step 4, map data from the CSV file to WordPress fields. This is the most important step when you import ACF fields because every CSV column must be connected to the correct destination field.
If the CSV was exported from WP Import Export, click Auto Map to automatically map matching columns. Auto Map is useful when CSV headers already match the fields available in the selected import type.
You can also map fields manually. Drag a column from the left panel and drop it into the corresponding field in the right panel. For example, drag post_title into Post title, post_content into Post content, and acf_subtitle into the matching ACF field.
WP Import Export supports fields from ACF and ACF PRO where supported by the active setup, including Flexible Content, Repeater fields, nested Repeaters, and other advanced ACF field types.
After you map the fields, the plugin shows a full list of fields that will be imported. Review this list carefully before continuing. It helps confirm that every mapped CSV column is going to the correct WordPress, custom field, media, taxonomy, Yoast SEO, or ACF destination.
Transform CSV Data During Import (PRO Add-on)
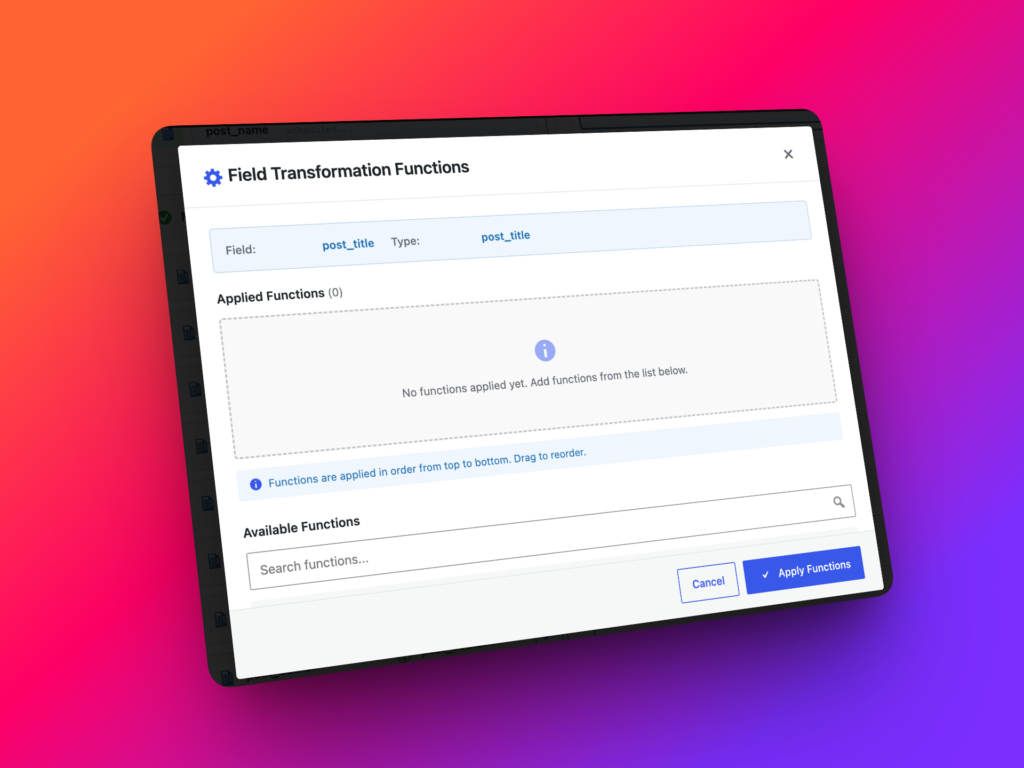
During mapping, you can assign transformation functions to imported fields. A transformation function receives the CSV value, applies custom logic, and returns the final value that should be saved in WordPress.
Transformation functions are useful when the CSV data is close to correct but needs cleanup before import. They can trim spaces, strip HTML, format dates, normalize prices, replace old domains, set fallback values, or prepare values for ACF fields.
To use a transformation function, create and test it in Import Export -> Functions, then assign it to the mapped field during import. Test the function with realistic sample values before running the full import.
Example transformation use cases include:
- Convert imported titles to title case.
- Set a default subtitle when an ACF text field is empty.
- Replace
https://old-example.comwithhttps://new-example.comin media URLs. - Convert date values into the format expected by WordPress.
- Clean HTML from a short text field before saving it to ACF.
- Normalize phone numbers, prices, codes, or labels before import.
Example function for cleaning an ACF text value:
function clean_acf_text_value( $value, $row ) {
    $value = wp_strip_all_tags( (string) $value );
    $value = preg_replace( '/\s+/', ' ', $value );

    return trim( $value );
}
Step 5: Choose Import Options
In Step 5, choose how WP Import Export should handle existing content, new content, media files, and batch processing. These options control whether the import updates existing posts, skips them, or creates new records.
Check for Existing Items by Field
Check for Existing Items by Field tells the importer which field should be used to determine whether a post, page, or custom post type entry already exists.
For example, you can choose Post title. If a post with the same title already exists, the importer treats that row as a match and then follows the If Match Found setting.
Use the most stable unique field available. Good matching fields may include post ID, slug, title, SKU, external ID, or another unique custom field. Avoid matching by a field that can repeat unless that is intentional.
If Match Found
If Match Found controls what happens when the importer finds an existing item using the selected matching field.
| Option | What it does | When to use it |
|---|---|---|
| Update | Updates the existing item with the new CSV data. | Use this when the CSV should refresh existing posts, pages, or custom post type entries. |
| Skip | Skips the row when a matching item already exists. | Use this when existing content should not be changed. |
| Create | Creates a new item even when a match is found. | Use this only when duplicate or separate records are intentional. |
If No Match Found
If No Match Found controls what happens when the importer does not find an existing item.
| Option | What it does | When to use it |
|---|---|---|
| Create | Creates a new post, page, or custom post type entry from the CSV row. | Use this when the file contains new content that should be added to WordPress. |
| Skip | Skips rows that do not match existing content. | Use this when the import should only update existing records and never create new ones. |
Batch Size
Batch Size controls how many records from the CSV file are processed in one request.
When the import contains many media files, keep this value at 1. Media downloads can be slower and heavier than text-only imports, so smaller batches are safer.
On fast and powerful servers, you can increase the batch size to improve import speed. Test carefully before using a larger value on production.
Automatically Import Media Files
Automatically Import Media Files lets the importer download media files found in the CSV and add them to the WordPress Media Library.
This is useful when the CSV contains image URLs for featured images, galleries, downloads, or ACF media fields. Make sure the media URLs are public and stable before running the import.
The importer can also check whether a media file already exists. If a matching media file is found, the If Media File Already Exists option controls what happens next.
| Media option | What it does | When to use it |
|---|---|---|
| Skip | Keeps the existing media file and does not import another copy. | Use this to avoid duplicate media library files. |
| Create new | Imports the media as a new file even if a matching file exists. | Use this when separate media records are required. |
| Replace | Replaces the existing media file with the imported file. | Use this when the CSV media should overwrite older media. |
Step 6: Start the Import and Review Results
Click Start Import. WP Import Export will begin processing the CSV file using the field mapping and import options you selected.
After the import finishes, review the result. Open several imported posts, pages, or custom post type entries in the WordPress editor and on the frontend. Check titles, content, custom fields, ACF fields, media, featured images, and templates.
Example: Import Posts with ACF PRO Repeater Fields
Suppose you have a CSV file with blog posts that include standard content, featured images, Yoast SEO fields, and ACF PRO Repeater data for article sections.
A practical import workflow would be:
- Open
Import Export -> Import. - Choose Posts in Step 1.
- Upload the CSV file and choose the delimiter in Step 2.
- Review the data preview in Step 3.
- Use Auto Map if the file was exported from WP Import Export.
- Manually map any remaining CSV columns to standard fields, media fields, Yoast SEO fields, custom fields, and ACF fields.
- Assign transformation functions where values need cleanup.
- Choose a matching field in Step 5, such as post ID, slug, or title.
- Choose whether matching posts should be updated, skipped, or created again.
- Enable automatic media import if the CSV includes media URLs.
- Set the batch size.
- Click Start Import.
- Review imported posts and ACF field output on the frontend.
Example: Import Custom Post Types with Flexible Content
Custom post types often depend on ACF fields more than standard post content. A resource entry might include subtitle, summary, download link, author, topic, and Flexible Content sections.
To import custom post types with Flexible Content, choose the custom post type in Step 1, upload the CSV in Step 2, preview data in Step 3, and carefully map the ACF fields in Step 4.
Use staging for the first import. Flexible Content and nested Repeater structures should be validated in the WordPress editor and on the frontend before production use.
Common Mistakes
The most common mistake is choosing the wrong delimiter in Step 2. If the preview in Step 3 looks broken, go back and check the delimiter before mapping fields.
Another mistake is relying on title matching when titles are not unique. If possible, use a stable unique field such as post ID, slug, external ID, SKU, or another unique custom field.
Do not skip the mapped fields review. The full mapped field list after Step 4 helps catch mistakes before the import creates or updates records.
Also avoid importing complex ACF PRO data directly into production without a staging test. Repeaters, nested Repeaters, Flexible Content, galleries, and relationship fields should be reviewed carefully.
Best Practices for Importing ACF Fields
- Back up the site before large imports.
- Use staging for complex ACF PRO field structures.
- Prepare clean CSV headers that match the intended fields.
- Choose the correct delimiter before previewing data.
- Use Auto Map when importing a CSV exported from WP Import Export.
- Manually review every mapped field before import.
- Use a stable matching field to avoid accidental duplicates.
- Use transformation functions to clean values before saving them.
- Keep Batch Size at
1when importing many media files. - Review imported content in both the editor and frontend templates.
Recommended Links
FAQ
Can I import ACF fields into WordPress posts?
Yes. WP Import Export can import ACF fields into WordPress posts where ACF support is available in the active setup.
Can I import ACF PRO fields?
Yes. WP Import Export supports ACF PRO field types where supported by the active setup, including Flexible Content, Repeater fields, nested Repeaters, and other advanced structures.
Can I import ACF fields into pages?
Yes. Choose Pages in Step 1, then map CSV columns to the registered ACF fields during Step 4.
Can I import ACF fields into custom post types?
Yes. Choose the registered custom post type in Step 1, then map incoming CSV columns to its ACF fields.
What does Auto Map do?
Auto Map automatically connects matching CSV columns to WordPress fields. It is especially useful when the CSV was exported from WP Import Export.
Can I transform CSV data during import?
Yes. You can assign transformation functions to mapped fields to clean, format, or adjust CSV values before they are saved.
Can WP Import Export import media files from CSV?
Yes. The Automatically Import Media Files option can download media files found in the CSV and add them to the WordPress Media Library where supported.
How do I avoid duplicate posts during import?
Use Check for Existing Items by Field and choose a stable matching field. Then use If Match Found to update, skip, or create records based on your import goal.