
In this tutorial, you will learn how to bulk import website pages into WordPress using a list of URLs and the AI URL Importer feature in Import Export by RockStarLab.
This workflow is useful when you have multiple external pages that you want to bring into WordPress for review, editing, rewriting, or content migration. Instead of manually copying titles, text, images, and excerpts one by one, you can provide a list of URLs and let the plugin create draft posts inside your WordPress admin.
When Should You Use AI URL Importer?
The AI URL Importer is designed for situations where you already have a list of pages that need to be imported into WordPress.
For example, you may want to import five pages, two hundred pages, or even a larger URL list. The plugin can help you turn external web pages into editable WordPress draft posts, while also importing detected images into the WordPress Media Library.
Common use cases include:
- Moving content from an old website into WordPress.
- Importing article drafts from external URLs for review.
- Collecting source pages before rewriting or editing content.
- Building a WordPress content library from a prepared URL list.
- Reducing manual copy-paste work during website migration.
Before You Start
To follow this lesson, make sure that Import Export by RockStarLab is installed and activated on your WordPress website.
You can download the plugin from WordPress.org:
Download Import Export by RockStarLab
You will also need an OpenAI API key, because AI URL Importer uses an AI provider to read and structure the content from URLs.
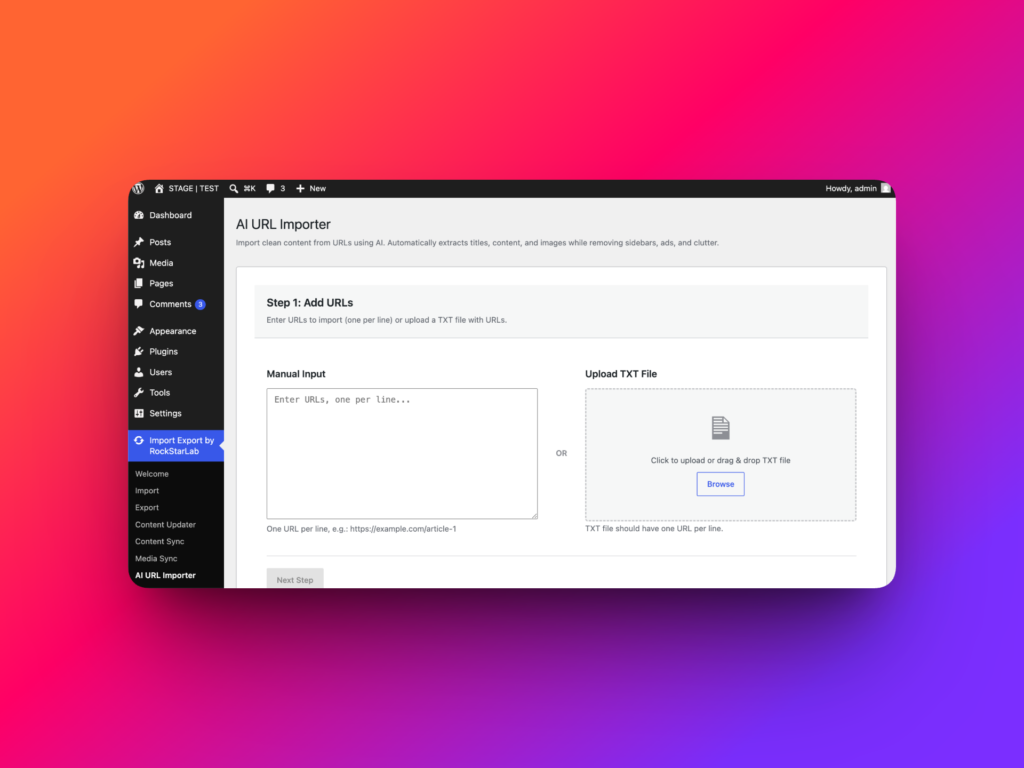
Step 1: Open AI URL Importer
In your WordPress admin dashboard, go to:
Import Export by RockStarLab → AI URL Importer
If an AI provider is not connected yet, you will see an AI Provider Required message. Click the button in that dialog to open the WordPress Connectors settings.
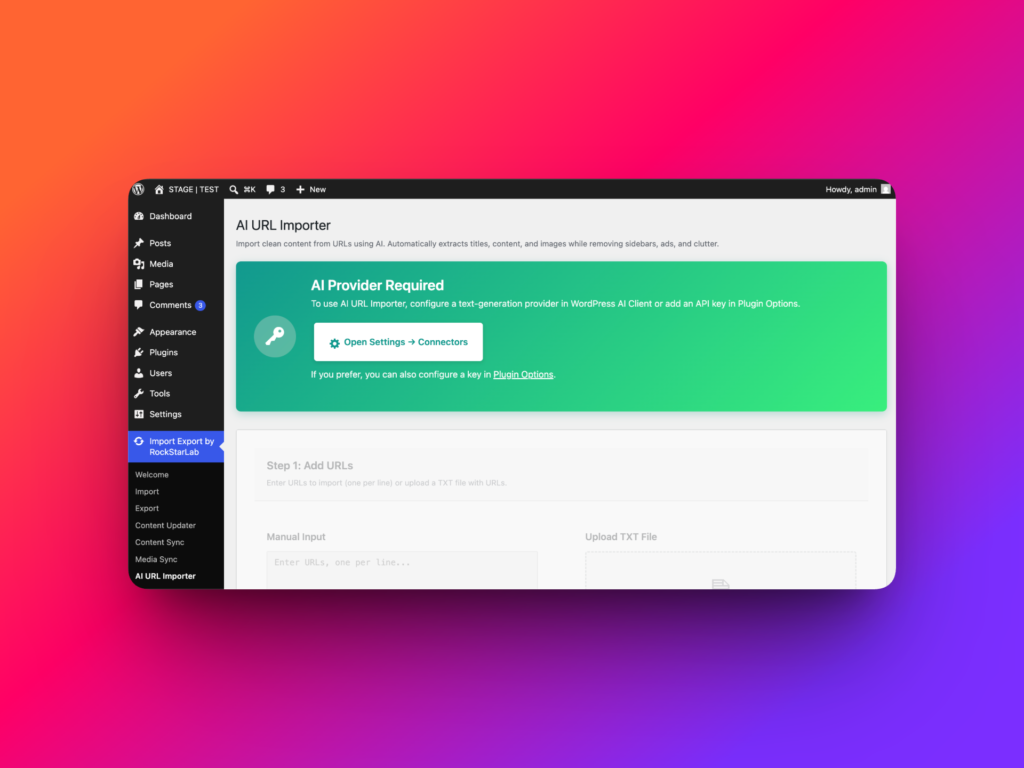
Step 2: Connect OpenAI
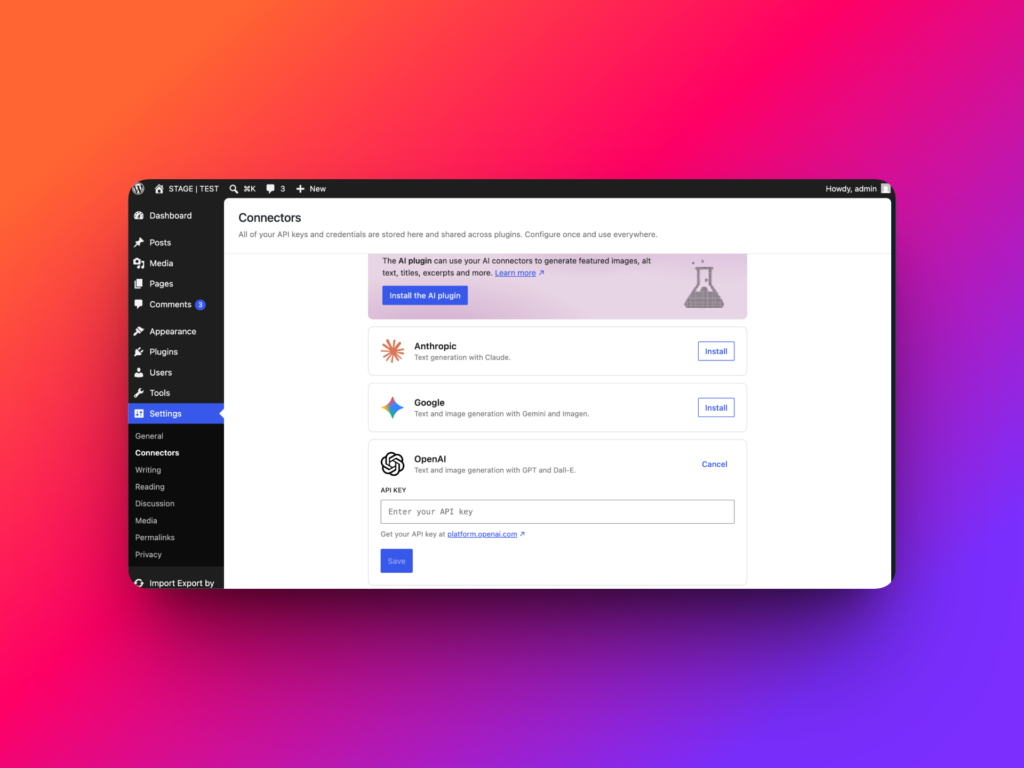
On the WordPress Connectors settings page, find OpenAI in the list of available connectors and click Install.
After the connector is installed, open the OpenAI platform and create a new secret key. You can optionally give the key a name, then click Create secret key.
Copy the generated key, return to WordPress, paste it into the API Key field, and click Save.
Once OpenAI is connected successfully, return to Import Export by RockStarLab → AI URL Importer. Step 1 should now be unlocked.
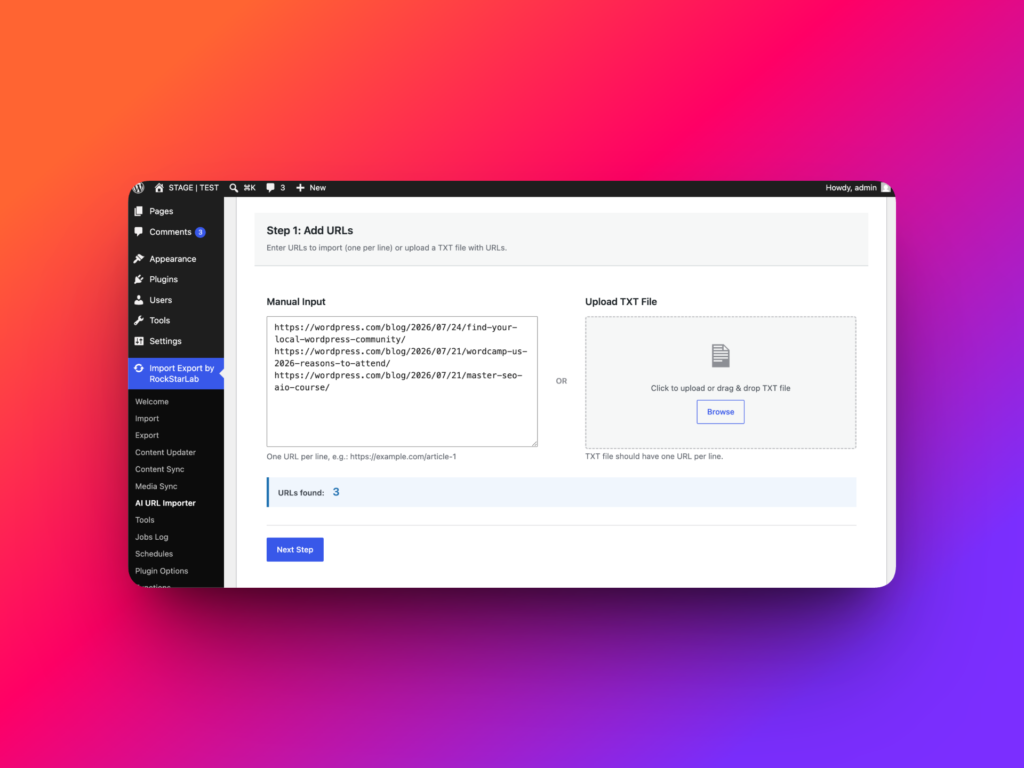
Step 3: Add Your URL List
AI URL Importer gives you two ways to provide URLs:
- Manual Input: paste URLs directly into the text area, one URL per line.
- File Upload: upload a text file that contains your URL list.
In this example, we import five URLs from the WordPress.com blog. After pasting the URLs into the manual input field, the plugin detects how many valid URLs were found.
When the URL count looks correct, click Next Step.
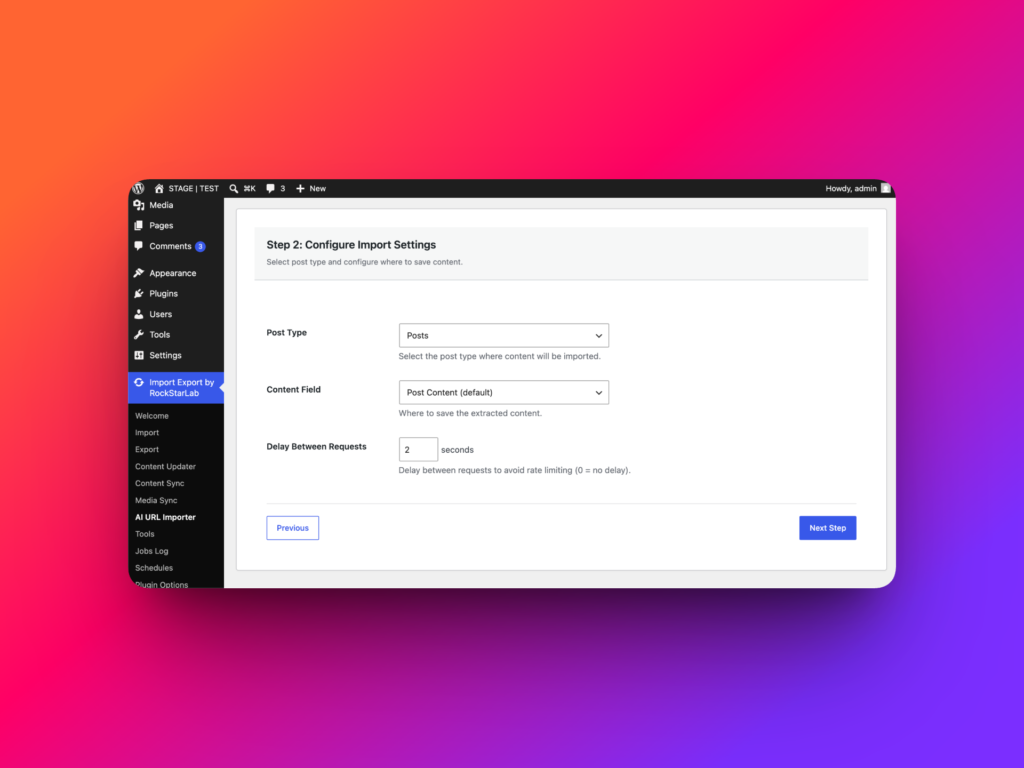
Step 4: Configure Import Settings
On the second step, configure how the imported content should be saved.
Choose the Post Type
Select the target post type for imported URLs. If your site has custom post types, they will appear in this list.
For a blog import, choose Posts. If you want to create WordPress pages instead, choose Pages.
Choose the Content Field
Next, choose where the imported article content should be saved.
You can save content into:
- The default WordPress Post Content field.
- A custom field used by your theme or workflow.
- An ACF field if Advanced Custom Fields is installed and active.
If ACF is not installed, ACF-specific fields will not be available. That is expected behavior.
Set Delay Between Requests
The Delay Between Requests option controls how long the plugin waits between AI requests.
Each URL is processed as one separate request. If you are importing many URLs, or if the source website is slow or heavy, it is a good idea to increase the delay. This can make the import process more stable.
Step 5: Generate a Preview
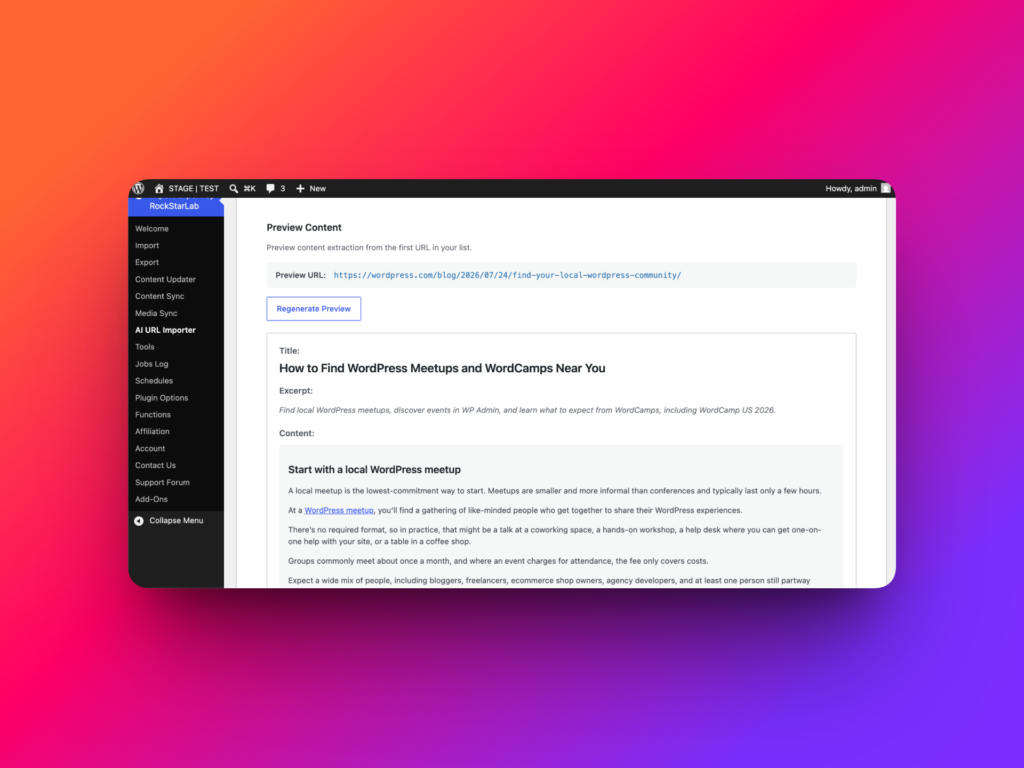
Before starting the full import, AI URL Importer lets you generate a preview from the first URL in your list.
Click Generate Preview. The plugin will ask AI to read the first page and prepare a preview of the detected content.
The preview can include:
- Post title.
- Excerpt.
- Main content.
- Detected images.
- Content statistics such as word count and character count.
Review the preview carefully. If the title, excerpt, content, or images do not look correct, you can regenerate the preview before continuing.
Step 6: Start the Bulk URL Import
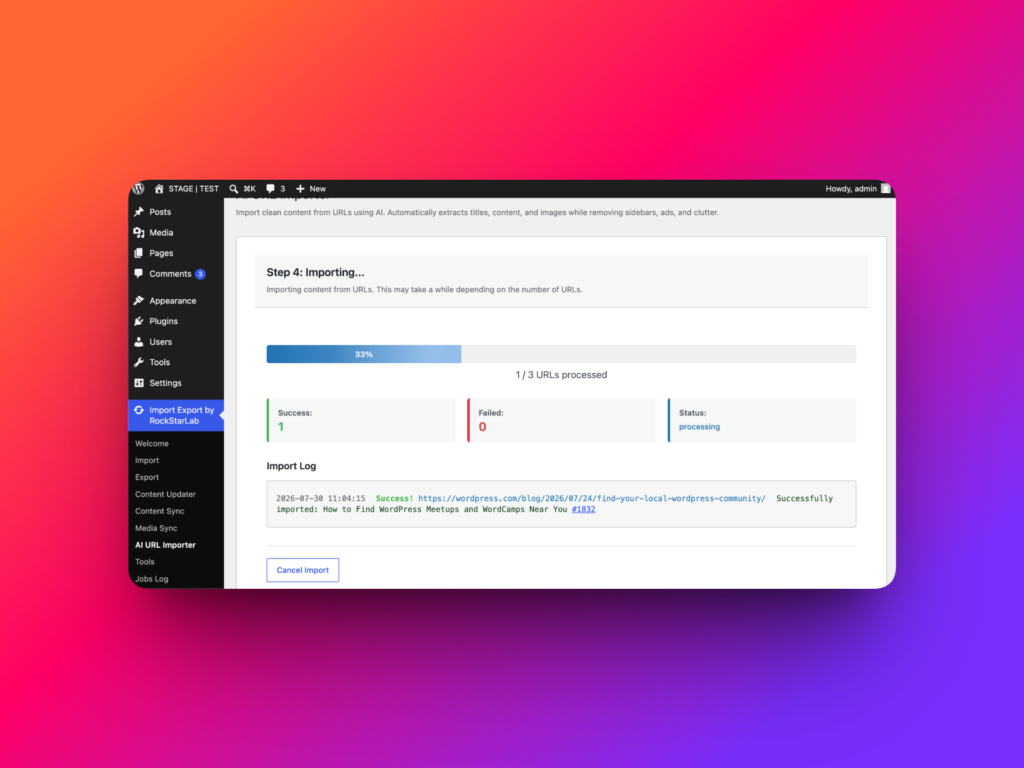
If the preview looks good, click Start Import.
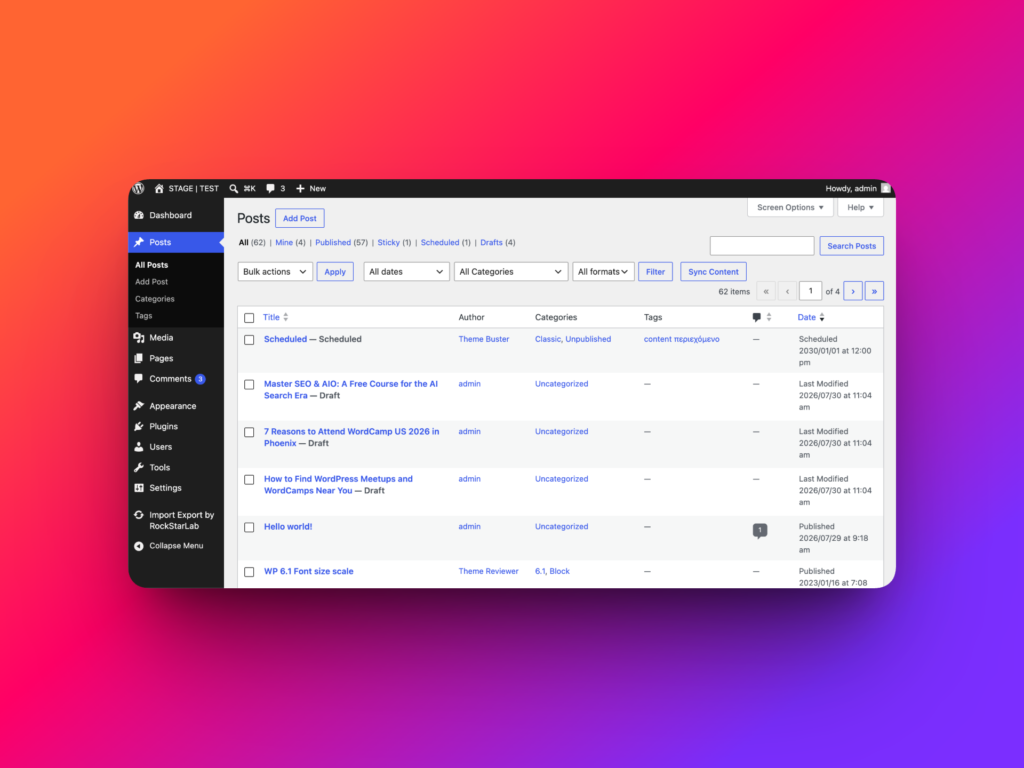
The plugin will process each URL one by one and show the import progress. When all URLs are completed, click View Imported Posts to open the imported content in the WordPress admin.
Imported posts are saved as Drafts. This is intentional, because AI-imported content should usually be reviewed before publishing. You may want to check formatting, adjust titles, add categories, optimize SEO, and confirm that the content matches your standards.
Step 7: Review Imported Posts and Images
After the import finishes, open one of the imported posts.
You should see the detected title, content, featured image, and inline images inside the WordPress editor.
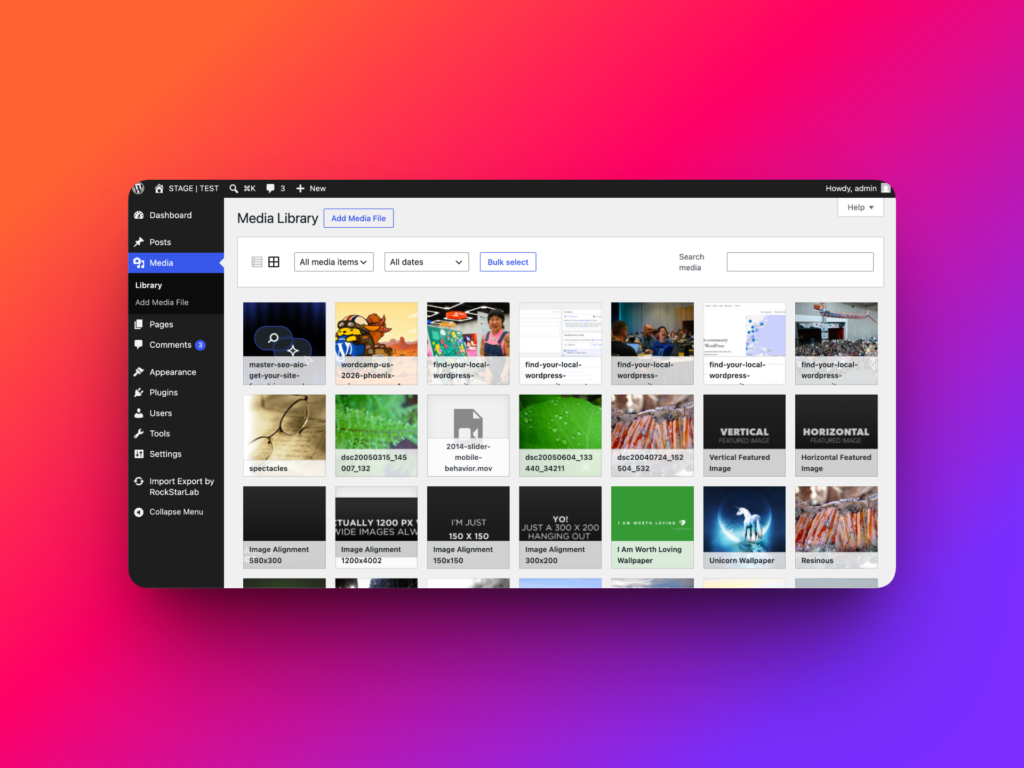
Then open the WordPress Media Library. Images detected during the import are downloaded and saved into your site’s Media Library, so you do not need to upload them manually.
Feature Overview
| Feature | What It Does | Why It Helps |
|---|---|---|
| Manual URL Input | Paste URLs directly into the importer, one per line | Fast option for short or medium URL lists |
| Text File Upload | Upload a file that contains many URLs | Useful for larger bulk import jobs |
| Post Type Selection | Choose whether URLs become posts, pages, or custom post types | Fits different WordPress content structures |
| Content Field Mapping | Save imported content into Post Content, custom fields, or ACF fields | Supports simple blogs and advanced custom themes |
| AI Preview | Preview the first imported URL before running the full import | Helps verify that AI detects the content correctly |
| Image Import | Downloads detected images into the WordPress Media Library | Reduces manual image handling and broken media references |
| Draft Status | Saves imported posts as drafts | Allows review and editing before publishing |
Best Practices for Bulk Importing URLs
- Start with a small batch before importing hundreds of URLs.
- Always review the preview before starting the full import.
- Increase the delay between requests for slow or heavy source websites.
- Review imported drafts before publishing them.
- Check imported images in the Media Library after the job finishes.
- Make sure you have permission to reuse or migrate the source content.
Conclusion
AI URL Importer in Import Export by RockStarLab helps you bulk import website pages into WordPress from a list of URLs.
It can detect titles, excerpts, main content, and images, then create editable draft posts inside WordPress. This makes it useful for content migration, review workflows, rewriting projects, and reducing repetitive copy-paste work.
Learn more about the WordPress import export plugin
FAQ
Can I bulk import URLs into WordPress?
Yes. AI URL Importer in Import Export by RockStarLab lets you paste or upload a list of URLs and import them into WordPress as draft posts.
Can imported URL content be saved as WordPress posts?
Yes. You can choose the target post type, including Posts, Pages, and available custom post types.
Does AI URL Importer import images?
Yes. The plugin can detect images in the source content and save them into the WordPress Media Library.
Can I import content into ACF fields?
Yes. If Advanced Custom Fields is installed and active, you can select supported ACF fields as the destination for imported content.
Are imported posts published automatically?
No. Imported posts are saved as drafts so you can review and edit them before publishing.